| Monster Image
|
Monster Description
|
Info
|
| 2-1, Shadow Forest
|

|
Enraged Ent - An ancient tree made bitter, angry and sentient from a contaminated piece of El. Appears much more intimidating and buff compared to his predecessor.
|
Moves:
-Double Swipe: The Ent will pull its arm back and swipes downward followed by and upward swipe with his other hand.
-Ground Pound: The Ent will pull both his arms back and and smash the ground full force.
-Shadow Ball: The Ent will shoot a gaseous dark cloud with loose homing properties.
-Root Attack: One of his strongest moves, he will summon many roots and branches that will continuously hit their victim pushing them away from the Ent.
Drops:
|
| 2-2, Banthus Cave
|

|
Awakened Banthus - Banthus who ran away from the El-Tree. He's much more stronger than before!
|
Moves:
-Swing: Banthus will swing his sword right at you.
-Jumping Slash: Banthus jumps into the air and strikes with his huge sword.
-Summon: Banthus will summon several Brother mobs. Will only use this skill once.
-Mortal Blow: Banthus smashes his sword into the ground and creates an erupting shock wave of earth and rock.
Drops:
|
| 2-3, Underground Waterway
|

|
Nasod Banthus - Banthus appears yet again after you find him in the Waterway! But there's something strange about him...
|
Moves:
-Swing: Banthus will swing his sword right at you.
-Kick Slash: Banthus kicks you with his foot, leaps towards you and swings his sword right at you.
-Laser!: His strongest move. Banthus shoots a laser out of his necklace to heavily damage you.
Drops:
|
| 2-4, Suburbs of Wally's Castle
|

|
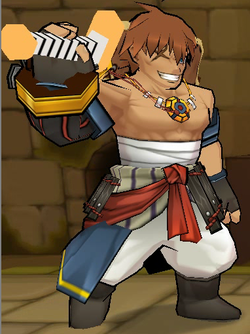
William - Not letting his hard work go to waste, William tries to fight you one more time, except he can now use Mega Slash!
|
Moves:
-Slash Combo: William will slash five consecutive times.
-Dash Attack: William attacks forward.
-Combo: William will use a combo that imitates Elsword's ZZZZ combo except with super armor.
-William Slash!: William's version of Mega Slash. The skill is also William's most powerful attack, so don't be fooled!
Drops:
|
| 2-5, Wally's Castle
|

|
Wally No.8 - You finally confront Wally, but he isn't going to give up so easily! Watch out for his Nasod robot!
|
Moves:
-Thrust: Wally will spin his arms to attack you.
-Fly: Given the opportunity, Wally will fly up into the air towards another platform to try and make distance. Differs from the next move in that he moves STRAIGHT up.
-Homing Missile: One of his strongest moves, Wally will extend his arms and launch two guided missiles out of his hands that will home in on a random player.
-Laser! His strongest move. Wally will fire out a massive yellow blast of energy out of his eye. It does tremendous damage all with incredible range. Requires a full mana bar, mana resets upon use.
Note:
-To Dodge : Avoid the guided missile by running from it - it self-destructs if it doesn't hit anything within around 5 seconds.
-Laser! His strongest move. Wally will fire out a massive yellow blast of energy out of his eye. It does tremendous damage all with incredible range. Requires a full mana bar, mana resets upon use.
-To Dodge : Move right next to or behind No.8 quickly before he fires it. If you are too far away, quickly get above or below the beam.
-Do NOT: Try to get out of its range by running away from him - it has infinite horizontal range.
Drops:
|
| 2-X, Wally's Underground Laboratory
|

|
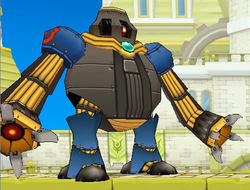
Nasod Inspector - After the Secret Dungeon Reorganization, all robot based monsters are much smaller, including the Nasod Inspector. The Nasod Inspector is the gargantuan blue robot boss found in Wally's Underground Laboratory.
|
Moves:
-Fire Laser: The Nasod Inspector can fire a beam of yellow laser (similar to that of the Cockatigles in Velder) from his signal lantern across a long distance, dealing substantial damage.
-Cannon Fire: The Nasod Inspector aims its cannon forward and fires, the attack is fairly short ranged but the damage is high.
-Cannon Slam: The Nasod Inspector slams his giant cannon vigorously onto the ground and fires, causing a series of giant explosions. This does extremely high damage, more so if you are carried along with the blast wave. Players hit by the cannon will be stunned for several seconds. Requires full mana bar to use, mana resets upon execution.
-Cannon Slam II: The Nasod Inspector slams its arm into the ground and then follows up by slamming its giant cannon against the ground as well but does not fire. This hits closer to itself and both the arm and cannon can deal moderate damage as well as launching you a significant distance upwards. A danger of this attack is that it can launch you into multiple yellow flares for incredible damage.
-Fire Yellow Flares: The Nasod Inspector aims his mini-cannon towards the ceiling and fires, causing yellow flares to start floating down slowly. These flares do high damage. These flares will usually fall near the Nasod Inspector.
-Fire Blue Flares: The Nasod Inspector aims his mini-cannon towards the ceiling and fires, causing blue flares to start dropping down to the floor quickly. These blue flares detonate after a set amount of time and do minor damage. These can fall anywhere and everywhere except for near the Nasod Inspector itself.
-Crawl: If you are too far away from the Nasod Inspector, it will put its arms on the ground and pull itself to you, then stumble and fall, then pick itself up again. This move can flatten you and cause moderate damage.
-Defense Mode: The Nasod Inspector will change its defense mode depending on its current remaining HP, the Signal Lantern will change color to indicate which defense mode it has entered. Whenever it does this it will recover a large amount of health.
-System Crash: When the Nasod Inspector's health is reduced to critical levels, the Nasod Inspector's attack speed and movement speed will be greatly increase like crazy and increase damage by 20% as if it were malfunctioning.
|

