Gate of the Setting Sun: Difference between revisions
From Elwiki
Gameboy224 (talk | contribs) No edit summary |
No edit summary |
||
| Line 27: | Line 27: | ||
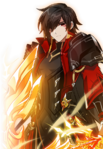
| '''Master Solace''' - The El Master of Light. | | '''Master Solace''' - The El Master of Light. | ||
| | | | ||
*'''<big>Marks of Light</big>''': | *'''<big>Marks of Light</big>''': A gauge will appear under Solace's health bar at the start of the fight, with 5 empty marks. Whenever Solace lands a hit on a player, that player will receive the '''Sunlight''' debuff, decreasing movement and jump speed for 30 seconds. Being hit by any of Solace's attacks while you have the '''Sunlight''' debuff will remove the debuff and add 1 Mark of Light to the gauge. After he gains 5 marks, Solace will enter an empowered state for 30 seconds, dealing higher damage and enhancing some of his attacks. | ||
*'''Slash:''' Solace slashes players in front once. | |||
*'''<font color=red>Shield Bash:</font>''' Solace bashes players in front with his shield, inflicting heavy hitstun, before following up with a slash attack. | |||
*'''<font color=red>Light Pillar:</font>''' Solace will raise his sword into the air, causing a pillar of light to appear on top of a designated player. Solace can target multiple players at once with this attack. The width of the pillar of light is increased while Solace is empowered. | |||
* | *'''<font color=red>Rain of Light:</font>''' Solace casts the '''Light Pillar''' attack in rapid succession. | ||
* | *'''<font color=red>Solar Bomb:</font>''' Solace will summon a small orb of solar energy which slowly follows a target, gradually speeding up as it travels, exploding on contact. The orb persists indefinitely until it hits a player and deals a certain percentage of your current HP. | ||
*'''<font color=red>Shield Guard:</font>''' When Solace's MP bar is filled, he will enter a defensive stance for a short period, with golden wings appearing at his back. Whenever Solace is attacked during this stance, he will create a tracking sword that homes in on players and deals significant damage. | |||
*'''<font color=red>Light Pillar:</font>''' Solace will raise his sword into the air, a pillar of light | *'''<font color=red>Blinding Light:</font>''' Solace charges up his shield with light energy before causing it to burst forward ahead of him, stunning players in range. | ||
*'''<font color=red>Rain of Light:</font>''' | |||
*'''<font color=red>Solar Bomb:</font>''' Solace will summon a small orb of | |||
*'''<font color=red>Shield Guard:</font>''' Solace will enter a defensive stance, | |||
*'''<font color=red> | |||
*'''<font color=red>Solar Pillar:</font>''' Solace summons a solar pillar that persists in the battlefield, damaging anyone that comes in contact with it. | *'''<font color=red>Solar Pillar:</font>''' Solace summons a solar pillar that persists in the battlefield, damaging anyone that comes in contact with it. | ||
*'''<font color=red>Wall of Light:</font>''' Solace's first phase ultimate attack. He will become invincible while | *'''<font color=red>Wall of Light:</font>''' Solace's first phase ultimate attack. He will warp to the center and become invincible, while creating a '''Solar Pillar''' somewhere on the map if none are active currently. From the side of the map, walls of light will slowly sweep to the other side of the map before exploding, doing massive damage. These walls must be attacked and destroyed to create a safe area in their path. Any active '''Solar Pillars''' will disappear after this attack. | ||
'''''Attacks highlighted in <font color=red>red</font> bypass Invincibility frames.''''' | '''''Attacks highlighted in <font color=red>red</font> bypass Invincibility frames.''''' | ||
|- | |- | ||
| Line 48: | Line 44: | ||
<font color=red>'''HELL MODE ONLY'''</font><br> | <font color=red>'''HELL MODE ONLY'''</font><br> | ||
Solace is able to use all abilities from phase 1 with the following adjustments: | Solace is able to use all abilities from phase 1 with the following adjustments: | ||
*'''<font color=red>Light Pillar:</font>''' The size of the light pillar is larger, | *'''<font color=red>Light Pillar:</font>''' The size of the light pillar is larger by default, and increases even further while Solace is empowered. | ||
*'''<font color=red>Solar Pillar:</font>''' The | *'''<font color=red>Solar Pillar:</font>''' The damage of the pillar is significantly increased. | ||
*'''Shields of Light:''' Hitting Solace too much while he's guarding with '''<font color=red>Shield Guard</font>''' will cause him to create a set of four '''Shields of Light''' that spin around and absorb the damage for him. The shields break after a certain amount of damage is dealt. | *'''Shields of Light:''' Hitting Solace too much while he's guarding with '''<font color=red>Shield Guard</font>''' will cause him to create a set of four '''Shields of Light''' that spin around and absorb the damage for him. The shields break after a certain amount of damage is dealt. | ||
*'''<font color=red>Gate of the Setting Sun:</font>''' Solace's ultimate attack, he will charge energy in the center of the stage while the field is filled with various prisms of light in the shape of a diamond, triangle, and four-sided star. When destroyed, each prism will provide one buff, one of each must be broken in order to gain immunity to Solace's attack. After he performs this, Solace defense is reduced and he will be left open for attack for a period of time. | *'''<font color=red>Gate of the Setting Sun:</font>''' Solace's ultimate attack, he will charge energy in the center of the stage while the field is filled with various prisms of light in the shape of a diamond, triangle, and four-sided star. When destroyed, each prism will provide one buff, one of each must be broken in order to gain immunity to Solace's attack. After he performs this, Solace defense is reduced and he will be left open for attack for a period of time. | ||
| Line 92: | Line 88: | ||
*'''Raven:''' '' '' | *'''Raven:''' '' '' | ||
}} | }} | ||
|Trivia= | |Trivia=<span style="display:none">{{</span> | ||
*The '''Mark of Light''' gauge is a callback to his '''Mark of Judgement''' gauge during his fight in [[Solace's Fortress]]. | |||
*The swords summoned during his '''Shield Guard''' act identical to the swords summoned by the [[Titles/Elysion|Eclipse]] title. | |||
<span style="display:none">}}</span> | |||
|Updates=<span style="display:none">{{</span> | |Updates=<span style="display:none">{{</span> | ||
{| cellpadding="5" border="1" style="border-collapse: collapse; text-align: center;" | {| cellpadding="5" border="1" style="border-collapse: collapse; text-align: center;" | ||
Revision as of 12:21, 9 September 2020

Gate of the Setting Sun
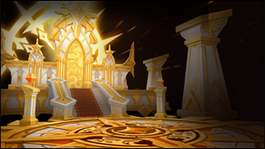
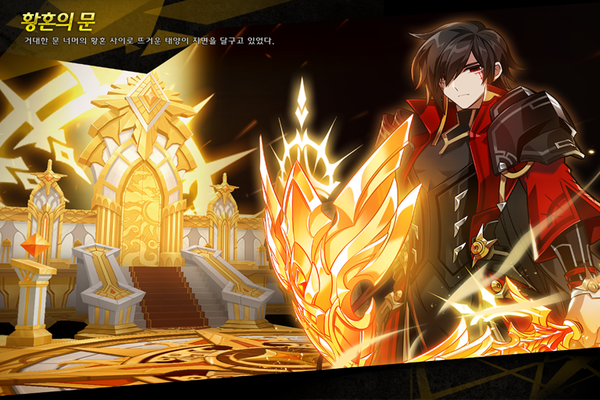
| “ | Gate of the Setting Sun. Beyond the great gates, the setting sun heats the ground.
|
” |
Description
In order to find the answer again, you face the Sun Master.
Recommended Level
99
Entry Requirements
- Must have reached level 99 and completed the quest [Dungeon] Master Road Entry.
Details
- Only 1 Resurrection Stone can be used to revive in Hell mode.
Environmental Debuff - Light of the Sun
- The Sun's light purifies everything touch you, Attack and HP will be reduced by 30% (70% on Phase 2). Effects are reduced by Adaptation.
Boss
{{
Dialogue
- Solace: I cannot give you the answer you desire. If you wish to find something, find it yourself.
{{
}}
| Image | Name | Boss | Character | Stats | Set Effects |
|---|---|---|---|---|---|
 |
Face Accessory (Bottom): [Unidentified * 1] |
2 Pieces:
3 Pieces:
|
Gallery
-
Small dungeon image (Normal)
-
-
-
-
-
Master Solace's Skill Cut-in.
Trivia
- The Mark of Light gauge is a callback to his Mark of Judgement gauge during his fight in Solace's Fortress.
- The swords summoned during his Shield Guard act identical to the swords summoned by the Eclipse title.
Updates
| Date | Changes | |
|---|---|---|
| KR | NA | |
| 02/27/2020 | 03/25/2020 |
|


![[Force] Sol Dominion](/wiki/images/2/2c/Item_-_Sol_Dominion.png)


