Henir's Time and Space/Season 4: Difference between revisions
Gameboy224 (talk | contribs) No edit summary |
mNo edit summary |
||
| (5 intermediate revisions by 2 users not shown) | |||
| Line 1: | Line 1: | ||
{{DISPLAYTITLE:Henir's Time and Space (Version | {{DISPLAYTITLE:Henir's Time and Space (Version 4)}} | ||
{{Languages|Henir's Time and Space/Season 3}} | {{Languages|Henir's Time and Space/Season 4}} | ||
{{DungeonPage | |||
=Henir's Time and Space | | Orient=3 | ||
| Color={{ColorSel|Village|SP}} | |||
< | | DunButton=HenirButton.png | ||
| SmallPic=HenirSelect.png | |||
| | | BigPic=Henir.png | ||
| | | DunName=Henir's Time and Space | ||
| | | Quotation='''Henir's Time and Space'''. Time and Space is in complete chaos. A dangerous trial awaits us... | ||
| Description=<span style="display:none">{{</span> | |||
A phenomenon called Henir's Time and Space lies in a temple called Seven Tower, where sages were known to dwell. The land it stands on was discovered in the olden days. This discovery brought about the emergence of magical skills, and led to the temple being built. Legend has it that the god Henir endured Ragnarok, and afterwards created a place where there is no limitation of time and space. Here, he is able to see the rise and fall of the world. Should you reach this place, by Henir's force, you are bound to face the enemies you have met in the past and those you are destined to meet in the future. | |||
It has been said that a person overcoming this test can meet Henir and acquire an immense power. However, as the power of El began to decrease, the entrance of Henir's Time and Space has suddenly appeared in several places. Elsword and the rest of the gang decide to enter this mysterious dungeon in attempts of gaining the legendary power and using it to take back the missing El. | |||
<span style="display:none">}}</span> | |||
| LvNeed=99 | |||
| LvFit=150000 | |||
| XEntryReq=<span style="display:none">{{</span> | |||
*Can only enter alone. | |||
*Must complete Normal Mode before Challenge Mode becomes available. | |||
<span style="display:none">}}</span> | |||
| Detail=<span style="display:none">{{</span> | |||
Originally ''[[Ymir's Time and Space]]'', ''[[William's Time and Space]]''.<br> | Originally ''[[Ymir's Time and Space]]'', ''[[William's Time and Space]]''.<br> | ||
Dimensional time and space where a genius magician is serving an eternal punishment.<br> | Dimensional time and space where a genius magician is serving an eternal punishment.<br> | ||
This dungeon mode allows you to fight the major bosses in Elsword in a boss rush style.<br> | This dungeon mode allows you to fight the major bosses in Elsword in a boss rush style.<br> | ||
Through this mode, you can collect Time and Space Fragments, which you can exchange at Glave for special items and Force skills.<br> | |||
Henir's Time and Space may be attempted as much as the player wishes, but rewards will only be given once per week. | |||
====Rules==== | |||
*Consumable(s) : '''Dungeon Specific Consumables''' | |||
**10x Advanced Healing Potion (25,000 HP Recovery, 1 Second Cooldown) | |||
**10x Advanced Mana Potion (300 MP Recovery, 1 Second Cooldown) | |||
**3x Water Orbs | |||
**3x Wind Orbs | |||
*Consumable(s) : | |||
* | |||
* | |||
* | |||
* | |||
* | |||
* | |||
*Resurrection(s) : '''Not Allowed''' | *Resurrection(s) : '''Not Allowed''' | ||
*Mounts: '''Disabled''' | *Mounts: '''Disabled''' | ||
* | *Does not give ED, EXP, and does not consume Stamina. | ||
<span style="display:none">}}</span> | <span style="display:none">}}</span> | ||
{{Section | {{Section | ||
| Color0={{ColorSel|Village|SP}} | | Color0={{ColorSel|Village|SP}} | ||
| Title0= | | Title0=Normal Mode | ||
| Content0= | | Content0= | ||
<span style="display:none">{{</span> | <span style="display:none">{{</span> | ||
| Line 87: | Line 60: | ||
<span style="display:none">}}</span> | <span style="display:none">}}</span> | ||
}} | }} | ||
{{Section | {{Section | ||
| Color0={{ColorSel|Village|SP}} | | Color0={{ColorSel|Village|SP}} | ||
| Title0= | | Title0=Challenge Mode | ||
| Content0= | | Content0= | ||
<span style="display:none">{{</span> | <span style="display:none">{{</span> | ||
| Line 106: | Line 79: | ||
<span style="display:none">}}</span> | <span style="display:none">}}</span> | ||
}} | }} | ||
| | | Boss=<span style="display:none">{{</span> | ||
|[[File:Dunno.png|60px]] | |[[File:Dunno.png|60px]] | ||
|'''Overzard''' - | |'''Overzard''' - A being of Henir that was locked away within the confines of Henir's Time And Space, broken free from its shackles. | ||
| | | | ||
*''' | === Overzard === | ||
*'''Teleport:''' Warp anywhere on the map at will, mostly used to warp in front of the player. | |||
*'''Uppercut:''' Claws at the player in front, causing a small shockwave that launches. | |||
*'''Thunder Dash:''' Winds up in place before dashing forward cloaked in electricity, carrying the player with it. | |||
*'''Illusion Burst:''' Dashes through the player, causing electric blasts to occur in its wake. | |||
*'''Shock Drain:''' Glares at the player before warping directly in front and causing an electric blast that drains 18 MP per hit. | |||
*'''EMP Burst:''' Jumps into the air before causing a massive explosion that drains 200 MP when hit. | |||
*When at 80x/60x HP - '''Maximum Charge:''' Jumps into the background and cloaks itself in an electric barrier while charging up energy. Creates two Overzard copies that can perform any of the above attacks except '''EMP Burst'''. If a player defeats the copies in time, '''Overzard''''s barrier will be broken and it will remain weakened for an extended period of time. If a player fails to defeat the copies, it will enter a charged form with additional attacks. | |||
*When at 50.5x HP - '''Energy Overload:''' Fires a laser from its chest into the sky that falls back down in a massive explosion to transform itself into a better, more powerful form. The transitioning cutscene does not cause damage. Additional platforms will appear in the stage. | |||
---------- | |||
=== Overzard (Maximum Charge) === | |||
*'''[[Thunderstorm]]:''' A thunderbolt will rain down at random, dealing damage in the area. | |||
*'''Electric Lariat:''' Performs a forward spinning move after charging up electricity. | |||
*'''Thunder Dash Combo:''' After performing '''Thunder Dash''', slams the ground to cause additional lightning blasts. | |||
*'''Chaos Dive:''' Jumps into the air and creates lightning copies of itself that will crash into the ground shortly, causing massive bursts of electricity on their way down, before diving into the ground itself. | |||
---------- | |||
=== Overzard (Energy Overload) === | |||
*'''Electric Lariat:''' Performs a forward spinning move after charging up electricity. | |||
*'''Chaos Dive:''' Jumps into the air and creates lightning copies of itself that will crash into the ground shortly, causing massive bursts of electricity on their way down, before diving into the ground itself. | |||
*When at 40x/20x HP - '''Lightning Chaos:''' Warps to the center while emitting a silencing field. While in the center, creates numerous lightning copies in sets of 2 per attack that dash around the stage dealing damage and draining 200 MP if the player comes into contact with them. If '''Overzard''' is unable to drain enough MP from the player, it will remain weakened on top of the lower center platform for an extended period of time. | |||
<span style="display:none">}}</span> | <span style="display:none">}}</span> | ||
| BBGM=[http://www.youtube.com/watch?v=-kTeDKjIfUk '''''li_henir_stage_boss_01'''''] | |||
| Gallery= | |||
| | |||
| | |||
<gallery widths=150px heights=150px> | <gallery widths=150px heights=150px> | ||
File:Henir_Background.jpg | File:Henir_Background.jpg | ||
</gallery> | </gallery> | ||
| Video= | |||
| Dialogue= | |||
{{tabs | |||
|name=Dialog | |||
|tab1=Dungeon Victory Quotes | |||
|contents1= | |||
*'''Elsword''': | |||
*'''Aisha''': | |||
*'''Rena''': | |||
*'''Raven''': | |||
*'''Eve''': | |||
*'''Chung''': | |||
*'''Ara''': | |||
*'''Elesis''': | |||
*'''Add''': | |||
*'''Lu''': | |||
*'''Ciel''': | |||
*'''Rose''': | |||
*'''Ain''': | |||
*'''Laby''': | |||
}} | }} | ||
|AltLang= | |||
| | |||
{{AlternateLanguages | {{AlternateLanguages | ||
|Color={{ColorSel|Village|SP}} | |Color={{ColorSel|Village|SP}} | ||
| Line 201: | Line 146: | ||
|BR=Tempo e Espaço de Henir |BRName=Henir's Time and Space | |BR=Tempo e Espaço de Henir |BRName=Henir's Time and Space | ||
}} | }} | ||
}} | }} | ||
Revision as of 00:58, 19 January 2019

Henir's Time and Space
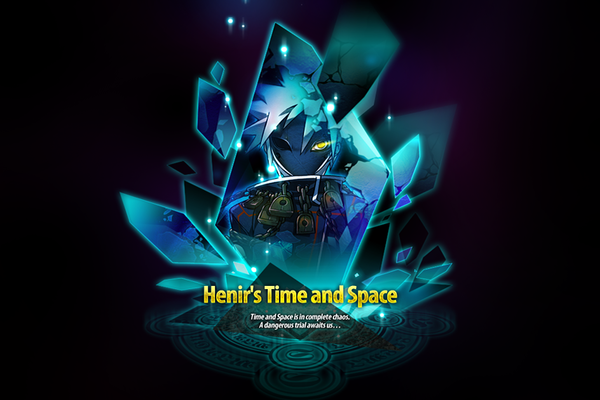
| “ | Henir's Time and Space. Time and Space is in complete chaos. A dangerous trial awaits us...
|
” |
A phenomenon called Henir's Time and Space lies in a temple called Seven Tower, where sages were known to dwell. The land it stands on was discovered in the olden days. This discovery brought about the emergence of magical skills, and led to the temple being built. Legend has it that the god Henir endured Ragnarok, and afterwards created a place where there is no limitation of time and space. Here, he is able to see the rise and fall of the world. Should you reach this place, by Henir's force, you are bound to face the enemies you have met in the past and those you are destined to meet in the future.
It has been said that a person overcoming this test can meet Henir and acquire an immense power. However, as the power of El began to decrease, the entrance of Henir's Time and Space has suddenly appeared in several places. Elsword and the rest of the gang decide to enter this mysterious dungeon in attempts of gaining the legendary power and using it to take back the missing El.
- Can only enter alone.
- Must complete Normal Mode before Challenge Mode becomes available.
Originally Ymir's Time and Space, William's Time and Space.
Dimensional time and space where a genius magician is serving an eternal punishment.
This dungeon mode allows you to fight the major bosses in Elsword in a boss rush style.
Through this mode, you can collect Time and Space Fragments, which you can exchange at Glave for special items and Force skills.
Henir's Time and Space may be attempted as much as the player wishes, but rewards will only be given once per week.
Rules
- Consumable(s) : Dungeon Specific Consumables
- 10x Advanced Healing Potion (25,000 HP Recovery, 1 Second Cooldown)
- 10x Advanced Mana Potion (300 MP Recovery, 1 Second Cooldown)
- 3x Water Orbs
- 3x Wind Orbs
- Resurrection(s) : Not Allowed
- Mounts: Disabled
- Does not give ED, EXP, and does not consume Stamina.
| Normal Mode | |||||||||||||||||||||||||||||||||
|---|---|---|---|---|---|---|---|---|---|---|---|---|---|---|---|---|---|---|---|---|---|---|---|---|---|---|---|---|---|---|---|---|---|
|
Consists of 20 consecutive stages. Bosses are selected randomly in any order each week.
|
| Challenge Mode | |||||||||||||
|---|---|---|---|---|---|---|---|---|---|---|---|---|---|
|
Consists of 6 consecutive stages. Bosses are selected randomly in any order each week.
|
| Monster Image | Boss Description | Boss Moves |
|---|---|---|

|
Overzard - A being of Henir that was locked away within the confines of Henir's Time And Space, broken free from its shackles. |
Overzard
Overzard (Maximum Charge)
Overzard (Energy Overload)
|
- Elsword:
- Aisha:
- Rena:
- Raven:
- Eve:
- Chung:
- Ara:
- Elesis:
- Add:
- Lu:
- Ciel:
- Rose:
- Ain:
- Laby:
- Region 13~18
- Region 1~6
- Region 7~12
- Region 19~20
- Laby
- Noah
- Lithia
- Other
- Miscellaneous
| Rigomor | Master Road | Pruinaum Outskirts | |||
|---|---|---|---|---|---|
| {{ }} | {{ }} | {{ }} | {{ }} | {{ }} | {{ }} |
- Region 13~18
- Region 1~6
- Region 7~12
- Region 19~20
- Other


