Master Class: Difference between revisions
Shironsaki (talk | contribs) |
|||
| (58 intermediate revisions by 10 users not shown) | |||
| Line 5: | Line 5: | ||
Characters can only advance to their Master Class after completing their 3rd Job Change and reaching [[Rigomor]]. To advance, the character must complete the Master Class quest available at the Town Board or use their respective class Item Mall Class Change item. If the character has already reached Master Class, they can change their class with the '''Master Class Change Ticket'''. | Characters can only advance to their Master Class after completing their 3rd Job Change and reaching [[Rigomor]]. To advance, the character must complete the Master Class quest available at the Town Board or use their respective class Item Mall Class Change item. If the character has already reached Master Class, they can change their class with the '''Master Class Change Ticket'''. | ||
=== Master Class Quest === | === Master Class Quest === | ||
{{Quest | {{Quest | ||
| Line 21: | Line 20: | ||
|QuestName=[Master] Master Class 2/5 | |QuestName=[Master] Master Class 2/5 | ||
|Requirement={{*}}Clear the quest '''[Master] Master Class 1/5''' | |Requirement={{*}}Clear the quest '''[Master] Master Class 1/5''' | ||
|Objectives={{*}}Collect 20 '''Apparition of Will''' from any '''Boss''' in [[Rigomor]] region dungeons. | |Objectives={{tabs | ||
|name=Master Class 2/5|divclass=forceland | |||
|tab1=General | |||
|contents1={{*}}Collect 20 '''Apparition of Will''' from any '''Boss''' in [[Rigomor]] region dungeons. | |||
|tab2=Adrian | |||
|contents2={{*}}Collect 20 '''Ancient Memory''' from any '''Boss''' in [[Rigomor]] region dungeons. | |||
|tab3=Hernia | |||
|contents3={{*}}Collect 20 '''Memory Pieces''' from any '''Boss''' in [[Rigomor]] region dungeons. | |||
}} | |||
|Description=[Chapter 2] - As ones who swore to protect the El with their lives, the El Masters have stronger than average determination. Though their purpose and goal may differ from each other, their strong determination is a common trait among them all. It is said that their determination appeared in front of them in a special apparition. | |Description=[Chapter 2] - As ones who swore to protect the El with their lives, the El Masters have stronger than average determination. Though their purpose and goal may differ from each other, their strong determination is a common trait among them all. It is said that their determination appeared in front of them in a special apparition. | ||
}} | }} | ||
| Line 29: | Line 36: | ||
|QuestName=[Master] Master Class 3/5 | |QuestName=[Master] Master Class 3/5 | ||
|Requirement={{*}}Clear the quest '''[Master] Master Class 2/5''' | |Requirement={{*}}Clear the quest '''[Master] Master Class 2/5''' | ||
|Objectives={{*}} | |Objectives={{*}}Spar with a Master / Defeat the Trial Opponent (Master Road Region Dungeon Normal / Hell) 0/1 | ||
|Description=[Chapter 3] - El Masters must have strong power in order to protect the El and the El Lady. Sometimes when powerful candidates come in contact with the power of the Master, their power will appear as a special apparition before them. | |Description=[Chapter 3] - El Masters must have strong power in order to protect the El and the El Lady. Sometimes when powerful candidates come in contact with the power of the Master, their power will appear as a special apparition before them. | ||
}} | }} | ||
| Line 37: | Line 44: | ||
|QuestName=[Master] Master Class 4/5 | |QuestName=[Master] Master Class 4/5 | ||
|Requirement={{*}}Clear the quest '''[Master] Master Class 3/5''' | |Requirement={{*}}Clear the quest '''[Master] Master Class 3/5''' | ||
|Objectives={{*}}Collect | |Objectives={{*}}Collect '''Origin Artifact''' (Master Road Region Dungeon Normal / Hell) 0/10 | ||
|Description=[Chapter 4] - It is said that these special apparition sometimes created new life. It is still not completely determined whether these creatures could be considered a "life form", but in any case, those who are qualified will have no trouble controlling it. Once they have accepted their master, it is said that they grew side by side as a part of their master. | |Description=[Chapter 4] - It is said that these special apparition sometimes created new life. It is still not completely determined whether these creatures could be considered a "life form", but in any case, those who are qualified will have no trouble controlling it. Once they have accepted their master, it is said that they grew side by side as a part of their master. | ||
}} | }} | ||
| Line 45: | Line 52: | ||
|QuestName=[Master] Master Class 5/5 | |QuestName=[Master] Master Class 5/5 | ||
|Requirement={{*}}Clear the quest '''[Master] Master Class 4/5''' | |Requirement={{*}}Clear the quest '''[Master] Master Class 4/5''' | ||
|Objectives={{*}} | |Objectives={{*}}Spar with a Master / Defeat the Trial Opponent (Master Road Region Dungeon Normal / Hell) 0/5 | ||
|Description=[Chapter 5] - To those who aim to be the Wind Master, know this. Be aware of the cutting flow. The apparition that appears before you will bring you to new heights. The last key lies with in you, and when you awaken that key, the power will be with you forever. | |Description=[Chapter 5] - To those who aim to be the Wind Master, know this. Be aware of the cutting flow. The apparition that appears before you will bring you to new heights. The last key lies with in you, and when you awaken that key, the power will be with you forever. | ||
}} | }} | ||
=== Skill Quests === | === Skill Quests === | ||
==== Master Skill Second Stage ==== | ==== Master Skill Second Stage ==== | ||
| Line 55: | Line 63: | ||
|QuestName=[Master] Transforming Power 1/3 | |QuestName=[Master] Transforming Power 1/3 | ||
|Requirement={{*}}Complete Master Class advancement | |Requirement={{*}}Complete Master Class advancement | ||
|Objectives={{*}}Clear | |Objectives={{*}}Clear Master Road Region Dungeon (Normal / Hell) 0/1 | ||
|Description=A battle against those who have reached a certain aptitude is sometimes what's needed to understand new power. While this match is unexected, the transformation already started for those who have accepted this challenge. | |Description=A battle against those who have reached a certain aptitude is sometimes what's needed to understand new power. While this match is unexected, the transformation already started for those who have accepted this challenge. | ||
}} | }} | ||
| Line 63: | Line 71: | ||
|QuestName=[Master] Transforming Power 2/3 | |QuestName=[Master] Transforming Power 2/3 | ||
|Requirement={{*}}Complete the quest '''[Master] Transforming Power 1/3''' | |Requirement={{*}}Complete the quest '''[Master] Transforming Power 1/3''' | ||
|Objectives={{*}}Collect 60 '''Mark of Transforming Power''' from any [[Master Road]] dungeon. | |Objectives={{*}}Collect 60 '''{{tt|Mark of Transforming Power|You will receive 2 in Normal Mode and 3 in Hell Mode}}''' from any [[Master Road]] dungeon. | ||
|Description=In order to properly use new power, there must be a transformation from within to accept this power. Do not fear transformation. It is needed to move forward. | |Description=In order to properly use new power, there must be a transformation from within to accept this power. Do not fear transformation. It is needed to move forward. | ||
}} | }} | ||
| Line 71: | Line 79: | ||
|QuestName=[Master] Transforming Power 3/3 | |QuestName=[Master] Transforming Power 3/3 | ||
|Requirement={{*}}Complete the quest '''[Master] Transforming Power 2/3''' | |Requirement={{*}}Complete the quest '''[Master] Transforming Power 2/3''' | ||
|Objectives={{*}}Clear | |Objectives={{*}}Clear Master Road Region Dungeon (Normal / Hell) 0/1 | ||
|Description=You feel the power within you transformed through sparring with those who have reached a certain aptitude. Go to the one who instigated the change and show them the proof of your transformation. | |Description=You feel the power within you transformed through sparring with those who have reached a certain aptitude. Go to the one who instigated the change and show them the proof of your transformation. | ||
|CImage1=[[File:Item - Master Class Secret Manual (Stage 2).png]] | |CImage1=[[File:Item - Master Class Secret Manual (Stage 2).png]] | ||
|CReward1=Master Class Secret Manual (Stage 2) | |CReward1=Master Class Secret Manual (Stage 2) | ||
}} | }} | ||
==== Master Skill Third Stage ==== | ==== Master Skill Third Stage ==== | ||
{{Quest | {{Quest | ||
| Line 90: | Line 99: | ||
|QuestName=[Master] Evolving Power 2/3 | |QuestName=[Master] Evolving Power 2/3 | ||
|Requirement={{*}}Complete the quest '''[Master] Evolving Power 1/3''' | |Requirement={{*}}Complete the quest '''[Master] Evolving Power 1/3''' | ||
|Objectives={{*}}Collect 120 '''Mark of Evolving Power''' from any [[Master Road]] dungeon. | |Objectives={{*}}Collect 120 '''{{tt|Mark of Evolving Power|You will receive 2 in Normal Mode and 3 in Hell Mode}}''' from any [[Master Road]] dungeon. | ||
|Description= | |Description= | ||
}} | }} | ||
| Line 117: | Line 126: | ||
|QuestName=[Master] Turbulent Power 2/3 | |QuestName=[Master] Turbulent Power 2/3 | ||
|Requirement={{*}}Complete the quest '''[Master] Turbulent Power 1/3''' | |Requirement={{*}}Complete the quest '''[Master] Turbulent Power 1/3''' | ||
|Objectives={{*}}Collect 180 '''Mark of Turbulent Power''' from any [[Master Road]] dungeon. | |Objectives={{*}}Collect 180 '''{{tt|Mark of Turbulent Power |You will receive 2 in Normal Mode and 3 in Hell Mode}}''' from any [[Master Road]] dungeon. | ||
|Description= | |Description= | ||
}} | }} | ||
| Line 138: | Line 147: | ||
{| style="border-collapse: collapse; text-align:center" border="1" cellpadding="1" | {| style="border-collapse: collapse; text-align:center" border="1" cellpadding="1" | ||
|- style="background-color: {{ColorSel|Master|Gaia4}};" class="textfloat" | |- style="background-color: {{ColorSel|Master|Gaia4}};" class="textfloat" | ||
! colspan=3 | [[File: | ! colspan=3 | [[File:Overlay - Gaia Sigil.png|25px]] [[Gaia]] | ||
|- | |- | ||
! rowspan= | ! rowspan=4 | [[File:EGaiaHead.png|120px]] | ||
| width="40" | [[File:Icon - Ara.png]] | | width="40" | [[File:Icon - Ara.png]] | ||
| width="150" | [[Ara]] | | width="150" | [[Ara]] | ||
| Line 146: | Line 155: | ||
| width="40" | [[File:Icon - Laby.png]] | | width="40" | [[File:Icon - Laby.png]] | ||
| width="150" | [[Laby]] | | width="150" | [[Laby]] | ||
|- | |||
| width="40" | [[File:Icon - Lithia.png]] | |||
| width="150" | [[Lithia]] | |||
|- | |- | ||
| Dungeon | | Dungeon | ||
| width="190" | | width="190" | [[Shrine of the Two-Headed Serpent]] | ||
|} | |} | ||
| Line 154: | Line 166: | ||
{| style="border-collapse: collapse; text-align:center" border="1" cellpadding="1" | {| style="border-collapse: collapse; text-align:center" border="1" cellpadding="1" | ||
|- style="background-color: {{ColorSel|Master|Rosso4}};" class="textfloat" | |- style="background-color: {{ColorSel|Master|Rosso4}};" class="textfloat" | ||
! colspan=3 | [[File: | ! colspan=3 | [[File:Overlay - Rosso Sigil.png|25px]] [[Rosso]] | ||
|- | |- | ||
! rowspan=3 | [[File:ERossoHead.png|120px]] | ! rowspan=3 | [[File:ERossoHead.png|120px]] | ||
| Line 164: | Line 176: | ||
|- | |- | ||
| Dungeon | | Dungeon | ||
| width="190" | | width="190" | [[Elrianode Training Grounds]] | ||
|} | |} | ||
| Line 170: | Line 182: | ||
{| style="border-collapse: collapse; text-align:center" border="1" cellpadding="1" | {| style="border-collapse: collapse; text-align:center" border="1" cellpadding="1" | ||
|- style="background-color: {{ColorSel|Master|Ventus4}};" class="textfloat" | |- style="background-color: {{ColorSel|Master|Ventus4}};" class="textfloat" | ||
! colspan=3 | [[File: | ! colspan=3 | [[File:Overlay - Ventus Sigil.png|25px]] [[Ventus]] | ||
|- | |- | ||
! rowspan=3 | [[File:VentusHead.png|120px]] | ! rowspan=3 | [[File:VentusHead.png|120px]] | ||
| Line 180: | Line 192: | ||
|- | |- | ||
| Dungeon | | Dungeon | ||
| width="190" | | width="190" | [[Spirit Sanctum]] | ||
|} | |} | ||
|- | |- | ||
| Line 186: | Line 198: | ||
{| style="border-collapse: collapse; text-align:center" border="1" cellpadding="1" | {| style="border-collapse: collapse; text-align:center" border="1" cellpadding="1" | ||
|- style="background-color: {{ColorSel|Master|Denif4}};" class="textfloat" | |- style="background-color: {{ColorSel|Master|Denif4}};" class="textfloat" | ||
! colspan=3 | [[File: | ! colspan=3 | [[File:Overlay - Denif Sigil.png|25px]] [[Denif]] | ||
|- | |- | ||
! rowspan=3 | [[File:DenifHead.png|120px]] | ! rowspan=3 | [[File:DenifHead.png|120px]] | ||
| Line 196: | Line 208: | ||
|- | |- | ||
| Dungeon | | Dungeon | ||
| width="190" | | width="190" | [[Water Dragon's Compass]] | ||
|} | |} | ||
| Line 202: | Line 214: | ||
{| style="border-collapse: collapse; text-align:center" border="1" cellpadding="1" | {| style="border-collapse: collapse; text-align:center" border="1" cellpadding="1" | ||
|- style="background-color: {{ColorSel|Master|Adrian4}};" class="textfloat" | |- style="background-color: {{ColorSel|Master|Adrian4}};" class="textfloat" | ||
! colspan=3 | [[File: | ! colspan=3 | [[File:Overlay - Adrian Sigil.png|25px]] [[Adrian]] | ||
|- | |- | ||
! rowspan=3 | [[File:AdrianNasodHead.png|120px]] | ! rowspan=3 | [[File:AdrianNasodHead.png|120px]] | ||
| Line 212: | Line 224: | ||
|- | |- | ||
| Dungeon | | Dungeon | ||
| width="190" | | width="190" | [[Nasod Testing Chamber]] | ||
|} | |} | ||
| Line 218: | Line 230: | ||
{| style="border-collapse: collapse; text-align:center" border="1" cellpadding="1" | {| style="border-collapse: collapse; text-align:center" border="1" cellpadding="1" | ||
|- style="background-color: {{ColorSel|Master|Solace4}};" class="textfloat" | |- style="background-color: {{ColorSel|Master|Solace4}};" class="textfloat" | ||
! colspan=3 | [[File: | ! colspan=3 | [[File:Overlay - Solace Sigil.png|25px]] [[Solace]] | ||
|- | |- | ||
! rowspan=3 | [[File:ESolaceHead.png|120px]] | ! rowspan=3 | [[File:ESolaceHead.png|120px]] | ||
| Line 228: | Line 240: | ||
|- | |- | ||
| Dungeon | | Dungeon | ||
| width="190" | | width="190" | [[Gate of the Setting Sun]] | ||
|} | |} | ||
|- | |- | ||
| Line 234: | Line 246: | ||
{| style="border-collapse: collapse; text-align:center" border="1" cellpadding="1" | {| style="border-collapse: collapse; text-align:center" border="1" cellpadding="1" | ||
|- style="background-color: {{ColorSel|Master|Hernia4}};" class="textfloat" | |- style="background-color: {{ColorSel|Master|Hernia4}};" class="textfloat" | ||
! colspan=3 | [[File: | ! colspan=3 | [[File:Overlay - Hernia Sigil.png|25px]] [[Hernia]] | ||
|- | |- | ||
! rowspan=4 | [[File:MRHerniaHead.png|120px]] | ! rowspan=4 | [[File:MRHerniaHead.png|120px]] | ||
| Line 244: | Line 256: | ||
|- | |- | ||
| rowspan=2 | Dungeons | | rowspan=2 | Dungeons | ||
| width="190" | | width="190" | [[File:Mini Icon - Ain.png]] [[Anguish of the Wavering Servant]] | ||
|- | |- | ||
| width="190" | | width="190" | [[File:Mini Icon - Noah.png]] [[Unraveling the Knot of Memories]] | ||
|} | |} | ||
|} | |} | ||
| Line 260: | Line 272: | ||
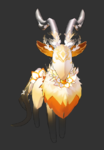
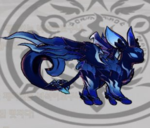
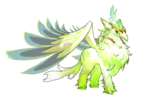
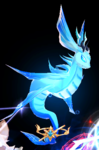
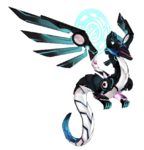
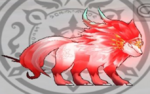
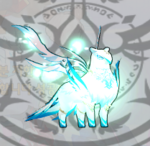
:''Main Article: [[Artifact System]]'' | :''Main Article: [[Artifact System]]'' | ||
When players advance to their Master Class, they will be able to use Master Artifacts. | When players advance to their Master Class, they will be able to use Master Artifacts. | ||
<gallery widths=150px heights=150px> | <gallery widths="150px" heights="150px"> | ||
File:Artifact - Apsara.png|Serne, Gaia's Artifact | File:Artifact - Apsara.png|Serne, Gaia's Artifact | ||
File:Artifact - Diangelion.png|Alisha, Rosso's Artifact | File:Artifact - Diangelion.png|Alisha, Rosso's Artifact | ||
File:Artifact - Daybreaker | File:Artifact - Daybreaker.png|Revent, Ventus's Artifact | ||
File:Artifact - Comet Crusader.png|Vaikal, Denif's Artifact | File:Artifact - Comet Crusader.png|Vaikal, Denif's Artifact | ||
File:Artifact - Code Ultimate.png|Karte, Adrian's Artifact | File:Artifact - Code Ultimate.png|Karte, Adrian's Artifact | ||
File:Artifact - Knight Emperor | File:Artifact - Knight Emperor.png|Leon, Solace's Artifact | ||
File:Artifact - Richter | File:Artifact - Richter.png|Dachsologie, Hernia's Artifact | ||
</gallery> | </gallery> | ||
<br> | <br> | ||
| Line 279: | Line 291: | ||
! colspan=2 |[[Elsword]] | ! colspan=2 |[[Elsword]] | ||
|- | |- | ||
| width="40" | | | width="40" | {{MasterOverlay|Knight Emperor|Solace|link=1}} | ||
| width="150" | [[Knight Emperor]] | | width="150" | [[Knight Emperor#Master Class|Knight Emperor]] | ||
|- | |- | ||
| width="40" | | | width="40" | {{MasterOverlay|Rune Master|Solace|link=1}} | ||
| width="150" | [[Rune Master]] | | width="150" | [[Rune Master#Master Class|Rune Master]] | ||
|- | |- | ||
| width="40" | | | width="40" | {{MasterOverlay|Immortal|Solace|link=1}} | ||
| width="150" | [[Immortal]] | | width="150" | [[Immortal#Master Class|Immortal]] | ||
|- | |- | ||
| width="40" | | | width="40" | {{MasterOverlay|Genesis|Solace|link=1}} | ||
| width="150" | [[Genesis]] | | width="150" | [[Genesis#Master Class|Genesis]] | ||
|} | |} | ||
| valign="top" | | | valign="top" | | ||
| Line 297: | Line 309: | ||
! colspan=2 |[[Aisha]] | ! colspan=2 |[[Aisha]] | ||
|- | |- | ||
| width="40" | | | width="40" | {{MasterOverlay|Aether Sage|Denif|link=1}} | ||
| width="150" | [[Aether Sage]] | | width="150" | [[Aether Sage#Master Class|Aether Sage]] | ||
|- | |- | ||
| width="40" | | | width="40" | {{MasterOverlay|Oz Sorcerer|Denif|link=1}} | ||
| width="150" | [[Oz Sorcerer]] | | width="150" | [[Oz Sorcerer#Master Class|Oz Sorcerer]] | ||
|- | |- | ||
| width="40" | | | width="40" | {{MasterOverlay|Metamorphy|Denif|link=1}} | ||
| width="150" | [[Metamorphy]] | | width="150" | [[Metamorphy#Master Class|Metamorphy]] | ||
|- | |- | ||
| width="40" | | | width="40" | {{MasterOverlay|Lord Azoth|Denif|link=1}} | ||
| width="150" | | | width="150" | [[Lord Azoth#Master Class|Lord Azoth]] | ||
|} | |} | ||
| valign="top" | | | valign="top" | | ||
| Line 314: | Line 326: | ||
! colspan=2 |[[Rena]] | ! colspan=2 |[[Rena]] | ||
|- | |- | ||
| width="40" | | | width="40" | {{MasterOverlay|Anemos|Ventus|link=1}} | ||
| width="150" | [[Anemos]] | | width="150" | [[Anemos#Master Class|Anemos]] | ||
|- | |- | ||
| width="40" | | | width="40" | {{MasterOverlay|Daybreaker|Ventus|link=1}} | ||
| width="150" | [[Daybreaker]] | | width="150" | [[Daybreaker#Master Class|Daybreaker]] | ||
|- | |- | ||
| width="40" | | | width="40" | {{MasterOverlay|Twilight|Ventus|link=1}} | ||
| width="150" | [[Twilight]] | | width="150" | [[Twilight#Master Class|Twilight]] | ||
|- | |- | ||
| width="40" | | | width="40" | {{MasterOverlay|Prophetess|Ventus|link=1}} | ||
| width="150" | | | width="150" | [[Prophetess#Master Class|Prophetess]] | ||
|} | |} | ||
| valign="top" | | | valign="top" | | ||
| Line 331: | Line 343: | ||
! colspan=2 |[[Raven]] | ! colspan=2 |[[Raven]] | ||
|- | |- | ||
| width="40" | | | width="40" | {{MasterOverlay|Furious Blade|Solace|link=1}} | ||
| width="150" | [[Furious Blade]] | | width="150" | [[Furious Blade#Master Class|Furious Blade]] | ||
|- | |- | ||
| width="40" | | | width="40" | {{MasterOverlay|Rage Hearts|Solace|link=1}} | ||
| width="150" | [[Rage Hearts]] | | width="150" | [[Rage Hearts#Master Class|Rage Hearts]] | ||
|- | |- | ||
| width="40" | | | width="40" | {{MasterOverlay|Nova Imperator|Solace|link=1}} | ||
| width="150" | [[Nova Imperator]] | | width="150" | [[Nova Imperator#Master Class|Nova Imperator]] | ||
|- | |- | ||
| width="40" | | | width="40" | {{MasterOverlay|Revenant|Solace|link=1}} | ||
| width="150" | | | width="150" | [[Revenant#Master Class|Revenant]] | ||
|} | |} | ||
|- | |- | ||
| Line 349: | Line 361: | ||
! colspan=2 |[[Eve]] | ! colspan=2 |[[Eve]] | ||
|- | |- | ||
| width="40" | | | width="40" | {{MasterOverlay|Code Ultimate|Adrian|link=1}} | ||
| width="150" | [[Code: Ultimate]] | | width="150" | [[Code: Ultimate#Master Class|Code: Ultimate]] | ||
|- | |- | ||
| width="40" | | | width="40" | {{MasterOverlay|Code Esencia|Adrian|link=1}} | ||
| width="150" | [[Code: Esencia]] | | width="150" | [[Code: Esencia#Master Class|Code: Esencia]] | ||
|- | |- | ||
| width="40" | | | width="40" | {{MasterOverlay|Code Sariel|Adrian|link=1}} | ||
| width="150" | [[Code: Sariel]] | | width="150" | [[Code: Sariel#Master Class|Code: Sariel]] | ||
|- | |- | ||
| width="40" | | | width="40" | {{MasterOverlay|Code Antithese|Adrian|link=1}} | ||
| width="150" | | | width="150" | [[Code: Antithese#Master Class|Code: Antithese]] | ||
|} | |} | ||
| valign="top" | | | valign="top" | | ||
| Line 366: | Line 378: | ||
! colspan=2 |[[Chung]] | ! colspan=2 |[[Chung]] | ||
|- | |- | ||
| width="40" | | | width="40" | {{MasterOverlay|Comet Crusader|Denif|link=1}} | ||
| width="150" | [[Comet Crusader]] | | width="150" | [[Comet Crusader#Master Class|Comet Crusader]] | ||
|- | |- | ||
| width="40" | | | width="40" | {{MasterOverlay|Fatal Phantom|Denif|link=1}} | ||
| width="150" | [[Fatal Phantom]] | | width="150" | [[Fatal Phantom#Master Class|Fatal Phantom]] | ||
|- | |- | ||
| width="40" | | | width="40" | {{MasterOverlay|Centurion|Denif|link=1}} | ||
| width="150" | [[Centurion]] | | width="150" | [[Centurion#Master Class|Centurion]] | ||
|- | |- | ||
| width="40" | | | width="40" | {{MasterOverlay|Dius Aer|Denif|link=1}} | ||
| width="150" | | | width="150" | [[Dius Aer#Master Class|Dius Aer]] | ||
|} | |} | ||
| valign="top" | | | valign="top" | | ||
| Line 383: | Line 395: | ||
! colspan=2 |[[Ara]] | ! colspan=2 |[[Ara]] | ||
|- | |- | ||
| width="40" | | | width="40" | {{MasterOverlay|Apsara|Gaia|link=1}} | ||
| width="150" | [[Apsara]] | | width="150" | [[Apsara#Master Class|Apsara]] | ||
|- | |- | ||
| width="40" | | | width="40" | {{MasterOverlay|Devi|Gaia|link=1}} | ||
| width="150" | [[Devi]] | | width="150" | [[Devi#Master Class|Devi]] | ||
|- | |- | ||
| width="40" | | | width="40" | {{MasterOverlay|Shakti|Gaia|link=1}} | ||
| width="150" | [[Shakti]] | | width="150" | [[Shakti#Master Class|Shakti]] | ||
|- | |- | ||
| width="40" | | | width="40" | {{MasterOverlay|Surya|Gaia|link=1}} | ||
| width="150" | | | width="150" | [[Surya#Master Class|Surya]] | ||
|} | |} | ||
| valign="top" | | | valign="top" | | ||
{| style="border-collapse: collapse; text-align:center" border="1" cellpadding="1" | {| style="border-collapse: collapse; text-align:center" border="1" cellpadding="1" | ||
|- style="background-color: {{ColorSel|Character|Elesis}};" class="textfloat" | |- style="background-color: {{ColorSel|Character|Elesis}};" class="textfloat" | ||
! colspan=2 |[[Elesis]] | ! colspan=2 |[[Elesis]] | ||
|- | |- | ||
| width="40" | | | width="40" | {{MasterOverlay|Empire Sword|Rosso|link=1}} | ||
| width="150" | [[Empire Sword]] | | width="150" | [[Empire Sword#Master Class|Empire Sword]] | ||
|- | |- | ||
| width="40" | | | width="40" | {{MasterOverlay|Flame Lord|Rosso|link=1}} | ||
| width="150" | [[Flame Lord]] | | width="150" | [[Flame Lord#Master Class|Flame Lord]] | ||
|- | |- | ||
| width="40" | | | width="40" | {{MasterOverlay|Bloody Queen|Rosso|link=1}} | ||
| width="150" | [[Bloody Queen]] | | width="150" | [[Bloody Queen#Master Class|Bloody Queen]] | ||
|- | |- | ||
| width="40" | | | width="40" | {{MasterOverlay|Adrestia|Rosso|link=1}} | ||
| width="150" | | | width="150" | [[Adrestia#Master Class|Adrestia]] | ||
|} | |} | ||
|- | |- | ||
| Line 418: | Line 430: | ||
! colspan=2 |[[Add]] | ! colspan=2 |[[Add]] | ||
|- | |- | ||
| width="40" | | | width="40" | {{MasterOverlay|Doom Bringer|Adrian|link=1}} | ||
| width="150" | [[Doom Bringer]] | | width="150" | [[Doom Bringer#Master Class|Doom Bringer]] | ||
|- | |- | ||
| width="40" | | | width="40" | {{MasterOverlay|Dominator|Adrian|link=1}} | ||
| width="150" | [[Dominator]] | | width="150" | [[Dominator#Master Class|Dominator]] | ||
|- | |- | ||
| width="40" | | | width="40" | {{MasterOverlay|Mad Paradox|Adrian|link=1}} | ||
| width="150" | [[Mad Paradox]] | | width="150" | [[Mad Paradox#Master Class|Mad Paradox]] | ||
|- | |- | ||
| width="40" | | | width="40" | {{MasterOverlay|Overmind|Adrian|link=1}} | ||
| width="150" | | | width="150" | [[Overmind#Master Class|Overmind]] | ||
|} | |} | ||
| valign="top" | | | valign="top" | | ||
| Line 435: | Line 447: | ||
! colspan=2 |[[Lu/Ciel]] | ! colspan=2 |[[Lu/Ciel]] | ||
|- | |- | ||
| width="40" | | | width="40" | {{MasterOverlay|Catastrophe|Rosso|link=1}} | ||
| width="150" | [[Catastrophe#Master Class|Catastrophe]]<br>(Timoria/Abysser) | |||
| | |||
| | |||
| | |||
| width="150" | |||
| | |||
|- | |- | ||
| width="40" | [[ | | width="40" | {{MasterOverlay|Innocent|Rosso|link=1}} | ||
| width="150" | [[Innocent#Master Class|Innocent]]<br>(Ishtar/Chevalier) | |||
|- | |- | ||
| width="40" | | | width="40" | {{MasterOverlay|Diangelion|Rosso|link=1}} | ||
| width="150" | | width="150" | [[Diangelion#Master Class|Diangelion]]<br>(Iblis/Anular) | ||
|- | |- | ||
| width="40" | [[ | | width="40" | {{MasterOverlay|Demersio|Rosso|link=1}} | ||
| width="150" | [[Demersio#Master Class|Demersio]]<br>(Nihilida/Tyrannus) | |||
|} | |} | ||
| valign="top" | | | valign="top" | | ||
| Line 460: | Line 464: | ||
! colspan=2 |[[Rose]] | ! colspan=2 |[[Rose]] | ||
|- | |- | ||
| width="40" | | | width="40" | {{MasterOverlay|Tempest Burster|Ventus|link=1}} | ||
| width="150" | [[Tempest Burster]] | | width="150" | [[Tempest Burster#Master Class|Tempest Burster]] | ||
|- | |- | ||
| width="40" | | | width="40" | {{MasterOverlay|Black Massacre|Ventus|link=1}} | ||
| width="150" | [[Black Massacre]] | | width="150" | [[Black Massacre#Master Class|Black Massacre]] | ||
|- | |- | ||
| width="40" | | | width="40" | {{MasterOverlay|Minerva|Ventus|link=1}} | ||
| width="150" | [[Minerva]] | | width="150" | [[Minerva#Master Class|Minerva]] | ||
|- | |- | ||
| width="40" | | | width="40" | {{MasterOverlay|Prime Operator|Ventus|link=1}} | ||
| width="150" | [[Prime Operator]] | | width="150" | [[Prime Operator#Master Class|Prime Operator]] | ||
|} | |} | ||
| valign="top" | | | valign="top" | | ||
| Line 477: | Line 481: | ||
! colspan=2 |[[Ain]] | ! colspan=2 |[[Ain]] | ||
|- | |- | ||
| width="40" | | | width="40" | {{MasterOverlay|Richter|Hernia|link=1}} | ||
| width="150" | [[Richter]] | | width="150" | [[Richter#Master Class|Richter]] | ||
|- | |- | ||
| width="40" | | | width="40" | {{MasterOverlay|Bluhen|Hernia|link=1}} | ||
| width="150" | [[Bluhen]] | | width="150" | [[Bluhen#Master Class|Bluhen]] | ||
|- | |- | ||
| width="40" | | | width="40" | {{MasterOverlay|Herrscher|Hernia|link=1}} | ||
| width="150" | [[Herrscher]] | | width="150" | [[Herrscher#Master Class|Herrscher]] | ||
|- | |- | ||
| width="40" | | | width="40" | {{MasterOverlay|Opferung|Hernia||link=1}} | ||
| width="150" | | | width="150" | [[Opferung#Master Class|Opferung]] | ||
|} | |} | ||
|- | |- | ||
| Line 495: | Line 499: | ||
! colspan=2 |[[Laby]] | ! colspan=2 |[[Laby]] | ||
|- | |- | ||
| width="40" | | | width="40" | {{MasterOverlay|Eternity Winner|Gaia|link=1}} | ||
| width="150" | [[Eternity Winner]] | | width="150" | [[Eternity Winner#Master Class|Eternity Winner]] | ||
|- | |- | ||
| width="40" | | | width="40" | {{MasterOverlay|Radiant Soul|Gaia|link=1}} | ||
| width="150" | [[Radiant Soul]] | | width="150" | [[Radiant Soul#Master Class|Radiant Soul]] | ||
|- | |- | ||
| width="40" | | | width="40" | {{MasterOverlay|Nisha Labyrinth|Gaia|link=1}} | ||
| width="150" | [[Nisha Labyrinth]] | | width="150" | [[Nisha Labyrinth#Master Class|Nisha Labyrinth]] | ||
|- | |- | ||
| width="40" | | | width="40" | {{MasterOverlay|Twins Picaro|Gaia|link=1}} | ||
| width="150" | | | width="150" | [[Twins Picaro#Master Class|Twins Picaro]] | ||
|} | |} | ||
| valign="top" | | | valign="top" | | ||
| Line 512: | Line 516: | ||
! colspan=2 |[[Noah]] | ! colspan=2 |[[Noah]] | ||
|- | |- | ||
| width="40" | [[ | | width="40" | {{MasterOverlay|Liberator|Hernia|link=1}} | ||
| width="150" | [[ | | width="150" | [[Liberator#Master Class|Liberator]] | ||
|- | |||
| width="40" | {{MasterOverlay|Celestia|Hernia|link=1}} | |||
| width="150" | [[Celestia#Master Class|Celestia]] | |||
|- | |||
| width="40" | {{MasterOverlay|Nyx Pieta|Hernia|link=1}} | |||
| width="150" | [[Nyx Pieta#Master Class|Nyx Pieta]] | |||
|- | |||
| width="40" | {{MasterOverlay|Morpheus|Hernia||link=1}} | |||
| width="150" | [[Morpheus#Master Class|Morpheus]] | |||
|} | |||
| valign="top" | | |||
{| style="border-collapse: collapse; text-align:center" border="1" cellpadding="1" | |||
|- style="background-color: {{ColorSel|Character|Lithia}};" class="textfloat" | |||
! colspan=2 |[[Lithia]] | |||
|- | |||
| width="40" | {{MasterOverlay|Gembliss|Gaia|link=1}} | |||
| width="150" | [[Gembliss#Master Class|Gembliss]] | |||
|- | |- | ||
| width="40" | | | width="40" | {{MasterOverlay|Dunno|Gaia|link=1}} | ||
| width="150" | | | width="150" | ?? | ||
|- | |- | ||
| width="40" | | | width="40" | {{MasterOverlay|Dunno|Gaia|link=1}} | ||
| width="150" | | | width="150" | ?? | ||
|- | |- | ||
| width="40" | | | width="40" | {{MasterOverlay|Dunno|Gaia|link=1}} | ||
| width="150" | | | width="150" | ?? | ||
|} | |} | ||
|} | |||
<br> | |||
== Related Items == | |||
{| cellpadding="5" border="1" style="border-collapse: collapse;" width=100% | |||
|- | |||
! width=1 | Image !! width=15% | Item Name !! width=20% | How to Obtain !! Effect | |||
|- | |||
| [[File:Job Change - Knight Emperor (Master).png]] | |||
| '''Mark of Awakening (Class Name)''' | |||
| Purchasable from the Item Mall (?? K-Ching) | |||
| rowspan=2 | Advance a 3rd job character to Master Class. | |||
|- | |||
| [[File:HQ Shop Item 715918.png]] | |||
| '''Master Class Advance Ticket''' | |||
| Event Reward | |||
|- | |||
| [[File:HQ Shop Item 711290.png]] | |||
| '''Master Class Change Ticket''' | |||
| Event Reward | |||
| Master Class Change Item<br>A ticket that allows you to change to a different job class.<br>{{*}}<font color="red">Warning: Can only be used by 3rd job (Master Class) characters.</font><br> | |||
(Right-click to use) | |||
|- | |||
| [[File:Item - Master Class Secret Manual (Stage 2).png]] | |||
| '''Master Class Secret Manual (Stage 2)''' | |||
| Purchasable from the Item Mall (?? K-Ching) | |||
| Unlock the Stage 2 Master skill | |||
|- | |||
| [[File:Item - Master Class Secret Manual (Stage 3).png]] | |||
| '''Master Class Secret Manual (Stage 3)''' | |||
| Purchasable from the Item Mall (?? K-Ching) | |||
| Unlock the Stage 3 Master skill | |||
|- | |||
| [[File:Item - Master Class Secret Manual (Stage 4).png]] | |||
| '''Master Class Secret Manual (Stage 4)''' | |||
| Purchasable from the Item Mall (?? K-Ching) | |||
| Unlock the Stage 4 Master skill | |||
|} | |} | ||
<br> | <br> | ||
== Trivia == | == Trivia == | ||
*Adrian's sign used to be light purple instead of deep blue before Eve and Add's Master Class was officially released. | *Adrian's sign used to be light purple instead of deep blue before Eve and Add's Master Class was officially released. | ||
*Hernia is the only master to have multiple dungeons. This is due to them taking place inside of Ain's psyche/Noah's memories instead of physical locations. | *Hernia is the only master to have multiple dungeons. This is due to them taking place inside of Ain's psyche/Noah's memories instead of physical locations. | ||
**Additionally, both of her dungeons drop the same Force Skill, and the accessories that can be obtained from them are functionally the same, only differing in name and appearance. | **Additionally, both of her dungeons drop the same Force Skill, and the accessories that can be obtained from them are functionally the same, only differing in name and appearance. | ||
<gallery widths="150px" heights="150px"> | |||
File:Overlay - Adrian (Old) Sigil.png|Adrian's old sign. | |||
</gallery> | |||
<br> | <br> | ||
{{Guides}} | {{Guides}} | ||
Latest revision as of 11:01, 10 December 2023
After completing their 3rd Job and reaching Rigomor, players are able to bring out their abilities beyond their limits to unlock new skills. Unlike previous advancements, reaching Master Class does not unlock Final Enhanced effects for 3rd Job skills, a new portrait, or a new skill cut-in for non-master skills, but it will give a skill cut-in that is used exclusively for Master Skills.
General Information
Characters can only advance to their Master Class after completing their 3rd Job Change and reaching Rigomor. To advance, the character must complete the Master Class quest available at the Town Board or use their respective class Item Mall Class Change item. If the character has already reached Master Class, they can change their class with the Master Class Change Ticket.
Master Class Quest

Skill Quests
Master Skill Second Stage
Master Skill Third Stage
Master Skill Fourth Stage
Master Road
|
|
| ||||||||||||||||||||||||||||||||
|
|
| ||||||||||||||||||||||||||||||||
| ||||||||||||||||||||||||||||||||||


.png)


Benefits of Master Class
Master Skill
After advancing to the Master Class, the player will have access to a Master Skill. This skill is available in 4 stages, increasing in power with each stage. The first stage is automatically unlocked upon advancing to Master Class while additional stages can be unlocked by completing their Skill Quests in sequential order.
Master Skills don't have Skill Traits and are not affected by Skill Damage Increase stat but they have their own Master Skill Damage Increase option. When a Master Skill is used, a special Master Class Skill Cut-in will be shown.
Artifact
- Main Article: Artifact System
When players advance to their Master Class, they will be able to use Master Artifacts.
-
Serne, Gaia's Artifact
-
Alisha, Rosso's Artifact
-
Revent, Ventus's Artifact
-
Vaikal, Denif's Artifact
-
Karte, Adrian's Artifact
-
Leon, Solace's Artifact
-
Dachsologie, Hernia's Artifact


List of Classes

Related Items
| Image | Item Name | How to Obtain | Effect |
|---|---|---|---|
.png)
|
Mark of Awakening (Class Name) | Purchasable from the Item Mall (?? K-Ching) | Advance a 3rd job character to Master Class. |

|
Master Class Advance Ticket | Event Reward | |

|
Master Class Change Ticket | Event Reward | Master Class Change Item A ticket that allows you to change to a different job class.
(Right-click to use) |
.png)
|
Master Class Secret Manual (Stage 2) | Purchasable from the Item Mall (?? K-Ching) | Unlock the Stage 2 Master skill |
.png)
|
Master Class Secret Manual (Stage 3) | Purchasable from the Item Mall (?? K-Ching) | Unlock the Stage 3 Master skill |
.png)
|
Master Class Secret Manual (Stage 4) | Purchasable from the Item Mall (?? K-Ching) | Unlock the Stage 4 Master skill |
Trivia
- Adrian's sign used to be light purple instead of deep blue before Eve and Add's Master Class was officially released.
- Hernia is the only master to have multiple dungeons. This is due to them taking place inside of Ain's psyche/Noah's memories instead of physical locations.
- Additionally, both of her dungeons drop the same Force Skill, and the accessories that can be obtained from them are functionally the same, only differing in name and appearance.
-

Adrian's old sign.
_Sigil.png)
