PvP: Difference between revisions
Gameboy224 (talk | contribs) m (Text replacement - "Critical Hit Rate" to "Critical") |
m (Text replacement - "Mystery and Awe" to "Mystique and Awe") |
||
| (71 intermediate revisions by 10 users not shown) | |||
| Line 2: | Line 2: | ||
'''''PvP (Player vs. Player)''''' is a feature of Elsword that allows players to battle each other. | '''''PvP (Player vs. Player)''''' is a feature of Elsword that allows players to battle each other. | ||
== Sparring == | == Sparring == | ||
[[ | [[File:SparringLobby.jpeg|thumb|Sparring Lobby]] | ||
Sparring is a PvP mode which allows you to spar against other players freely with custom settings across multiple match types. Matches that take place in sparring have no effect whatsoever on your PvP Rank, Rank Points (RP), or Arena Points (AP). You can access the sparring lobby by talking to [[Camilla]] in any town, and selecting the 'Sparring' option. Once you are in the lobby, you can select a room to enter or spectate, as well as create your own sparring room for others to join. | Sparring is a PvP mode which allows you to spar against other players freely with custom settings across multiple match types. Matches that take place in sparring have no effect whatsoever on your PvP Rank, Rank Points (RP), or Arena Points (AP). You can access the sparring lobby by talking to [[Camilla]] in any town, and selecting the 'Sparring' option. Once you are in the lobby, you can select a room to enter or spectate, as well as create your own sparring room for others to join. | ||
[[ | [[File:CreatingRoom.jpeg|thumb|Creating a room]] | ||
[[ | [[File:InsideSparringRoom.jpeg|thumb|Sparring room]] | ||
=== Channel === | === Channel === | ||
| Line 34: | Line 34: | ||
=== Miscellaneous Options=== | === Miscellaneous Options=== | ||
[[ | [[File:MapSelect.jpeg|thumb|Map select]] | ||
*''Room Name:'' Allows you to title your room. You can also edit the room name after creating the room by clicking in the text box at the top of the screen. <br> | *''Room Name:'' Allows you to title your room. You can also edit the room name after creating the room by clicking in the text box at the top of the screen. <br> | ||
*''Playtime:'' Allows you to set how long the match will last. The minimum time you can choose is 200 seconds, while the maximum is 1100 seconds. Team Matches only allow a maximum of 400 seconds.<br> | *''Playtime:'' Allows you to set how long the match will last. The minimum time you can choose is 200 seconds, while the maximum is 1100 seconds. Team Matches only allow a maximum of 400 seconds.<br> | ||
| Line 68: | Line 68: | ||
3v3 Lose: (AP won) / (n + 1) <br> | 3v3 Lose: (AP won) / (n + 1) <br> | ||
[[File: | [[File:PvPUI.png|thumb|300px|You can also check the rank gauge which shows the current percentage of their rank.]] | ||
'''Take note that disconnecting and/or leaving a match early does not negatively impact your AP tier. Rather, you will lose RP instead, which has NO bearing on your letter rank, and only becomes relevant at SSS for board placement.''' <br> | '''Take note that disconnecting and/or leaving a match early does not negatively impact your AP tier. Rather, you will lose RP instead, which has NO bearing on your letter rank, and only becomes relevant at SSS for board placement.''' <br> | ||
| Line 77: | Line 77: | ||
|- | |- | ||
| '''''Rank''''' | | '''''Rank''''' | ||
| [[File: | | [[File:RankE3.png]] | ||
| [[File: | | [[File:RankD3.png]] | ||
| [[File: | | [[File:RankC3.png]] | ||
| [[File: | | [[File:RankB3.png]] | ||
| [[File: | | [[File:RankA3.png]] | ||
| [[File: | | [[File:RankS3.png]] | ||
| [[File: | | [[File:RankSS3.png]] | ||
| [[File: | | [[File:RankSSS3.png]] | ||
|- | |- | ||
| '''''Required AP''''' | | '''''Required AP''''' | ||
| Line 101: | Line 101: | ||
=== Star Rank === | === Star Rank === | ||
New Ranking: '''Star''' [[File: | New Ranking: '''Star''' [[File:RankStar3.png]] | ||
The new rank, '''Star''', will be given to the top '''20%''' of SSS ranked players.<br> | The new rank, '''Star''', will be given to the top '''20%''' of SSS ranked players.<br> | ||
| Line 123: | Line 123: | ||
| Discovered at the start | | Discovered at the start | ||
| Achieve Star Rank in the weekly ranking of [[PvP]] (Ranking based on periodic inspections every week) | | Achieve Star Rank in the weekly ranking of [[PvP]] (Ranking based on periodic inspections every week) | ||
| Action Speed +2% <br>Critical +2% <br>Add. Damage +2% <br>Damage Reduction +2.5% <br>Awakening Charge Speed +2.5% <br>MP | | Action Speed +2% <br>Critical +2% <br>Add. Damage +2% <br>Damage Reduction +2.5% <br>Awakening Charge Speed +2.5% <br>MP Recovery Attacking +1.5% | ||
|- | |- | ||
| align="center" | [[File:Battle Master Brawl.png]] | | align="center" | [[File:Battle Master Brawl.png]] | ||
| Line 129: | Line 129: | ||
| Discovered at the start | | Discovered at the start | ||
| Achieve Star Rank in the weekly ranking of [[PvP|Brawl Mode]] (Ranking based on periodic inspections every week) | | Achieve Star Rank in the weekly ranking of [[PvP|Brawl Mode]] (Ranking based on periodic inspections every week) | ||
| Action Speed +2% <br>Critical +2% <br>Add. Damage +2% <br>Damage Reduction +2.5% <br>Awakening Charge Speed +2.5% <br>MP | | Action Speed +2% <br>Critical +2% <br>Add. Damage +2% <br>Damage Reduction +2.5% <br>Awakening Charge Speed +2.5% <br>MP Recovery Attacking +1.5% | ||
|} | |} | ||
| Line 135: | Line 135: | ||
==Maps== | ==Maps== | ||
{{ | {{Tabber | ||
| divclass= | |$divclass=tabber-vertical fancy | ||
| | |Standard=<dfn>{{</dfn> | ||
{| width="100%" cellspacing="0" cellpadding="5" border="1" style="border-collapse: collapse; text-align: center" | |||
{{{ | ! width="3%" | Image | ||
! width="3%" | ! width="30%" | Name | ||
! width="30%" | ! width="3%" | Image | ||
! width="3%" | ! width="30%" | Name | ||
! width="30%" | ! width="3%" | Image | ||
! width="3%" | ! width="30%" | Name | ||
! width="30%" | |- | ||
| [[File:TreeofEl-Top.png|122px]] | |||
| '''Tree of El - Top'''<br>''Size: Medium''<br>The tree of El contains 4 long branches to fight on. Be sure not to fall off from the tree! | |||
---- | ---- | ||
''Music:'' [http://www.youtube.com/watch?v= | ''Music:'' [http://www.youtube.com/watch?v=Ys7Z-K_qNww '''''music006_boss'''''] | ||
| [[File:TreeofEl-Bottom.png|122px]] | |||
| '''Tree of El - Bottom'''<br>''Size: Small''<br>The heroes of Elrios once fought on these grounds to defend against the Ancient Nasods. | |||
---- | ---- | ||
''Music:'' [http://www.youtube.com/watch?v= | ''Music:'' [http://www.youtube.com/watch?v=9d-FUmAJMZI '''''music005_stage'''''] | ||
| [[File:BanthusRoom.png|122px]] | |||
| '''Banthus Room'''<br>''Size: Medium''<br>Banthus hideout is full of stolen treasures. Possibly, maybe some were stolen from you? | |||
---- | ---- | ||
''Music:'' [http://www.youtube.com/watch?v= | ''Music:'' [http://www.youtube.com/watch?v=1sgY6ITB-Ho '''''music011_boss'''''] | ||
|- | |||
| [[File:WallyCastleCentre.png|122px]]<br> | |||
| '''Wally Castle Centre'''<br>''Size: Medium''<br>Wally uses these grounds to train his soldiers. A lot of blood shed has tainted the castle's ground. | |||
---- | ---- | ||
''Music:'' [http://www.youtube.com/watch?v= | ''Music:'' [http://www.youtube.com/watch?v=nO291DGTWd0 '''''music017_boss'''''] | ||
| [[File:WallyCastleRooftop.png|122px]]<br> | |||
| '''Wally Castle Rooftop'''<br>''Size: Small''<br>Wally's personal training ground where he practiced shooting missiles down at the peasants. | |||
---- | ---- | ||
''Music:'' [http://www.youtube.com/watch?v= | ''Music:'' [http://www.youtube.com/watch?v=oj1bHxtcpoQ '''''music009_boss'''''] | ||
| [[File:BethmaLake.png|122px]] | |||
| '''Bethma Lake'''<br>''Size: Large''<br>One of Bethma's most beautiful lakes that was created from the lizard men. | |||
---- | ---- | ||
''Music:'' [http://www.youtube.com/watch?v= | ''Music:'' [http://www.youtube.com/watch?v=kKoQ2Jo9TUc '''''music012_stage'''''] | ||
|- | |||
| [[File:CargoAirship.png|122px]] | |||
| '''Cargo Airship'''<br>''Size: Medium''<br>Raven once commanded this ship before he joined Elsword. The cargo ship is massive once inside. | |||
---- | ---- | ||
''Music:'' [http://www.youtube.com/watch?v= | ''Music:'' [http://www.youtube.com/watch?v=4FWLz0EKHyI '''''music020_stage'''''] | ||
| [[File:ElriosBay.png|122px]] | |||
| '''Elrios Bay'''<br>''Size: Small''<br>Elrios citizens prefer this location as the designated vacation spot for adventurers. | |||
---- | ---- | ||
''Music:'' [http://www.youtube.com/watch?v= | ''Music:'' [http://www.youtube.com/watch?v=30ZoUyFJG0g '''''music007_boss'''''] | ||
| [[File:DurahanColiseum.png|122px]] | |||
| '''Durahan Coliseum'''<br>''Size: Small''<br>The ancient heroes once challenged one another in this coliseum before Durahan took over. | |||
---- | ---- | ||
''Music:'' [http://www.youtube.com/watch?v= | ''Music:'' [http://www.youtube.com/watch?v=4RgJq2MI3pg '''''music026_stage'''''] | ||
|- | |||
| [[File:TyrantsArena.png|122px]]<br> | |||
| '''Tyrant's Arena'''<br>''Size: Large''<br>Tyrant built this arena to use as a demon's training ground. Many glitters fought for dominancy here. | |||
---- | ---- | ||
''Music:'' [http://www.youtube.com/watch?v= | ''Music:'' [http://www.youtube.com/watch?v=4RgJq2MI3pg '''''music026_stage'''''] | ||
| [[File:HopeBridge.png|122px]]<br> | |||
| '''Hope Bridge'''<br>''Size: Large''<br>Velder's famous hope bridge was their primary defensive location. | |||
---- | |||
''Music:'' [http://www.youtube.com/watch?v=ypWNq2ADQwU '''''music032_stage'''''] | |||
| [[File:WinteryVelder.png|122px]] | |||
| '''Wintery Velder'''<br>''Size: Medium''<br>Velder's soldiers practied in this location during the winters. It's beautifully covered in snow. | |||
---- | |||
''Music:'' [http://www.youtube.com/watch?v=30ZoUyFJG0g '''''music007_boss'''''] | |||
|- | |||
| [[File:GarpaiSandstorm.png|122px]] | |||
| '''Garpai Sandstorm'''<br>''Size: Small''<br>A 1v1 map in Garpai Rock with swirling sandstorms. Use the sandstorms to make the battle more fun. | |||
---- | ---- | ||
''Music:'' [http://www.youtube.com/watch?v= | ''Music:'' [http://www.youtube.com/watch?v=mZztuuOP9NA '''''music056_stage'''''] | ||
| [[File:SanderOasis.png|122px]] | |||
| '''Sander Oasis'''<br>''Size: Large''<br>A large 4v4 PVP map with Sander's luscious oasis as the background. The air pad in the middle will allow a variety of play styles to defeat your enemies! | |||
---- | ---- | ||
''Music:'' [http://www.youtube.com/watch?v= | ''Music:'' [http://www.youtube.com/watch?v=WcIhbBytcEs '''''music055_stage'''''] | ||
| [[File:LanoxLavaArea.png|122px]] | |||
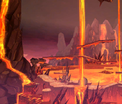
| '''Lanox Lava'''<br>''Size: Small''<br>A largely curved map. May receive damage from lava. | |||
---- | ---- | ||
''Music:'' [http://www.youtube.com/watch?v= | ''Music:'' [http://www.youtube.com/watch?v=v8UwySeAXKs '''''field_ranox001'''''] | ||
|- | |||
| [[File:HeartofArbiter.png|122px]]<br> | |||
| '''Judge's Heart'''<br>''Size: Medium''<br>A map with both curved and straight aspects. Many variations of fighting available with jumping platforms at both ends of the map. | |||
---- | ---- | ||
''Music:'' [http://www.youtube.com/watch?v= | ''Music:'' [http://www.youtube.com/watch?v=V7uv8hPEAmc '''''li_field_elysion001'''''] | ||
| [[File:ElrianodeCity.png|122px]] | |||
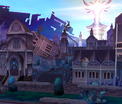
| '''Elrianode City'''<br>''Size: Small''<br>Straight map, small and basic. | |||
---- | ---- | ||
''Music:'' [http://www.youtube.com/watch?v= | ''Music:'' [http://www.youtube.com/watch?v=XGSVNQMFgOI '''''li_stage_elianod002'''''] | ||
| [[File:MazeofExtinction.png|122px]] | |||
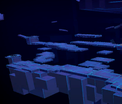
| '''Labyrinth of Ruin'''<br>''Size: Medium''<br>Has both straight and curved sections with different platforms. Allows strategic play with different portals. | |||
---- | ---- | ||
''Music:'' [http://www.youtube.com/watch?v= | ''Music:'' [http://www.youtube.com/watch?v=Kku3kr2r7Hc '''''li_devildom1_henir_01'''''] | ||
|- | |||
| [[File:PvP Map - Eternal Winner.png|122px]] | |||
| '''Eternal Winner'''<br>''Size: Small''<br>- | |||
---- | ---- | ||
''Music:'' [http://www.youtube.com/watch?v= | ''Music:'' [http://www.youtube.com/watch?v=VLppFwq0j0Q '''''li_stage_pvp001'''''] | ||
| [[File:PvP Map - Blizzard Ruins.png|122px]] | |||
| '''Blizzard Ruins'''<br>''Size: Small''<br>- | |||
---- | ---- | ||
''Music:'' [http://www.youtube.com/watch?v= | ''Music:'' [http://www.youtube.com/watch?v=fYLBFT7FW68 '''''li_devildom2_village_01'''''] | ||
|} | |||
<dfn>}}</dfn> | |||
| | |Winner Match=<dfn>{{</dfn> | ||
{| width="100%" cellspacing="0" cellpadding="5" border="1" style="border-collapse: collapse; text-align: center" | |||
{{{ | ! width="3%" | Image | ||
! width="3%" | ! width="30%" | Name | ||
! width="30%" | ! width="3%" | Image | ||
! width="3%" | ! width="30%" | Name | ||
! width="30%" | ! width="3%" | Image | ||
! width="3%" | ! width="30%" | Name | ||
! width="30%" | |- | ||
| [[File:AshCoveredArena.png|122px]] | |||
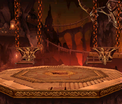
| '''Ash Covered Arena'''<br>''Size: Small''<br>Deep in the mines underneath Lanox lies a small arena, which keeps you in close proximity to your opponent at all times. | |||
---- | ---- | ||
''Music:'' [http://www.youtube.com/watch?v= | ''Music:'' [http://www.youtube.com/watch?v=XUbi3e7nu8o '''''music047_boss'''''] | ||
| [[File:RoomofGreed.png|122px]] | |||
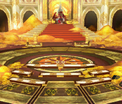
| '''Room of Greed'''<br>''Size: Medium''<br>A gold-filled battle arena in Perkisas' lair, overseen by Nightmare Perkisas himself. | |||
---- | ---- | ||
''Music:'' [http://www.youtube.com/watch?v= | ''Music:'' [http://www.youtube.com/watch?v=G3GY9m0-sLc '''''field_raid005_ready01'''''] | ||
| [[File:AdriansCelestialRoom.png|122px]] | |||
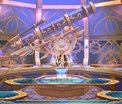
| '''Adrian's Celestial Room''' <br> ''Size: Small'' <br>After defeating Herbaon, he allows you to fight each other in his celestial room. | |||
---- | ---- | ||
''Music:'' [http://www.youtube.com/watch?v= | ''Music:'' [http://www.youtube.com/watch?v=MNbUn2ctwmk '''''li_boss_elysion002'''''] | ||
|} | |||
<dfn>}}</dfn> | |||
| | |Brawl Mode=<dfn>{{</dfn> | ||
{| width="100%" cellspacing="0" cellpadding="5" border="1" style="border-collapse: collapse; text-align: center" | |||
{{{ | ! width="3%" | Image | ||
! width="3%" | ! width="30%" | Name | ||
! width="30%" | ! width="3%" | Image | ||
! width="3%" | ! width="30%" | Name | ||
! width="30%" | |- | ||
| [[File:HopeBridge.png|122px]] | |||
| '''Hope Bridge'''<br>''Size: Large''<br>Velder's famous hope bridge was their primary defensive location. | |||
---- | ---- | ||
''Music:'' [http://www.youtube.com/watch?v= | ''Music:'' [http://www.youtube.com/watch?v=ypWNq2ADQwU '''''music032_stage'''''] | ||
| [[File:ResiamTriangle.png|122px]] | |||
| '''Resiam Triangle'''<br>''Size: Large''<br>Battle it out brawl style in the ruins of Resiam, just be careful not to fall into the raging waters! | |||
---- | ---- | ||
''Music:'' [http://www.youtube.com/watch?v= | ''Music:'' [http://www.youtube.com/watch?v=rmDnKzPYyFU '''''music043_stage'''''] | ||
|- | |||
| [[File:GarpaiSandstorm.png|122px]] | |||
| '''Garpai Sandstorm'''<br>''Size: Small''<br>A 1v1 map in Garpai Rock with swirling sandstorms. Use the sandstorms to make the battle more fun. | |||
---- | ---- | ||
''Music:'' [http://www.youtube.com/watch?v= | ''Music:'' [http://www.youtube.com/watch?v=WcIhbBytcEs '''''music055_stage'''''] | ||
| [[File:SanderOasis.png|122px]] | |||
| '''Sander Oasis'''<br>''Size: Large''<br>A large 4v4 PVP map with Sander's luscious oasis as the background. The air pad in the middle will allow a variety of play styles to defeat your enemies! | |||
---- | ---- | ||
''Music:'' [http://www.youtube.com/watch?v= | ''Music:'' [http://www.youtube.com/watch?v=mZztuuOP9NA '''''music056_stage'''''] | ||
|} | |||
<dfn>}}</dfn> | |||
| | |Unused=<dfn>{{</dfn> | ||
{| width="33%" cellspacing="0" cellpadding="5" border="1" style="border-collapse: collapse; text-align: center" | |||
{{{ | ! width="3%" | Image | ||
! width="3%" | ! width="30%" | Name | ||
! width="30%" | |- | ||
| [[File:PVP DARKFOREST.png|122px]] | |||
| '''[[PVP Dark Forest|Shadow Forest]]'''<br>''Size: Unknown''<br>A secret PvP map made for Developing Purposes... Information about this map is currently unknown. Can only be accessed through debug map-select. | |||
|} | |||
<dfn>}}</dfn> | |||
}} | }} | ||
| Line 295: | Line 299: | ||
== PvP Shop == | == PvP Shop == | ||
You can use the AP you obtain from Arena matches to purchase special items from Alchemists or [[Camilla]]. Below is a list of purchasable items. | You can use the AP you obtain from Arena matches to purchase special items from Alchemists or [[Camilla]]. Below is a list of purchasable items. | ||
{{ | {{Tabber | ||
| | |$divclass=tabber-vertical fancy | ||
|Basic Magic Stones=<dfn>{{</dfn> | |||
{{{ | {| cellspacing="0" cellpadding="5" border="1" style="border-collapse: collapse; width: 100%;" | ||
|- | |||
! width="20%" | ! width="20%" | Name | ||
! width="59%" | ! width="59%" | Description | ||
! width="1%" | ! width="1%" | Image | ||
! width="20%" | ! width="20%" | Cost | ||
|- | |||
| '''Magic Stone''' | |||
| Used to socket weapons and armor with a random stat.<br> | |||
| [[File:HQ Shop Item 109945.png]] | |||
|'''1000 ED''' | |||
'''150 AP''' | '''150 AP''' | ||
|- | |||
| '''Advanced Magic Stone''' | |||
| Used to socket weapons and armor with a random stat, with a higher chance of better values than a basic Magic Stone.<br> | |||
| [[File:HQ Shop Item 109955.png]] | |||
|'''1000 ED''' | |||
'''450 AP''' | '''450 AP''' | ||
|} | |||
<dfn>}}</dfn> | |||
| | | El Shards and Enhancement Stones=<dfn>{{</dfn> | ||
{| cellspacing="0" cellpadding="5" border="1" style="border-collapse: collapse; width: 100%;" | |||
{{{ | |- | ||
! width="20%" | Name | |||
! width="20%" | ! width="59%" | Description | ||
! width="59%" | ! width="1%" | Image | ||
! width="1%" | ! width="20%" | Cost | ||
! width="20%" | |- | ||
| '''El Shard (Mystery)''' | |||
| Used to apply random attributes to weapons and armor. They can also be identified into specific elemental shards with items from the Alchemists. <br> | |||
| [[File:RandELSTONE.png]] | |||
|'''1000 ED''' | |||
'''500 AP''' | '''500 AP''' | ||
|- | |||
| '''Sparring Enhancement Fragment''' | |||
| A material required to upgrade a sparring gear. | |||
| [[File:Sparring Ennhancement Fragment.png]] | |||
| '''1,000 ED''' | |||
'''100 AP''' | '''100 AP''' | ||
|} | |||
<dfn>}}</dfn> | |||
| | |Consumable=<dfn>{{</dfn> | ||
{| cellspacing="0" cellpadding="5" border="1" style="border-collapse: collapse; width: 100%;" | |||
{{{ | |- | ||
! width="20%" | Name | |||
! width="20%" | ! width="35%" | Description | ||
! width="35%" | ! width="24%" | Effect | ||
! width="24%" | ! width="1%" | Image | ||
! width="1%" | ! width="20%" | Cost | ||
! width="20%" | |- | ||
| '''Basic Warrior's Potion''' | |||
| A potion which recovers HP and MP by a fixed amount. | |||
| Recover 15% HP<br>Recover 100 MP<br>Cooldown Time: 60 secs. | |||
| [[File:HQ Shop Item 91570.png]] | |||
|'''0 ED''' | |||
'''75 AP''' | '''75 AP''' | ||
|- | |||
| '''Intermediate Warrior's Potion''' | |||
| A potion which recovers HP and MP by a great quantity. | |||
| Recover 30% HP<br>Recover 100 MP<br>Cooldown Time: 60 secs. | |||
| [[File:HQ Shop Item 91590.png]] | |||
|'''0 ED''' | |||
'''150 AP''' | '''150 AP''' | ||
|- | |||
| '''Organic Apple''' | |||
| Certified organic by William Ranch, eating this premium apple offers more health benefits than eating just regular ones. | |||
| Recover 50% HP<br>Recover 50% MP<br>Cooldown Time: 30 secs. | |||
| [[File:HQ Shop Item 78040.png]] | |||
|'''100 ED''' | |||
'''160 AP''' | '''160 AP''' | ||
|- | |||
| '''Stone Apple''' | |||
| This apple looks like a stone, feels like a stone, and tastes like a stone.<br>Although it tastes terrible, this apple strengthens your skill for a set duration.<br>Activates the Super Armor effect and increases Defense for its duration. | |||
| Activates Super Armor<br>Increases defense for duration<br>Cooldown Time: 60 secs. | |||
| [[File:HQ Shop Item 78050.png]] | |||
|'''100 ED''' | |||
'''160 AP''' | '''160 AP''' | ||
|- | |||
| '''Andromeda Apple''' | |||
| This apple is believed to be grown and smuggled from an alien planet since its shape resembles the cosmos.<br>Increased mana recovery for a certain amount of time. | |||
| Increases mana recovery rate (+5 MP per second)<br>Cooldown Time: 75 secs. | |||
| [[File:HQ Shop Item 78060.png]] | |||
|'''100 ED''' | |||
'''300 AP''' | '''300 AP''' | ||
|- | |||
| '''Twister Apple''' | |||
| Imbued with the power of a tornado, this apple keeps you cool when you are holding it.<br>It cancels Poison, Fire, and Curse effects.<br>It also increased Movement Speed for a specific period of time. | |||
| Cures Poison, Fire, and Curse.<br>Increases movement speed.<br>Cooldown Time: 60 secs. | |||
| [[File:HQ Shop Item 78070.png]] | |||
|'''100 ED''' | |||
'''160 AP''' | '''160 AP''' | ||
|- | |||
| '''Superhuman Apple''' | |||
| Rumored to be favored by superhumans, this peculiar apple immediately stimulates your mind.<br>Activates Awakening or DP for a specific period of time. | |||
{{ | | Activates Awakening/{{DCM}} for a set period of time.<br>Cooldown Time: 60 secs. | ||
| [[File:HQ Shop Item 78080.png]] | |||
|'''100 ED''' | |||
'''300 AP''' | '''300 AP''' | ||
|- | |||
| '''Giant Apple''' | |||
| When eaten, this apple makes you bigger and taller with greater leg strength.<br>Enlarges your character size and increases Jumping Power for a specific period of time. | |||
| Increases character size<br>Increases Jumping Speed | |||
| [[File:HQ Shop Item 78090.png]] | |||
|'''100 ED''' | |||
'''160 AP''' | '''160 AP''' | ||
|} | |||
<dfn>}}</dfn> | |||
| | |Stat-Specific Magic Stones=<dfn>{{</dfn> | ||
{| cellspacing="0" cellpadding="5" border="1" style="border-collapse: collapse; width: 100%;" | |||
{{{ | |- | ||
! width="20%" | Name | |||
! width="20%" | ! width="59%" | Description | ||
! width="59%" | ! width="1%" | Image | ||
! width="1%" | ! width="20%" | Cost and Requirements | ||
! width="20%" | |- | ||
| '''Sparring Magic Stone [Movement Speed]''' | |||
| Sockets your equipment with Movement Speed (Match-only)<br> | |||
| [[File:HQ Shop Item 132202.png]] | |||
|'''1000 ED''' | |||
'''117 AP''' <br> | '''117 AP''' <br> | ||
'''E Rank or higher required to purchase | '''E Rank or higher required to purchase | ||
|- | |||
| '''Sparring Magic Stone [Jump Speed]''' | |||
| Sockets your equipment with Jump Speed (Match-only)<br> | |||
| [[File:HQ Shop Item 132205.png]] | |||
|'''1000 ED''' | |||
'''117 AP'''<br> | '''117 AP'''<br> | ||
'''E Rank or higher required to purchase''' | '''E Rank or higher required to purchase''' | ||
|- | |||
| '''Sparring Magic Stone [HP]''' | |||
| Sockets your equipment with HP (Match-only)<br> | |||
| [[File:HQ Shop Item 132198.png]] | |||
|'''1000 ED''' | |||
'''117 AP'''<br> | '''117 AP'''<br> | ||
'''E Rank or higher required to purchase''' | '''E Rank or higher required to purchase''' | ||
|- | |||
| '''Sparring Magic Stone [Awakening Charging Speed]''' | |||
| Sockets your equipment with Awakening Charge Speed (Match-only)<br> | |||
| [[File:HQ Shop Item 132199.png]] | |||
|'''1000 ED''' | |||
'''147 AP''' <br> | '''147 AP''' <br> | ||
'''D Rank or higher required to purchase''' | '''D Rank or higher required to purchase''' | ||
|- | |||
| '''Sparring Magic Stone [Awakening Time]''' | |||
| Sockets your equipment with Awakening Time (Match-only)<br> | |||
| [[File:HQ Shop Item 132197.png]] | |||
|'''1000 ED''' | |||
'''147 AP'''<br> | '''147 AP'''<br> | ||
'''D Rank or higher required to purchase''' | '''D Rank or higher required to purchase''' | ||
|- | |||
| '''Sparring Magic Stone [Critical]''' | |||
| Sockets your equipment with Critical (Match-only)<br> | |||
| [[File:HQ Shop Item 132201.png]] | |||
|'''1000 ED''' | |||
'''225 AP''' <br> | '''225 AP''' <br> | ||
'''B Rank or higher required to purchase''' | '''B Rank or higher required to purchase''' | ||
|- | |||
| '''Sparring Magic Stone [Action Speed]''' | |||
| Sockets your equipment with Action Speed (Match-only)<br> | |||
| [[File:HQ Shop Item 132200.png]] | |||
|'''1000 ED''' | |||
'''225 AP'''<br> | '''225 AP'''<br> | ||
'''B Rank or higher required to purchase''' | '''B Rank or higher required to purchase''' | ||
|- | |||
| '''Sparring Magic Stone [Additional Damage]''' | |||
| Sockets your equipment with Additional Damage (Match-only)<br> | |||
| [[File:HQ Shop Item 72510.png]] | |||
| '''1000 ED''' | |||
'''303 AP'''<br> | '''303 AP'''<br> | ||
'''S Rank or higher required to purchase''' | '''S Rank or higher required to purchase''' | ||
|- | |||
| '''Sparring Magic Stone [Damage Reduction]''' | |||
| Sockets your equipment with Damage Reduction (Match-only)<br> | |||
| [[File:HQ Shop Item 72520.png]] | |||
|'''1000 ED''' | |||
'''303 AP'''<br> | '''303 AP'''<br> | ||
'''S Rank or higher required to purchase''' | '''S Rank or higher required to purchase''' | ||
|- | |||
| '''Sparring Magic Stone [MP Gain when attacking]''' | |||
| Sockets your equipment with MP Gain when attacking (Match-only)<br> | |||
| [[File:HQ Shop Item 72530.png]] | |||
|'''1000 ED''' | |||
'''303 AP'''<br> | '''303 AP'''<br> | ||
'''S Rank or higher required to purchase''' | '''S Rank or higher required to purchase''' | ||
|- | |||
| '''Sparring Magic Stone [MP Gain when attacked]''' | |||
| Sockets your equipment with MP Gain when attacked (Match-only)<br> | |||
| [[File:HQ Shop Item 72540.png]] | |||
|'''1000 ED''' | |||
'''303 AP'''<br> | '''303 AP'''<br> | ||
'''S Rank or higher required to purchase''' | '''S Rank or higher required to purchase''' | ||
|- | |||
| '''Sparring Magic Stone [Specialization A]''' | |||
| Sockets your equipment with Specialization A (Match-only)<br> | |||
| [[File:HQ Shop Item 72550.png]] | |||
|'''1000 ED''' | |||
'''303 AP'''<br> | '''303 AP'''<br> | ||
'''S Rank or higher required to purchase''' | '''S Rank or higher required to purchase''' | ||
|- | |||
| '''Sparring Magic Stone [Specialization B]''' | |||
| Sockets your equipment with Specialization B (Match-only)<br> | |||
| [[File:HQ Shop Item 72560.png]] | |||
|'''1000 ED''' | |||
'''303 AP'''<br> | '''303 AP'''<br> | ||
'''S Rank or higher required to purchase''' | '''S Rank or higher required to purchase''' | ||
|- | |||
| '''Sparring Magic Stone [Maximize]''' | |||
| Sockets your equipment with Maximize (Match-only)<br> | |||
| [[File:HQ Shop Item 72570.png]] | |||
|'''1000 ED''' | |||
'''303 AP'''<br> | '''303 AP'''<br> | ||
'''S Rank or higher required to purchase''' | '''S Rank or higher required to purchase''' | ||
|} | |||
<dfn>}}</dfn> | |||
| | |Special Magic Stones=<dfn>{{</dfn> | ||
{| cellspacing="0" cellpadding="5" border="1" style="border-collapse: collapse; width: 100%;" | |||
{{{ | |- | ||
! width="20%" | Name | |||
! width="20%" | ! width="59%" | Description | ||
! width="59%" | ! width="1%" | Image | ||
! width="1%" | ! width="20%" | Cost and Requirements | ||
! width="20%" | |- | ||
| rowspan=3 | '''Sparring Special Magic Stone [Additional Damage]''' | |||
| Sockets your weapon with 6% Additional Damage. When used on armor, the stats will be halved (Match-only). | |||
| [[File:HQ Shop Item 154037.png]] | |||
| '''2000 ED''' | |||
'''2280 AP'''<br> | '''2280 AP'''<br> | ||
'''S Rank or higher required to purchase''' | '''S Rank or higher required to purchase''' | ||
|- | |||
| Sockets your weapon with 7% Additional Damage. When used on armor, the stats will be halved (Match-only). | |||
| [[File:HQ Shop Item 154038.png]] | |||
| '''2000 ED''' | |||
'''6840 AP'''<br> | '''6840 AP'''<br> | ||
'''SS Rank or higher required to purchase''' | '''SS Rank or higher required to purchase''' | ||
|- | |||
| Sockets your weapon with 8% Additional Damage. When used on armor, the stats will be halved (Match-only). | |||
| [[File:HQ Shop Item 154039.png]] | |||
| '''2000 ED''' | |||
'''20520 AP'''<br> | '''20520 AP'''<br> | ||
'''SSS Rank or higher required to purchase''' | '''SSS Rank or higher required to purchase''' | ||
|- | |||
| rowspan=3 | '''Sparring Special Magic Stone [Critical]''' | |||
| Sockets your weapon with 6% Critical. When used on armor, the stats will be halved (Match-only). | |||
| [[File:HQ Shop Item 154040.png]] | |||
| '''2000 ED''' | |||
'''2280 AP'''<br> | '''2280 AP'''<br> | ||
'''S Rank or higher required to purchase''' | '''S Rank or higher required to purchase''' | ||
|- | |||
| Sockets your weapon with 7% Critical. When used on armor, the stats will be halved (Match-only). | |||
| [[File:HQ Shop Item 154041.png]] | |||
| '''2000 ED''' | |||
'''6840 AP'''<br> | '''6840 AP'''<br> | ||
'''SS Rank or higher required to purchase''' | '''SS Rank or higher required to purchase''' | ||
|- | |||
| Sockets your weapon with 8% Critical. When used on armor, the stats will be halved (Match-only). | |||
| [[File:HQ Shop Item 154042.png]] | |||
| '''2000 ED''' | |||
'''20520 AP'''<br> | '''20520 AP'''<br> | ||
'''SSS Rank or higher required to purchase''' | '''SSS Rank or higher required to purchase''' | ||
|- | |||
| rowspan=3 | '''Sparring Special Magic Stone [Action Speed]''' | |||
| Sockets your weapon with 6% Action Speed. When used on armor, the stats will be halved (Match-only). | |||
| [[File:HQ Shop Item 154043.png]] | |||
| '''2000 ED''' | |||
'''2280 AP'''<br> | '''2280 AP'''<br> | ||
'''S Rank or higher required to purchase''' | '''S Rank or higher required to purchase''' | ||
|- | |||
| Sockets your weapon with 7% Action Speed. When used on armor, the stats will be halved (Match-only). | |||
| [[File:HQ Shop Item 154044.png]] | |||
| '''2000 ED''' | |||
'''6840 AP'''<br> | '''6840 AP'''<br> | ||
'''SS Rank or higher required to purchase''' | '''SS Rank or higher required to purchase''' | ||
|- | |||
| Sockets your weapon with 8% Action Speed. When used on armor, the stats will be halved (Match-only). | |||
| [[File:HQ Shop Item 154045.png]] | |||
| '''2000 ED''' | |||
'''20520 AP'''<br> | '''20520 AP'''<br> | ||
'''SSS Rank or higher required to purchase''' | '''SSS Rank or higher required to purchase''' | ||
|- | |||
| rowspan=3 | '''Sparring Special Magic Stone [Damage Reduction]''' | |||
| Sockets your weapon with 6% Damage Reduction. When used on armor, the stats will be halved (Match-only). | |||
| [[File:HQ Shop Item 154046.png]] | |||
| '''2000 ED''' | |||
'''2280 AP'''<br> | '''2280 AP'''<br> | ||
'''S Rank or higher required to purchase''' | '''S Rank or higher required to purchase''' | ||
|- | |||
| Sockets your weapon with 7% Damage Reduction. When used on armor, the stats will be halved (Match-only). | |||
| [[File:HQ Shop Item 154047.png]] | |||
| '''2000 ED''' | |||
'''6840 AP'''<br> | '''6840 AP'''<br> | ||
'''SS Rank or higher required to purchase''' | '''SS Rank or higher required to purchase''' | ||
|- | |||
| Sockets your weapon with 8% Damage Reduction. When used on armor, the stats will be halved (Match-only). | |||
| [[File:HQ Shop Item 154048.png]] | |||
| '''2000 ED''' | |||
'''20520 AP'''<br> | '''20520 AP'''<br> | ||
'''SSS Rank or higher required to purchase''' | '''SSS Rank or higher required to purchase''' | ||
|- | |||
| rowspan=3 | '''Sparring Special Magic Stone [Maximize]''' | |||
| Sockets your weapon with 6% Maximize. When used on armor, the stats will be halved (Match-only). | |||
| [[File:HQ Shop Item 163356.png]] | |||
| '''2000 ED''' | |||
'''2280 AP'''<br> | '''2280 AP'''<br> | ||
'''S Rank or higher required to purchase''' | '''S Rank or higher required to purchase''' | ||
|- | |||
| Sockets your weapon with 7% Maximize. When used on armor, the stats will be halved (Match-only). | |||
| [[File:HQ Shop Item 163357.png]] | |||
| '''2000 ED''' | |||
'''6840 AP'''<br> | '''6840 AP'''<br> | ||
'''SS Rank or higher required to purchase''' | '''SS Rank or higher required to purchase''' | ||
|- | |||
| Sockets your weapon with 8% Maximize. When used on armor, the stats will be halved (Match-only). | |||
| [[File:HQ Shop Item 163358.png]] | |||
| '''2000 ED''' | |||
'''20520 AP'''<br> | '''20520 AP'''<br> | ||
'''SSS Rank or higher required to purchase''' | '''SSS Rank or higher required to purchase''' | ||
|- | |||
| rowspan=3 | '''Sparring Special Magic Stone [Health]''' | |||
| Sockets your weapon with 6% HP. When used on armor, the stats will be halved (Match-only). | |||
| [[File:HQ Shop Item 163353.png]] | |||
| '''2000 ED''' | |||
'''2280 AP'''<br> | '''2280 AP'''<br> | ||
'''S Rank or higher required to purchase''' | '''S Rank or higher required to purchase''' | ||
|- | |||
| Sockets your weapon with 7% HP. When used on armor, the stats will be halved (Match-only). | |||
| [[File:HQ Shop Item 163354.png]] | |||
| '''2000 ED''' | |||
'''6840 AP'''<br> | '''6840 AP'''<br> | ||
'''SS Rank or higher required to purchase''' | '''SS Rank or higher required to purchase''' | ||
|- | |||
| Sockets your weapon with 8% HP. When used on armor, the stats will be halved (Match-only). | |||
| [[File:HQ Shop Item 163355.png]] | |||
| '''2000 ED''' | |||
'''20520 AP'''<br> | '''20520 AP'''<br> | ||
'''SSS Rank or higher required to purchase''' | '''SSS Rank or higher required to purchase''' | ||
|} | |||
<dfn>}}</dfn> | |||
| | | Dual-Socket Magic Stones=<dfn>{{</dfn> | ||
{| cellspacing="0" cellpadding="5" border="1" style="border-collapse: collapse; width: 100%;" | |||
{{{ | |- | ||
! width="20%" | Name | |||
! width="20%" | ! width="59%" | Description | ||
! width="59%" | ! width="1%" | Image | ||
! width="1%" | ! width="20%" | Cost and Requirements | ||
! width="20%" | |- | ||
| '''Sparring Magic Stone [Amplification]''' | |||
| Sockets your equipment with Critical and Additional Damage (Match-only).<br> | |||
| [[File:HQ Shop Item 153765.png]] | |||
| | |||
'''1000 ED'''<br> | '''1000 ED'''<br> | ||
'''684 AP''' <br> | '''684 AP''' <br> | ||
'''S Rank or higher required to purchase''' | '''S Rank or higher required to purchase''' | ||
|- | |||
| '''Sparring Magic Stone [Absorption]''' | |||
| Sockets your equipment with Critical and Damage Reduce, HP (Match-only).<br> | |||
| [[File:HQ Shop Item 153766.png]] | |||
| | |||
'''1000 ED''' <br> | '''1000 ED''' <br> | ||
'''684 AP''' <br> | '''684 AP''' <br> | ||
'''S Rank or higher required to purchase''' | '''S Rank or higher required to purchase''' | ||
|- | |||
| '''Sparring Magic Stone [Resistance]''' | |||
| Sockets your equipment with Crticial Hit Rate and Awaken Charge Speed, Awaken Time (Match-only).<br> | |||
| [[File:HQ Shop Item 153767.png]] | |||
| | |||
'''1000 ED''' <br> | '''1000 ED''' <br> | ||
'''684 AP''' <br> | '''684 AP''' <br> | ||
'''S Rank or higher required to purchase''' | '''S Rank or higher required to purchase''' | ||
|- | |||
| '''Sparring Magic Stone [Ruin]''' | |||
| Sockets your equipment with Critical and Specific Skills' Damage (Match-only).<br> | |||
| [[File:HQ Shop Item 153768.png]] | |||
| | |||
'''1000 ED''' <br> | '''1000 ED''' <br> | ||
'''684 AP''' <br> | '''684 AP''' <br> | ||
'''S Rank or higher required to purchase''' | '''S Rank or higher required to purchase''' | ||
|- | |||
| '''Sparring Magic Stone [Gale]''' | |||
| Sockets your equipment with Critical and All Speed (Match-only)<br> | |||
| [[File:HQ Shop Item 153769.png]] | |||
| | |||
'''1000 ED''' <br> | '''1000 ED''' <br> | ||
'''684 AP''' <br> | '''684 AP''' <br> | ||
'''S Rank or higher required to purchase''' | '''S Rank or higher required to purchase''' | ||
|- | |||
| '''Sparring Magic Stone [Transcendencee]''' | |||
| Sockets your equipment with Maximize and Specialization (A or B) (Match-only)<br> | |||
| [[File:HQ Shop Item 73000.png]] | |||
| | |||
'''1000 ED''' <br> | '''1000 ED''' <br> | ||
'''684 AP''' <br> | '''684 AP''' <br> | ||
'''S Rank or higher required to purchase''' | '''S Rank or higher required to purchase''' | ||
|- | |||
| '''Sparring Magic Stone [Shining Amplification]''' | |||
| Sockets your equipment with Critical and Additional Damage (Match-only).<br> | |||
| [[File:HQ Shop Item 153770.png]] | |||
| | |||
'''1000 ED'''<br> | '''1000 ED'''<br> | ||
'''1140 AP''' <br> | '''1140 AP''' <br> | ||
'''SS Rank or higher required to purchase''' | '''SS Rank or higher required to purchase''' | ||
|- | |||
| '''Sparring Magic Stone [Shining Absorption]''' | |||
| Sockets your equipment with Critical and Damage Reduce, HP (Match-only).<br> | |||
| [[File:HQ Shop Item 153771.png]] | |||
| | |||
'''1000 ED''' <br> | '''1000 ED''' <br> | ||
'''1140 AP''' <br> | '''1140 AP''' <br> | ||
'''SS Rank or higher required to purchase''' | '''SS Rank or higher required to purchase''' | ||
|- | |||
| '''Sparring Magic Stone [Shining Resistance]''' | |||
| Sockets your equipment with Crticial Hit Rate and Awaken Charge Speed, Awaken Time (Match-only).<br> | |||
| [[File:HQ Shop Item 153772.png]] | |||
| | |||
'''1000 ED''' <br> | '''1000 ED''' <br> | ||
'''1140 AP''' <br> | '''1140 AP''' <br> | ||
'''SS Rank or higher required to purchase''' | '''SS Rank or higher required to purchase''' | ||
|- | |||
| '''Sparring Magic Stone [Shining Ruin]''' | |||
| Sockets your equipment with Critical and Specific Skills' Damage (Match-only).<br> | |||
| [[File:HQ Shop Item 153773.png]] | |||
| | |||
'''1000 ED''' <br> | '''1000 ED''' <br> | ||
'''1140 AP''' <br> | '''1140 AP''' <br> | ||
'''SS Rank or higher required to purchase''' | '''SS Rank or higher required to purchase''' | ||
|- | |||
| '''Sparring Magic Stone [Shining Gale]''' | |||
| Sockets your equipment with Critical and All Speed (Match-only)<br> | |||
| [[File:HQ Shop Item 153774.png]] | |||
| | |||
'''1000 ED''' <br> | '''1000 ED''' <br> | ||
'''1140 AP''' <br> | '''1140 AP''' <br> | ||
'''SS Rank or higher required to purchase''' | '''SS Rank or higher required to purchase''' | ||
|- | |||
| '''Sparring Magic Stone [Shining Transcendence]''' | |||
| Sockets your equipment with Maximize and Specialization (A or B) (Match-only)<br> | |||
| [[File:HQ Shop Item 73010.png]] | |||
| | |||
'''1000 ED''' <br> | '''1000 ED''' <br> | ||
'''1140 AP''' <br> | '''1140 AP''' <br> | ||
'''SS Rank or higher required to purchase''' | '''SS Rank or higher required to purchase''' | ||
|} | |||
<dfn>}}</dfn> | |||
}} | }} | ||
The | The current season's PvP gear can also be purchased from Camilla, see '''[[Duelist's Sparring Equipment]]''' for more information. Buying these from Camilla is unnecessary though, as you acquire them during the '''[[Story/Other#.5BPvP.5D_Champion.27s_Condition.21|[PvP] Camilla's Training for a Champion! Equipment!]]''' story quest for free. | ||
== Tips and | == Tips and Details == | ||
The Arena is a cut-throat competition that takes hours of practice and perseverance to master, but there are some basic tips that every character should follow:<br><br> | The Arena is a cut-throat competition that takes hours of practice and perseverance to master, but there are some basic tips that every character should follow:<br><br> | ||
*'''Establish good baseline stats before PvPing:''' The main stats that are vital to PvP are Action Speed, Movement Speed, Jump Speed, Critical, HP, Additional Damage, and Damage Reduction. Having a minimum of 20% in your speeds allows you to both move and attack at a brisk pace, staying one step ahead of your enemies. This is the most important thing you should work on with sockets, as low speeds will allow other players to easily catch you and even slip out of your combos. Having around | *'''Establish good baseline stats before PvPing:''' The main stats that are vital to PvP are Action Speed, Movement Speed, Jump Speed, Critical, HP, Additional Damage, and Damage Reduction. Having a minimum of 20% in your speeds allows you to both move and attack at a brisk pace, staying one step ahead of your enemies. This is the most important thing you should work on with sockets, as low speeds will allow other players to easily catch you and even slip out of your combos. Having around some critical will greatly help your damage output, and stacking HP will increase your overall durability. Having a minimum of 30% reduced damage is almost as essential as HP and serves the same purpose. Additional Damage benefits multi-hit classes more than others.<br><br> | ||
*'''Aim for "End-game" gear:''' Most of the higher ranked players sport one of the so-called end-game gear sets, and you should aim to do the same. Which set you should use is dependent on your character and your own play style. The first easy-to-get | *'''Aim for "End-game" gear:''' Most of the higher-ranked players sport one of the so-called end-game gear sets, and you should aim to do the same. Which set you should use is dependent on your character and your own play style. The first, easy-to-get, yet crucial gear is [[Elrianode Equipment|Duelist's Sparring Equipment]] via Camilla’s Story Quest, as this gear is specialized for PvP gameplay since the equipment set effects won't be reduced to 40% unlike most of the gears. Harder-to-get but more powerful ones include Violet [[Amethystine Prophecy Equipment]], [[Flames of Judgement - Demonic Weapon]], [[Vestige of Soul - Weapon of Requiem]], and [[Submergence of Abyss - Phantom Weapon]]. Until you acquire this equipment, the [[Apocalypse Type - Void Weapon]] you get through between leveling to 99 is a nice alternative for beginners, as they are easy to socket and attribute.<br><br> | ||
*'''Know your attributes:''' Attributing your weapon and armor can mean the difference between life and death. Certain characters and classes can utilize elements better than others, refer to the [[Attributing Equipment]] guide to see what some options are for your setup. Furthermore, remember to add resists smartly. All elements can be deadly if used correctly, so learn which ones you're most vulnerable to and attribute your armor to resist them.<br><br> | *'''Know your attributes:''' Attributing your weapon and armor can mean the difference between life and death. Certain characters and classes can utilize elements better than others, refer to the [[Attributing Equipment]] guide to see what some options are for your setup. Furthermore, remember to add resists smartly. All elements can be deadly if used correctly, so learn which ones you're most vulnerable to and attribute your armor to resist them.<br><br> | ||
*'''Aim for a Magic Necklace:''' While not necessary, a Magic Necklace can give you a serious leg-up in Arena. 30% extra MP from attacks both dealt and received adds up quickly, and lets you both break more often and dish out more damage with more Special Actives.<br><br> | *'''Aim for a [[Accessory|Magic Necklace]] and an MP visor:''' While not necessary, a Magic Necklace can give you a serious leg-up in Arena. 30% extra MP from attacks both dealt and received adds up quickly, and lets you both break more often and dish out more damage with more Special Actives. Furthermore, an MP visor accessory (such as [[Accessory|Nasod Prototype Goggles]]) can be helpful to tell if your enemy can [[Mana Break]] or if you can expect them to use a skill in order to catch you.<br><br> | ||
*'''[[Mana Break|Mana breaking]] is not a "noob" tactic, use it to your advantage:''' Contrary to what the ragers would have you believe, mana breaking is an incredibly useful technique that can save you from losing a match in one catch. There are plenty of players who know how to reset the knockdown counter | *'''[[Mana Break|Mana breaking]] is not a "noob" tactic, use it to your advantage:''' Contrary to what the ragers would have you believe, mana breaking is an incredibly useful technique that can save you from losing a match in one catch. There are plenty of players who know how to reset the knockdown counter and have no qualms about killing you in a single combo. Of course, there are some situations where it's better to simply take some hits, but when those are is something you can only learn through experience.<br><br> | ||
*'''Hit And Run:''' Although this may seem like a noob tactic, | *'''Hit And Run:''' Although this may seem like a noob tactic, this may come in handy when you're about to die in a match. It also might provoke your opponent to try a high-mp attack and they end up losing it all if you evade.<br><br> | ||
*'''Awaken when necessary:''' The delay from awakening as well as the damage increase can | *'''Awaken when necessary:''' The delay from awakening as well as the damage increase can quickly turn the tide in a match, allowing you to escape combos, catch opponents in combos, and power up your attacks. Don't be afraid to use it when your back is against the wall.<br><br> | ||
<br> | |||
*'''X Drop is incredibly useful''': The mid-air knockdown command for certain characters (normally known as X Drop) is useful for PvP gameplay. Since it reduces knockdown counters and could be the hit-confirm tool for continuing combo. (When an enemy gets launched and falls down to the ground while '''not''' in the knocked-down state, with good timing, there'd be a standby frame at the moment the character touches the ground where an enemy can take the opportunity to counter by surprise. X Drop doesn't allow this situation to happen.)<br><br> | |||
*'''Undying Flame can counter the resurrection effect''': One of the [[Eternal Flame Set]] accessories, [[Undying Flame]], can burn the enemy's HP within range in any situation, even when the freeze frame occurs. Making it a useful tool for countering the resurrection titles (for example, Eclipse and The Freed Shadow) and certain characters' resurrection passives where HP is '''gradually generated''' after being defeated. (for example, [[Apeiron]] and [[Flexible Movement]]). Note that this method doesn't work on certain characters' resurrection passives where HP is '''generated at a fixed amount''' after being defeated. (for example, [[Resurrection (Ara)|Resurrection]], [[Blood Mastery]], and [[Mystique and Awe]]) | |||
== | == Gallery == | ||
<gallery> | |||
File:NPC Camilia.png|Arena NPC Camilla. | |||
File:RankS+3.png|Icon of '''SS Rank''' in European server. (called '''S+ Rank''') | |||
File:RankS++3.png|Icon of '''SSS Rank''' in European server. (called '''S++ Rank''') | |||
File:RankF.png|Old Icon of '''F Rank''' (removed in Season 2). | |||
File:RankE.png|Old Icon of '''E Rank'''. | |||
File:RankD.png|Old Icon of '''D Rank'''. | |||
File:RankC.png|Old Icon of '''C Rank'''. | |||
File:RankB.png|Old Icon of '''B Rank'''. | |||
File:RankA.png|Old Icon of '''A Rank'''. | |||
File:RankS.png|Old Icon of '''S Rank'''. | |||
File:RankSS.png|Old Icon of '''SS Rank'''. | |||
File:RankS+.png|Old Icon of '''S+ Rank''' in European server. | |||
File:RankSSSOld.png|Old Icon of '''SSS Rank''' (in early Season 2). | |||
File:RankSSS.png|Old Icon of '''SSS Rank'''. | |||
File:RankS++.png|Old Icon of '''S++ Rank''' in European server. | |||
File:RankStar.png|Old Icon of '''Star Rank'''. | |||
</gallery> | |||
<br> | <br> | ||
| Line 784: | Line 803: | ||
*Prior to the Season 2 revamp, 2v2 mode existed in Arena queuing. However, it was removed due to its unpopularity in Korea. Despite being much more popular in the North American and European server, it was also removed there due to coding conflicts. | *Prior to the Season 2 revamp, 2v2 mode existed in Arena queuing. However, it was removed due to its unpopularity in Korea. Despite being much more popular in the North American and European server, it was also removed there due to coding conflicts. | ||
**However in NA, 2v2 mode was reinstated after the July 15th, 2014 Patch (In EU after the July 30th, 2014 Patch). | **However in NA, 2v2 mode was reinstated after the July 15th, 2014 Patch (In EU after the July 30th, 2014 Patch). | ||
*While entering Sparring for the first time, the music track will not change, carrying whatever track was playing when you entered the sparring room. However, once you've entered a match and exit back into the Sparring menu, the game will begin to play [http://www.youtube.com/watch?v= | *While entering Sparring for the first time, the music track will not change, carrying whatever track was playing when you entered the sparring room. However, once you've entered a match and exit back into the Sparring menu, the game will begin to play [http://www.youtube.com/watch?v=8FlmAdvGrmI '''''lobby''''']. | ||
*There's a 60% global damage modifier on all projectiles. | |||
<br> | |||
== Updates == | |||
{| cellpadding="5" border="1" style="border-collapse: collapse; text-align: center" | |||
|- style="background-color: {{ColorSel|Misc}}" | |||
! colspan=2 | Date !! colspan=2 | Changes | |||
|- style="background-color: {{ColorSel|Misc}}" | |||
! KR !! NA !! Update | |||
|- | |||
| 02/22/2018 || 03/15/2018 || align="left" | | |||
*{{nerf|Critical Damage, Skill Damage Increase, MP Cost Decrease, and Skill Cooldown Decrease stats from titles and equipment are only 40% as effective.}} | |||
|- | |||
| 07/02/2020 || 07/29/2020 || align="left" | | |||
*{{nerf|Upon reviving, character specific resources for Rena (NF), Add (DP) and Laby (Sentimental Points) are reset.}} | |||
**Add's DP will be reset to 100 if the player has more than 100 DP. No change when reviving with less than 100 DP. | |||
|- | |||
| 08/19/2021 || 08/18/2021 || align="left" | | |||
*'''music056_stage''' track tied to '''Garpai Sandstorm''' map. | |||
*'''music055_stage''' track tied to '''Sander Oasis''' map. | |||
|- | |||
| <!-- 09/30/2021 --> || 09/29/2021 || align="left" | | |||
*'''li_field_elysion001''' track tied to '''Judge's Heart''' map. | |||
|} | |||
<br> | <br> | ||
{{Guides}} | {{Guides}} | ||
Latest revision as of 20:53, 17 April 2024
PvP (Player vs. Player) is a feature of Elsword that allows players to battle each other.
Sparring
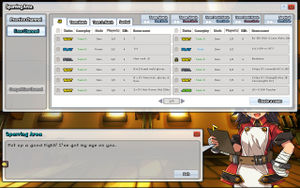
Sparring is a PvP mode which allows you to spar against other players freely with custom settings across multiple match types. Matches that take place in sparring have no effect whatsoever on your PvP Rank, Rank Points (RP), or Arena Points (AP). You can access the sparring lobby by talking to Camilla in any town, and selecting the 'Sparring' option. Once you are in the lobby, you can select a room to enter or spectate, as well as create your own sparring room for others to join.
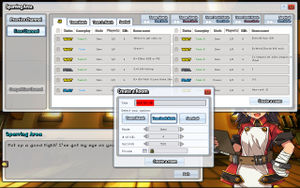
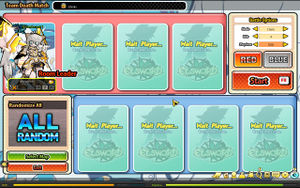
Channel
There are three channels to choose from in the lobby: Practice, Free, and Competition.
- Practice Channel: As the name implies, a channel for practice. MP regeneration is much faster than usual in the Practice channel, and both kills and match time are infinite. Stat normalization DOES NOT occur in this channel.
- Free Channel: Functions closer to Arena PvP, but still suffers from the same stat normalization as the Practice Channel. More modes and options are available in Free Channel, such as being able to adjust kills and playtime, as well as access to the Team Match mode.
- Competition Channel: Under normal circumstances, this channel is closed. It is only opened for official tournaments run by the staff of the server, and can only be accessed by the GMs and participants of the tournament. Specifics of normalization in this channel are currently unknown. Note: During the NA Winter League Tournament, GM Skillz said in a forum post that the normalizations in the Competition Channel were equivalent to the ones in Sparring. Whether or not this is true is unconfirmed.
Match Type
- Team Match: A battle that gives each player one life. There must be the same amount of members on each team in order to start. This mode does not exist in the Practice Channel.
- Team Death Match: A battle that gives team points depending on the number of kills for each team. There can be an uneven amount of players on each team, but the team with less players will be granted a damage, awakening charge, and MP buff.
- Survival: A free-for-all. The player with the most kills in the battle wins. This mode favors the usage of large area-of-effect skills, such as Generate Black Hole and Wind Wall.
- Winner Match: A tag-team like 1v1 mode where players are substituted with the next player on a given team when they die. Only available maps in this mode are Ash Covered Arena and Room of Greed.
- Brawl Mode: A battle mode where various buffs, debuffs, and miscellaneous abilities are handed to players through items.
- 2 vs 2 PvP League: A 2 vs 2 team battle mode which adheres to the rules and settings of official tournament matches.
Item Rules
- Item Mode: Allows random items to appear on the battlefield which can change the tide of the battle.
- Power Mode: Disables random items from appearing.
NOTE: Survival rooms can only be played in Item mode, while Wnner Match and 2 vs 2 PvP League can only be played in Power mode.
Applied Stats
Using the Apply Stats option in the room creation menu, you can toggle which stats will be enabled during the match. Icons will be listed on each room in the lobby to denote the stats which are enabled or disabled for that room.
 ERP Lv.: Only 40% of ERP effect will be applied.
 Title: Effects of Titles will be applied.
 Equipment Stats: Equipment will be as effective as in official PvP matches.
 Stat Disabled: Stats that are crossed out are disabled for that room.
Miscellaneous Options
- Room Name: Allows you to title your room. You can also edit the room name after creating the room by clicking in the text box at the top of the screen.
- Playtime: Allows you to set how long the match will last. The minimum time you can choose is 200 seconds, while the maximum is 1100 seconds. Team Matches only allow a maximum of 400 seconds.
- Kills: The number of kills needed in a Team Death Match or Survival Battle in order to win. The maximum kills allowed in Team Death Match is 28, and 12 in Survival. This option does not appear for Team Match.
- Number of Players: After creating the room, you may click on character slots to open or close them. In Team/Team Death Match, only an even number of player slots can be opened/closed.
- Private Room Option: Normally, your room is completely open to anyone who decides to join. By checking the mark next to the lock icon, your room will become private, and users will be required to enter a password before they can join. The password can be any length from 1 to 12 characters, so long as it is only letters and numbers. This can also be changed from inside the room by clicking on the lock next to the room title.
- Spectator Mode: Enables players to spectate the match without directly participating in the match. This option is unchecked by default, and can be enabled by clicking the checkbox on the room creation window. Rooms with spectator mode enabled will have a
 icon on them, which you can click on in order to start spectating.
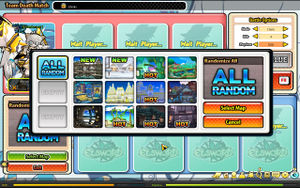
 - Map Select: The Room Leader can click this button after creating the room to choose which map the fight will take place on. If a map is not selected, the map will be chosen randomly once the match begins.
Arena
Arena PvP is, in a sense, the "official" PvP. Each match will have an effect on your server-wide ranking, as well as rewarding AP, a currency used to buy items from Camilla's PvP Shop. Winning a match will also reward RP, which is used to determine your ranking within whatever rank you currently hold. Be careful, as losing a match will also subtract RP!
Arena can currently be accessed in two ways: Talking to Camilla and choosing Arena, or simply clicking the Arena tab when in a town or field. From there, you can choose either a one-on-one fight, two-versus-two or a three-versus-three fight. If you are in a party of two or three, you may only choose either 2v2 or 3v3.
Rank
When you first create a character, they will have no rank. To obtain a PvP rank, you must participate in ten qualifier matches. After the end of your tenth match, you will be awarded your rank. The ranks, from lowest to highest, are E, D, C, B, A, S, SS, and SSS. Your rank determines many things, such as:
-The amount of AP you can gain from matches.
-The strength of the players you are matched with.
-The strength of Epic NPCs you can encounter.
-The items you can purchase from Camilla's Shop.
To increase your rank, you must consistently win matches in Arena. Doing so will increase your AP Tier, an unspecified variable that can be determined by finding the amount of AP you receive from winning a 1v1 match. Upon reaching certain AP Tiers, you can rank up by winning a few matches at that tier. Conversely, you can rank down by consistently losing and dropping down AP Tiers.
In 2v2 and 3v3, AP tier can be calculated using the formulas below.
n = (K + A) / 2 = (average of kills and assists)
2v2 Win: (AP won) / (n + 3)
2v2 Lose: (AP won) / (n + 0.75)
3v3 Win: (AP won) / (n + 4)
3v3 Lose: (AP won) / (n + 1)
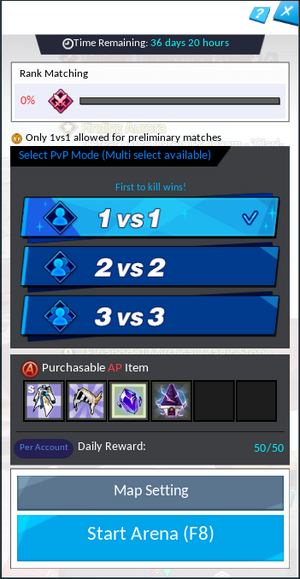
Take note that disconnecting and/or leaving a match early does not negatively impact your AP tier. Rather, you will lose RP instead, which has NO bearing on your letter rank, and only becomes relevant at SSS for board placement.
Also, every time you rank up, your RP will be RESET to zero. Ranking down will yield a little bit of RP.
| Required AP to rank up: | |||||||||
|---|---|---|---|---|---|---|---|---|---|
| Rank | |||||||||
| Required AP | 20 | 26 | 30 | 36 | 46 | 60 | 72 | 82 | |
After reaching SSS, you may continue rising in AP Tiers until you reach the maximum AP gain of ??. However, losing a single match on ?? AP Tier will immediately drop you back to the ?? AP Tier.
Star Rank
The new rank, Star, will be given to the top 20% of SSS ranked players.
Only a maximum of 2000 players can achieve the Star rank.
Star ranked players are renewed everyday at midnight.
Players who are in the Star rank will be given a title which can be used for 7 days.
| Icon | Title | Discovery | Obtain | Stats |
|---|---|---|---|---|

|
Master of Battle | Discovered at the start | Achieve Star Rank in the weekly ranking of PvP (Ranking based on periodic inspections every week) | Action Speed +2% Critical +2% Add. Damage +2% Damage Reduction +2.5% Awakening Charge Speed +2.5% MP Recovery Attacking +1.5% |

|
Master of Battle (Brawl) | Discovered at the start | Achieve Star Rank in the weekly ranking of Brawl Mode (Ranking based on periodic inspections every week) | Action Speed +2% Critical +2% Add. Damage +2% Damage Reduction +2.5% Awakening Charge Speed +2.5% MP Recovery Attacking +1.5% |
Maps
- Standard
- Winner Match
- Brawl Mode
- Unused
{{
| Image | Name | Image | Name | Image | Name |
|---|---|---|---|---|---|
|
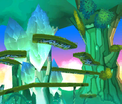
Tree of El - Top Size: Medium The tree of El contains 4 long branches to fight on. Be sure not to fall off from the tree! Music: music006_boss |

|
Tree of El - Bottom Size: Small The heroes of Elrios once fought on these grounds to defend against the Ancient Nasods. Music: music005_stage |

|
Banthus Room Size: Medium Banthus hideout is full of stolen treasures. Possibly, maybe some were stolen from you? Music: music011_boss |
 |
Wally Castle Centre Size: Medium Wally uses these grounds to train his soldiers. A lot of blood shed has tainted the castle's ground. Music: music017_boss |
 |
Wally Castle Rooftop Size: Small Wally's personal training ground where he practiced shooting missiles down at the peasants. Music: music009_boss |
|
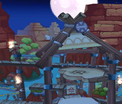
Bethma Lake Size: Large One of Bethma's most beautiful lakes that was created from the lizard men. Music: music012_stage |
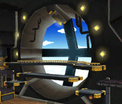
|
Cargo Airship Size: Medium Raven once commanded this ship before he joined Elsword. The cargo ship is massive once inside. Music: music020_stage |
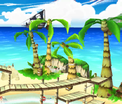
|
Elrios Bay Size: Small Elrios citizens prefer this location as the designated vacation spot for adventurers. Music: music007_boss |
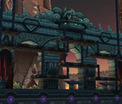
|
Durahan Coliseum Size: Small The ancient heroes once challenged one another in this coliseum before Durahan took over. Music: music026_stage |
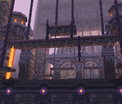 |
Tyrant's Arena Size: Large Tyrant built this arena to use as a demon's training ground. Many glitters fought for dominancy here. Music: music026_stage |
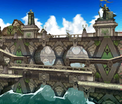 |
Hope Bridge Size: Large Velder's famous hope bridge was their primary defensive location. Music: music032_stage |
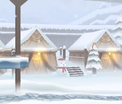
|
Wintery Velder Size: Medium Velder's soldiers practied in this location during the winters. It's beautifully covered in snow. Music: music007_boss |
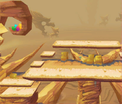
|
Garpai Sandstorm Size: Small A 1v1 map in Garpai Rock with swirling sandstorms. Use the sandstorms to make the battle more fun. Music: music056_stage |
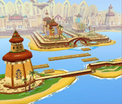
|
Sander Oasis Size: Large A large 4v4 PVP map with Sander's luscious oasis as the background. The air pad in the middle will allow a variety of play styles to defeat your enemies! Music: music055_stage |
|
Lanox Lava Size: Small A largely curved map. May receive damage from lava. Music: field_ranox001 |
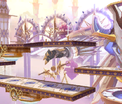 |
Judge's Heart Size: Medium A map with both curved and straight aspects. Many variations of fighting available with jumping platforms at both ends of the map. Music: li_field_elysion001 |
|
Elrianode City Size: Small Straight map, small and basic. Music: li_stage_elianod002 |
|
Labyrinth of Ruin Size: Medium Has both straight and curved sections with different platforms. Allows strategic play with different portals. Music: li_devildom1_henir_01 |

|
Eternal Winner Size: Small - Music: li_stage_pvp001 |
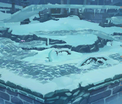
|
Blizzard Ruins Size: Small - Music: li_devildom2_village_01 |
}}
Free Season
Free Seasons are a rankless arena PvP mode that generally takes place in between actual PvP Seasons. Despite being unable to gain ranks during these seasons, players are still able to gain AP from matches. PvP modifies on skills are also removed during free seasons.
PvP Shop
You can use the AP you obtain from Arena matches to purchase special items from Alchemists or Camilla. Below is a list of purchasable items.
- Basic Magic Stones
- El Shards and Enhancement Stones
- Consumable
- Stat-Specific Magic Stones
- Special Magic Stones
- Dual-Socket Magic Stones
The current season's PvP gear can also be purchased from Camilla, see Duelist's Sparring Equipment for more information. Buying these from Camilla is unnecessary though, as you acquire them during the [PvP] Camilla's Training for a Champion! Equipment! story quest for free.
Tips and Details
The Arena is a cut-throat competition that takes hours of practice and perseverance to master, but there are some basic tips that every character should follow:
- Establish good baseline stats before PvPing: The main stats that are vital to PvP are Action Speed, Movement Speed, Jump Speed, Critical, HP, Additional Damage, and Damage Reduction. Having a minimum of 20% in your speeds allows you to both move and attack at a brisk pace, staying one step ahead of your enemies. This is the most important thing you should work on with sockets, as low speeds will allow other players to easily catch you and even slip out of your combos. Having around some critical will greatly help your damage output, and stacking HP will increase your overall durability. Having a minimum of 30% reduced damage is almost as essential as HP and serves the same purpose. Additional Damage benefits multi-hit classes more than others.
- Aim for "End-game" gear: Most of the higher-ranked players sport one of the so-called end-game gear sets, and you should aim to do the same. Which set you should use is dependent on your character and your own play style. The first, easy-to-get, yet crucial gear is Duelist's Sparring Equipment via Camilla’s Story Quest, as this gear is specialized for PvP gameplay since the equipment set effects won't be reduced to 40% unlike most of the gears. Harder-to-get but more powerful ones include Violet Amethystine Prophecy Equipment, Flames of Judgement - Demonic Weapon, Vestige of Soul - Weapon of Requiem, and Submergence of Abyss - Phantom Weapon. Until you acquire this equipment, the Apocalypse Type - Void Weapon you get through between leveling to 99 is a nice alternative for beginners, as they are easy to socket and attribute.
- Know your attributes: Attributing your weapon and armor can mean the difference between life and death. Certain characters and classes can utilize elements better than others, refer to the Attributing Equipment guide to see what some options are for your setup. Furthermore, remember to add resists smartly. All elements can be deadly if used correctly, so learn which ones you're most vulnerable to and attribute your armor to resist them.
- Aim for a Magic Necklace and an MP visor: While not necessary, a Magic Necklace can give you a serious leg-up in Arena. 30% extra MP from attacks both dealt and received adds up quickly, and lets you both break more often and dish out more damage with more Special Actives. Furthermore, an MP visor accessory (such as Nasod Prototype Goggles) can be helpful to tell if your enemy can Mana Break or if you can expect them to use a skill in order to catch you.
- Mana breaking is not a "noob" tactic, use it to your advantage: Contrary to what the ragers would have you believe, mana breaking is an incredibly useful technique that can save you from losing a match in one catch. There are plenty of players who know how to reset the knockdown counter and have no qualms about killing you in a single combo. Of course, there are some situations where it's better to simply take some hits, but when those are is something you can only learn through experience.
- Hit And Run: Although this may seem like a noob tactic, this may come in handy when you're about to die in a match. It also might provoke your opponent to try a high-mp attack and they end up losing it all if you evade.
- Awaken when necessary: The delay from awakening as well as the damage increase can quickly turn the tide in a match, allowing you to escape combos, catch opponents in combos, and power up your attacks. Don't be afraid to use it when your back is against the wall.
- X Drop is incredibly useful: The mid-air knockdown command for certain characters (normally known as X Drop) is useful for PvP gameplay. Since it reduces knockdown counters and could be the hit-confirm tool for continuing combo. (When an enemy gets launched and falls down to the ground while not in the knocked-down state, with good timing, there'd be a standby frame at the moment the character touches the ground where an enemy can take the opportunity to counter by surprise. X Drop doesn't allow this situation to happen.)
- Undying Flame can counter the resurrection effect: One of the Eternal Flame Set accessories, Undying Flame, can burn the enemy's HP within range in any situation, even when the freeze frame occurs. Making it a useful tool for countering the resurrection titles (for example, Eclipse and The Freed Shadow) and certain characters' resurrection passives where HP is gradually generated after being defeated. (for example, Apeiron and Flexible Movement). Note that this method doesn't work on certain characters' resurrection passives where HP is generated at a fixed amount after being defeated. (for example, Resurrection, Blood Mastery, and Mystique and Awe)
Gallery
-
Arena NPC Camilla.
-
Icon of SS Rank in European server. (called S+ Rank)
-
Icon of SSS Rank in European server. (called S++ Rank)
-
Old Icon of F Rank (removed in Season 2).
-
Old Icon of E Rank.
-
Old Icon of D Rank.
-
Old Icon of C Rank.
-
Old Icon of B Rank.
-
Old Icon of A Rank.
-
Old Icon of S Rank.
-
Old Icon of SS Rank.
-
Old Icon of S+ Rank in European server.
-
Old Icon of SSS Rank (in early Season 2).
-
Old Icon of SSS Rank.
-
Old Icon of S++ Rank in European server.
-
Old Icon of Star Rank.
Trivia
- There is a secret Dark Forest PvP map made for Developing Purposes. Information about this map is currently unknown. Can only be accessed through debug map-select.
- Before the PvP revamp (commonly known as Season 1 Arena), all matches took place in the Sparring Arena.
- At this point, the ranks only went from D to SS, and all players started at D.
- AP also didn't exist at this point. Instead, winning gave you VP (Victory Points). These were mainly used to buy items from Camilla, but her shop was much more limited than the Season 2 shop.
- In Season 1 Arena, all players started at F Rank, and had to work their way up to higher ranks. Anyone with a rank from pre-Season 1 got to keep their rank.
- Season 1 wiped all players' VP, and introduced AP. They were used to purchase Season 1 PvP gear from Camilla, and also for some items at the Accessory shops.
- Season 2 PvP introduced the concept of qualifier matches, wiped all players' current ranks and RP, and also removed F Rank and added SSS Rank.
- It also introduced a new damage table that heavily nerfed most skills over 120MP in Arena.
- Furthermore, most of the normalization that existed in Season 1 was removed, the most prominent being the restrictions on HP.
- Prior to the Season 2 revamp, 2v2 mode existed in Arena queuing. However, it was removed due to its unpopularity in Korea. Despite being much more popular in the North American and European server, it was also removed there due to coding conflicts.
- However in NA, 2v2 mode was reinstated after the July 15th, 2014 Patch (In EU after the July 30th, 2014 Patch).
- While entering Sparring for the first time, the music track will not change, carrying whatever track was playing when you entered the sparring room. However, once you've entered a match and exit back into the Sparring menu, the game will begin to play lobby.
- There's a 60% global damage modifier on all projectiles.
Updates
| Date | Changes | ||
|---|---|---|---|
| KR | NA | Update | |
| 02/22/2018 | 03/15/2018 |
| |
| 07/02/2020 | 07/29/2020 |
| |
| 08/19/2021 | 08/18/2021 |
| |
| 09/29/2021 |
| ||
