Savage White-Ghost's Castle: Difference between revisions
From Elwiki
Gameboy224 (talk | contribs) No edit summary |
No edit summary |
||
| Line 23: | Line 23: | ||
| Mob= | | Mob= | ||
| Obstacle=<span style="display:none">{{</span> | | Obstacle=<span style="display:none">{{</span> | ||
|[[File: | |[[File:Hadron_teleporter.png|100px]] | ||
|'''Teleporter''' - Portals between the two barracks where both of Hadron's Alter Egos are. | |'''Teleporter''' - Portals between the two barracks where both of Hadron's Alter Egos are. | ||
|- | |- | ||
| | ||[[File:15-5_pitfall.png|100px]] | ||
|'''Pitfall''' - After being launched up into the upper rafters of the castle, falling down will quickly tick away at player's HP until they die, effectively making them instant death. | |'''Pitfall''' - After being launched up into the upper rafters of the castle, falling down will quickly tick away at player's HP until they die, effectively making them instant death. | ||
<span style="display:none">}}</span> | <span style="display:none">}}</span> | ||
| MiniBoss= | | MiniBoss= | ||
| Boss=<span style="display:none">{{</span> | | Boss=<span style="display:none">{{</span> | ||
|[[File: | |[[File:Red_hadron.png|100px]] | ||
| '''Hadron's Alter Ego''' - A red spirit that guards the entrance to the White-Ghost Castle. Will guard one of two paths alongside its partner. | | '''Hadron's Alter Ego''' - A red spirit that guards the entrance to the White-Ghost Castle. Will guard one of two paths alongside its partner. | ||
| | | | ||
*''' | *'''<font color=red>Axe Swing:</font>''' Red Hadron's Alter Ego swings his axe in front of him. If you get hit, you'll receive Ember of Retribuition debuff for 5 seconds. | ||
*'''Axe Wave:''' Red Hadron's Alter Ego creates a shockwave that goes forward by swinging his axe from the ground. | |||
*'''Charge:''' Red Hadron's Alter Ego charges forward, dealing damage as it moves. | |||
*'''Stun:''' One person is teleported to the Red Hadron's Alter Ego side, and stunned for 30 seconds. Red Hadron's Alter Ego then does a stronger version of '''Charge''', aiming for him. By getting hit by this '''Charge''', the damage of the next '''Charge''' hit decreases. If no one gets hit by this '''Charge''', the stunned person will die when Red Hadron's Alter Ego gets to him. | |||
**While preparing this move, Red Hadron's Alter Ego will stand still for some seconds. You can use this occasion to deal a lot of damage to him. | |||
**After this move, Red Hadron's Alter Ego becomes exhausted for a short period of time. | |||
*'''<font color=red>Box:</font>''' Red Hadron's Alter ego creates a red field, shaped like a box, right in front of him. If someone doesn't enter this field, the whole party dies. | |||
'''''Attacks highlighted in <font color=red>red</font> bypass Invincibility frames.''''' | |||
'''Note:''' | |||
*The Ember of Retribution debuff will burn 5% MP per second and heal enemies hit instead of harm them. | |||
*You should split the party between the two bosses. If 6 people meet at the same Hadron Alter Ego, his defense will drastically increase. | |||
*If even one party member dies, both Hadron's Alter Egos defenses will drastically increase. | |||
*Just killing one of the two Hadron's Alter Egos will end the first phase of this raid. | |||
|- | |- | ||
|[[File: | |[[File:Blue_hadron.png|100px]] | ||
| '''Hadron's Alter Ego''' - A blue spirit that guards the entrance to the White-Ghost Castle. Will guard one of two paths alongside its partner. | | '''Hadron's Alter Ego''' - A blue spirit that guards the entrance to the White-Ghost Castle. Will guard one of two paths alongside its partner. | ||
| | | | ||
*''' | *'''Explosion:''' Blue Hadron's Alter Ego channels his energy, then quickly releases it as a blue explosion around him. If you get hit, you'll receive Ember of Retribuition debuff for 5 seconds. | ||
*'''Water Pillars:''' Water pillars rise from the ground. If you get hit, you'll receive Ember of Retribuition debuff for 5 seconds. | |||
*'''<font color=red>Link:</font>''' Two people will get a blue circle around their bodies. These two circle will be linked by a blue ray that deals damage to whoever overlaps to it. If those two circle are too far, the circle will turn red and both people will die. The blue circle disappears after some time. | |||
*'''<font color=red>Chains:</font>''' Some platforms will be marked by a blue aura. Every single marked platform needs to be stepped on. If a single platform is free, the platform will release a chain attack that kills the whole party. | |||
'''''Attacks highlighted in <font color=red>red</font> bypass Invincibility frames.''''' | |||
'''Note:''' | '''Note:''' | ||
* | *The Ember of Retribution debuff will burn 5% MP per second and heal enemies hit instead of harm them. | ||
*You should split the party between the two bosses. If 6 people meet at the same Hadron Alter Ego, his defense will drastically increase. | |||
*If even one party member dies, both Hadron's Alter Egos defenses will drastically increase. | |||
*Just killing one of the two Hadron's Alter Egos will end the first phase of this raid. | |||
|- | |- | ||
|[[File: | |[[File:Hadron.png|100px]] | ||
| '''Hadron''' - A White-Ghost Army top rank and a martial arts master of his own right. A challenge for those who enter the castle. | | '''Hadron''' - A White-Ghost Army top rank and a martial arts master of his own right. A challenge for those who enter the castle. | ||
| | | | ||
*''' | *'''Red sphere:''' Hadron creates a red sphere in front of him. This sphere will suction players into it, dealing damage before vanishing. | ||
*'''Leap&Fall 1:''' Hadron jumps and stays airborn for some seconds before diving down, dealing damage on the impact. | |||
*'''Leap&Fall 2:''' Same as 1, but deals more damage and Hadron will also shot yellow projectiles from various point of the map before diving back. | |||
*'''Stab:''' Hadrons stabs right in front of him. | |||
|- | |- | ||
|[[File: | |[[File:Hadron_p2.png|100px]] | ||
| '''Hadron (Phase 2)''' - Sending playing into the rafters, Hadron takes flight. | | '''Hadron (Phase 2)''' - Sending playing into the rafters, Hadron takes flight. | ||
| | | | ||
*''' | *'''Spheres:''' Right at the start of Phase 2, some spheres will form on the ground. By touching them, they'll send you up to the next platform. After getting up, you'll suffer [[Status_Effects|Confusion]] for 5 seconds. Everyone who stays on the bottom floor will die after some seconds. | ||
*'''Corner shots:''' Hadron teleports itself between the two map's corners, shooting out green projectiles. | |||
*'''Purple sphere:''' Hadron launches a purple projectile, drastically pushing you back. | |||
*'''Leap&Fall 3:''' Same as 2, but the yellow projectile attack lasts longer and getting hit by them inflicts [[Status_Effects|Wound]] for 5 seconds. | |||
*'''Tornado:''' Hadron spins in the center of the map, causing a tornado to appear. The tornado will constantly push you towards the nearest edge, while also shooting green projectiles every few seconds. Getting hit by the tornado will inflict 15 of cooldowns to all your potions. | |||
|- | |- | ||
|[[File: | |[[File:Haivan.PNG|100px]] | ||
| '''Haivan''' - The final trial within the castle, Haivan himself mounted on his weaponized vehicle. | | '''Haivan''' - The final trial within the castle, Haivan himself mounted on his weaponized vehicle. | ||
| | | | ||
*''' | *'''Core protection:''' Until all 3 cores are destroyed, Haivan healthbar doesn't appear and he can't be damaged. | ||
*'''<font color=red>Core explosion:</font>''' Every few seconds, the core that's being attacked charges an explosion that can either inflict stun, silence or potion cooldown. | |||
*'''<font color=red>Lasers:</font>''' Yellow lasers are constantly falling down the map. If you get hit by them, you may fall down and die. | |||
*'''<font color=red>Bomb:</font>''' When moving from a Core to another and when moving to a Core to fighting Haivan, a bomb appears. If the bomb isn't destroyed within 15 seconds, it explodes and the party dies. | |||
*'''<font color=red>Missile Spread:</font>''' Haivan quickly releases a spread of missiles, starting right under him and then arching out until it forms a 180° degree angle. | |||
*'''<font color=red>Single Target Marking:</font>''' Haivan marks a player and focuses fire on him. | |||
**Haivan can angle his missiles at a maximum of 180° degrees, making you impossible to hit if you're above him during this attack. | |||
*'''<font color=red>Side Lasers: </font>'''Haivan shoots yellow lasers horizontally, starting from the top platform and then descending them one by one. | |||
*'''Land Mine:''' Flying machines can sometimes install landmines on the ground. They explode upon being stepped on. | |||
*'''<font color=red>Head bomb:</font>''' Haivan will send out a small flying drone will attach to a player appearing over the person's head, where [[Titles]] are. This drone explodes after a while without dealing damage, but if the person with the drone is too near other people, it will kill everyone in range. This drone is only visible to the one having it. | |||
*'''<font color=red>Airstrike:</font>''' Haivan marks the entire map but a single spot. Move into this spot to avoid the missile attack, which instantly kills you. Haivan does this attack twice in a row, but the safe spot doesn't change. | |||
'''''Attacks highlighted in <font color=red>red</font> bypass Invincibility frames.''''' | |||
'''Note:''' | |||
*Only Haivan is counted as a Boss. Cores and Bombs are considered normal mobs. | |||
*On the first core phase, Haivan will only use '''<font color=red>Missile Spread</font>''' and '''<font color=red>Single Target Marking</font>''' | |||
*On the second core phase, Haivan will only use '''<font color=red>Side Lasers</font>'''. Also from the second core phase onward, Flying machines start to appear. | |||
*On the third core phase, Haivan will only use '''<font color=red>Missile Spread</font>''' and '''<font color=red>Single Target Marking</font>''', while Flying machines will use '''<font color=red>Side Lasers</font>''','''Land Mine''' and '''<font color=red>Head bomb</font>''' | |||
*When all cores are destroyed, Haivan will only use '''<font color=red>Missile Spread</font>''' and '''<font color=red>Single Target Marking</font>''',while Flying machines will use '''<font color=red>Side Lasers</font>''','''Land Mine''','''<font color=red>Head bomb</font>''' and '''<font color=red>Airstrike</font> | |||
<span style="display:none">}}</span> | <span style="display:none">}}</span> | ||
| BDrop={{:15-5Bdrop1}} | | BDrop={{:15-5Bdrop1}} | ||
Revision as of 15:37, 16 August 2020

Information: This article is currently under development. Please be patient while we're adding the finishing touches!


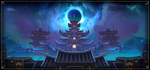
The Barbaric White-Ghost Castle
| “ | The Barbaric White-Ghost Castle.
|
” |

Description
-
Recommended Level
99
Required Combat Power
1,500,000
Entry Requirements
Dungeon Layout
Details
- Up to 6 players can enter (minimum 3 players required to enter)
Demon Realm
- The El's power does not reach into this realm, Attack and HP will be reduced by 80%.
Obstacles
{{
}}
| Obstacles Image | Obstacles Description |
|---|---|

|
Teleporter - Portals between the two barracks where both of Hadron's Alter Egos are. |
| Pitfall - After being launched up into the upper rafters of the castle, falling down will quickly tick away at player's HP until they die, effectively making them instant death.
|
Boss
{{
}}
| Monster Image | Boss Description | Boss Moves |
|---|---|---|

|
Hadron's Alter Ego - A red spirit that guards the entrance to the White-Ghost Castle. Will guard one of two paths alongside its partner. |
Attacks highlighted in red bypass Invincibility frames. Note:
|

|
Hadron's Alter Ego - A blue spirit that guards the entrance to the White-Ghost Castle. Will guard one of two paths alongside its partner. |
Attacks highlighted in red bypass Invincibility frames. Note:
|

|
Hadron - A White-Ghost Army top rank and a martial arts master of his own right. A challenge for those who enter the castle. |
|

|
Hadron (Phase 2) - Sending playing into the rafters, Hadron takes flight. |
|

|
Haivan - The final trial within the castle, Haivan himself mounted on his weaponized vehicle. |
Attacks highlighted in red bypass Invincibility frames. Note:
|
Dialogue
{{
}}
| Image | Name | Boss | Character | Stats |
|---|---|---|---|---|
 |
Lv99 Accessory (Earring): |
Gallery
-
-
-

-
-

Pruinaum raid poster.


Trivia
- The characters featured on the loading screen are the original trio: Knight Emperor, Aether Sage, and Daybreaker.
Updates
| Date | Changes | |
|---|---|---|
| KR | NA | |
| 08/13/2020 | - |
|
Alternative Names
{{
}}
| Server | Name | Translation |
|---|---|---|
| 야성에 잠식된 백귀의 성 | The Barbaric White-Ghost Castle |
