Template:SpecialAbilities: Difference between revisions
No edit summary |
No edit summary |
||
| Line 13: | Line 13: | ||
Note that the system they use is not what what it may appear to be at first; vitality-based attacks take away vitality from the gauge, leaning the gauge towards destruction; destruction-based attacks take away destruction from the gauge, leaning the gauge towards vitality; this is why only attacks that use the gauge area affected in the respective aura. | Note that the system they use is not what what it may appear to be at first; vitality-based attacks take away vitality from the gauge, leaning the gauge towards destruction; destruction-based attacks take away destruction from the gauge, leaning the gauge towards vitality; this is why only attacks that use the gauge area affected in the respective aura. | ||
|tab2=Aisha|contents2=[[File:Aishposter2.png|link= | |tab2=Aisha|contents2=[[File:Aishposter2.png|link=Memorize|left]] | ||
'''[[Memorize]]''' | '''[[Memorize]]''' | ||
---- | ---- | ||
| Line 19: | Line 19: | ||
When the note appears and you click on a skill key, the skill's MP cost and cooldown will be consumed but will not be activated. Instead it is stored in her memorized skill slots. Successful memorizing is indicated when the note becomes bigger. You are able to memorize a maximum set of 3 skills. Pressing V will activate the first skill you memorized and does not activate the original skill MP cost and cooldown. This allows you to activate the same skill twice in a row if you memorize the skill beforehand. | When the note appears and you click on a skill key, the skill's MP cost and cooldown will be consumed but will not be activated. Instead it is stored in her memorized skill slots. Successful memorizing is indicated when the note becomes bigger. You are able to memorize a maximum set of 3 skills. Pressing V will activate the first skill you memorized and does not activate the original skill MP cost and cooldown. This allows you to activate the same skill twice in a row if you memorize the skill beforehand. | ||
|tab3=Rena|contents3=[[File:Renposter2.png|link= | |tab3=Rena|contents3=[[File:Renposter2.png|link=Nature's Force System|left]] | ||
'''[[Nature's Force System|Nature's Force]]''' | '''[[Nature's Force System|Nature's Force]]''' | ||
---- | ---- | ||
| Line 33: | Line 33: | ||
Defensively, when Raven is hit by an attack in front of him while standing, the core transforms into shield that reduces damage. The shield lasts a short time and the core loses a level each time it forms the shield. If the core is level 1 when it defends Raven, it will disappear afterward and requires the usual conditions to reappear. Raven cannot move during the guarding animation, but he can [[Shadow Step]] out of it. In the TW version, Raven can cancel the guarding animation by moving or using other skills. | Defensively, when Raven is hit by an attack in front of him while standing, the core transforms into shield that reduces damage. The shield lasts a short time and the core loses a level each time it forms the shield. If the core is level 1 when it defends Raven, it will disappear afterward and requires the usual conditions to reappear. Raven cannot move during the guarding animation, but he can [[Shadow Step]] out of it. In the TW version, Raven can cancel the guarding animation by moving or using other skills. | ||
|tab5=Eve|contents5=[[File:Eveposter2.png|link= | |tab5=Eve|contents5=[[File:Eveposter2.png|link=Core Release|left]] | ||
'''[[Core Release]]''' | '''[[Core Release]]''' | ||
---- | ---- | ||
| Line 41: | Line 41: | ||
When Eve is attacked on the ground while in Core Release mode, the Queen's Core will switch to defense mode and cover Eve in a damage reducing shield and absorb the damage. While the Core covers Eve in the Shield, pressing Z or X will allow Eve to phase to the back of the target. The Core however disappears after defending and will appear again after Eve does some hits. | When Eve is attacked on the ground while in Core Release mode, the Queen's Core will switch to defense mode and cover Eve in a damage reducing shield and absorb the damage. While the Core covers Eve in the Shield, pressing Z or X will allow Eve to phase to the back of the target. The Core however disappears after defending and will appear again after Eve does some hits. | ||
|tab6=Chung|contents6=[[File:Chungposter2.png|link= | |tab6=Chung|contents6=[[File:Chungposter2.png|link=Freiturnier|left]] | ||
'''[[Freiturnier]]''' | '''[[Freiturnier]]''' | ||
---- | ---- | ||
| Line 49: | Line 49: | ||
Whenever Chung is hit while he has a blue outline (e.g., the third attack of the ZZZ combo. Like super armor, it cannot be seen if unit graphics are not set to high), he switches to a guarding stance which gives 66% damage reduction. However, he will stagger after guarding around 5-6 hits or an attack that [[Status Effects|stuns or flattens]]. | Whenever Chung is hit while he has a blue outline (e.g., the third attack of the ZZZ combo. Like super armor, it cannot be seen if unit graphics are not set to high), he switches to a guarding stance which gives 66% damage reduction. However, he will stagger after guarding around 5-6 hits or an attack that [[Status Effects|stuns or flattens]]. | ||
|tab7=Ara|contents7=[[File:Araposter2.png|link= | |tab7=Ara|contents7=[[File:Araposter2.png|link=Power of Eun|left]] | ||
'''[[Power of Eun]]''' | '''[[Power of Eun]]''' | ||
---- | ---- | ||
| Line 65: | Line 65: | ||
Note that the system they use is not what what it may appear to be at first; gale-based attacks take away gale from the gauge, leaning the gauge towards annihilation; annihilation-based attacks take away annihilation from the gauge, leaning the gauge towards gale; this is why only attacks that use the gauge area affected in the respective aura. | Note that the system they use is not what what it may appear to be at first; gale-based attacks take away gale from the gauge, leaning the gauge towards annihilation; annihilation-based attacks take away annihilation from the gauge, leaning the gauge towards gale; this is why only attacks that use the gauge area affected in the respective aura. | ||
|tab9=Add|contents9=[[File:Addposter2.png|link= | |tab9=Add|contents9=[[File:Addposter2.png|link=Dynamo Point System|left]] | ||
'''[[Dynamo Point System|Dynamo Point]]''' | '''[[Dynamo Point System|Dynamo Point]]''' | ||
---- | ---- | ||
| Line 71: | Line 71: | ||
When Add goes into DC mode, 1 Dynamo Mutation Point will be added to the counters below his portrait. Mutation Points are used to power up his skills. Skills will only be boosted if Add is in DC mode. | When Add goes into DC mode, 1 Dynamo Mutation Point will be added to the counters below his portrait. Mutation Points are used to power up his skills. Skills will only be boosted if Add is in DC mode. | ||
|tab10=Lu/Ciel|contents10=[[File:LuCielposter2.png|link= | |tab10=Lu/Ciel|contents10=[[File:LuCielposter2.png|link=Combination|left]] | ||
'''[[Combination]]''' | '''[[Combination]]''' | ||
---- | ---- | ||
Revision as of 04:18, 25 April 2015
| Character Systems |
|---|
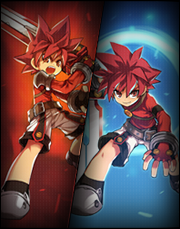
 When playing Elsword, there will be an additional gauge below the skill hotkeys. This Way of the Sword(Also known as WotS) gauge will enable you to activate "Aura of Vitality" or "Spirit of Destruction" for a period of time. Depending on the type of combo attack (e.g. Z and X key moves) or skill you use, the gauge will lean towards vitality or destruction. While in either "Aura of Vitality" or "Aura of Destruction", you will receive special benefits. Note that the system they use is not what what it may appear to be at first; vitality-based attacks take away vitality from the gauge, leaning the gauge towards destruction; destruction-based attacks take away destruction from the gauge, leaning the gauge towards vitality; this is why only attacks that use the gauge area affected in the respective aura. |


