Dragon Nest: Abyss (Old): Difference between revisions
Gameboy224 (talk | contribs) m (Text replacement - "rbFD3sWpqs8" to "1sgY6ITB-Ho") Tags: Mobile edit Mobile web edit |
IceSoulMOG (talk | contribs) m (Text replacement - "{{DungeonPage" to "{{DungeonPage|Old") |
||
| (6 intermediate revisions by 2 users not shown) | |||
| Line 4: | Line 4: | ||
{{DISPLAYTITLE:Dragon Nest: Abyss}} | {{DISPLAYTITLE:Dragon Nest: Abyss}} | ||
{{Languages|Dragon Nest: Abyss (Old)}} | {{Languages|Dragon Nest: Abyss (Old)}} | ||
{{DungeonPage | {{DungeonPage|Old | ||
| Color={{ColorSel|Village|3}} | | Color={{ColorSel|Village|3}} | ||
| DunButton=Old 3-XButton.png | | DunButton=Old 3-XButton.png | ||
| Line 14: | Line 14: | ||
| LvNeed={{tabs|name=l|tab1=Normal|contents1=35-36 |tab2=Hard|contents2=37-39 |tab3=Very Hard|contents3=40-42}} | | LvNeed={{tabs|name=l|tab1=Normal|contents1=35-36 |tab2=Hard|contents2=37-39 |tab3=Very Hard|contents3=40-42}} | ||
| LvFit=—— | | LvFit=—— | ||
| XEntryReq=< | | XEntryReq=<dfn>{{</dfn> | ||
*Complete all dungeons in Bethma on Very Hard. | *Complete all dungeons in Bethma on Very Hard. | ||
*Crafting '''Map of the Abyss''' in [[NPCs#Bethma|'''Chacha Buch''']], the Alchemist of [[ | *Crafting '''Map of the Abyss''' in [[NPCs#Bethma|'''Chacha Buch''']], the Alchemist of [[Bethma Village]]. Crafting Requirements: | ||
**1 ''Compass'' from '''Kayak the Shaman''' in [[Dragon Nest|3-4]]. | **1 ''Compass'' from '''Kayak the Shaman''' in [[Dragon Nest|3-4]]. | ||
**20 ''Life Dust'' from '''Nasod Healer''' in [[Old 3-6]], [[Richie Mines|3-5]] or [[Cargo Airship|3-6]]. | **20 ''Life Dust'' from '''Nasod Healer''' in [[Old 3-6]], [[Richie Mines|3-5]] or [[Cargo Airship|3-6]]. | ||
*Have a '''Map of the Abyss''' [[File:Special_109992.png|50px]] in your inventory. | *Have a '''Map of the Abyss''' [[File:Special_109992.png|50px]] in your inventory. | ||
< | <dfn>}}</dfn> | ||
| Mob=< | | Mob=<dfn>{{</dfn> | ||
|[[File:DNA3.jpg|60px]] | |[[File:DNA3.jpg|60px]] | ||
|'''Shadow Lizardman''' - Similar to the '''Shadow Lizardmen''', in [[Bethma Lake (Night)]], except that it can now throw spears (while in super armor) and wears a helmet. | |'''Shadow Lizardman''' - Similar to the '''Shadow Lizardmen''', in [[Bethma Lake (Night)]], except that it can now throw spears (while in super armor) and wears a helmet. | ||
| Line 39: | Line 39: | ||
|[[File:3-4-1.jpg|60px]] | |[[File:3-4-1.jpg|60px]] | ||
|'''Flame Bat''' - A red bat that clings onto you and detonates itself, so watch out! | |'''Flame Bat''' - A red bat that clings onto you and detonates itself, so watch out! | ||
< | <dfn>}}</dfn> | ||
| MiniBoss=< | | MiniBoss=<dfn>{{</dfn> | ||
|[[File:3-3-boss.jpg|60px]] | |[[File:3-3-boss.jpg|60px]] | ||
|'''Shadow Warrior''' - Although this boss may look like the '''Lizardman Warriors''' from '''[[Dragon Road]]''', the Shadow Lizardman is much stronger than you think. With agile capabilities making him hard to aim at, the Shadow Lizardman also uses its duel swords for a flurry of attacks! | |'''Shadow Warrior''' - Although this boss may look like the '''Lizardman Warriors''' from '''[[Dragon Road]]''', the Shadow Lizardman is much stronger than you think. With agile capabilities making him hard to aim at, the Shadow Lizardman also uses its duel swords for a flurry of attacks! | ||
| Line 54: | Line 54: | ||
'''Note:''' | '''Note:''' | ||
-Has a stoic threshold of 20 hits. | -Has a stoic threshold of 20 hits. | ||
< | <dfn>}}</dfn> | ||
| Obstacle=< | | Obstacle=<dfn>{{</dfn> | ||
|[[File:3-2-trap.jpg|60px]] | |[[File:3-2-trap.jpg|60px]] | ||
|'''Totem''' - An inert Totem that stands still. But don't get too close to it or else fire will come out of its mouth straight at you!<br> | |'''Totem''' - An inert Totem that stands still. But don't get too close to it or else fire will come out of its mouth straight at you!<br> | ||
| Line 69: | Line 69: | ||
|'''Small Boulder''' - A small boulder that rolls down hills knocking down players and dealing minor damage. | |'''Small Boulder''' - A small boulder that rolls down hills knocking down players and dealing minor damage. | ||
*You can generally tell how close they are by listening to the rumbling sounds of their movement.<br> | *You can generally tell how close they are by listening to the rumbling sounds of their movement.<br> | ||
< | <dfn>}}</dfn> | ||
| Boss=< | | Boss=<dfn>{{</dfn> | ||
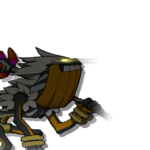
|[[File:Kayak SHShman Clone.png|60px]] | |[[File:Kayak SHShman Clone.png|60px]] | ||
|'''Kayak the Shadow Shaman''' - The boss from [[Dragon Nest|Dragon's Nest]] is back. His moves are exactly the same except he immediately summons a clone to aid in battle. | |'''Kayak the Shadow Shaman''' - The boss from [[Dragon Nest|Dragon's Nest]] is back. His moves are exactly the same except he immediately summons a clone to aid in battle. | ||
| Line 90: | Line 90: | ||
'''Note:''' | '''Note:''' | ||
-Has a stoic threshold of 20 hits. | -Has a stoic threshold of 20 hits. | ||
< | <dfn>}}</dfn> | ||
| BDrop={{tabs|divclass=forceland|name=1|tab1=Headdress of Darkness|contents1={{:3-3Bdrop2}}|tab2=Dragonic Great Sword|contents2={{:3-XBdrop1}} |tab3=Dragonic Wand|contents3={{:3-XBdrop2}} |tab4=Dragonic Bow|contents4={{:3-XBdrop3}} |tab5=Dragonic Blade|contents5={{:3-XBdrop4}} |tab6=Dragonic Drones|contents6={{:3-XBdrop5}}}} | | BDrop={{tabs|divclass=forceland|name=1|tab1=Headdress of Darkness|contents1={{:3-3Bdrop2}}|tab2=Dragonic Great Sword|contents2={{:3-XBdrop1}} |tab3=Dragonic Wand|contents3={{:3-XBdrop2}} |tab4=Dragonic Bow|contents4={{:3-XBdrop3}} |tab5=Dragonic Blade|contents5={{:3-XBdrop4}} |tab6=Dragonic Drones|contents6={{:3-XBdrop5}}}} | ||
| SBGM= | | SBGM= | ||
[http://www.youtube.com/watch?v= | [http://www.youtube.com/watch?v=UmZFwnDrBRw '''''music018_stage''''']<br> | ||
[http://www.youtube.com/watch?v= | [http://www.youtube.com/watch?v=DwibAlaIZkk '''''music019_stage''''']<br> | ||
[http://www.youtube.com/watch?v= | [http://www.youtube.com/watch?v=Ok9wfTaOg-o '''''music022_stage'''''] | ||
[http://www.youtube.com/watch?v=1sgY6ITB-Ho '''''music011_boss'''''] | [http://www.youtube.com/watch?v=1sgY6ITB-Ho '''''music011_boss'''''] | ||
Latest revision as of 11:46, 30 December 2022
- THIS IS AN OLD MAP.
- For the current iteration of this dungeon, see Dragon Nest: Abyss.


Dragon Nest: Abyss
| “ | Kayak's conspiracy isn't over yet. The gate of the Dragon Nest opens wide into the Abyss, The land of the accursed.
|
” |

He got the power of Ancient Lizardman, and tried to control all of the Lizardmans. However, Elsword and his team broke his plan.
So Kayak ran back to the Dragon Nest: Abyss, and waited for the chance for revenge.
- Complete all dungeons in Bethma on Very Hard.
- Crafting Map of the Abyss in Chacha Buch, the Alchemist of Bethma Village. Crafting Requirements:
- Have a Map of the Abyss
 in your inventory.

| Monster Image | Monster Description | Monster Moves |
|---|---|---|

|
Shadow Lizardman - Similar to the Shadow Lizardmen, in Bethma Lake (Night), except that it can now throw spears (while in super armor) and wears a helmet. | |

|
Shadow Shaman Lizardman - Similar to the Shaman Lizardmen seen in the Bethma Region, except that it can summon High Magician's Magic Missile in a row. | |

|
Flame Armadillo - Similar to the Armadillo in Bethma region, but its attacks can now cause the burn ailment. | |

|
Flame Scorpion - A powerful scorpion that is much more advanced than before! | |

|
Flame Cactus - Similar to the Cactus in Bethma region, but its attacks can now inflict Panic. | |

|
Flame Bat - A red bat that clings onto you and detonates itself, so watch out!
}} |
| Monster Image | Boss Description | Boss Moves |
|---|---|---|

|
Shadow Warrior - Although this boss may look like the Lizardman Warriors from Dragon Road, the Shadow Lizardman is much stronger than you think. With agile capabilities making him hard to aim at, the Shadow Lizardman also uses its duel swords for a flurry of attacks! |
-Swipe: The Lizardman will run over to you and use its dual swords to repeatedly hit you.
Note: -Has a stoic threshold of 20 hits. }} |
| Obstacles Image | Obstacles Description |
|---|---|

|
Totem - An inert Totem that stands still. But don't get too close to it or else fire will come out of its mouth straight at you! |

|
Geyser - A hole that spits fire at intervals and can cause burning damage. They are triggered by proximity |

|
Large Boulder - A giant boulder that is pushed down hills ahead of the smaller boulders, flattens players for a long period of time and does extremely high damage. |

|
Small Boulder - A small boulder that rolls down hills knocking down players and dealing minor damage.
}} |
| Monster Image | Boss Description | Boss Moves |
|---|---|---|

|
Kayak the Shadow Shaman - The boss from Dragon's Nest is back. His moves are exactly the same except he immediately summons a clone to aid in battle. |
-Summon: Kayak will immediately summon a clone to aid in battle.
Note: -Has a stoic threshold of 20 hits. }} |
| Image | Name | Boss | Character | Stats |
|---|---|---|---|---|
 |
Face Accessory (Top): Physical Attack +30 Magical Attack +30 [Unidentified * ?] Critical +1% |


-
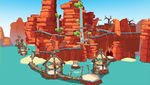
Dragon Nest: Abyss exterior.
-
Kayak the Shadow Shaman's Skill Cut in (Unused)

