Blooming Mineral Field

From Elwiki
Revision as of 16:40, 18 June 2024 by G123u (talk | contribs) (Expanding article)
(diff) ← Older revision | Latest revision (diff) | Newer revision → (diff)
  • English

Blooming Mineral Field

Blooming Mineral Field.

Description
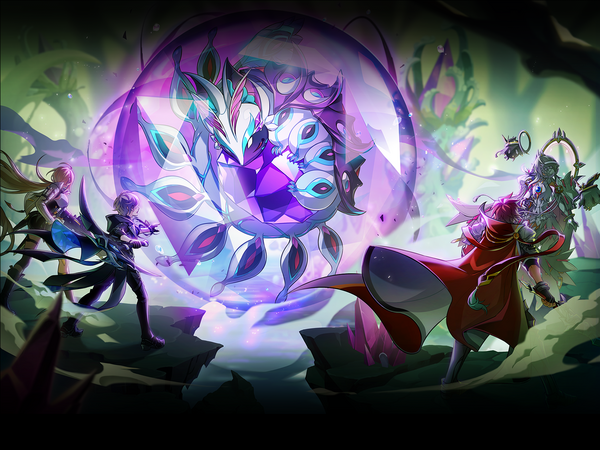
When they followed the El energy to the mineral field, the El Search Party finds the thief.
Recommended Level
99
Required Combat Power
  • Story Mode
  • Normal Mode

2,500,000

Entry Requirements
{{ }}
Details
{{
  • Most enemy attacks in this dungeon ignore players' physical and magical defense (either fully or partially).

Demon Realm

  • The El's power does not reach into this realm, Attack and HP will be reduced by 90%. Enemies will have a 20% chance to resist your critical hits.

Boss Defenses

Boss Name Defense (Raw) Defense (Percentage)
Dreaming Hatchling 21883 83.91%
Awakened Myuriconus
}}
  • Phase 1
  • Phase 2
Phase 1 - Dreaming Hatchling
{{
???.

Phase Gimmick

Barrier - At the start of the raid, the boss will be encased in a barrier. There are multiple mineral blocks that will spawn around the map. Destroy them the deplete the barrier.

  • Head Hunter is recommend to be taken off while attacking mineral blocks.

Barrier Regeneration: After the barrier is depleted, you can attack the boss. Re-equip Head Hunter to burst down the boss. Mineral blocks will still spawn around the map. Destroy them to slow down the rate at which the barrier regenerates.


Boss

Attacks highlighted in red bypass invincibility frames.
Boss Attacks Tips
  • Target: A random player will be targeted with a purple aura, which will explode after 3 seconds and deal lethal damage. The damage is reduced for every player stacked with the target.
  • It is possible to survive this pattern with just 2 players stacked together.
  • This attack is extremely lag sensitive. It is possible for the targeted player to explode immediately if they are not with another player when the mark spawns.
  • Surge: Myuriconus will release waves to nearby players that debuffs you with Attack decreased.
  • The debuff will disappear either when duration ends or cleansed with debuff removal skills.
  • Mini Laser: Myuriconus will either rotate, releasing a laser beam as it moves, or spawn a straight-firing laser in a random spot.
  • The rotating lasers can be dodged if you hug the boss close enough.
  • The rotating lasers are always fired from the center of the boss.
    • If fired from the left side of the boss, the laser will start at a downwards angle and move upwards.
    • If fired from the right side of the boss, the laser will start at an upwards angle and move downwards.
  • The lasers are able to cover two platforms of height.
  • The lasers deal significant damage and hit multiple times in succession. Do not be afraid to manually dodge them.
  • Side Laser: Myuriconus will blast off lasers on one side of the map if there are more than 5 minerals spawned there. After the laser ends, all the minerals on that side will disappear.
  • Fog Explosion: Patches of purple fog will appear randomly across the map. These patches will explode after a short amount of time and inflict  Move SlowdownMove Slowdown on any players hit.
  • Final Laser: The ultimate attack. If the barrier finishes regenerating, Myuriconus will release lasers that are instant-kill and ignore any resurrection effects. At the end of this attack, the barrier will be fully restored and players must deplete the barrier gauge once more.
  • Numerous safe zones will appear on the screen. There is a grace period of roughly 3 seconds between the appearance of the safe zones, and when the lasers fire. It is recommended to head to a safe zone as quickly as possible, as the laser 'snapshot' happens before the visuals occur.
  • It is possible for characters that are taller or have straighter posture, such as Ara or Ain, to be unfairly hit by the lasers. It may be necessary to use the default '/sit' command in order to ensure your character's hitbox fits within the safe zone.
}}
Dialogue
  • Ara: I found the fake El! But what is that attached to it? A
  • Eve: That thing claimed the fake El before we did.
  • Elsword: I'm sorry, but we're here to get rid of it. You better give it up!
{{
Image Name Boss Character Stats Set Effects
Swirling Phantasma
Swirling Phantasma
Swirling Phantasma
Myuriconus, Nightmare Keeper
Common

Accessory (Bottom Piece):
▪ All Speed +7%
▪ Damage Reduction +10%

Sharp Abyss Set:

2 Pieces:

  • Awakening Duration +10%
  • Damage Increase to Boss Monsters +5% (Dungeon)
  • All Resistance +50

3 Pieces:

  • Deals additional continuous damage that is 3.0% of damage upon attack for 3 sec. (Dungeon)
  • Polarize +3% (Max 55%) (Dungeon)
}}
Gallery
Trivia
{{ }}
Updates
{{
Date Changes
KR NA
08/04/2022 8/31/2022
  • Blooming Mineral Field added.
09/01/2022 9/28/2022
  • Phase 1 all Laser pattern range decreased.
07/20/2023 08/16/2023
  • 1st Phase (Dreaming Hatchling)
    • Barrier HP decreases even more when destroying minerals.
    • Recovery duration increases after the barrier is destroyed.
  • 2nd Phase (Awakened Myuriconus)
    • Teleport pattern cooldown is increased.
    • Sea Current Adaptation buff stack obtained through plants is increased from 5 to 8.
    • When Nightmare’s Crib dungeon is cleared while playing against Awakened Myuriconus boss monster, 20 Sea Current Adaptation stacks will be applied
}}
Alternative Names
{{
Server Name Translation
South Korea 피어난 광물지대 Blooming Mineral Field
China (Simplified Chinese) 绽放的矿物地带 Blooming Mineral Field
}}


  • Region 19~20
  • Region 1~6
  • Region 7~12
  • Region 13~18
  • Laby
  • Noah
  • Lithia
  • Other
  • Miscellaneous