Halls of Water

From Elwiki
Revision as of 00:49, 29 August 2024 by Gameboy224 (talk | contribs)
(diff) ← Older revision | Latest revision (diff) | Newer revision → (diff)

Halls of Water

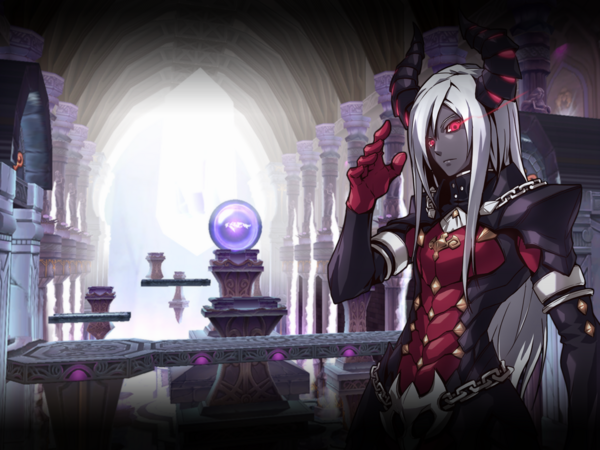
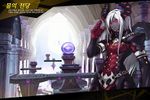
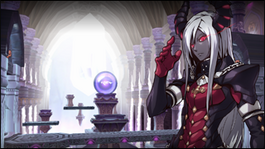
Ran the Dark Earl has many secrets... This is where the battle of Hamel's fate begins...

Description
The heart of the temple. Something huge is happening here.
Recommended Level
65-68
Required Combat Power
8,260
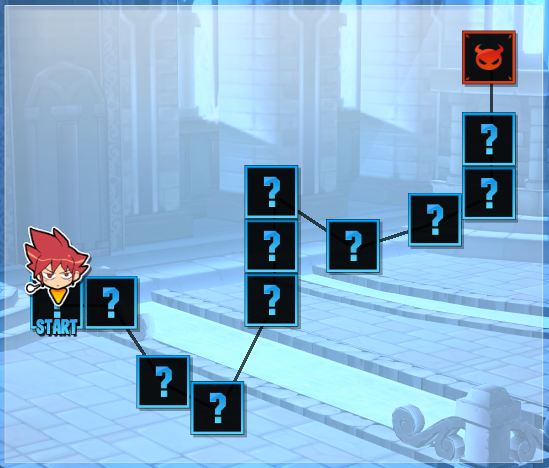
Dungeon Layout
Mobs
{{ {{
Monster Image Monster Description Monster Moves
Shadow Port Walker - This is an stronger variant of the Shadow Walker that you have encountered in previous Hamel dungeons.
  • Claw Swipe: Deals a basic 2 hit combo with their claws. Will typically follow up with a Claw Slam if the previous hits connect.
  • Claw Slam: Slam its claws downward, knocking targets down and away.
  • Recover Claw: When knocked down, spring back on its feet with an overhead claw slash.
Shadow Port Trickster - A large Shadow monster with advanced magical capabilities.
  • Wind Totem: A blue totem that creates a sphere of wind that increases the stats of the mobs.
  • Fire Totem: A red totem that emits homing fireballs.
  • Lightning Bolt: The Trickster shoots a bolt of lightning out of his hands.
Shadow Port Charger - This is an stronger variant of the Shadow Charger that you have encountered in previous Hamel dungeons.
  • Charge: It will run forward, damaging any players within its path.
  • Grab: It can also grab onto any players, immobilizing them. You can escape from their grasp by rapidly tapping the left and right arrow keys.
Shadow Port Defender - This is an stronger variant of the Shadow Defender that you have encountered in previous Hamel dungeons.
  • Shadow Spear: It will launch spears in and arc towards you. When a player gets hit by the spears, they will be Cursed and will gradually lose mana over time.
  • Dark Aura: Emit a dark aura that increases the defense of monsters within range. It will also cause Shadow Charger's Grab to drain HP and MP at a significant rate.
  • Crescent Slash: When knocked down, recover by swinging its thorn like arms ins a circle.
Shadow Port Sniper - This is an stronger variant of the Shadow Sniper that you have encountered in previous Hamel dungeons.
  • Aimed Light Beam: Slowly charges up their laser and then fires it. The laser will travel across the entire stage. Unlike the normal Shadow Sniper the laser can be aimed in all directions including into the back and foreground.
Shadow Port Voider - These snakes can absorb magical projectiles and use their energy to heal themselves 10% of their maximum HP.
  • Energy Bolt: If can charge and fire an energy bolt very similar to Eve's Mega Electron Balls.
Blood Linker - This is a red alternate form of the Shadow Linker.
  • Blood Link: The Blood Linker will link itself with a player eating away at their health gradually.
Mana Linker - This is a blue alternate form of the Shadow Linker.
  • Mana Link: The Mana Linker will link itself with a player eating away at their mana gradually.
Shadow Linker - A small Shadow monster that can Soul Link just like Shadow Master.
  • Link: Links itself with a player causing them to have significantly reduced movement and attack speed.
  • Latch: Latch onto a player, causing their controls to be reversed, must be shaken off.
Fallen Red Knight - Unlike the Red Knights from Magmanta's Cave, these Red Knights have now turned over to the dark side and fight for the demons.
  • Lord Knight Commands: It can perform very basic Lord Knight commands.
  • Sonic Blade: They can use Sonic Blade exactly the same way that Elsword can.
Fallen Red Knight - Unlike the Red Knights from Magmanta's Cave, these Red Knights have now turned over to the dark side and fight for the demons.
  • Rune Slayer Commands: It can perform very basic Rune Slayer commands.
  • Flame Geyser: They can use Flame Geyser exactly the same way that Elsword can.

}}

}}
Mini Boss
{{ {{
Monster Image Boss Description Boss Moves
Shadow Stinger - A deadlier creature of the shadows. Has spikes on it.
  • Forward Spikes: Jabs you with a few spikes when you stand in front of it. Hits multiple times and pushes backwards for some distance
  • Spike Ball: Extends all the spikes on it, impaling anything nearby. Induces KD.
  • Spike Fall: Jumps into the air and turns upside down as it's turning its head into a giant spike before making a sharp fall, tends to do this to attack players through platforms. Induces KD.
  • Crystal Stinger: Brings forth a crystal in it's chest to poke you with it. Does moderate damage. Induces KD.
  • Spike Roll: When knocked down, roll forwards with its spikes extended outwards.
Giant Hammer Bobosse - A powerful demon with a special chain flail.
  • Smash: Bobosse will simply smash his hammer once onto the ground.
  • Launcher: Bobosse will swing his hammer twice at you. The second hit will launch you into the air.
  • Double Hit: Bobosse will become super-armored and smashes his hammer twice into the ground.
  • Quake Smash: Bobosse will jump into the air and as he descends, he will swing his hammer into the ground, which will create a small quake on the ground.
  • Recovery Smash: Swing his hammer a full 180 degrees before standing back on his feet.
Victor - Victor, the one responsible for the disappearance of Hamel's water. One of the more aggressive bosses in Elrios. Possesses superhuman strength and loves violence.
  • Victor Combo: Poses then strikes in a certain direction three times. Unlike when fighting him as a boss this attack has no super armor frames.
  • Victor Swing: Poses then swings his fists into the air to throw you upwards while in super armor.
  • Victor Charge: Occurs only if you are at a certain distance away from him. It's similar to Burning Rush, except debris will fall from the ceiling on impact with a wall.
  • Victor Assault: Victor roars, beats his chest rapidly, and then launches himself at the nearest target. He lands on them and violently attacks them repeatedly for enormous damage.
    • If he fails to land on a valid target he will not continue with his combo.
  • Body Slam: Body Slam that will inflict Flattening for a period of time. Very fast and powerful but requires that he jumps before performing it.

Note:

  • Has absolute immunity against all elements so you cannot inflict any elemental debuff on him.
  • Due to his strange physical properties, he can be knocked around much more easily than normal enemies making him difficult to use some special actives on.

}}

}}
Boss
{{ {{
Monster Image Boss Description Boss Moves
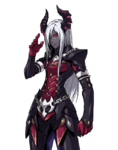
Ran - The demon possessing Aren's body and the leader of the demons invading Hamel. He has captured the Water Priestess and has obtained the Water Seal from Avalanche.
  • Dark Sword Combo: Ran slashes with his sword twice, then uses his shadow arm to attack and launch you into the air. He can cancel this attack on his own after the first two strikes.
  • Black Fire Claw: Ran will materialize a shadow arm and use it to slash you. He will use this move when you are more than a certain distance away from him. He will always target the player furthest away from him with this attack.
  • Shadow Clone: If you try to distance yourself from Ran, he will create a clone of himself next to you and attack. He will always target the player furthest away from him with this attack.
    • He can still use this move even if you stay close to him, however he will use it less.
  • Aerial Black Fire Claw: Ran will ascend to the air and will move left or right of the stage for a small distance. He will use Black Fire Claw to swipe anyone that is close to him as he descends.
  • Black Flame Burst: Ran will swing his sword and unleash a trail of black fire towards you. Includes freeze frames. He will only use this after his second awakening.
  • Black Destiny: Ran will unleash several slashes against you, each followed by a rapid burst of black fire, and finishes his string of attacks with an eruption of dark energy. Includes freeze frames. He will only use this after his second awakening.
  • Fallen Fire Claw: When Ran is knocked down on his knees, he will materialize a claw and sweep overhead while he stands back up.
  • Reverse Gravity: A spell circle will appear under Ran. Any player caught within the circle will slowly rise into the air and will be vulnerable for his next attack, where he releases a shock wave from the ground. He will use this whenever he is awakening after his HP is depleted. He will only use this regularly after his first awakening, his second awakening will almost double its area of effect. This attack will abruptly cancel many special actives used within its area of effect.
  • Awakening I: Dark Enhancement: After depleting about 1/4 of Ran's health, he will enhance his sword with darkness. Afterwards, his attacks will then inflict  Enemy DebuffCurseEnemy DebuffCurse on you. All claw related attacks become larger and more damaging.
  • Awakening II: Fire Enhancement: After depleting about 1/2 of Ran's health, he will enhance his sword with fire. Afterwards, his attacks will then inflict  Enemy DebuffBurnEnemy DebuffBurn on you. All claw related attacks become even larger and more damaging.

Note:

  • Has a stoic threshold of 20 hits.
  • Many of his dark and fire enhanced attacks still continue even if he is interrupted by an attack.
  • When awakened his sword will glow whenever he is about to use a skill, which can be used to predict his attacks.

}}

}}
Dialogue
  • Mid Dungeon Cutscene
  • Dungeon Victory Quote
  • Ran: It has already been placed into the hands of the water priestess... Time is on my side.
{{
Image Name Boss Character Stats
Shadow Sabre
Shadow Sabre
Shadow Stinger
Elsword

Lv54 Great Sword:

Physical Attack +3446

Magical Attack +3446


[Unidentified * ?]

[Unidentified * ?]

Critical +4%

Action Speed +2%

}}
Gallery
Videos
Trivia
{{
  • Some of Ran's attacks have differentiated names on the Japanese server. Examples of this are Black Flame Burst becoming "Eternal Banishment",and Black Destiny becoming "Sacred Spear".
    • Strangely,the speech of "Sacred Spear" on the Japanese server is "Black Destiny" indeed.
  • With the removal of Fallen Chloe as a mini-boss from this dungeon, she no longer appears in Hamel's dungeons at all. While she already had no dialogue in the Epic Quests for the area, this effectively erases her presence from the region, making her go directly from her appearance in Velder to her later appearance in Varnimyr.
}}
Updates
{{
Date Changes
KR NA
- -
  • Halls of Water added.
07/08/2021 08/04/2021
  • Dungeon stages adjusted.
  • Mini Boss Bizarre Conrad and Fallen Chloe deleted.
}}
Alternative Names
{{
Server Name Translation
South Korea 물의 전당 Halls of Water
Taiwan (Traditional Chinese) 水之神殿 Temple of Water
China (Simplified Chinese) 水之神殿 Temple of Water
Germany Schrein im Wassertempel Shrine in the Water Temple
Spain Santuario del Templo del Agua Water Temple Sanctuary
France Reliquaire du temple de l'eau Water Temple Reliquary
Italy Reliquiario del Tempio dell'Acqua Water Temple Reliquary
Poland Relikwiarz w Świątyni Wody Reliquary in the Water Temple
United Kingdom Water Temple Shrine
Brazil Salões da Água Halls of Water
}}


  • Region 7~12
  • Region 1~6
  • Region 13~18
  • Region 19~22
  • Laby
  • Noah
  • Lithia
  • Other
  • Miscellaneous