Commercial Area 1

From Elwiki
Revision as of 05:44, 7 September 2024 by Gameboy224 (talk | contribs)
For the previous iteration of this dungeon, see Commercial Area 1 (Old).
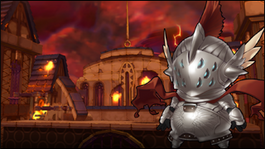
Commercial Area 1

The only escape route to reach Southern Gate is to break through Commercial Area 1.

Description
A needed passage in order to get to the escape route through the Southern Gate.
Recommended Level
53-55
Required Combat Power
7,000
Dungeon Layout
Mobs
{{ {{
Monster Image Monster Description Monster Moves
Arc Glitter Guard - The same as the Glitter Spearman from Feita, except that it has a horn, has grey skin, wears shiny golden armor and wields a flashier spear.
  • Spear Combo: Stab forward with its spear then performs an overhead slash.
  • Spear Charge: Charges forward with his spear dealing multiple hits.
  • Aerial Counter: It will counter attack with a downward smash if it is struck while in the air.
Arc Glitter Protector - The same as the Glitter Shielder from Feita, except that it has a horn, has grey skin, wears shiny golden armor and wields a flashier shield.
  • Block: Guards against any oncoming attacks from the front.
  • Shield Bash: Smashes players with its shield.
  • Shield Rush: Dash forward shield bashing anybody in front of it.
Arc Glitter Sniper - The same as the Glitter Archer from Feita, except that it has a horn, has grey skin, wears shiny golden armor and wields a flashier bow.
  • Arrow Shot: Fires an arrow forward.
  • Down Shot: Fire an arrow downward.
Arc Glitter Panzer - A shield for a face, a shield in hand and a mace in the other, this monster is slow but highly defensive.
  • Tank: Attacks from the front will have little effect on it.
  • Flail Smash: Smash its flail in front of it.
  • Heavy Weight: Due to its immense weight, just jumping or falling will create shockwaves.
Arc Glitter Alchemist - A Glitter who wears red robes and a cap. Can throw a variety of chemicals.
  • Combustion: Throws a cloud of black smoke then ignites is with a spark.
  • Potion Toss: Throw a beaker filled with an assortment of chemicals.
    • Red smoke: Inflicts Burn
    • Green smoke: Inflicts Poison
    • Black smoke: Inflicts Curse
    • Gray Smoke: Disables running
  • Healing Powder: It can also toss powder which can heal it, mobs nearby and even players.
Arc Glitter Assassin - A Glitter Soldier garbed in a black outfit.
  • Aerial Slash: Dashes forward and perform an aerial attack.
  • Slash & Dodge: After stabbing you, it will roll away.
  • Dodge Roll: While knocked down, they will dodge roll backwards out of harm's way.
Glitter Commander - This is a muscular and taller version of a Glitter.
  • Battle Formation: Is able to organize Glitter troops into a blockade formation.
    • Arc Glitter Protector up front.
    • Arc Glitter Guards with their spears pointed upwards.
    • Arc Glitter Dashers creating earthquakes with their hammers.
    • Arc Glitter Snipers in the back firing arrows in an arc.
  • Double Stab: A quick two hit combo with his dagger.
Dark Elf Sentinel - A skimpily dressed elf with dark skin.
  • Dagger Slash: Dark Elves will pull a dagger on close ranged targets.
  • Arrow Shot: Fire an arrow forward.
Kenaz - These fairies utilise fire based magic attacks that can burn you.
  • Combustion: Kenaz will float back then create a fiery explosion in front of her.
  • Self-Destruct: After being defeated Kenaz will explode.
Wyvern - A yellow wyvern with brown spots over its body.
  • Wyvern Dive: Wyvern will stall in the air then dive at an angle.
  • Meteor Breath: Wyverns will fire mini-meteor fireballs out of their mouths. It is inadvisable to stand in front of a wyvern when he vomits meteors as it can juggle you, dealing very substantial damage.
Blood Eater - Similar to the Mana Eater in Feita, except that it eats HP instead of MP.
  • Blood Absorb: The Blood Eater will absorb 50% of your current health. Defeating it after it has absorbed your HP will give you a 50% total HP recover, this can be used as a means of recovering health.
}}
Mini Boss
{{ {{
Monster Image Boss Description Boss Moves
Invincible Vardon - One of the Elrios' best. Boasts great defense and weight.It has the same attacks as the Arc Glitter Panzer, but when it falls from jumps it can cause earthquake effects.
  • Tank: Attacks from the front will have little effect on it.
  • Flail Smash: Smash its flail in front of it.
  • Flail Fury: Vardon is capable of using Fatal Fury style attack, then gives you a body slam. Its guard will be lowered as it prepares and uses this attack.
  • Heavy Weight: Due to his immense size and weight, he will create a shock wave every time he lands after falling or jumping.
Crazy Puppet - A pyromaniac puppet who apparently destroyed part of the Bridge of Hope.
  • Puppet Throw: Throws 3 puppets that explode in a matter of seconds. Being hit with a puppet as it's thrown will result in it exploding immediately dealing many times more damage than if it had just exploded on it's own.
  • Fiery Whack: Clubs you with a burning stick in a variety of unorthodox movements.
  • Jump Twirl: While jumping he can perform a spin, smacking anybody in the way with his torch.
  • Ignite: The Crazy Puppet can set aflame any portion of the map for a period of time.
  • Puppet Soul Transfer: The Crazy Puppet laughs in a sinister manner as a red orb pops out from its hat and then falls lifelessly to the ground. At this moment, the Crazy Puppet is intangible and numerous Puppet Stones are summoned. The player must find the 'Triple Bell Doll' (that wears a red hat, a red scarf, and has a third 'horn') and destroy it within 15 seconds, eliminating the remaining puppets and taking a chunk out of the Crazy Puppet's health (the more remaining puppets, the more HP is taken out). *Overdrive Mode: If the player fails to destroy the odd puppet in time during, Crazy Puppet's Soul Transfer, the Crazy Puppet will laugh maniacally, going into overdrive, gaining super armor and enhanced speed for 30 seconds.
Puppet Stone - When using Puppet Soul Transfer Crazy Puppet will summon many Puppet Stones who are only meant to be distractions.
  • Self-Destruct: If the real Puppet Stone is not defeated in time, all Puppet Stones will perform their little dance before exploding.
Triple Bell Doll - When using Puppet Soul Transfer Crazy Puppet will summon a single puppet who's appearance is distinctly different than the others, destroy this puppet to do extra damage to Crazy Puppet and prevent him from going into overdrive.
  • Self-Destruct: If this Puppet Stone is not defeated in time, all Puppet Stones will perform their little dance before exploding.

Strategy:

  • Using skills with wide areas of effect like Pandemonium make taking out the real puppet or clearing the fake ones much easier.

Note:

  • The Puppet Stones summoned/spawned during Puppet Soul Transfer are highly immune to knockback and my be difficult to defeat with combos, so make sure you have the mp to wipe your target(s) out.
  • The Puppet Stones spawned have no attacks other than self-destruction once the timer has run out, and will only move around a lot.
Uno Hound - A towering Glitter with a sinewy physique. Looks like a wrestler.
  • Downward Punch: The Glitter pulls his arm back and punches downwards at you. The punch is inaccurate and it will miss you entirely if you stand right next to him.
  • Double Lariat: The Glitter spins himself around with his arms wide apart, knocking everything in his radius away from him. This does rather substantial damage if he manages to combo you.
  • Leap Smash: The Glitter leaps up into the air and smashes downwards.
  • Running Punch: If the Glitter notices that you are some distance away from you, he will run towards you and punch you. This does not do much damage as long as he doesn't combo you.
  • Seismic Smash: The Glitter squats, and repeatedly smashes the ground with his two arms. At the 4th smash, it will cause an earthquake effect on whoever is on the same level ground as it. Does substantial damage.

Strategy:

  • The best time to attack is whenever he does the Downward Punch or right after he smashes down with Leap Smash. Keep your distance and use ranged attacks whenever he uses Seismic Smash or Double Lariat.
  • Elsword can Counter Attack all of his moveset, excluding Running Punch if you are standing directly in front of him. The final hit of Seismic Smash cannot be parried.
}}
Obstacles
{{ {{
Obstacles Image Obstacles Description
Unstable Ground - Due to the demon invasion various areas are structurally unsound and will collapse at a moment's notice revealing large pitfalls.
Pitfalls - A gaping hole in the ground, falling down one of these will result in a percent loss in HP.
Barricades - These barricades merely block your way.
}}
Boss
{{ {{
Monster Image Boss Description Boss Moves
Spriggan - Elrios' Ultimate Test. Looks like a cute and chubby boy, but something seems to be hidden within that suit of armor...
  • Shadow Sword: While possessing Super Armor, Spriggan will perform a series of 3 slashes, ending with a dark mega slash.
  • Shadow Trap: Spriggan hops on the ground twice and creates a shadow trap where he stands. Those caught in it will be unable to move or attack until the hole disappears. Similar to Entangle.
  • Shadow Embrace: During the battle, black holes of dark energy will appear in the battlefield, accompanied with a low-key whistling sound. If the holes are not destroyed in time, they will expand into much larger portals. When Spriggan enters the range of these portals, his true demonic shadow form will be unleashed from the constrictions of his armor, announcing his arrival with eruptive bursts of dark energy around the battlefield.

While in Shadow Embrace state, Spriggan's physical body will not attack, however he true form will perform the following until the he is no longer in the portal's range.

  • Shadow Swipe: Slashes at you upwards, throwing you away from the Shadow Embrace it is under. Can be followed by tons of Dark Energy Splashes
  • Dark Energy Slash: Spriggan's shadow swings his arm upwards and unleashes a violent eruption of dark energy beneath your feet, dealing substantial damage.
  • Black Hole: Spriggan's shadow summons a black hole with his hand, sucking in everyone on the battlefield. It deals continuous hits of damage and ends with a powerful explosion. You will NOT survive this move. If he catches you, quickly mana break to avoid death.
}}
Dialogue
  • Dungeon Victory Quote
  • Normal
  • Heroic
  • Elsword
  • Aisha
  • Rena
  • Raven
  • Eve
  • Elesis
  • Add
  • Ain
  • Elsword: As long as we can get out of here, we've pretty much made our escape, right? Come at me, demons!
  • Elsword: I may not be a hero like my sister, but I will do what I can to protect everyone.
  • Elsword: All of you, run! Even if I fall, I will hold them here!
{{
Image Name Boss Character Stats
Baradon Flail
Baradon Flail
Invincible Vardon
Elsword

Lv50 Great Sword:

Physical Attack +3293

Magical Attack +3293


[Unidentified * ?]

Critical +3%

}}
Gallery
Trivia
{{
  • Compared to its older version, the dungeon begins with the now defunct Burning Hope Bridge dungeon rooms, including its boss acting as the mini-boss for the dungeon, essentially merging the two dungeons together.
  • Uno Hound also appears as a mini-boss in the room before the boss, having originally been the boss of his own dungeon, Residential Area 3.
}}
Updates
{{
Date Changes
KR NA
07/08/2021 08/04/2021
  • Current iteration added.
    • Dungeon stages adjusted.
}}
Alternative Names
{{
Server Name Translation
South Korea 제1 상업지구 Commercial Area 1
Taiwan (Traditional Chinese) 第一商業地區 First Commercial District
China (Simplified Chinese) 第一商业区 First Commercial District
Germany Händlerviertel Trader Area
Spain Distrito de comerciantes Merchant's District
France Quartier des commerçants Trader's District
Italy Quartiere dei Commercianti Merchant's District
Poland Dzielnica Handlowa Commerce's District
United Kingdom Merchant's District
Brazil Distrito Comercial Nº1 Commercial District N°1
}}


  • Region 1~6
  • Region 7~12
  • Region 13~18
  • Region 19~21
  • Laby
  • Noah
  • Lithia
  • Other
  • Miscellaneous