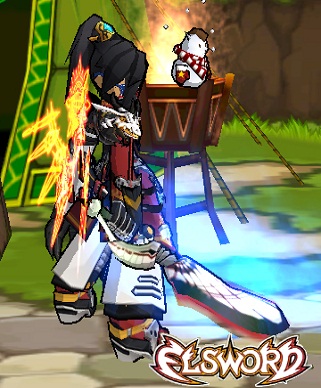
Yuthara
Joined 23 August 2012
No edit summary |
Shironsaki (talk | contribs) m (Text replacement - "Wolf Fang.PNG" to "BladeMasterSkill8.png") |
||
| (31 intermediate revisions by 4 users not shown) | |||
| Line 1: | Line 1: | ||
{{Infobox_character |name=Yoshii. |color=#333333 |image=[[File:ClawBladez.jpg]] |class=Blade Master |age=17 |weapon=WindBlade, Nasod Arm (TYPE-A+)}} | __NOTOC__{{Infobox_character |name=Yoshii. |color=#333333 |image=[[File:ClawBladez.jpg]] |class=Blade Master |age=17 |weapon=WindBlade, Nasod Arm (TYPE-A+)}} | ||
=== | ===Details=== | ||
Youtube Channel: [https://www.youtube.com/user/TheYuthara Click Here]<br/> | |||
'''Characters'''<br/> | |||
Clawbladez lv.60 - BM - SSS <br/> | |||
OneMagic lv.60 - RS - S <br/> | |||
BlueBlazez lv.48 - DC - S <br/> | |||
RedBlazez lv.48 - LK - A <br/> | |||
Kamikazii lv.54 - IS - A <br/> | |||
Skrimory lv.46 - VC - A <br/> | |||
Yaoishi lv.22 - ST - A <br/> | |||
=== | ===Dreams=== | ||
I want to be the very best,<br/> | |||
As no one everwas,<br/> | |||
To kill them is my real test,<br/> | |||
And training is my cause,<br/> | |||
ELSWORD! Got to kill them all!<br/> | |||
===Quote=== | ===Quote=== | ||
| Line 11: | Line 23: | ||
===Info=== | ===Info=== | ||
Lvl.60 and ready to fight.<br/> | |||
Rank SSS Blademaster<br/> | |||
Kills:<br/> | |||
SSS-153<br/> | |||
SS-327<br/> | |||
S-761<br/> | |||
A-587<br/> | |||
B-301<br/> | |||
C-693<br/> | |||
D-205<br/> | |||
E-90<br/> | |||
F-28<br/> | |||
Still counting.<br/> | |||
===BladeMaster | ===BladeMaster Commands=== | ||
{| cellspacing="0" cellpadding="5" border="1" width="100%" style="border-collapse: collapse;" | {| cellspacing="0" cellpadding="5" border="1" width="100%" style="border-collapse: collapse;" | ||
|- | |- | ||
| Line 19: | Line 43: | ||
| align="center" style="border-style: solid; border-width: 1px; background-color:#999999"| '''Description''' | | align="center" style="border-style: solid; border-width: 1px; background-color:#999999"| '''Description''' | ||
|- | |- | ||
|{{CZ}}{{CZ}}{{CX}}{{ | |{{CZ}}{{CZ}}{{CX}}{{CDL}}{{CR}} | ||
|ZZ or ZZX loop. ZZX For MP gain. | |ZZ or ZZX loop. ZZX For MP gain. | ||
|- | |- | ||
| Line 25: | Line 49: | ||
|XZ Loop. | |XZ Loop. | ||
|- | |- | ||
|{{CX}}{{CZ}}{{CZ}}[[image: | |{{CX}}{{CZ}}{{CZ}}[[image:SwordTakerSkill1.png|link:one_flash]]{{CL}}{{CU}}{{CX}}{{CDZ}} | ||
|'''Catching the Leaf''' I figured this out but not sure if its someone elses already. | |'''Catching the Leaf''' I figured this out but not sure if its someone elses already. | ||
|- | |- | ||
|{{CZ}}{{CZ}}{{CX}} {{ | |{{CZ}}{{CZ}}{{CX}}{{CDR}}{{CL}}{{CR}}{{CZ}}{{CZ}}{{CZ}}{{CX}}{{CZ}}...{{CZ}} [[Image:BladeMasterSkill8.png|link=Wolf Fang]] {{CDRU}} [[Image:SwordTakerSkill2.png|link=Shockwave]] {{CDR}}{{CD}} Awakening [[Image:BladeMasterSkill8.png|link=Wolf Fang]] | ||
|He wasted 300mp on this combo but he gains about 100mp back then he does awakening and uses wolf fang again. | |He wasted 300mp on this combo but he gains about 100mp back then he does awakening and uses wolf fang again. | ||
|- | |- | ||
|{{CX}}{{CX}}{{CZ}}----{{CZ}}[[Image: | |{{CX}}{{CX}}{{CZ}}----{{CZ}}[[Image:SwordTakerSkill2.png|link=Shockwave]] [[Image:BladeMasterSkill8.png|link=Wolf Fang]] [[image:STactive1.png|link:Shadow_Step]] [[image:STPassive4.png|link:Shadow_Piercing]] | ||
|V2 of the combo above. | |V2 of the combo above. | ||
|- | |- | ||
|{{CZ}} {{CZ}} {{CZ}} {{CX}}----{{CZ}} [[image:STactive1.png|link:Shadow_Step]] [[image:STPassive4.png|link:Shadow_Piercing]] {{CL}} {{CZ}} [[image: | |{{CZ}}{{CZ}}{{CZ}}{{CX}}{{CZ}}----{{CZ}} [[image:STactive1.png|link:Shadow_Step]] [[image:STPassive4.png|link:Shadow_Piercing]] {{CL}}{{CZ}} [[image:SwordTakerSkill1.png|link:one_flash]] {{CR}}{{CZ}}{{CZ}}{{CX}}[[image:BladeMasterSkill4.png|link:Giga_Drive]] Loop {{CZ}}{{CZ}}{{CX}}{{CDR}}{{CL}}{{CR}} | ||
|Using Shadow Pierce | |Using Shadow Pierce | ||
|- | |- | ||
|{{CZ}}{{CZ}}{{CX}}{{CDR}} {{CZ}}{{CZ}}{{CZ}} [[image: | |{{CZ}}{{CZ}}{{CX}}{{CDR}}{{CZ}}{{CZ}}{{CZ}} [[image:SwordTakerSkill1.png|link:one_flash]] {{CDL}}{{CZ}}{{CZ}}{{CX}} [repeat from the opposite side] | ||
|Incase he fail the loop he uses this to patch it up. | |Incase he fail the loop he uses this to patch it up. | ||
|- | |- | ||
|{{CZ}}{{CZ}}{{CX}}{{CDR}}{{CL}}{{ | |{{CZ}}{{CZ}}{{CX}}{{CDR}}{{CL}}{{CRX}}{{CZ}}({{CZ}}){{CDR}}{{CL}}{{CR}} | ||
|'''Switch!''' Switching from his {{CX}} Spam to {{CZ}} Spam. | |'''Switch!''' Switching from his {{CX}} Spam to {{CZ}} Spam. | ||
|- | |- | ||
|{{CX}}{{CZ}} ( {{CZ}} ) {{ | |{{CX}}{{CZ}} ( {{CZ}} ) {{CDRU}}{{CL}}{{CR}} [[Image:SwordTakerSkill2.png|link=Shockwave]] [air]{{CDR}} [ground]{{CDRU}}{{CZ}} | ||
|'''Fly~!''' Another way of doing XZZZ but dealing more damage, The second Z must hit then dash. | |'''Fly~!''' Another way of doing XZZZ but dealing more damage, The second Z must hit then dash. | ||
|- | |- | ||
|{{CZ}}{{CZ}}{{CX}}{{CDR}}{{CL}}{{ | |{{CZ}}{{CZ}}{{CX}}{{CDR}}{{CL}}{{CRX}}{{CX}}{{CZ}}-{{CZ}} [[Image:SwordTakerSkill2.png|link=Shockwave]] {{CR}} [hold] {{CZ}} [[Image:BladeMasterSkill6.png|link=Cut Tendon]] {{CZ}}{{CZ}}{{CX}} ETC.. | ||
|Can do this combo by replacing the {{CZ}}{{CZ}}{{CX}} to {{CZ}}{{CZ}}{{CZ}}. Must use shockwave right after the finisher! Then right after Shock wave is executed hold {{CR}} and Keep pressing {{CZ}} just to make sure you catch them, then Cut Tendon to cut their running off. Recommended to use this near the walls. | |Can do this combo by replacing the {{CZ}}{{CZ}}{{CX}} to {{CZ}}{{CZ}}{{CZ}}. Must use shockwave right after the finisher! Then right after Shock wave is executed hold {{CR}} and Keep pressing {{CZ}} just to make sure you catch them, then Cut Tendon to cut their running off. Recommended to use this near the walls. | ||
|- | |||
|[On Platform Edge] {{CDR}}{{CX}}{{CDR}}{{CDZ}}{{CD}}[Ground] {{CZ}}[[Image:BladeMasterSkill6.png|link=Cut Tendon]]{{CZ}}[[image:SwordTakerSkill1.png|link:one_flash]]{{CDL}}{{CZ}}{{CZ}}{{CZ}}{{CDL}}{{CU}}{{CZ}}[On Platform]{{CZ}}{{CDL}}{{CX}}[[Image:SwordTakerSkill2.png|link=Shockwave]][[Image:BladeMasterSkill8.png|link=Wolf Fang]] | |||
|A combo that involves platforms | |||
*Need Wind III to do this. | |||
|- | |||
|[[Image:RActive1.png|link=Burning_Rush]][[Image:BladeMasterSkill4.png|link=Giga_Drive]] Right side {{CZ}}{{CZ}}{{CX}}{{CDL}}{{CU}}{{CZ}}{{CZ}} [[Image:BladeMasterSkill6.png|link=Cut Tendon]]{{CX}}{{CZ}}{{CZ}}[[image:SwordTakerSkill1.png|link:one_flash]]{{CR}}{{CU}}{{CDX}}{{CZ}}{{CZ}}{{CX}}{{CDR}}{{CL}}{{CR}}<br/> | |||
{{CZ}}{{CZ}}{{CX}}{{CDR}}{{CZ}}{{CZ}}{{CZ}}{{CRX}}{{CZ}}{{CDR}}<br/>{{CZ}}{{CZ}}{{CZ}}{{CDR}}[[Image:BladeMasterSkill6.png|link=Cut Tendon]]<br/>{{CZ}}{{CZ}}{{CZ}}{{CX}}{{CZ}}{{CZ}}{{CZ}}{{CZ}}[[image:STactive1.png|link:Shadow_Step]] [[image:STPassive4.png|link:Shadow_Piercing]] {{CZ}}{{CZ}}{{CX}} [[Image:SwordTakerSkill3.png|link=Beserker_Blade]] | |||
|'''Clawbladez Revamped Video Combo''' A long combo that involves Mid Clashing, KD reset, Timing, chance of 60% for a fatallity (100% in KR) | |||
|- | |||
|} | |} | ||
Latest revision as of 13:09, 9 August 2023
Details
Youtube Channel: Click Here
Characters
Clawbladez lv.60 - BM - SSS
OneMagic lv.60 - RS - S
BlueBlazez lv.48 - DC - S
RedBlazez lv.48 - LK - A
Kamikazii lv.54 - IS - A
Skrimory lv.46 - VC - A
Yaoishi lv.22 - ST - A
Dreams
I want to be the very best,
As no one everwas,
To kill them is my real test,
And training is my cause,
ELSWORD! Got to kill them all!
Quote
I'll bite you to death.
Info
Lvl.60 and ready to fight.
Rank SSS Blademaster
Kills:
SSS-153
SS-327
S-761
A-587
B-301
C-693
D-205
E-90
F-28
Still counting.
