- English

Blooming Mineral Field
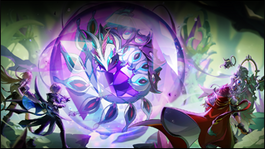
| “ | The environment bloomed in the Abyss seems perilous like a model garden. A primordial land, the one lost in time awakens after a long slumber.
|
” |
Description
When they followed the El energy to the mineral field, the El Search Party finds the thief.
Recommended Level
99
Required Combat Power
- Story Mode
2,500,000
- Normal Mode
Entry Requirements
Details
- Most enemy attacks in this dungeon ignore players' physical and magical defense (either fully or partially).
Enviromental Debuff - Demon Realm
- The El's power does not reach into this realm, Attack and HP will be reduced by 90%. Enemies will have a 20% chance to resist your critical hits.
Boss Defenses
| Boss Name | Defense (Raw) | Defense (Percentage) |
|---|---|---|
| Dreaming Hatchling | 21883 | 83.91% |
| Awakened Myuriconus |
- Phase 1
- Head Hunter is recommend to be taken off while attacking mineral blocks.
- Target: A random player will be targeted with a purple aura, which will explode after 3 seconds and deal lethal damage. The damage is reduced for every player stacked with the target.
- It is possible to survive this pattern with just 2 players stacked together.
- This attack is extremely lag sensitive. It is possible for the targeted player to explode immediately if they are not with another player when the mark spawns.
- Surge: Myuriconus releases waves from its body, damaging nearby players and inflicting them with a debuff that decreases Physical/Magical Attack.
- The debuff will disappear either when duration ends or cleansed with debuff removal skills.
- Mini Laser: Myuriconus will either rotate, releasing a laser beam as it moves, or spawn a straight-firing laser in a random spot.
- The rotating lasers can be dodged if you hug the boss close enough.
- The rotating lasers are always fired from the center of the boss.
- If fired from the left side of the boss, the laser will start at a downwards angle and move upwards.
- If fired from the right side of the boss, the laser will start at an upwards angle and move downwards.
- The lasers are able to cover two platforms of height.
- The lasers deal significant damage and hit multiple times in succession. Do not be afraid to manually dodge them.
- Side Laser: If there are more than 5 minerals on one side of Myuriconus, it will blast off lasers on that side of the map, destroying all minerals hit. The mineral destruction will not affect Myuriconus' shield.
- Targeted Fog Explosion: A variation of the above attack. Myuriconus spawns a patch of purple fog on each player. This fog will follow the player around and explode after ~3 seconds.
- The damage inflicted by these explosions is not high, but because they are targeted on each player, it is possible to overlap them and receive multiple hits.
- Final Laser: The ultimate attack. If the barrier finishes regenerating, Myuriconus will release lasers that are instant-kill and ignore any resurrection effects. At the end of this attack, the barrier will be fully restored and players must deplete the barrier gauge once more.
- Numerous safe zones will appear on the screen. There is a grace period of roughly 3 seconds between the appearance of the safe zones, and when the lasers fire. It is recommended to head to a safe zone as quickly as possible, as the laser 'snapshot' happens before the visuals occur.
- It is possible for characters that are taller or have straighter posture, such as Ara or Ain, to be unfairly hit by the lasers. It may be necessary to use the default '/sit' command in order to ensure your character's hitbox fits within the safe zone.
Phase 1 - Dreaming Hatchling
Phase Gimmick
Barrier - At the start of the raid, the boss will be encased in a barrier. There are multiple mineral blocks that will spawn around the map. Destroy them the deplete the barrier.
Barrier Regeneration: After the barrier is depleted, you can attack the boss. Re-equip Head Hunter to burst down the boss. Mineral blocks will still spawn around the map. Destroy them to slow down the rate at which the barrier regenerates.
Boss
| Dreaming Hatchling | ||
|---|---|---|
| An infant dragon trapped and slumbering within the Abyss. | ||
| Boss Attacks | Tips | |
|
|
| |
|
|
| |
|
|
| |
|
|
||
|
|
| |
|
|
| |
- Phase 2
Dialogue
{{
}}
| Image | Name | Boss | Character | Stats | Set Effects |
|---|---|---|---|---|---|
|
Accessory (Bottom Piece): |
2 Pieces:
3 Pieces:
|
{{
}}
Trivia
Updates
| Date | Changes | ||
|---|---|---|---|
| KR | NA | ||
| 08/04/2022 | 8/31/2022 |
| |
| 09/01/2022 | 9/28/2022 |
| |
| 07/20/2023 | 08/16/2023 |
| |
| 09/12/2024 | 09/25/2024 |
| |
- Region 19~22
| Abyss | Monaterra | Serpentium | Doom Aporia | ||
|---|---|---|---|---|---|
| {{ }} | {{ }} | {{ }} | {{ }} |
- Region 1~6
- Region 7~12
- Region 13~18
- Laby
- Noah
- Lithia
- Other
- Miscellaneous
- Region 19~22
- Region 1~6
- Region 7~12
- Region 13~18
- Other
