Sunken Holy Ground: Difference between revisions
Shironsaki (talk | contribs) No edit summary |
Gameboy224 (talk | contribs) No edit summary |
||
| (2 intermediate revisions by the same user not shown) | |||
| Line 61: | Line 61: | ||
|} | |} | ||
(All stacks are lost after the duration is over.) | (All stacks are lost after the duration is over.) | ||
* '''{{Color|red|Berserk}}''': When the gauge reaches 100%, the altar will perform uncontrollable mass '''Orb Release''' and lower its own gauge over time. When the Berserk state ends at 0%, the altar will be deactivated. ('''Fanatic Light''' can still increase the gauge and prolong the Berserk state) | * '''{{Color|red|Berserk}}''': When the gauge reaches 100%, the altar will perform uncontrollable mass '''Orb Release''' and lower its own gauge over time. When the Berserk state ends at 0%, the altar will be deactivated. ('''Fanatic Light''' can still increase the gauge and prolong the Berserk state) | ||
'''Note:''' | '''Note:''' | ||
| Line 76: | Line 75: | ||
! colspan=3 | Abyss Worshiper | ! colspan=3 | Abyss Worshiper | ||
|- | |- | ||
| align=center width=5% | [[File:Abyss Worshipper. | | align=center width=5% | {{tt|[[File:Mob Icon - Abyss Worshipper.jpg|60px]]|[[File:Mob - Abyss Worshipper.jpg|200px]]}} | ||
| colspan=2 align=center width=95% | Mysterious servants of the Abyss. | | colspan=2 align=center width=95% | Mysterious servants of the Abyss. | ||
|- | |- | ||
| Line 94: | Line 93: | ||
| | | | ||
*You can avoid this effect by turning back from the incense. It will disappear after some time. | *You can avoid this effect by turning back from the incense. It will disappear after some time. | ||
|- | |||
| colspan=2 | | |||
*'''{{Color|red|Fanatic Light}}''': The Abyss Worshiper will warp to the center of the map and attempt to imbue energy into one of the '''Abyssal Altars''' through a laser beam, rapidly charging their gauge. Players can block the connection by overlapping with the laser that deals continuous damage. Those who are hit will receive {{Se|2=Fanatic Light|4=ed|841}}, increasing damage taken from the attack by 10% per stack. When the boss is below 150x HP, they will fire two lasers. | |||
*{{color|#9F6811|'''Solo Mode Variation''':}} | |||
**The boss will still fire only 1 laser even below 150x HP. | |||
| | |||
|- | |- | ||
| colspan=2 | | | colspan=2 | | ||
| Line 120: | Line 125: | ||
*The altar will be healed if hit. Healing skills will also increase the rate of healing. | *The altar will be healed if hit. Healing skills will also increase the rate of healing. | ||
*Characters who can heal are recommended to enter this door. | *Characters who can heal are recommended to enter this door. | ||
*{{color|#9F6811|'''Solo Mode Variation''':}} | |||
**Blue doors will be mechanically indistinct from purple doors, simply requiring the '''Abyssal Atlars''' be destroyed. | |||
'''Abyssal Door (Purple) ''' - A portal to another dimension where players must destroy three kinds of '''Abyssal Altars'''. | '''Abyssal Door (Purple) ''' - A portal to another dimension where players must destroy three kinds of '''Abyssal Altars'''. | ||
| Line 132: | Line 139: | ||
! colspan=3 | Abyss Fanatic | ! colspan=3 | Abyss Fanatic | ||
|- | |- | ||
| align=center width=5% | [[File:Abyss Fanatic. | | align=center width=5% | {{tt|[[File:Mob Icon - Abyss Fanatic.jpg|60px]]|[[File:Mob - Abyss Fanatic.jpg|300px]]}} | ||
| colspan=2 align=center width=95% | The high authority of the mysterious Abyss worshiping servants. A monstrous creature with a spider like body. | | colspan=2 align=center width=95% | The high authority of the mysterious Abyss worshiping servants. A monstrous creature with a spider like body. | ||
|- | |- | ||
| Line 145: | Line 152: | ||
*'''{{color|red|Sticky Spider Web}}:''' Attach a mark to a random player through {{Se|843|2=Sticky Spider Web|4=ed}}. After a while, spawn an Abyssal spider web on the player that will continuously heal the boss in range. | *'''{{color|red|Sticky Spider Web}}:''' Attach a mark to a random player through {{Se|843|2=Sticky Spider Web|4=ed}}. After a while, spawn an Abyssal spider web on the player that will continuously heal the boss in range. | ||
| | | | ||
*'''Sticky Spider Web''' will | *'''Sticky Spider Web''' will occasionally desync, causing an immediate explosion. This explosion will not heal the boss, unless it happened on the host's side. (The normal pattern still happens) | ||
|- | |- | ||
| colspan=2 | | | colspan=2 | | ||
Latest revision as of 21:22, 28 May 2025
- English

Sunken Holy Ground
| “ | The entrance to the Abyss. The ruins fallen in to the giant pit whispers unrecognizable words.
|
” |
Description
The demonic energy of the Abyss overflows. They feel like they're heading to their graves but cannot stop. If Ran is not stopped now, there will be no next time.
Recommended Level
99
Required Combat Power
- Story Mode
2,500,000
- Normal/Solo Mode
Entry Requirements
Solo Mode
- Main Article: Raid Solo Mode
- Up to 4 players can enter, requiring a minimum of at least 3 people. (Normal)
- 2~4 players. (Story)
- Only three Resurrection Stones can be used to revive.
- Players are given a 15 second penalty before they can resurrect themselves.
- Bosses can only be frozen or petrified 3 times each (every hit is 1 count) at a time. When this limit is exceeded, they become invulnerable to that debuff for 60 seconds.
- Freezing or petrifying can be attempted again after 30 seconds, but you will not be able to chain it further. This also resets the 3-step chain's cooldown to 60 seconds.
Details
- Most enemy attacks in this dungeon ignore players' physical and magical defense (either fully or partially).
Enviromental Debuff - Demon Realm
- The El's power does not reach into this realm, Attack and HP will be reduced by 90%. Enemies will have a 10% chance to resist your critical hits.
Boss Defenses
| Boss Name | Defense (Raw) | Defense (Percentage) |
|---|---|---|
| Abyss Worshipper | 21883 | 83.91% |
| Abyss Fanatic |
- Phase 1
- Toggle: Players can activate or deactivate altars by simply hitting them with normal attacks (Commands/Active Skills/Pet/Proc Effects). When active, altars will perform Orb Release. Active altars will have their gauge reduced over time, inactive altars will recover the gauge instead.
- Orb Release: Altars fire numerous Abyss energy infused orbs. When a player is hit, one stack of a debuff unique to each altar will be applied.
- Berserk: When the gauge reaches 100%, the altar will perform uncontrollable mass Orb Release and lower its own gauge over time. When the Berserk state ends at 0%, the altar will be deactivated. (Fanatic Light can still increase the gauge and prolong the Berserk state)
- It is best to immediately activate altars that do not provide detrimental effects to your party (such as Attack Power Decrease and HP Decrease) in order to keep their gauge percentage low early on.
- You should never let the altars go Berserk.
- It is recommended to let the healer/tank deal with the Fanatic Light pattern, as the attack can get insanely strong. In some cases, taking turns with another party member might work as well. Also, re-entering the beam's range will make you and your allies get hit again, avoid doing so.
- Chain Strike: Perform an attack imbued with Abyss magic that hits enemies in front multiple times, stops them for a short while and launches them. Even if you are in the Super Armor status, you will still get pushed (without being knocked down).
- Currently active Cooldown Acceleration effects will increase the effectiveness of Abyss Swamp.
- Abyssal Incense: Spawn an invincible incense that burns HP and 30 MP per second.
- You can avoid this effect by turning back from the incense. It will disappear after some time.
- Fanatic Light: The Abyss Worshiper will warp to the center of the map and attempt to imbue energy into one of the Abyssal Altars through a laser beam, rapidly charging their gauge. Players can block the connection by overlapping with the laser that deals continuous damage. Those who are hit will receive Enemy DebuffFanatic Light, increasing damage taken from the attack by 10% per stack. When the boss is below 150x HP, they will fire two lasers.
- Solo Mode Variation:
- The boss will still fire only 1 laser even below 150x HP.
- Rope of Confession: The ultimate attack. Summon a deadly jump rope on the middle platform surrounded with Abyssal Aura. Anyone who touches the aura will be immediately teleported to the middle. After some time, the jump rope will start moving and deal damage when it reaches the front view. Players must jump in time to avoid it. During the pattern, all players will have their resource recovery efficiency set to 0%.
- The only HP recovery method for the Rope of Confession pattern is normal or forced Awakening with the Guardian of Secret Closed Space title equipped to proc the Fever effect.
- The Tenebrous Barrier effect can also be useful to increase survivability during Rope of Confession.
- Teleport: Teleports to an enemy across the map.
- It is recommended to stay in more or less the same spot as your party members in order to avoid the boss teleporting through the map.
Phase 1 - Abyss Worshipper
Phase Gimmick
Abyssal Altars - Four objects located in the corners of the stage. Their attacks will inflict various debuffs on players.
(All stacks are lost after the duration is over.)
Note:
Boss
| Abyss Worshiper | ||
|---|---|---|
| Mysterious servants of the Abyss. | ||
| Boss Attacks | Tips | |
|
|
||
|
| ||
|
|
| |
|
|
||
|
|
| |
|
|
| |
- Phase 2
Dialogue
- Vasili: I'll go first and leave a trail. Keep your eyes open.
- Lu: Ugh, Abyss Worshippers! Even here...
- Red Demon King's Eye: Oh? Lu, do you see those altars?
- Red Demon King's Eye: Demonic energy is gathering there. We should keep an eye on those.
- Abyss Worshiper: ...eno eht ton era uoy.
- Abyss Worshiper: ysae eb tnow ti tub... pots ton lliw ew.
{{
}}
| Image | Name | Boss | Character | Stats | Set Effects |
|---|---|---|---|---|---|
|
Accessory (Support Unit): |
2 Pieces:
3 Pieces:
|
{{
}}
Trivia
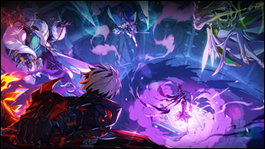
- The characters featured on the loading screen are Aether Sage, Daybreaker, Rage Hearts and Bluhen.
Updates
| Date | Changes | ||
|---|---|---|---|
| KR | NA | ||
| 08/04/2022 | 08/31/2022 |
| |
| 08/11/2022 | 8/31/2022 |
| |
| 09/11/2022 | 9/28/2022 |
| |
| 01/19/2023 | 02/15/2023 |
| |
| 09/12/2024 | 09/25/2024 |
| |
| 04/24/2025 | 05/22/2025 |
| |
Alternative Names
{{
}}
| Server | Name | Translation |
|---|---|---|
| South Korea | 매몰된 성전 | Buried Temple |
| China (Simplified Chinese) | 被埋没的神殿 | Buried Temple |
| Germany | Flüsternde Krypta | Whispering Crypt |
| Spain | Cripta susurrante | Whispering Crypt |
| France | Crypte des murmures | Crypt of Whispers |
| Italy | Cripta dei sussurri | Crypt of Whispers |
| Poland | Szepcząca Krypta | The Whispering Crypt |
| Brazil | O Cofre Sussurrante | The Whispering Vault |
Regions
- Region 19~22
| Abyss | Monaterra | Serpentium | Doom Aporia | ||
|---|---|---|---|---|---|
| {{ }} | {{ }} | {{ }} | {{ }} |
- Region 1~6
- Region 7~12
- Region 13~18
- Laby
- Noah
- Lithia
- Other
- Miscellaneous
