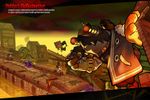
Velder's Hallucination

Velder's Hallucination
| “ | Joaquin's trap is elaborately prepared, Velder's Hallucination is a place where you cannot wake up from your dream.
|
” |

- 5 weekly entries permitted. Entry count is shared with other Secret Dungeons.
- Must be Level 99 or higher.
| Monster Image | Monster Description | Monster Moves |
|---|---|---|
  |
Bloody Uno Hound - This is a smaller variant of Uno Hound. It will use the same moves that the regular Uno Hound will and possesses much more attack speed. |
|
  |
Bloody Glitter Spearman - This is a stronger variant of the Glitter Guard that you have encountered throughout Velder. |
|
  |
Bloody Glitter Sniper - This is a stronger variant of the Glitter Sniper that you have encountered throughout Velder. |
|
  |
Bloody Glitter Defender - This is a stronger variant of the Glitter Defender that you have encountered throughout Velder. |
|
  |
Puppet Stone - These are the red puppets that you have encountered when you fought against Crazy Puppet. |
|
  |
Bloody Glitter Bomber - This is a stronger variant of the Glitter Rock Thrower. But instead of rocks, this Glitter holds a case full of bombs on their back and is no longer immobile. |
|
.png)  |
Joaquin's Hallucination - During this stage, you will encounter Crazy Puppet as a hallucination. |
|
  |
Zombie Glitter Grave - A set of coffin which Zombie Glitters spawn from, they have a significantly large amount of HP. |
|
  |
Zombie Glitter - As the name would suggest, this is a reanimated Glitter corpse. |
|
| Monster Image | General Description | General Moves |
|---|---|---|
  |
Awakened Bloody Spear Glitter - This is one of the Elite Glitter that you will encounter. |
|
  |
Awakened Bloody Magic Glitter -This is the third Elite Glitter that you will encounter. |
|
Player Potions
As you progress through the dungeon, you will encounter various cauldrons filled with potions. If you destroy them, you will receive the effects based off of what potion you just destroyed.
 Self BuffGiant Brew: Your character size will increase substantially (and so do your attacks) and you will receive a 100% critical hit buff for its duration.
- Although the effects of the potions normally disappear after the room in which they're acquired is cleared, if an Infinity Sword uses Phantom Sword while the potion is active, the Sword maintains the increased size afterward.
 Self BuffOptical Brew: Your character will have the ability to instantly kill enemies, when you touch them or hit them (except for Crazy Puppet/Joaquin's Hallucination) for its duration.
Mob Potions
Most Bloody Glitter monsters (Except Bloody Glitter Bomber) are capable of drinking potions whenever their health reaches about 60%. In Luto Mode, they will drink their potions at 70% HP. After drinking their potions, they will receive various effects.
- Red Smoke - Increasing their size and 100% critical chance.
- Yellow Smoke - Granting them super-armored status.
- Blue Smoke - Increasing their mana regeneration rate.
- Only Bloody Spear Glitter, Bloody Sniper Glitter, Bloody Magic Glitter, as well as their Awakened General variants will consume blue potions.
They will have 90% damage reduction and super armor when they are drinking a potion but this can be prevented by using a launching attack or skill (getting Freeze or Petrified can work too to prevent drinking a Potion) just as they would normally drink a potion. Sometimes they will gain the effect of the potion anyways when launched, though the animation for drinking the potion will still be skipped.
}}- As you progress through the dungeon, you will re-encounter previous opponents that will try to stop you. They only appear in the background, meaning you cannot attack them or stop them from attacking.
| Obstacles Image | Obstacles Description |
|---|---|

|
Crazy Puppet - Will ignite a small fire on the field that burns anyone within. |

|
Joaquin - Will create obstacles that do damage and block your path. He can throw Puppet Stones onto the field and create portals to uplift buildings from the ground or drop them from the air. |
| Monster Image | Boss Description | Boss Moves | |||||||||||||
|---|---|---|---|---|---|---|---|---|---|---|---|---|---|---|---|
  |
Joaquin's Hallucination - The mad scientist Glitter that drugged you into his nightmarish trap. Finish him off at the end the illusion. |
Notes:
| |||||||||||||
- Elsword
- Elsword: -
- Elsword: -
- Elsword: -
- Aisha
- Rena
- Raven
- Eve
- Chung
- Ara
- Elesis
- Add
- Lu/Ciel
- Rose
- Ain
| Image | Item Name | How to Obtain | Effect |
|---|---|---|---|

|
Barrier's Fragment | Obtained by playing the dungeon. | Quantity: 100
Throw at A tree imbued with the El energy to gain rewards. |

|
El Reward | Obtained by playing the dungeon. | Quantity: 5
Exchange for rewards at Ariel. |

|
ED | Obtained by playing the dungeon. | ED Gain: 10,000,000 |

|
EXP | Obtained by playing the dungeon. | EXP Gain: 200,000,000 |
-
-
-
-
-
Old loading image.
-
Old Dungeon Button of Velder's Hallucination.


| Date | Changes | |
|---|---|---|
| KR | NA | |
| 11/09/2023 | 12/06/2023 |
|
| 10/10/2024 | 11/06/2024 |
|
| Server | Name | Translation |
|---|---|---|
| 환각의 벨더 | Velder's Hallucinations | |
| 幻惑のベルダー | Dazzle of Velder | |
| 秘境班德 | Belder's Fam | |
| 拜德幻境 | Velder's Hallucination | |
| Halluzinationen in Belder | Hallucinations in Belder | |
| Alucinaciones en Bélder | Hallucinations in Belder | |
| Hallucinations à Belder | Hallucinations in Belder | |
| Allucinazioni a Belder | Hallucinations in Belder | |
| Halucynacje w Belder | Hallucinations in Belder | |
| Hallucinations in Belder | ||
| Alucinação de Velder | Velder's Hallucination | |
- Other
- Region 1~6
- Region 7~12
- Region 13~18
- Region 19~22
- Laby
- Noah
- Lithia
- Miscellaneous
- Other
- Region 1~6
- Region 7~12
- Region 13~18
- Region 19~22