Espace-temps d'Henir

From Elwiki


Espace-temps d'Henir

« 
Espace-temps d'Henir. Là où règne le chaos t'attend un défi encore plus grand...
 »
Description
Anciennement Espace-temps d'Ymir et Espace-temps de Tokar.

Ce talentueux magicien a été banni dans l'Espace-temps d'Henir en raison de sa vanité.

Ce donjon permet de combattre les grands boss d'Elsword.

Dans ce donjon, vous pouvez obtenir des Cristaux de l'espace-temps qui peuvent être échangés auprès de Glave pour des objets ou équipements spéciaux.

L'Espace-temps d'Henir peut être joué autant de fois que le joueur veut mais il ne peut obtenir de récompenses que pour les 3 premiers donjons joués.

  • Si le donjon échoue à charger ou que vous vous déconnectiez lors du chargement, un donjon avec récompenses sera quand même compté.
  • Après les 3 donjons avec récompenses du jour faits, vous n'obtiendrez plus de Cristaux de l'espace-temps, d'objets ou de PP pour les autres donjons mais vous pouvez toujours compléter la quête du jour.
  • Tous les boss ont 30% de défense (besoin de confirmation).
Règle du mode normal
{{
  • Consommable : utilisable
  • Résurrection : permise
  • Monture : utilisable
  • Mort de tous les joueurs : échec
  • Les membres de groupe morts seront ressuscités dans leDead party members will be revived upon party entering Rest Area stage.
  • Boss Level : Average level of the highest and lowest leveled players that are within 5 levels of the highest leveled character in party rounded down to the nearest whole level.
}}
Challenge Mode Rules
{{
  • Consumable(s) : Disabled
  • Resurrection(s) : Not Allowed
  • Mounts: Disabled
  • Death of party/solo : Fail
  • Dead party members will be revived upon party entering Rest Area stage.
  • Boss Level : Average level of the highest and lowest leveled players that are within 5 levels of the highest leveled character in party rounded down to the nearest whole level.
}}
Story
{{

A phenomenon called Henir's Time and Space lies in a temple called Seven Tower, where sages were known to dwell. The land it stands on was discovered in the olden days. This discovery brought about the emergence of magical skills, and led to the temple being built. Legend has it that the god Henir endured Ragnarok, and afterwards created a place where there is no limitation of time and space. Here, he is able to see the rise and fall of the world. Should you reach this place, by Henir's force, you are bound to face the enemies you have met in the past and those you are destined to meet in the future.

It has been said that a person overcoming this test can meet Henir and acquire an immense power. However, as the power of El began to decrease, the entrance of Henir's Time and Space has suddenly appeared in several places. Elsword and the rest of the gang decide to enter this mysterious dungeon in attempts of gaining the legendary power and using it to take back the missing El.

}}
Map Layout
{{

Consists of 24 consecutive boss rooms with one rest area after stage 15. Bosses are now selected randomly in any order each week with secret dungeon bosses in room 2, 17, and 20.

}}
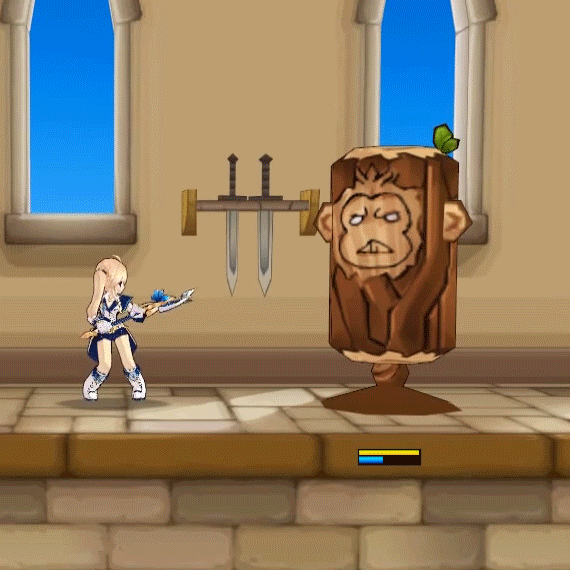
Boss Set List
Bethma Selection
{{
  • Berauk (x1), Dark Berauk (x1), Kayak the Shaman (x1)
}}
Altera Selection
{{
  • Raven (x3)
  • Wally No. 8 MK2 (x1), Crow Rider (x2)
  • Code: Q-PROTO_00 (x1), Apple (x1)
}}
Feita Selection
{{
  • Durahan Knight (x1), Teach the Tyrant (x1)
  • Berthe (x2)
  • Proxy the Nimble (x1), Wise Dutor (x1), Assaulter Crash (x1)
}}
Velder Selection
{{
  • Uno Hound (x1), Chloe (1x)
  • Spriggan (x2)
  • Stealthy Morfos (x1), McGard the Blitzkrieg (x1), Polka (x1), Invincible Vardon (x1), Sullen Hoakin (x1)
}}
Hamel Selection
{{
  • Shadow Master (x2)
  • Victor (x2)
  • Magmanta (x2)
  • Ran (x2)
  • Shadow Stinger (x1), Bizarre Conrad (x1), Fallen Chloe (x1), Giant Hammer Bobosse (x1)
}}
Sander Selection
{{
  • Giant Waldo (x2)
  • Chieftain Trockta (x2)
  • Great Battle Chief Karu (x2)
  • Karis (x2)
  • Karis' True Form (x1)
  • Fierce Stone Axe Bootru (x1), Dark Wing Okypete (x1), Battle Chief Tariq (x1), Battle Chief Tuadin (x1), Succubus : Erilot (x1)
}}
Lanox Selection
{{
  • Dryad Kenta (x2)
  • Iron Anvil Sdeing (x2)
  • Traitor Ignia (x1), Berserker Armageddon (x3), Steel Lava Fighter, Steel Lava Berserker
  • Iplitan (x2)
  • Demon General Scar (2x)
  • Entranced Demon Jin (x1), Enslaved Demon In (x1)
}}
Elysion Selection
{{
  • Science Dekal (x1), Dekal (x1)
  • CODE-Maya (x2)
  • Herna Over (x1), Herna Shield (x1)
  • Herbaon (x1)
}}
Secret Dungeon Selection
{{
  • Kayak the Shadow Shaman (x1), Ancient Bone Dragon (x1)
  • Alterasia Type-H (x1)
  • Joaquin's Hallucination (x1)
  • Fallen Guardian: Helputt (x1)
  • Enraged Manifestation (x1)
  • Form of Mutated Demonic Energy (x1)
}}
Rest Area Buffs
{{

Rest Areas will restore a fixed percentage of HP and MP. Each rest area after the first will restore a bit less HP\MP than the previous one.

Rest Areas will also have a chance of giving every player a special buff at random as follows:

Note

  • Light Buff is mislabeled in this image, it is an Attack Power boost.
  • In the image it doesn't give a duration for Dark Buff as that is instantaneous.
}}
Guide for Players
{{

Basics

Be equipped to your best ability.

Expand
  • Bring at least +6 weapons, have least 18% attack speed, bring lots of mana potions, craftable potions and/or 30% HP potions from Camilla, and most importantly, high DPS skills.

In Henir there are multiples of most enemies. Generally as a first priority, you would want to group the enemies if conveniently possible.

Expand
  • By grouping enemies together, you can effectively multiply your damage output.
  • A grouped enemy is usually much easier to defend against since you will only need to focus your attention on a single area.

Be considerate of your party mates.

Expand
  • Do not purposely knock down bosses that have high knockdown damage reductions. (This includes everything past Feita Set)
  • Do not use Bravery skills at Berthe.
  • Magmanta will escape after 60 hits when it is not super armored, do not use weak multi-hit skills that will cause it to escape like awakened Plasma Cutter, or Cyclone.
  • Some skills like Gungnir and Shooting Star have a long skill delay which is needed to hit enemies, do not interrupt it with a short skill delay if it will interfere with the skill.

Have an understanding of how each boss fights before challenging Henir's Time and Space.

Expand
  • There is information on every boss you can encounter in this wiki. If you are unfamiliar with any, you can read up on their skills and attacks as well as their weaknesses.
  • However there are some bosses that operate differently in Henir. These include:
    • No boss will have any displayed text warnings when they use a special attack.
      • This can make Joaquin's Hallucination skill much harder to spot, especially if he is in dwarf mode.
    • Uno Hound's regeneration is a fixed rate not dependent on its maximum HP. In Challenge mode, it will regenerate extremely fast.
    • Chloe's summoning of Dark Elves is time based in here. They will all do it at the same time if the fight is prolonged.
}}
Rewards
{{

After completing a run, you will receive Time and Space Crystals. These will be used for crafting Henir equipment or exchanging for other rewards at Glave.
In addition, certain titles can be obtained from completing Henir on Challenge mode. When you play in Challenge mode and quit the dungeon at the rest areas, you and your playtime will be placed on the leaderboards. Titles will only be awarded to Ranks 1 through 100 with the exception of Monthly Ranking, which will only be rewarded to Ranks 1 through 10.

{{

Area Reward for Exiting Reward for Failing Area Reward for Exiting Reward for Failing
Material Amount Material Amount Material Amount Material Amount
Stage 1 2 0 Stage 16 32 30
Stage 2 4 2 Stage 17 34 32
Stage 3 6 4 Stage 18 36 34
Stage 4 8 6 Stage 19 38 36
Stage 5 10 8 Stage 20 40 38
Stage 6 12 10 Stage 21 42 40
Stage 7 15 12 Stage 22 45 42
Stage 8 17 15 Stage 23 70 45
Stage 9 19 17 Stage 24 70 70
Stage 10 21 19
Stage 11 23 21
Stage 12 25 23
Stage 13 27 25
Stage 14 30 27
Stage 15 30 30
}}
}}
Henir Equipment
  • 1st Dimension
  • 2nd Dimension
  • 3rd Dimension
  • 4th Dimension

{{

Image Name Item Grade Additional Effects Set Bonus
1st Dimension Weapon Item Level: 97
Required Level: 80
[Unidentified * ?]
Critical +2%
Add. Damage +2%

2 Pieces Effect:

  • Resistance to All Attributes +20
  • All weapons Element attributes +0.2%

3 Pieces Effect:

  • MP Recovery Rate +2%
  • Add. Damage +1%

4 Pieces Effect:

  • Critical +1%
  • Action Speed +1%
  • Damage Reduction +2%

5 Pieces Effect:

  • 1% chance of Double Attack (excluding Special Actives)
  • +2% Physical Attack Power
  • +2% Magical Attack Power
1st Dimension Top Piece HP Increase +3%
1st Dimension Bottom Piece Damage Reduction +1%
1st Dimension Gloves Action Speed +1%
1st Dimension Shoes Movement Speed +3%
Jump Speed +3%
}}
Videos
{{
}}
BGM
Lobby - space_henir
Possible Bug/Glitches
{{

This is a list of possible bugs/glitches that might be encountered inside Henir's Time and Space:

  • Berthe roars at all special actives more than 200 MP, not just 250+ MP skills (except Hyper actives).
  • Players can be teleported onto Ran's platform before he teleports to the main platform due to loading problems. It's rare but possible that a player can become stuck on the side platform until the end of the fight.
  • Both Ran's might revive after defeating both of them, basically restarting the fight.
}}
Alternative Names
{{
Server Name Translation
South Korea 헤니르의 시공 Henir's Time and Space
Taiwan (Traditional Chinese) 赫尼爾時空 Henir's Time and Space
China (Simplified Chinese) 赫尼尔时空 Henir's Time and Space
Germany Henirs Raumzeit Henir's Space-Time
Spain Espacio-tiempo de Henir Henir's Space-Time
France Espace-temps d'Henir Henir's Space-Time
Italy Spazio Tempo di Henir Henir's Space-Time
Poland Czasoprzestrzeń Henir'a Henir's Time-Space
United Kingdom Henir's Time-Space Continuum
Brazil Tempo e Espaço de Henir Henir's Time and Space
}}


Donjons