|
|
| (12 intermediate revisions by 6 users not shown) |
| Line 1: |
Line 1: |
| {{Languages|3-2}}
| |
| {{DISPLAYTITLE:3-2 : Lac de Besma}} | | {{DISPLAYTITLE:3-2 : Lac de Besma}} |
| [[File:3-2FR.png|right]]
| | {{Languages|Bethma Lake}} |
| | | {{DungeonPageFR |
| =Lac de Besma=
| | | Color={{ColorSel|Village|3}} |
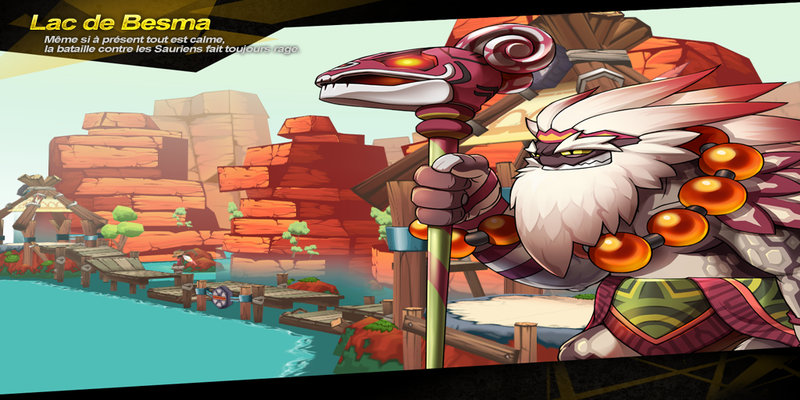
| <center>{{quotation|Your battle against the Lizardmen continues here at peaceful '''Bethma Lake'''.}}</center>
| | | DunButton=3-2Button.png |
| {| width="100%" style="font-size:1em; line-height:1.5em;" | | | SmallPic=3-2FR.png |
| | valign="top" style="border:2px solid #f7812b; border-radius: 1px;"| | | | BigPic=3-2newFR.png |
| {| cellspacing="2" cellpadding="5" rules="all" style="margin:0.5em 0.5em 0.5em 0.5em; empty-cells:show;"
| | | DunName=Lac de Besma |
| |- | | | Quotation=Your battle against the Lizardmen continues here at peaceful '''Bethma Lake'''. |
| |valign="top" width="100%" align="center" style="border:1px solid; border-color:#000000; background: #f7812b; color:#FFFFFF;" colspan="12"| '''Description:''' | | | Description=Bethma Mountain's oasis. It is said to be a Lizardman habitat. |
| |- | | | LvNeed=21-23 |
| |width="100%" colspan="12" align="center" style="border:1px solid; border-color:#000000; font-size:1em; line-height:1.5em;" valign="top"| | | | LvFit=11 |
| Originally, the '''Lizardmen''' were peaceful with the humans, even friends with them. But for some reason, they were enraged and started attacking innocent civilians. [[Besma#Stella|Sheriff Stella]] asks Elsword to go to '''Bethma Lake''' to find out the cause, as the Lizardmen were seen rallying up there.
| | | DunMap={{tabs|name=-|tab1=All Difficulties |contents1=[[File:Bethma Lake Map.png]]}} |
| | | | Mob=<dfn>{{</dfn> |
| The team spots '''Berauk''', the elder of the Lizardmen. But it turns out he was enraged like the Lizardmen too. Having no choice, Elsword and his gang defeat him, only to find that he dropped a '''Hypnotizing Orb'''. Curious, Elsword brings it back to [[Besma#Chacha Buch|Chacha Buch]], the alchemist of Bethma, and a Lizardman himself. It was later revealed that the Hypnotizing Orbs were used to control the Lizardmen.
| | |[[File:3-1-1.jpg|60px]] |
| |-
| | |'''Scorpion''' - An aggressive scorpion that tries to attack you with its pincers and claws. |
| |rowspan="4" | [[File:3-2newFR.png|800px]]
| |
| |align="center" style="border:1px solid; border-color:#000000; background: #f7812b; color:#FFFFFF;" colspan="12" | '''Recommended Level:''' | |
| |-
| |
| | style="border:1px solid; border-color:#000000;" align="center" colspan="12" | 21-23
| |
| |- | |
| | align="center" style="border:1px solid; border-color:#000000; background: #f7812b; color:#FFFFFF;" colspan="12" | '''Appropriate Item Level:'''
| |
| |-
| |
| | style="border:1px solid; border-color:#000000;" align="center" colspan="12" |
| |
| 11 | |
| |- | |
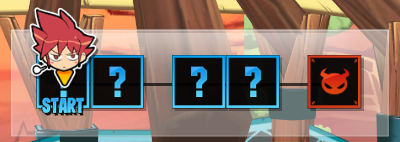
| |valign="top" width="100%" align="center" style="border:1px solid; border-color:#000000; background: #f7812b; color:#FFFFFF;" colspan="12"| '''Dungeon Layout:'''
| |
| |-
| |
| |width="100%" colspan="12" align="center" style="border:1px solid; border-color:#000000; font-size:1em; line-height:1.5em;" valign="top"|
| |
| {{tabs|name=-|tab1=Normal|contents1=[[Image:Pin.png]] |tab2=Hard|contents2=[[Image:Pin.png]] |tab3=Very Hard|contents3=[[Image:Pan.png]]}} | |
| |- | |
| | |
| |valign="top" width="100%" align="center" style="border:1px solid; border-color:#000000; background: #f7812b; color:#FFFFFF;" colspan="12"| '''Vidéo du donjon :'''
| |
| |-
| |
| |width="100%" colspan="12" align="center" style="border:1px solid; border-color:#000000; font-size:1em; line-height:1.5em;" valign="top"|
| |
| <center>Expert</center>
| |
| <center>{{#ev: youtube|RhHmazZy_ac }}</center>
| |
| |- | |
| |valign="top" align="center" style="border:1px solid; border-color:#000000; background: #f7812b; color:#FFFFFF;" width="100%" colspan="12"| '''Mobs:'''
| |
| |-
| |
| | colspan="12" style="border:1px solid; border-color:#000000;" valign="top" width="100%" |
| |
| *[[File:3-1-1.jpg|60px]]
| |
| '''Scorpion''' - An aggressive scorpion that tries to attack you with its pincers and claws. | |
| *[[File:Komodo.jpg|60px]]
| |
| '''Komodo''' - A Komodo that helps the '''Lizardmen''' tribe attack you.
| |
| *[[File:3-1-4.jpg|60px]]
| |
| '''Lizardman''' - A Lizardman Scout. They are the weakest among the '''Lizardmen''', but that still doesn't mean that they aren't dangerous!
| |
| *[[File:3-1-3.jpg|60px]]
| |
| '''Lizardman Saurus''' - A strong and big Lizardman that can really whack a punch at you with its club.
| |
| *[[File:3-2-1.jpg|60px]]
| |
| '''Shaman Lizardman ''' - A skinny lizardmen that is capable of casting spells and healing others.
| |
| |-
| |
| |valign="top" align="center" style="border:1px solid; border-color:#000000; background: #f7812b; color:#FFFFFF;" width="100%" colspan="12"| '''Mini Boss:'''
| |
| |- | | |- |
| | colspan="12" style="border:1px solid; border-color:#000000;" valign="top" width="100%" | | | |[[File:Komodo.jpg|60px]] |
| *[[File:3-2-mboss.jpg|60px]]
| | |'''Komodo''' - A Komodo that helps the '''Lizardmen''' tribe attack you. |
| '''King Armadillo''' - The king of the '''Armadillos''', not to mention the strongest. It's gigantic so stay alert! | |
| |- | | |- |
| | |[[File:3-1-4.jpg|60px]] |
| | |'''Lizardman''' - A Lizardman Scout. They are the weakest among the '''Lizardmen''', but that still doesn't mean that they aren't dangerous! |
| |- | | |- |
| |valign="top" width="100%" align="center" style="border:1px solid; border-color:#000000; background: #f7812b; color:#FFFFFF;" colspan="12"| '''Obstacles:''' | | |[[File:3-1-3.jpg|60px]] |
| | |'''Lizardman Saurus''' - A strong and big Lizardman that can really whack a punch at you with its club. |
| |- | | |- |
| |width="100%" colspan="12" style="border:1px solid; border-color:#000000; font-size:1em; line-height:1.5em;" valign="top"| | | |[[File:3-2-1.jpg|60px]] |
| *[[File:3-2-trap.jpg|60px]]
| | |'''Shaman Lizardman ''' - A skinny lizardmen that is capable of casting spells and healing others. |
| '''Totem''' - An inert Totem that stands still. But don't get too close to it or else fire will come out of its mouth straight at you!<br> | | <dfn>}}</dfn> |
| |- | | | MiniBoss=<dfn>{{</dfn> |
| |valign="top" width="100%" align="center" style="border:1px solid; border-color:#000000; background: #f7812b; color:#FFFFFF;" colspan="12"| '''Boss:'''
| | |[[File:3-2-mboss.jpg|60px]] |
| |- | | |'''King Armadillo''' - The king of the '''Armadillos''', not to mention the strongest. It's gigantic so stay alert! |
| |width="100%" colspan="12" style="border:1px solid; border-color:#000000; font-size:1em; line-height:1.5em;" valign="top"|
| | | |
| *[[File:3-2-boss.jpg|60px]]
| | <dfn>}}</dfn> |
| '''Berauk''' - The Elder of the '''Lizardmen'''. Although he is wise and understanding, he has suddenly been enraged and uses his magic to try and attack you. | | | Obstacle=<dfn>{{</dfn> |
| <br>
| | |[[File:3-2-trap.jpg|60px]] |
| '''Moves:'''
| | |'''Totem''' - An inert Totem that stands still. But don't get too close to it or else fire will come out of its mouth straight at you! |
| <br>
| | <dfn>}}</dfn> |
| | | Boss=<dfn>{{</dfn> |
| | |[[File:3-2-boss.jpg|60px]] |
| | |'''Berauk''' - The Elder of the '''Lizardmen'''. Although he is wise and understanding, he has suddenly been enraged and uses his magic to try and attack you. |
| | | |
| -''Energy Ball:'' Berauk fire a ball of energy at you. | | -''Energy Ball:'' Berauk fire a ball of energy at you. |
| <br> | | <br> |
| Line 89: |
Line 57: |
| -To Dodge : If he is on a separate plane, you can just move to the opposite one to avoid it. If you are on the same plane, try to rush where a near by '''Thunder''' has hit last. You can also push Berauk a couple paces (with skills like [[Kick]] or [[Fury Guardian]]'s >>ZZ) and stand where he was previously standing. | | -To Dodge : If he is on a separate plane, you can just move to the opposite one to avoid it. If you are on the same plane, try to rush where a near by '''Thunder''' has hit last. You can also push Berauk a couple paces (with skills like [[Kick]] or [[Fury Guardian]]'s >>ZZ) and stand where he was previously standing. |
| <br> | | <br> |
| -This Boss has a stoic threshold of 30 hits. | | -This Boss has a stoic threshold of 20 hits. |
| |-
| | <dfn>}}</dfn> |
| |valign="top" align="center" style="border:1px solid; border-color:#000000; background: #f7812b; color:#FFFFFF;" width="50%" colspan="6"| '''Boss Drops:'''
| | | BDrop={{:3-2Bdrop1}} |
| |valign="top" align="center" style="border:1px solid; border-color:#000000; background: #f7812b; color:#FFFFFF;" width="50%" colspan="6"| '''BGMs:'''
| | | SBGM=[http://www.youtube.com/watch?v=DwibAlaIZkk '''''music019_stage'''''] |
| |-
| |
| | colspan="6" style="border:1px solid; border-color:#000000;" valign="top" width="50%" | | |
| {{:3-2Bdrop1}} | |
| | colspan="6" style="border:1px solid; border-color:#000000;" valign="top" align="center" width="50%" | | |
| === Dungeon ===
| |
| [http://www.youtube.com/watch?v=xAVrtxgBcFs '''''music019_stage'''''] | |
|
| |
|
| === Boss ===
| |
| [http://www.youtube.com/watch?v=7aETncBI-1U '''''music009_boss'''''] | | [http://www.youtube.com/watch?v=7aETncBI-1U '''''music009_boss'''''] |
| |- | | | Video=[http://www.youtube.com/watch?v=J7chZRE2Kuw '''Click here for Bethma Lake Video'''] |
| |valign="top" width="100%" align="center" style="border:1px solid; border-color:#000000; background: #f7812b; color:#FFFFFF;" colspan="12"| '''Videos:'''
| | }} |
| |-
| |
| |width="100%" colspan="12" align="center" style="border:1px solid; border-color:#000000; font-size:1em; line-height:1.5em;" valign="top"|
| |
| [http://www.youtube.com/watch?v=J7chZRE2Kuw '''Click here for Bethma Lake Video'''] | |
| |}
| |
| |}
| |
| <br>
| |
| | |
| {{Donjons}}
| |


