Solace's Fortress
From Elwiki

Information: This article is currently under development. Please be patient while we're adding the finishing touches!


Solace's Fortress
| “ | Solace's Fortress.
|
” |

Dungeon Layout

Ally
{{
}}
| Ally Image | Ally Description |
|---|---|

|
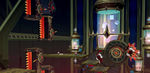
Herbaon - Defend Herbaon as he opens the gates into the fortress's deepest corridors.
|
Mobs
{{
}}
| Monster Image | Monster Description | Monster Moves |
|---|---|---|

|
??? - A corrupted Hernacyd Fear. |
|
|
|
??? - A more powerful lance wielding angel Hernacyd. |
|
|
|
??? - A more powerful magician like angel Hernacyd who attacks with energy rather than a weapon. |
|
|
|
??? - A more powerful large hammer wielding angel Hernacyd. |
|
|
|
??? - A more powerful bow wielding angel Hernacyd archer. |
|
|
|
??? - A floating corrupted Hernacyd. |
- |
|
|
??? - A Hernacyd which can cloak itself as well as fire laser in cross shapes. |
- |
Mini Boss
{{
}}
| Monster Image | Boss Description | Boss Moves |
|---|---|---|
|
|
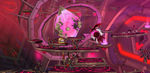
COPY_S - A duplicate of CODE-Maya. |
|
|
|
??? - The core device, destroy this and COPY_S will cease to function. |
(None) |
Obstacles
{{
}}
| Obstacles Image | Obstacles Description |
|---|---|
|
|
Lasers - Powerful lasers which fire out at players. Do not provide hitstun but hit many times. |
|
|
Draining Lasers - A laser that deals continuous damage to players and completely drains players MP. |
|
|
Lava - Molten minerals in containers all around Solace's Fortress, will deal continuous damage to those standing on it. |
|
|
Portal - Portals which will take players to different parts of the fortress. |
|
|
Moving Platforms - Platforms that are not in a fixed position and will travel in a variety of patterns. |
|
|
Dark Fan - Moving devices which deal multiple hits and drag players. |
|
|
Spike Pump - Mechanical devices that function as moving platforms and extremely spiky hazards. |
|
|
Dark Surveillan - A remodeled Surveillan has been stationed inside Solace's Fortress, much like its previous incarnation will snipe players from the background. However will only fire once per round instead of three time. |
|
|
Light Scabbard - A giant scabbard than can only be harmed with combos. |
|
|
Dark Scabbard - A giant scabbard that can only be harmed with skills. |
|
|
Energy Bolt - A giant laser stream of electricity that will creep up on players slowly.
|
Boss
{{
}}
| Monster Image | Boss Description | Boss Moves |
|---|---|---|

|
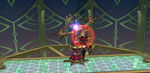
Solace - The Master of the Sun. The one responsible for the disappearance on the El Lady and the El Explosion. |
Upon the start of the fight, Solace's health bar will be engulfed by the [Mark of Judgement]. The mark will change depending on the outcome of [Judgement] moves.
|

|
Solace (Phase 2) - Solace, unmasked, in a dimension of his own creation. |
Solace is able to use all the abilities from Phase 1 with the exception of [Judgement] Darkness Flame.
|
Dialogue
{{
}}


Gallery
-
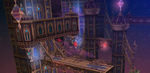
Outer labs.
-
Outer labs.
-
COPY_S.
-
Corridor to the inner area.
-

Solace.
-

Solace.


Alternative Names
{{
}}
| Server | Name | Translation |
|---|---|---|
| 솔레스의 요새 | Solace's Fortress |