Temple of Trials: Difference between revisions

From Elwiki
No edit summary
No edit summary
 
(111 intermediate revisions by 18 users not shown)
Line 1: Line 1:
{{Languages|6-x}}
{{Languages|Temple of Trials}}
[[File:6-X.png|right]]
{{DungeonPage
 
| Orient=Other
=Temple of Trials=
| Color={{ColorSel|Village|7}}
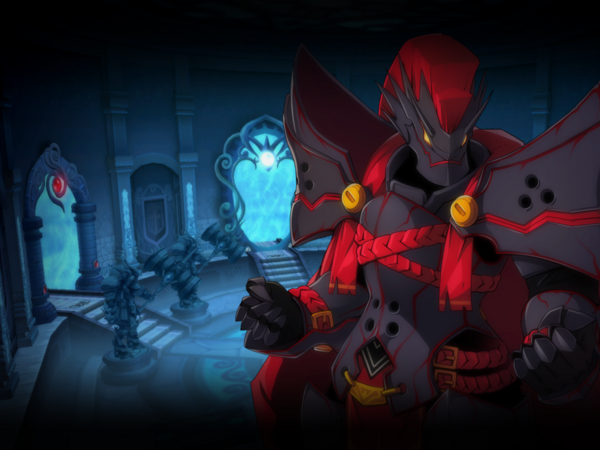
<center>{{quotation|'''Temple of Trials'''. A hidden place surrounded by suspicion. We need to save the fallen White Colossus.}}</center>
| DunButton=7-XButton.png
{| width="100%" style="font-size:1em; line-height:1.5em;"
| SmallPic=6-X.png
| valign="top" style="border:2px solid #007be4; border-radius: 1px;"|
| BigPic=7-Xnew2.png
{| cellspacing="2" cellpadding="5" rules="all" style="margin:0.5em 0.5em 0.5em 0.5em; empty-cells:show;"
| DunName=Temple of Trials
|style="font-size: 1em; font-weight: bold; text-align: center; text-shadow: 1px 1px 1px black; border-bottom: 1px #000; border-style: solid; background-color: #007be4; background-image: linear-gradient(to bottom, lightgray 0%, #007be4 100%);" colspan="12" | <font color="white">'''Description:'''</font>
| Quotation=A hidden place surrounded by suspicion. We need to save the fallen White Colossus.
| Description=The shrine is at the end of Hamel, a hidden place unknown to anyone. Rumor has it, there lies the power of the Guardian Stone.
| LvNeed=99
| LvFit=1500000
| XEntryReq=<dfn>{{</dfn>
*5 weekly entries permitted. Entry count is shared with other Secret Dungeons.
*Must be Level 99 or higher.
<dfn>}}</dfn>
| Ally=<dfn>{{</dfn>
|[[File:Sasha6-X.png|60px]]
|'''[[Sasha|Water Priestess Sasha]]''' - When you start this dungeon, there will be an NPC named Sasha. She will follow the El Search Party and tell you what the Temple of Trials is.
|
*'''Heal:''' Sasha heals 10% of your max HP.
*'''Water Shield:''' Sasha gives you a shield that 25% Damage Reduction for up to 3 hits.
*'''Fully Heal:''' After each trial, she will fully heal your HP when you go back to the start in order of the Trials.
<dfn>}}</dfn>
| AllyATK=true
| Mob=<dfn>{{</dfn>
*All mobs except Ancient Magmanta can activate stoic after 30 hits.
|[[File:BrutalWalkerHead.png|60px]]
|'''Brutal Walker''' - Same as '''Shadow Port Walker''' but will be in super armor during first and last hit.
|
*'''Claw Attack:''' A basic 3 hit combo with their claws.
|-
|-
|width="100%" colspan="12" align="center" style="border:1px solid; border-color:#000000; font-size:1em; line-height:1.5em;" valign="top"|
|[[File:BrutalDefenderHead.png|60px]]
The Water Priestess Sasha guides the El-team to where [[Chung]]'s father, Helputt, is being held captive. To purify Helputt from the demon's grasp, the El-team need to clear 3 trials and get special items.
|'''Brutal Defender''' - An enhanced version of '''Shadow Port Defender'''.
|
*'''Shadow Spear:''' It will launch spears in and arc towards you. When a player gets hit by the spears, they will be Cursed and will gradually lose mana over time.
*'''Dark Aura:''' Emit a dark aura that gives enemies within range super armor.
|-
|-
|rowspan="6" | [[File:6-xnew.jpg|800px]]
|[[File:BrutalChargerHead.png|60px]]
|style="font-size: 1em; font-weight: bold; text-align: center; text-shadow: 1px 1px 1px black; border-bottom: 1px #000; border-style: solid; background-color: #007be4; background-image: linear-gradient(to bottom, lightgray 0%, #007be4 100%);" colspan="12" | <font color="white">'''Recommended Level:'''</font>
|'''Brutal Charger''' - Same as '''Shadow Port Charger'''.
|
*'''Charge:''' It will run forward, damaging any players within its path.
*'''Grab:''' It can also grab onto any players, immobilizing them. You can escape from their grasp by rapidly tapping the left and right arrow keys.
|-
|-
| style="border:1px solid; border-color:#000000;" align="center" colspan="12" | 60-70
|[[File:BrutalVoiderHead.png|60px]]
|'''Brutal Voider''' - Same as '''Shadow Port Voider'''. Can absorb magical projectiles and use their energy to heal themselves 10% of their maximum HP.
|
*'''Energy Bolt:''' If can charge and fire an energy bolt very similar to Eve's Mega Electron Balls.
|-
|-
|style="font-size: 1em; font-weight: bold; text-align: center; text-shadow: 1px 1px 1px black; border-bottom: 1px #000; border-style: solid; background-color: #007be4; background-image: linear-gradient(to bottom, lightgray 0%, #007be4 100%);" colspan="12" | <font color="white">'''Appropriate Item Level (Normal):'''</font>
|[[File:BrutalTricksterHead.png|60px]]
|'''Brutal Trickster''' - Same as '''Shadow Port Trickster'''.
|
*'''Wind Totem:''' A blue totem that creates a sphere of wind that increases the stats of the mobs.
*'''Fire Totem:''' A red totem that emits homing fireballs.
*'''Lightning Bolt:''' The Trickster shoots a bolt of lightning out of his hands.
|-
|-
| style="border:1px solid; border-color:#000000;" align="center" colspan="12" | 75
|[[File:TwinkyLinkerHead.png|60px]]
|'''Twinky Linker''' - Same as '''Shadow Linker''' but instead will using Soul Link this mobs now can use Lightning.
|
*'''Lightning Bolt:''' The Linker shoots a bolt of lightning out of his hands.
<dfn>}}</dfn>
| General=<dfn>{{</dfn>
|[[File:ColdheartedBrutalWalkerHead.png|60px]]
|'''Cold-hearted Brutal Walker''' - A powerful '''Brutal Walker''' that is stronger and has substantially more health.
|
*'''Claw Attack:''' A basic 3 hit combo with their claws.
'''Notes:'''
*Has a stoic threshold of 30 hits.
|-
|-
|style="font-size: 1em; font-weight: bold; text-align: center; text-shadow: 1px 1px 1px black; border-bottom: 1px #000; border-style: solid; background-color: #007be4; background-image: linear-gradient(to bottom, lightgray 0%, #007be4 100%);" colspan="12" | <font color="white">'''Appropriate Item Level (Hell):'''</font>
|[[File:ColdheartedBrutalStingerHead.png|60px]]
|'''Cold-hearted Brutal Stinger''' - A powerful '''Brutal Stinger''' that is stronger and has substantially more health.
|
*'''Forward Spikes:''' Jabs you with a few spikes when you stand in front of it. Hits multiple times and pushes backwards for some distance
*'''Spike Ball:''' Extends all the spikes on it, impaling anything nearby. Induces KD.
*'''Spike Fall:''' Jumps into the air and turns upside down as it's turning its head into a giant spike before making a sharp fall, tends to do this to attack players through platforms. Induces KD.
*'''Crystal Stinger:''' Brings forth a crystal in its chest to poke you with it. Does moderate damage. Induces KD.
'''Notes:'''
*Has a stoic threshold of 30 hits.
|-
|-
| style="border:1px solid; border-color:#000000;" align="center" colspan="12" | 90
|[[File:ColdheartedBrutalCharger_Face.png|60px]]
|'''Cold-hearted Brutal Charger''' - A powerful '''Brutal Charger''' that is stronger and has substantially more health.
|
*'''Slap:''' It will swing its arms and slap nearby players.
*'''Charge:''' It will run forward, damaging any players within its path.
*'''Grab:''' It can also grab onto any players, immobilizing them. You can escape from their grasp by rapidly tapping the left and right arrow keys.
'''Notes:'''
*Has a stoic threshold of 30 hits.
|-
|-
|style="font-size: 1em; font-weight: bold; text-align: center; text-shadow: 1px 1px 1px black; border-bottom: 1px #000; border-style: solid; background-color: #007be4; background-image: linear-gradient(to bottom, lightgray 0%, #007be4 100%);" colspan="12" | <font color="white">'''Entry Requirements:'''</font>
|[[File:ColdheartedBrutalDefenderHead.png|60px]]
|'''Cold-hearted Brutal Defender''' - A powerful '''Brutal Defender''' that is stronger and has substantially more health.
|
*'''Slap:''' They now can attack from a stationary position.
*'''Shadow Spear:''' It will launch spears in and arc towards you. When a player gets hit by the spears, they will be Cursed and will gradually lose mana over time.
*'''Dark Aura:''' Emit a dark aura that gives enemies within range super armor.
'''Notes:'''
*Has a stoic threshold of 30 hits.
<dfn>}}</dfn>
| MiniBoss=<dfn>{{</dfn>
|[[File:ShadowPriestHead.png|60px]]
|'''Shadow Priest (2x)''' - A [[Resiam Outskirts|Shadow Master]] who's using its dark powers to restrain Helputt.
|
*'''Shadow Swipe:''' He will drag you towards him and then swipes at you. Throws you upwards for some distance.
*'''Dark Explosion:''' He blows you up as he clenches his fist. Unlike Shadow Master instead of instantly attacking a target he will explode, blowing away nearby targets.
*'''Shadow Storm:''' Summon a few dark spheres to rain down, far less compared to that of Shadow Master.
'''Notes:'''
*Has a stoic threshold of 30 hits.
*Does very low damage.
|-
|-
|width="100%" colspan="12" style="border:1px solid; border-color:#000000; font-size:1em; line-height:1.5em;" valign="top"|
|[[File:Corrupt_Destroyer_Helputt.png|60px]]
 
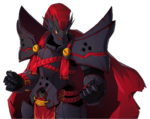
|'''[[Helputt|Fallen Guardian: Helputt]]''' - [[Chung]]'s father, who is being controlled by the demons. His fighting stance and style is similar to that of [[Chung]]. He cannot be defeated and will finish you off with a near fatal attack.
*Complete all dungeons in Hamel on Very Hard.
|
*Have a Luto's Pass in your inventory. (2 Luto's Passes is needed when entering Hell mode)
*'''[[Iron Paladin]] Commands:''' He will use his Destroyer to mimic Chung's combos, such as ZZZX, XXX, XXZX, and [[Iron Paladin]]'s ZZX.
*Must be Level 60 or higher.
**Helputt will always have the [[Land Demolisher - Heavy Arms|Land Demolisher]] buff active passively.
|-
|style="font-size: 1em; font-weight: bold; text-align: center; text-shadow: 1px 1px 1px black; border-bottom: 1px #000; border-style: solid; background-color: #007be4; background-image: linear-gradient(to bottom, lightgray 0%, #007be4 100%);" colspan="12" | <font color="white">'''Ally:'''</font>
|-
|width="100%" colspan="12" style="border:1px solid; border-color:#000000; font-size:1em; line-height:1.5em;" valign="top"|
*[[File:Sasha6-X.png|60px]]
'''Water Priestess Sasha''' - When you start this dungeon, there will be an NPC named Sasha. She will follow the El Search Party and tell you what the Temple of Trials is. If you have received damage, she will heal 10% of your max HP and give you 25% Reduced Damage for up to 3 hits. She will stop following you after the first encounter with Helputt. After each trial, she will fully heal your HP when you go back to the start in order of the Trials. This NPC cannot be hit by monsters.
|-
|style="font-size: 1em; font-weight: bold; text-align: center; text-shadow: 1px 1px 1px black; border-bottom: 1px #000; border-style: solid; background-color: #007be4; background-image: linear-gradient(to bottom, lightgray 0%, #007be4 100%);" colspan="12" | <font color="white">'''Mobs:'''</font>
|-
| colspan="12" style="border:1px solid; border-color:#000000;" valign="top" width="100%" |
*[[File:Dunno.png|60px]]
'''Brutal Walker''' - Same as '''Shadow Port Walker''' but will super armor during first and last hit.
*[[File:Dunno.png|60px]]
'''Brutal Defender''' - Same as '''Shadow Port Defender''' but its Defensive Aura make mobs around itself stoic quickly.
*[[File:Dunno.png|60px]]
'''Brutal Charger''' - Same as '''Shadow Port Charger'''.
*[[File:Dunno.png|60px]]
'''Brutal Voider''' - Same as '''Shadow Port Voider'''.
*[[File:Dunno.png|60px]]
'''Brutal Trickster''' - Same as '''Shadow Port Trickster'''.
*[[File:Dunno.png|60px]]
'''Twinky Linker''' - Same as '''Shadow Linker''' but instead will using Soul Link this mobs now can use Lightning (will super armor) similar to '''Brutal Trickster'''.
*[[File:Dunno.png|60px]]
'''Brutal Stinger''' - Same as '''Shadow Stinger'''.
*[[File:Dunno.png|60px]]
'''Brutal Sniper''' - Same as '''Shadow Sniper''', unlike '''Shadow Port Sniper''' this mob will not aim and will instead shoot straight.
*[[File:Dunno.png|60px]]
'''Brutal Bobosse''' - Same as '''Giant Hammer Bobosse''' but this mob can only use '''Smash''' moves that does not knockdown on last smash.
*[[File:Dunno.png|60px]]
'''Ancient Magmanta''' - Same as '''Magmanta''' but it can only use '''Leg Slash''' and  '''Lunge''' moves.
<br>
'''Note:'''
All mobs except Ancient Magmamta now can activate stoic after 30 hits. They now appear randomly in any stage.
==General==
*[[File:Dunno.png|60px]]
'''Cold-hearted Brutal Walker''' - A powerful '''Brutal Walker''' that is stronger and has substantially more health.
*[[File:Dunno.png|60px]]
'''Cold-hearted Brutal Stinger''' - A powerful '''Brutal Stinger''' that is stronger and has substantially more health.
*[[File:Dunno.png|60px]]
'''Cold-hearted Brutal Charger''' - A powerful '''Brutal Charger''' that is stronger and has substantially more health.
*[[File:Dunno.png|60px]]
'''Cold-hearted Brutal Defender''' - A powerful '''Brutal Defender''' that is stronger and has substantially more health.
*[[File:Dunno.png|60px]]
'''Cold-hearted Brutal Trickster''' - A powerful '''Brutal Trickster''' that is stronger and has substantially more health.
*[[File:Dunno.png|60px]]
'''Cold-hearted Brutal Bobosse''' - A powerful '''Brutal Bobosse''' that is stronger and has substantially more health.
*[[File:Dunno.png|60px]]
'''Cold-hearted Ancient Magmanta''' - A powerful '''Ancient Magmanta''' that is stronger and has substantially more health.
|-
|style="font-size: 1em; font-weight: bold; text-align: center; text-shadow: 1px 1px 1px black; border-bottom: 1px #000; border-style: solid; background-color: #007be4; background-image: linear-gradient(to bottom, lightgray 0%, #007be4 100%);" colspan="12" | <font color="white">'''Mini Boss:'''</font>
|-
| colspan="12" style="border:1px solid; border-color:#000000;" valign="top" width="100%" |
*[[File:Dunno.png|60px]]
'''Shadow Priest (2x)''' - A [[6-1|Shadow Master]] who's using its dark powers to restrain Helputt.
<br>
'''Moves:'''
<br>
-''Shadow Swipe:'' He will drag you towards him and then swipes at you. Throws you upwards for some distance.
<br>
-''Dark Explosion:'' He blows you up as he clenches his fist. Unlike Shadow Master instead of instantly attacking a target he will explode, blowing away nearby targets.
<br>
-''Shadow Storm:'' Summon a few dark spheres to rain down, far less compared to that of Shadow Master.
<br>
*[[File:Corrupt_Destroyer_Helputt.png|60px]]
'''Fallen Guardian: Helputt''' - Chung's father, who is being controlled by the demons. His fighting stance and style is similar to that of [[Chung]]. He cannot be defeated and will finish you off with a near fatal attack.
<br>
'''Moves:'''
<br>
Helputt is capable of using some of Chung's skills in a similar style. Unlike Chung's skills, Helputt's skills will be colored red instead of blue.
<br>
-''Combo:'' He will use his Destroyer to mimic Chung's combos, such as ZZZX, XXX, XXZX, and [[Fury Guardian]]'s ZZX.
<br>
*During his XXZX combo, he will not be in Stoic during the Z portion of the combo.
-''Auto [[Land Demolisher - Heavy Arms]]:'' Basic attacks used by Helputt will kick up rocks.
<br>
-''[[Artillery Strike - Quantum Ballista]]:'' Fires a warhead up and drops down, causing a large explosion.
<br>
-''[[Carpet Bombing]]:'' Calls for an air strike.
<br>
*He can only call one airstrike, unlike [[Shelling Guardian]] who can call two.
-''[[Comet Crasher]]:'' Fires numerous missiles down.
<br>
*Animation is same to that to [[Deadly Chaser]], however he fires faster and with more shots.
-''[[Iron Howling]]:'' Release a loud war cry that stuns.
<br>
-''[[Pain of Caladbolg]]:'' Release a devastating war cry, dealing high damage.
<br>
-''[[Scare Chase]]:'' Fires a red homing missile.
<br>
*[[File:Dunno.png|60px]]
'''Brutal Victor''' - Same as '''Victor''', you will face during the Trial of Strength.
<br>
'''Moves:'''
<br>
-''Victor Combo:'' Poses then strikes in a certain direction three times.
<br>
-''Victor Swing:'' Poses then swings his fists into the air to throw you upwards while in super armor.
<br>
-''Victor Charge:'' Occurs only if you are at a certain distance away from him. It's similar to [[Burning Rush]], except debris will fall from the ceiling on impact with a wall.
<br>
-''Victor Assault:'' Victor roars, beats his chest rapidly, and then launches himself at the nearest target.  He lands on them and violently attacks them repeatedly for enormous damage.<br>
*If he fails to land on a valid target he will not continue with his combo.
-''Victor Earthquake:'' Victor roars and then jumps straight up in the air and creates an earthquake when he hits the ground.<br>
*[[File:Strength_Guardian.png|60px]]
'''Guardian Knight of Trials''' - Miniboss required to defeat to pass the Trial of Strength and receive the Impenetrable Shield.
<br>
'''Moves:'''
<br>
-''Lunatic Smash:'' It charges its hammer and smashes down numerous times.
<br>
-''Hammer Combo:'' Does an uppercut and smashes 1 more time.
<br>
-''Impact Hammer:'' Uses a regular hammer attack and is nearly unavoidable. After it smashes its hammer, it becomes vulnerable to any attack.
<br>
-''Hammer Swing:'' It swings its hammer and then uses the Impact Hammer attack if you're at the platform.
 
'''Note:'''
<br>
-After you kill the Strength Guardian, you will receive the Impenetrable Shield. This will increase your Phy/Mag Defense by 10%.
<br>
*[[File:Dunno.png|60px]]
'''Brutal Shadow Master''' - A [[6-1|Shadow Master]] who you face during the Trial of Mind before and after the battle with the Guardian Magician of Trials.
<br>
'''Moves:'''
<br>
-''Shadow Swipe:'' He will drag you towards him and then swipes at you. Throws you upwards for some distance.
<br>
-''Dark Explosion:'' He blows you up as he clenches his fist. Unlike Shadow Master instead of instantly attacking a target he will explode, blowing away nearby targets.
<br>
-''Shadow Storm:'' Summon a few dark spheres to rain down, far less compared to that of Shadow Master.
<br>
-''Self Destruct:'' Unlike Shadow Priest, he will self destruct when all of his HP is depleted.
<br>
*[[File:Mind_Guardian.png|60px]]
'''Guardian Magician of Trials''' - Mini boss required to defeat to pass the Trial of Mind and receive the Magical Cape.
<br>
'''Moves:'''
 
'''Note:'''
<br>
-It's difficult to attack him when you're not on the platform since he can spin easily (It will knockdown) and then Teleport himself to prevent more hits. It's recommend to inflict [[Status Effects|Freezing]], [[Status Effects|Petrifying]] or inflict [[Status Effects|Helpless]] to prevent spin and teleport.
<br>
-After you kill the Mind Guardian, you will receive the Magical Cape. This will add 2 more MP gain per second.
|-
|style="font-size: 1em; font-weight: bold; text-align: center; text-shadow: 1px 1px 1px black; border-bottom: 1px #000; border-style: solid; background-color: #007be4; background-image: linear-gradient(to bottom, lightgray 0%, #007be4 100%);" colspan="12" | <font color="white">'''Trial of Shadows:'''</font>
|-
|width="100%" colspan="12" style="border:1px solid; border-color:#000000; font-size:1em; line-height:1.5em;" valign="top"|
In the last trial before fighting Helputt, you will enter a room and Doppelgangers similar to the characters' base classes will appear. Roughly 50 Doppelgangers will spawn.
*[[File:Doppleganger_Knight.png|60px]]
'''Shadow Elsword''' - This mob's combo and actives are virtually similar to [[Elsword]]'s.
*[[File:Doppleganger_Magician.png|60px]]
'''Shadow Aisha''' - This mob's combo and actives are virtually similar to [[Aisha]]'s.
*[[File:Doppleganger_Ranger.png|60px]]
'''Shadow Rena''' - This mob's combo and actives are virtually similar to [[Rena]]'s.
*[[File:Doppleganger_Taker.png|60px]]
'''Shadow Raven''' - This mob's combo and actives are virtually similar to [[Raven]]'s.
*[[File:Doppleganger_Another_Code.png|60px]]
'''Shadow Eve''' - This mob's combo and actives are virtually similar to [[Eve]]'s.
*[[File:Doppleganger_Guardian.png|60px]]
'''Shadow Chung''' - This mob's combo and actives are virtually similar to [[Chung]]'s. However, the model of this doppelganger uses [[Shelling Guardian]]'s armor and hairstyle instead use Base job model. The Destroyer remains the same as Base Chung Destroyer. The Z combo however only hit once.
*[[File:Doppleganger_Little_Xia.png|60px]]
'''Shadow Ara''' - This mob's combo and actives are virtually similar to [[Ara]]'s, except will do an incomplete X combo(The combo is listed as XXX~X. The Spin and the final stab is removed). This mob has a bug when you evade its 2nd X combo or 2nd and 3rd Z combo it will become immoveable until being attacked.
*[[File:Doppleganger_Free_Knight.png|60px]]
'''Shadow Elesis''' - This mob's combo and actives are virtually similar to [[Elesis]]'.
*[[File:Doppleganger_Knight.png|60px]]
'''Berserk Elsword (Last Shadow)''' - This doppelganger will appear as '''Berserk Elsword'''. It has same move as '''Berserk Elsword''' except when killed it will release the Shadow of Godness.
<br>
'''Note:'''
<br>
-When you fight against the Shadows, there's another version called the '''Berserk Shadow''' (ex. Berserk Ara, Berserk Elsword, etc.). This Berserk Shadow will have the same moves as the regular ones, except they will have a red aura, will super armor at their First Strike, has more HP and more damage when attacking, able to use any Active/Special Active skills and sometimes can use their skills more than once.(Their skills are different according of what class they are.)<br>
-List skill used by Berserk Shadows:<br>
-Berserk Elsword : [[Flame Geyser]]<br>
-Berserk Aisha : [[Chain Fireball]] : has no super armor when use this skill.<br>
-Berserk Rena : [[Back Tumbling Shot]]<br>
-Berserk Raven : [[Power Assault]]<br>
-Berserk Eve : [[Illusion Strike]]<br>
-Berserk Chung : [[Lunatic Blow]] : The '''Initial''' animation is much faster but when at '''Final Hit''' it will become slower.<br>
-Berserk Ara : [[Tempest Dance]] : has no super armor when use this skill.<br>
-Berserk Elesis : [[Power Burster]]
<br>
-After you kill the Last Shadow, you will receive the Shadow of Godness. This will increase your Phy/Mag Attack by 10%.
|-
|style="font-size: 1em; font-weight: bold; text-align: center; text-shadow: 1px 1px 1px black; border-bottom: 1px #000; border-style: solid; background-color: #007be4; background-image: linear-gradient(to bottom, lightgray 0%, #007be4 100%);" colspan="12" | <font color="white">'''Obstacles:'''</font>
|-
|width="100%" colspan="12" style="border:1px solid; border-color:#000000; font-size:1em; line-height:1.5em;" valign="top"|
*[[File:Strength_Guardian%27s_Hammer.png|60px]]
'''Guardian Knight of Trials:''' Will knock you up by striking its hammer into the ground.
*[[File:Mind_Guardian%27s_Lunatic_Fury.png|60px]]
'''Guardian Magician of Trials:''' Will knock you up and its magic can hit twice.
|-
|style="font-size: 1em; font-weight: bold; text-align: center; text-shadow: 1px 1px 1px black; border-bottom: 1px #000; border-style: solid; background-color: #007be4; background-image: linear-gradient(to bottom, lightgray 0%, #007be4 100%);" colspan="12" | <font color="white">'''Boss:'''</font>
|-
|width="100%" colspan="12" style="border:1px solid; border-color:#000000; font-size:1em; line-height:1.5em;" valign="top"|
*[[File:Corrupt_Destroyer_Helputt.png|120px]] '''Fallen Guardian: Helputt'''
Chung's father, who is being controlled by the demons. His fighting stance and style is similar to that of [[Chung]].
<br>
===Moves===
Helputt is capable of using some of Chung's skills in a similar style. Unlike Chung's skills, Helputt's skills will be colored red instead of blue.
*'''Combo:''' He will use his Destroyer to mimic Chung's combos, such as ZZZX, XXX, XXZX, and [[Fury Guardian]]'s ZZX.
**During his XXZX combo, he will not be in Stoic during the Z portion of the combo.
*'''Auto [[Land Demolisher - Heavy Arms]]:''' Basic attacks used by Helputt will kick up rocks.
*'''[[Artillery Strike - Quantum Ballista]]:''' Fires a warhead up and drops down, causing a large explosion.
*'''[[Carpet Bombing]]:''' Calls for an air strike.
**He can only call one airstrike, unlike [[Shelling Guardian]] who can call two.
**He can only call one airstrike, unlike [[Shelling Guardian]] who can call three.
*'''[[Comet Crasher]]:''' Fires numerous missiles down.
**Animation is same to that to [[Deadly Chaser]], however he fires faster and with more shots.
Line 241: Line 121:
*'''[[Pain of Caladbolg]]:''' Release a devastating war cry, dealing high damage.
*'''[[Scare Chase]]:''' Fires a red homing missile.
*'''Heavy Stance:''' Sometimes when Helputt is attacked, he will automatically enter heavy stance mode (Will super armor) and he may use a counterattack through his X combo.
*'''Death Howling:''' After his HP drops down low enough, everybody including Helputt will be placed in scripted area and he'll unleash his final attack reduced everybody's HP to 1 and inflict {{se||Faint}}.
**During Heavy Stance, he will temporarily reduce all incoming damage by 99%.
<dfn>}}</dfn>
| Obstacle=
| Boss=<dfn>{{</dfn>
|[[File:Corrupt_Destroyer_Helputt.png|60px]]
|'''[[Helputt|Fallen Guardian: Helputt]]''' - Chung's father, who is being controlled by the demons. His fighting stance and style is similar to that of [[Chung]]'s.
|
*'''[[Iron Paladin]] Commands:''' He will use his Destroyer to mimic Chung's combos, such as ZZZX, XXX, XXZX, and [[Iron Paladin]]'s ZZX.
**Helputt will always have the [[Land Demolisher - Heavy Arms|Land Demolisher]] buff active passively.
**During his XXZX combo, he will not be in Stoic during the Z portion of the combo.
*'''[[Artillery Strike - Quantum Ballista]]:''' Fires a warhead up and drops down, causing a large explosion.
*'''[[Carpet Bombing]]:''' Calls for an air strike.
**He can only call one airstrike, unlike [[Shelling Guardian]] who can call three.
*'''[[Comet Crasher]]:''' Fires numerous missiles down.
**Animation is same as that of [[Deadly Chaser]], however he fires faster and with more shots.
*'''[[Iron Howling]]:''' Release a loud war cry that stuns.
*'''[[Pain of Caladbolg]]:''' Release a devastating war cry, dealing high damage, does additional damage for every status ailment a player is inflicted with. Tends to be used after Iron Howling.
**The explosion can instantly kill you, as it can do over 400,000 damage and it ignores defense like Chung's version.
*'''[[Scare Chase]]:''' Fires a red homing missile.
**After the 03/18/2015 KR patch, explosion damage increased, almost similar to [[City in the Sky|Eltrion]]'s missile damage, so it's best to use any special active that gives invincibility frames to avoid being tracked by the missiles.
*'''Heavy Stance:''' Sometimes when Helputt is attacked, he will automatically enter heavy stance mode (with super armor) and he may use a counterattack through his X combo.
**During Heavy Stance, he will reduce all incoming damage by 99%.
'''Strategy:'''
*There are less chances of mistakes being made if Helputt is cornered; once the fight starts, make an effort to push him against a wall.
*You can prevent being targeted by Helputt's Scare Chase if you use a skill with invincibility frames. This is especially necessary if you are going solo. If you use a Special Active with short invincibility frames, be sure that Helputt is out of range from the delay or you risk being targeted after the delay ends.
*Helputt has no [[Stoic Thresholds|Stoic Threshold]], making it possible to keep him in an infinite stunlock using attacks with no KD value.
<dfn>}}</dfn>
| Reward=<dfn>{{</dfn>
{| cellpadding="5" border="1" style="border-collapse: collapse;" width=100%
|-
! width="5%" | Image
! width="15%" | Item Name
! width="25%" | How to Obtain
! width="55%" | Effect
|-
| [[File:HQ_Shop_Item_154066.png]]
| Barrier's Fragment
| Obtained by playing the dungeon.
| Quantity: 100


===Strategy===
Throw at [[A tree imbued with the El energy]] to gain rewards.
*You can wait outside the teleporter to the Trial of Shadows for approximately 2 minutes, at which point all the doppelgangers will have spawned. You can then teleport over and wipe them all out in one fell swoop.
|-
*There are less chances of mistakes being made if Hellputt is cornered; once the fight starts, make an effort to push him against a wall.
| [[File:HQ_Shop_Item_154065.png]]
*You can prevent being targeted by Helputt's Scare Chase if you use a skill with iframes. This is especially necessary if you are going solo. If you use a special active with short iframes, be sure that Hellputt is out of range from the delay or you risk being targeted after the delay ends.
| El Reward
*Hellputt's Pain of Caladbolg shares the same effect as Chung's; if you have a status ailment while hit by the attack, you will be damaged by an explosion momentarily afterwards. Hellputt tends to use Pain of Caladbolg as a follow up to Iron Howling to induce this special effect.
| Obtained by playing the dungeon.
| Quantity: 5


===Information===
Exchange for rewards at [[Ariel]].
|-
|-
|style="font-size: 1em; font-weight: bold; text-align: center; text-shadow: 1px 1px 1px black; border-bottom: 1px #000; border-style: solid; background-color: #007be4; background-image: linear-gradient(to bottom, lightgray 0%, #007be4 100%);" colspan="12" | <font color="white">'''Secret Set:'''</font>
| [[File:Dunno.png]]
| ED
| Obtained by playing the dungeon.
| ED Gain: 10,000,000
|-
|-
|width="100%" colspan="12" style="border:1px solid; border-color:#000000; font-size:1em; line-height:1.5em;" valign="top"|
| [[File:Dunno.png]]
{{:Ancient Guardian}}
| EXP
|-
| Obtained by playing the dungeon.
|style="font-size: 1em; font-weight: bold; text-align: center; text-shadow: 1px 1px 1px black; border-bottom: 1px #000; border-style: solid; background-color: #007be4; background-image: linear-gradient(to bottom, lightgray 0%, #007be4 100%);" colspan="12" | <font color="white">'''BGMs:'''</font>
| EXP Gain: 200,000,000
|-
|}
|width="100%" colspan="12" align="center" style="border:1px solid; border-color:#000000; font-size:1em; line-height:1.5em;" valign="top"|
<dfn>}}</dfn>
 
|Dialogue=
=== Dungeon ===
{{tabber
[https://www.youtube.com/watch?v=mPWN_crILYw '''''music046_stage''''']
|$divclass=tabber-vertical
|Dungeon Intro Dialogue=
{{*}}{{StoryIcon|Sasha}} '''Sasha''': ''This is the secret temple that Helputt was talking about...''
|Mid Dungeon Dialogue=
{{*}}{{StoryIcon|Sasha}} '''Sasha''': ''불길한 기운이 느껴지고 있습니다. 어서 서둘러야 해요!!''
{{*}}{{StoryIcon|Sasha}} '''Sasha''': ''Helputt's aura can be sensed....We must hurry!!''
{{*}}{{StoryIcon|Sasha}} '''Sasha''': ''I have a bad feeling about this!''
----
''Upon retreating from Helputt:''
{{*}}{{StoryIcon|Sasha}} '''Sasha''': ''May you endure and pass through the Temple of Trials...''
----
''Upon defeating Guardian Knight of Trials:''
{{*}}{{StoryIcon|Sasha}} '''Sasha''': ''You have opened your eyes to a new power... But I need to practice my battle skills.''
----
''Upon defeating Guardian Magician of Trials:''
{{*}}{{StoryIcon|Sasha}} '''Sasha''': ''I have a bad feeling about this....Let's hurry.''
|Mini Boss Dialogue=
{{*}}{{StoryIcon|Shadow Master2}} '''Shadow Priest''': ''Sooner or later... they will become our slaves forever...''
{{*}}{{StoryIcon|Shadow Master2}} '''Shadow Priest''': ''May you fall deep into shadows of evil...''
{{*}}{{StoryIcon|Helputt2}} '''Helputt''': ''Ar...gh!...''
''Upon defeating Shadow Priest:''
{{*}}{{StoryIcon|Helputt2}} '''Helputt''': ''Ah....Don't you dare come any closer!!''
''Helputt uses '''Death Howling''':''
{{*}}{{StoryIcon|Helputt2}} '''Helputt''': ''How dare you weaklings challenge demons!!''
{{*}}{{StoryIcon|Sasha}} '''Sasha''': ''Self-improvement requires discipline. I need more time to improve. I'll have to retreat for now.''
{{*}}{{StoryIcon|Helputt2}} '''Helputt''': ''This is it. I will exterminate you!!''
|Boss Intro Cutscene={{*}}{{StoryIcon|Helputt2}} '''Helputt''': ''Surrender to the demons!!''
|Boss Outro Cutscene={{*}}{{StoryIcon|Helputt}} '''Helputt''': ''I'll be fine. Leave Now!! Be strong, my son...''
|Dungeon Victory Quote=
{{CharsTabs
|EL=
*'''Elsword''': ''-''
|AI=
*'''Aisha''': ''-''
*'''Aisha''': ''-''
*'''Aisha''': ''-''
|RN=
*'''Rena''': ''-''
*'''Rena''': ''-''
*'''Rena''': ''-''
|RA=
*'''Raven''': ''-''
*'''Raven''': ''-''
*'''Raven''': ''-''
|EV=
*'''Eve''': ''The power aura coming from the Guardian Stone is similar to that coming from the El.''
*'''Eve''': ''-''
*'''Eve''': ''-''
|CS=
*'''Chung''': ''Fa...Father!!!!!!!!''<!--Why so many exclamation points?!-->
*'''Chung''': ''-''
*'''Chung''': ''-''
|AR=
*'''Ara''': ''-''
*'''Ara''': ''-''
*'''Ara''': ''-''
|ES=
*'''Elesis''': ''As expected of Hamel's White Colossus... Sir Helputt, we will never forget your assistance here.''
*'''Elesis''': ''I'm sorry, Chung. I'm sure no words can comfort you at this moment... But I'm sure we'll save Sir Helputt one day.<br>I will make sure that happens!''
*'''Elesis''': ''Even demon schemes were not able to crush Sir Helputt's indominable will...''
|AD=
*'''Add''': ''-''
*'''Add''': ''-''
*'''Add''': ''-''
|LC=
*'''Lu/Ciel''': ''You're a truly righteous person... I hope we can survive to meet again.''
*'''Lu/Ciel''': ''Helputt...Was that his name? His eyes were filled with sorrow.''
*'''Ciel''': ''That was a battle fought with true strength. If I hesitated for even a second, I may not have won.''
*'''Ciel''': ''-''
|RS=
*'''Rose''': ''-''
*'''Rose''': ''-''
*'''Rose''': ''-''
|AN=
*'''Ain''': ''-''
*'''Ain''': ''-''
*'''Ain''': ''-''
}}
}}
| SBGM=[http://www.youtube.com/watch?v=QJ05Y9_pZrA '''''music046_stage''''']


=== Boss ===
[http://www.youtube.com/watch?v=wjRjZFNlMqQ '''''music027_boss''''']
[http://www.youtube.com/watch?v=yGiKGl8fS9o '''''music027_boss''''']
| Gallery=
|-
<gallery widths=150px heights=150px>
|style="font-size: 1em; font-weight: bold; text-align: center; text-shadow: 1px 1px 1px black; border-bottom: 1px #000; border-style: solid; background-color: #007be4; background-image: linear-gradient(to bottom, lightgray 0%, #007be4 100%);" colspan="12" | <font color="white">'''Gallery:'''</font>
File:6-xnew.jpg|Old loading image.
|-
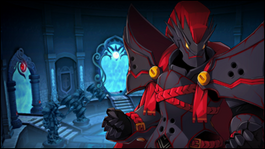
File:DemonHelputt.png|'''[[Helputt]]''''s corrupted form.
|width="100%" colspan="12" style="border:1px solid; border-color:#000000; font-size:1em; line-height:1.5em;" valign="top"|
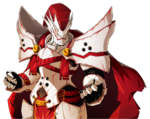
File:ChungPapa.png|'''[[Helputt]]''''s true armor form after he has been purified from the demons.
<br><gallery widths=150px heights=150px>
File:DemonHelputt.png|'''Helputt''''s corrupted form.
File:ChungPapa.png|Helputt's true armor form after he has been purified from the demons.
File:HelputtConcept.png|Concept art of '''Helputt'''.
File:StrenghtGuardianConcept.png|Concept art of the '''Strength Guardian'''.
File:MindGuardianConcept.png|Concept art of the '''Mind Guardian'''.
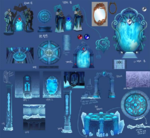
File:FieldConcepts.png|Concept art of the artifacts found in the temple.
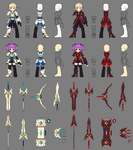
File:6-xArmorConcept.png|Concepts art of the armors and weapon craft-able from 6-X.  
File:6-xArmorConcept.png|Concepts art of the armors and weapon craft-able from '''Temple of Trials'''.  
</gallery>
</gallery>
| Trivia=<dfn>{{</dfn>
*There is a glitch where, if you awaken right before teleporting into Helputt's room, only your weapon (and tails if you're '''Ara''') will appear, and you will be invincible against all attacks. However, you can still attack in this state.
**This state of invincibility and avatar invisibility will wear off once your awakening mode ends.
*Hamel Secret Dungeon Development Story. [https://elwiki.net/babel/?p=755]
<dfn>}}</dfn>
|Updates=<dfn>{{</dfn>
{| cellpadding="5" border="1" style="border-collapse: collapse; text-align: center;"
|- style="background:{{ColorSel|Village|7}}" class="textfloat"
! colspan=2 | Date !! rowspan=2 | Changes
|- style="background:{{ColorSel|Village|7}}" class="textfloat"
! KR !! NA
|-
|-
|style="font-size: 1em; font-weight: bold; text-align: center; text-shadow: 1px 1px 1px black; border-bottom: 1px #000; border-style: solid; background-color: #007be4; background-image: linear-gradient(to bottom, lightgray 0%, #007be4 100%);" colspan="12" | <font color="white">'''Videos:'''</font>
| 11/09/2023 || 12/06/2023 || align="left" |  
|-
*Level Requirement increased from 70-90 to 99.
|width="100%" colspan="12" align="center" style="border:1px solid; border-color:#000000; font-size:1em; line-height:1.5em;" valign="top"|
*CP Requirement increased from 15000 to 1500000.
[http://www.youtube.com/watch?v=dRa0O_ARhzY '''''Eve and party Run''''']
*Dungeon shortened.
 
[http://youtu.be/fi7owLewqfI '''''Yama Raja with party Run''''']
|-
|width="60%" colspan="6" style="border:0px solid; border-color:#000000; font-size:1em; line-height:0em;" align="center" valign="top"|
|width="60%" colspan="6" style="border:0px solid; border-color:#000000; font-size:1em; line-height:0em;" align="center" valign="top"|
|-
|-
| 14/03/2024 || 04/24/2024 || align="left" |
*The miniboss appearance time is reduced.
*A skip function for the boss ending cutscene is added.
|}
|}
|}
<dfn>}}</dfn>
<br>
|AltLang=
{{Dungeons}}
{{AlternateLanguages
|Color={{ColorSel|Village|7}}
|KR=시련의 신전 |KRName=Temple of Trials
|TW=試煉神殿 |TWName=Temple of Trials
|CN=试炼之神殿 |CNName=Temple of Trials
|FR=Temple des épreuves |FRName=Temple of Tests
|DE=Tempel der Prüfungen |DEName=Temple of Tests
|IT=Tempio delle Prove |ITName=Temple of Trials
|PL=Świątynia Próby |PLName=Temple of Trials
|ES=Templo de las Pruebas |ESName=Temple of Trials
|UK=Temple of Testing
|BR=Templo das Provações |BRName=Temple of Trials
}}
}}

Latest revision as of 18:22, 8 April 2024
Temple of Trials

A hidden place surrounded by suspicion. We need to save the fallen White Colossus.

Description
The shrine is at the end of Hamel, a hidden place unknown to anyone. Rumor has it, there lies the power of the Guardian Stone.
Recommended Level
99
Required Combat Power
1,500,000
Entry Requirements
{{
  • 5 weekly entries permitted. Entry count is shared with other Secret Dungeons.
  • Must be Level 99 or higher.
}}
Ally
{{ {{
Ally Image Ally Description Ally Moves
Water Priestess Sasha - When you start this dungeon, there will be an NPC named Sasha. She will follow the El Search Party and tell you what the Temple of Trials is.
  • Heal: Sasha heals 10% of your max HP.
  • Water Shield: Sasha gives you a shield that 25% Damage Reduction for up to 3 hits.
  • Fully Heal: After each trial, she will fully heal your HP when you go back to the start in order of the Trials.

}}

}}
Mobs
{{ {{
  • All mobs except Ancient Magmanta can activate stoic after 30 hits.
Monster Image Monster Description Monster Moves
Brutal Walker - Same as Shadow Port Walker but will be in super armor during first and last hit.
  • Claw Attack: A basic 3 hit combo with their claws.
Brutal Defender - An enhanced version of Shadow Port Defender.
  • Shadow Spear: It will launch spears in and arc towards you. When a player gets hit by the spears, they will be Cursed and will gradually lose mana over time.
  • Dark Aura: Emit a dark aura that gives enemies within range super armor.
Brutal Charger - Same as Shadow Port Charger.
  • Charge: It will run forward, damaging any players within its path.
  • Grab: It can also grab onto any players, immobilizing them. You can escape from their grasp by rapidly tapping the left and right arrow keys.
Brutal Voider - Same as Shadow Port Voider. Can absorb magical projectiles and use their energy to heal themselves 10% of their maximum HP.
  • Energy Bolt: If can charge and fire an energy bolt very similar to Eve's Mega Electron Balls.
Brutal Trickster - Same as Shadow Port Trickster.
  • Wind Totem: A blue totem that creates a sphere of wind that increases the stats of the mobs.
  • Fire Totem: A red totem that emits homing fireballs.
  • Lightning Bolt: The Trickster shoots a bolt of lightning out of his hands.
Twinky Linker - Same as Shadow Linker but instead will using Soul Link this mobs now can use Lightning.
  • Lightning Bolt: The Linker shoots a bolt of lightning out of his hands.

}}

}}
General
{{ {{
Monster Image General Description General Moves
Cold-hearted Brutal Walker - A powerful Brutal Walker that is stronger and has substantially more health.
  • Claw Attack: A basic 3 hit combo with their claws.

Notes:

  • Has a stoic threshold of 30 hits.
Cold-hearted Brutal Stinger - A powerful Brutal Stinger that is stronger and has substantially more health.
  • Forward Spikes: Jabs you with a few spikes when you stand in front of it. Hits multiple times and pushes backwards for some distance
  • Spike Ball: Extends all the spikes on it, impaling anything nearby. Induces KD.
  • Spike Fall: Jumps into the air and turns upside down as it's turning its head into a giant spike before making a sharp fall, tends to do this to attack players through platforms. Induces KD.
  • Crystal Stinger: Brings forth a crystal in its chest to poke you with it. Does moderate damage. Induces KD.

Notes:

  • Has a stoic threshold of 30 hits.
Cold-hearted Brutal Charger - A powerful Brutal Charger that is stronger and has substantially more health.
  • Slap: It will swing its arms and slap nearby players.
  • Charge: It will run forward, damaging any players within its path.
  • Grab: It can also grab onto any players, immobilizing them. You can escape from their grasp by rapidly tapping the left and right arrow keys.

Notes:

  • Has a stoic threshold of 30 hits.
Cold-hearted Brutal Defender - A powerful Brutal Defender that is stronger and has substantially more health.
  • Slap: They now can attack from a stationary position.
  • Shadow Spear: It will launch spears in and arc towards you. When a player gets hit by the spears, they will be Cursed and will gradually lose mana over time.
  • Dark Aura: Emit a dark aura that gives enemies within range super armor.

Notes:

  • Has a stoic threshold of 30 hits.

}}

}}
Mini Boss
{{ {{
Monster Image Boss Description Boss Moves
Shadow Priest (2x) - A Shadow Master who's using its dark powers to restrain Helputt.
  • Shadow Swipe: He will drag you towards him and then swipes at you. Throws you upwards for some distance.
  • Dark Explosion: He blows you up as he clenches his fist. Unlike Shadow Master instead of instantly attacking a target he will explode, blowing away nearby targets.
  • Shadow Storm: Summon a few dark spheres to rain down, far less compared to that of Shadow Master.

Notes:

  • Has a stoic threshold of 30 hits.
  • Does very low damage.
Fallen Guardian: Helputt - Chung's father, who is being controlled by the demons. His fighting stance and style is similar to that of Chung. He cannot be defeated and will finish you off with a near fatal attack.
  • Iron Paladin Commands: He will use his Destroyer to mimic Chung's combos, such as ZZZX, XXX, XXZX, and Iron Paladin's ZZX.
    • Helputt will always have the Land Demolisher buff active passively.
    • During his XXZX combo, he will not be in Stoic during the Z portion of the combo.
  • Artillery Strike - Quantum Ballista: Fires a warhead up and drops down, causing a large explosion.
  • Carpet Bombing: Calls for an air strike.
  • Comet Crasher: Fires numerous missiles down.
    • Animation is same to that to Deadly Chaser, however he fires faster and with more shots.
  • Iron Howling: Release a loud war cry that stuns.
  • Pain of Caladbolg: Release a devastating war cry, dealing high damage.
  • Scare Chase: Fires a red homing missile.
  • Death Howling: After his HP drops down low enough, everybody including Helputt will be placed in scripted area and he'll unleash his final attack reduced everybody's HP to 1 and inflict  Enemy DebuffFaintEnemy DebuffFaint.

}}

}}
Boss
{{ {{
Monster Image Boss Description Boss Moves
Fallen Guardian: Helputt - Chung's father, who is being controlled by the demons. His fighting stance and style is similar to that of Chung's.
  • Iron Paladin Commands: He will use his Destroyer to mimic Chung's combos, such as ZZZX, XXX, XXZX, and Iron Paladin's ZZX.
    • Helputt will always have the Land Demolisher buff active passively.
    • During his XXZX combo, he will not be in Stoic during the Z portion of the combo.
  • Artillery Strike - Quantum Ballista: Fires a warhead up and drops down, causing a large explosion.
  • Carpet Bombing: Calls for an air strike.
  • Comet Crasher: Fires numerous missiles down.
    • Animation is same as that of Deadly Chaser, however he fires faster and with more shots.
  • Iron Howling: Release a loud war cry that stuns.
  • Pain of Caladbolg: Release a devastating war cry, dealing high damage, does additional damage for every status ailment a player is inflicted with. Tends to be used after Iron Howling.
    • The explosion can instantly kill you, as it can do over 400,000 damage and it ignores defense like Chung's version.
  • Scare Chase: Fires a red homing missile.
    • After the 03/18/2015 KR patch, explosion damage increased, almost similar to Eltrion's missile damage, so it's best to use any special active that gives invincibility frames to avoid being tracked by the missiles.
  • Heavy Stance: Sometimes when Helputt is attacked, he will automatically enter heavy stance mode (with super armor) and he may use a counterattack through his X combo.
    • During Heavy Stance, he will reduce all incoming damage by 99%.

Strategy:

  • There are less chances of mistakes being made if Helputt is cornered; once the fight starts, make an effort to push him against a wall.
  • You can prevent being targeted by Helputt's Scare Chase if you use a skill with invincibility frames. This is especially necessary if you are going solo. If you use a Special Active with short invincibility frames, be sure that Helputt is out of range from the delay or you risk being targeted after the delay ends.
  • Helputt has no Stoic Threshold, making it possible to keep him in an infinite stunlock using attacks with no KD value.

}}

}}
Dialogue
  • Dungeon Intro Dialogue
  • Mid Dungeon Dialogue
  • Mini Boss Dialogue
  • Boss Intro Cutscene
  • Boss Outro Cutscene
  • Dungeon Victory Quote
  • Sasha: This is the secret temple that Helputt was talking about...
Reward
{{
Image Item Name How to Obtain Effect
Barrier's Fragment Obtained by playing the dungeon. Quantity: 100

Throw at A tree imbued with the El energy to gain rewards.

El Reward Obtained by playing the dungeon. Quantity: 5

Exchange for rewards at Ariel.

ED Obtained by playing the dungeon. ED Gain: 10,000,000
EXP Obtained by playing the dungeon. EXP Gain: 200,000,000
}}
Gallery
Trivia
{{
  • There is a glitch where, if you awaken right before teleporting into Helputt's room, only your weapon (and tails if you're Ara) will appear, and you will be invincible against all attacks. However, you can still attack in this state.
    • This state of invincibility and avatar invisibility will wear off once your awakening mode ends.
  • Hamel Secret Dungeon Development Story. [1]
}}
Updates
{{
Date Changes
KR NA
11/09/2023 12/06/2023
  • Level Requirement increased from 70-90 to 99.
  • CP Requirement increased from 15000 to 1500000.
  • Dungeon shortened.
14/03/2024 04/24/2024
  • The miniboss appearance time is reduced.
  • A skip function for the boss ending cutscene is added.
}}
Alternative Names
{{
Server Name Translation
South Korea 시련의 신전 Temple of Trials
Taiwan (Traditional Chinese) 試煉神殿 Temple of Trials
China (Simplified Chinese) 试炼之神殿 Temple of Trials
Germany Tempel der Prüfungen Temple of Tests
Spain Templo de las Pruebas Temple of Trials
France Temple des épreuves Temple of Tests
Italy Tempio delle Prove Temple of Trials
Poland Świątynia Próby Temple of Trials
United Kingdom Temple of Testing
Brazil Templo das Provações Temple of Trials
}}


  • Other
  • Region 1~6
  • Region 7~12
  • Region 13~18
  • Region 19~20
  • Laby
  • Noah
  • Lithia
  • Miscellaneous