Fahrmann's Peak: Difference between revisions
From Elwiki
(Not grammatically correct) |
Gameboy224 (talk | contribs) m (Text replacement - "{{Hunting Fields|name=b|Orient=3}}" to "{{Hunting Fields|name=b|Orient=Other}}") Tags: Mobile edit Mobile web edit |
||
| (40 intermediate revisions by 12 users not shown) | |||
| Line 1: | Line 1: | ||
{{History}} | |||
{{Languages|Fahrmann's Peak}} | {{Languages|Fahrmann's Peak}} | ||
[[File:DraBaki.jpg|thumb|500px]] | [[File:DraBaki.jpg|thumb|500px]] | ||
== | == Entering Fahrmann's Peak== | ||
*After hunting certain | *After hunting certain number of monsters in Hamel and Sander's fields, 'Gate of Time' opens. '''The Highlighted blue text is the area where the Gate is located.''' In KR, the 'Gate of Time' leading to Fahrmann's Peak is exclusively found in [[Sander]] fields. | ||
*When the Gate of Time opens a notice can be seen by people in both fields and towns | *When the Gate of Time opens a notice can be seen by people in both fields and towns (If you're in PvP, Sparring or Dungeons, you won't see the notice). | ||
*You can use the Gate of Time opening notice to see which field boss battle you can enter. | *You can use the Gate of Time opening notice to see which field boss battle you can enter. | ||
| Line 20: | Line 21: | ||
*You can exit the boss field during the battle, and as long as Gate of Time remains, you can enter mid battle. | *You can exit the boss field during the battle, and as long as Gate of Time remains, you can enter mid battle. | ||
*You cannot re-enter for 10 minutes after you've entered once. | |||
*You cannot join mid-battle when Boss's HP is less than 10%. | |||
*You cannot join mid-battle if the time limit is 60 seconds or less. | |||
*''' | *You must have '''at least more than 0.01 Stamina''' while raiding. Otherwise, You'll see that the others are fighting thin air. | ||
== | == Battle with the Giant Boss== | ||
*Maximum of 12 people can enter the Gate of Time into the Boss field. | *Maximum of 12 people can enter the Gate of Time into the Boss field. | ||
| Line 32: | Line 38: | ||
*There is a 12 minute time limit for the Giant Boss. When the time limit is up, the battle results in defeat. | *There is a 12 minute time limit for the Giant Boss. When the time limit is up, the battle results in defeat. | ||
== | == Field Boss rewards== | ||
*Depending on damage dealt by you, you can acquire following items. Field Boss Cube, Ancient Steel Gem, Ancient Guardian Gem..etc | *Depending on damage dealt by you, you can acquire following items. Field Boss Cube, Ancient Steel Gem, Ancient Guardian Gem..etc | ||
*Ancient Steel Gem and Ancient Guardian Gem are materials used to craft Ancient Steel Wedge and Ancient Guardian Wedge items. These items can be crafted from Glave NPC. | *Ancient Steel Gem and Ancient Guardian Gem are materials used to craft Ancient Steel Wedge and Ancient Guardian Wedge items. These items can be crafted from Glave NPC. | ||
*You can acquire with low probability a '''Drabaki's Jewel''', which contains your character's respective weapon. (Trade is not possible) | *You can acquire with low probability a '''Drabaki's Jewel''', which contains your character's respective weapon. (Trade is not possible) | ||
*Every weapon is untradeable and +9. | *Every weapon is untradeable and +9. | ||
<br> | |||
{| width="100%" cellspacing="0" cellpadding="5" border="1" style="border-collapse: collapse;" | |||
|- | |||
! width="320px" | Icon | |||
! width="20%" | Name | |||
! Stats | |||
|- | |||
| align=center | [[File:HQ_Shop_Elsword_Set_FB_Weapon02.png]][[File:HQ_Shop_Arme_Set_FB_Weapon02.png]][[File:HQ_Shop_Lire_Set_FB_Weapon02.png]][[File:HQ_Shop_Raven_Set_FB_Weapon02.png]][[File:HQ_Shop_Eve_Set_FB_Weapon02.png]][[File:HQ_Shop_Chung_Set_FB_Weapon02.png]][[File:HQ_Shop_Ara_Set_FB_Weapon02.png]][[File:HQ_Shop_EL_Set_FB_Weapon02.png]][[File:HQ_Shop_Add_Set_FB_Weapon02.png]] | |||
| [[Warden of Darkness Weapon/Lv70|Warden of Darkness Weapon [Unique]]] | |||
| | |||
'''Lv70 Weapon:'''<br /> | |||
[2 Unidentified Effects]<br> | |||
Critical +5%<br> | |||
Add. Damage +3%<br> | |||
Resistance to Dark Attributes +60 | |||
|- | |- | ||
| | | align=center | [[File:HQ_Shop_Elsword_Set_FB_Weapon02 LV7.png]][[File:HQ_Shop_Arme_Set_FB_Weapon02 LV7.png]][[File:HQ_Shop_Lire_Set_FB_Weapon02 LV7.png]][[File:HQ_Shop_Raven_Set_FB_Weapon02 LV7.png]][[File:HQ_Shop_Eve_Set_FB_Weapon02 LV7.png]][[File:HQ_Shop_Chung_Set_FB_Weapon02 LV7.png]][[File:HQ_Shop_Ara_Set_FB_Weapon02 LV7.png]][[File:HQ_Shop_EL_Set_FB_Weapon02 LV7.png]][[File:HQ_Shop_ADD_Set_FB_Weapon02 LV7.png]][[File:HQ_Shop_LUCIEL_Set_FB_Weapon02 LV7.png]] | ||
| [[Warden of Darkness Weapon/Lv75|Warden of Darkness Weapon [Unique]]] | |||
| | |||
'''Lv75 Weapon:'''<br /> | |||
[[File:HQ_Shop_Elsword_Set_FB_Weapon02.png]] | [2 Unidentified Effects]<br> | ||
Critical +5%<br> | |||
[[File:HQ_Shop_Arme_Set_FB_Weapon02.png]] | Add. Damage +3%<br> | ||
Resistance to Dark Attributes +60 | |||
[[File:HQ_Shop_Lire_Set_FB_Weapon02.png]] | |- | ||
| align=center | [[File:HQ_Shop_Elsword_Set_FB_Weapon02 LV7.png]][[File:HQ_Shop_Arme_Set_FB_Weapon02 LV7.png]][[File:HQ_Shop_Lire_Set_FB_Weapon02 LV7.png]][[File:HQ_Shop_Raven_Set_FB_Weapon02 LV7.png]][[File:HQ_Shop_Eve_Set_FB_Weapon02 LV7.png]][[File:HQ_Shop_Chung_Set_FB_Weapon02 LV7.png]][[File:HQ_Shop_Ara_Set_FB_Weapon02 LV7.png]][[File:HQ_Shop_EL_Set_FB_Weapon02 LV7.png]][[File:HQ_Shop_ADD_Set_FB_Weapon02 LV7.png]][[File:HQ_Shop_LUCIEL_Set_FB_Weapon02 LV7.png]] | |||
[[File:HQ_Shop_Raven_Set_FB_Weapon02.png]] | | [[Warden of Darkness Weapon/Lv80|Warden of Darkness Weapon [Unique]]] | ||
| | |||
[[File:HQ_Shop_Eve_Set_FB_Weapon02.png]] | '''Lv80 Weapon:'''<br /> | ||
[[File:HQ_Shop_Chung_Set_FB_Weapon02.png]] | |||
[[File:HQ_Shop_Ara_Set_FB_Weapon02.png]] | |||
[[File:HQ_Shop_EL_Set_FB_Weapon02.png]] | |||
[[File: | |||
[2 Unidentified Effects]<br> | |||
Critical +5%<br> | |||
Add. Damage +3%<br> | |||
Resistance to Dark Attributes +60 | |||
|} | |} | ||
==Boss: Warden of Darkness Drabaki== | ==Boss: Warden of Darkness Drabaki== | ||
| Line 95: | Line 89: | ||
<br> | <br> | ||
===Moves=== | ===Moves=== | ||
*'''Meteors''': | *'''Meteors''': Drabaki periodically summons meteors that will damage players in its radius. | ||
*'''Atrium''': While switching to any position, | *'''Atrium''': While switching to any position, Drabaki's body will create pits that continuously damage players. | ||
*'''Crush''': | *'''Crush''': Drabaki slams his tail vertically onto players. | ||
*'''Swipe''': | *'''Swipe''': Drabaki uses his tail to sweep the field. | ||
*'''Blitz''': | *'''Blitz''': Drabaki takes aim at players, then charge his head into the ground. | ||
*'''Dusk Inferno''': After | *'''Dusk Inferno''': After its health drops to a certain point, Drabaki positions it's head and starts sweeping the field with dark fire. It will perform this 2 times. | ||
*'''Corrupt Downfall''': After | *'''Corrupt Downfall''': After its health drops to a certain point, Drabaki casts a dark orb into the sky. High amounts of meteors will then fall randomly on the field. | ||
*'''Transition - A''': | *'''Transition - A''': Drabaki changes positions by sliding around the map, it's new position will be on the far left. It can use Blitz and both tail attacks in this position. | ||
**After staying in it's new position for a while, it can move to Position B or back to it's original position. Same rules apply for Transition - B. | **After staying in it's new position for a while, it can move to Position B or back to it's original position. Same rules apply for Transition - B. | ||
*'''Vile Shockwave''': While in Position A, | *'''Vile Shockwave''': While in Position A, Drabaki will cast a dark orb downward. The orb will travel vertically, pass through platforms, and create multiple shockwaves when it hits the ground. | ||
*'''Transition - B''': | *'''Transition - B''': Drabaki changes positions by sliding around the map, it's new position will be on the far right. It can use both tail attacks in this position. | ||
*'''Dusk Blaze''': While in Position B, | *'''Dusk Blaze''': While in Position B, Drabaki will exhale dark fire to damage players. | ||
*''' | *'''Abyss''': While in Position B, Drabaki will create a large dark orb and transform it into a void. The void will absorb and continuously damage players. | ||
*''' | *'''Final Attack''': When Drabaki dies, he will create pits larger than normal (about the AoE of his original Position), deal lethal damage. | ||
* | **This move is indicated of very long cutscene, when he dies. | ||
===Information=== | ===Information=== | ||
====Attack Pattern Changes==== | |||
===Attack Pattern Changes=== | |||
Raid Bosses will periodically change their locations after set amounts of time and use different attacks when their HP drops to a certain point. | Raid Bosses will periodically change their locations after set amounts of time and use different attacks when their HP drops to a certain point. | ||
*'''Transition''': 120 seconds after the start of the raid, Drabaki will always transition. From there on, it will then transition after every 60 seconds. | *'''Transition''': 120 seconds after the start of the raid, Drabaki will always transition. From there on, it will then transition after every 60 seconds. | ||
| Line 126: | Line 114: | ||
<br> | <br> | ||
====Strategy==== | |||
===Strategy=== | |||
*'''[https://www.youtube.com/watch?v=IWChlqaR-7M Raid Boss Drabaki Video Guide]''' | *'''[https://www.youtube.com/watch?v=IWChlqaR-7M Raid Boss Drabaki Video Guide]''' | ||
*'''Meteors''': Simply avoid the warning light when meteor falls. | |||
*'''Atrium''': Avoid going to its pit when he moves to another Position. | |||
*'''Crush''': Simply avoid the warning light when he slam his tail. | |||
**Be cautions, in Transition A, its tail can reach his head. | |||
*'''Swipe''': In his original position and Transition A, top platform when attack his head is safe. In Transition B, this move will miss if you stand at platform 2 from bottom. | |||
*'''Blitz''': Simply avoid the warning light when he slam his head. | |||
*'''Dusk Inferno''': Go to the right if you're in top platform, then when Drabaki is about sweep to the right, go to left. | |||
*'''Corrupt Downfall''': See '''Meteors''' to see how to avoid this move. | |||
*'''Vile Shockwave''': Avoid going below his head. Top platform is safe. | |||
*'''Dusk Blaze''': Use any Special Active that gives invincible frames or get below his head. | |||
*'''Abyss''': Go to the left of his tail to avoid sucking to the void or use long invinciblity Special Actives. | |||
*'''Final Attack''': If you're in middle, you can't do anything to avoid this move since you cannot move during Drabaki die cutscenes. | |||
<br> | <br> | ||
== Music == | == Music == | ||
Drabaki - [https://www.youtube.com/watch?v= | Drabaki - [https://www.youtube.com/watch?v=EeyRHW69vTw '''''field_raid002'''''] | ||
<br> | <br> | ||
| Line 147: | Line 146: | ||
== Trivia == | == Trivia == | ||
*In the poster of Drabaki, there is a town on top of the mountain. That town's name is 'Fahrmann', which is [[Ara]]'s hometown. | *In the poster of Drabaki, there is a town on top of the mountain. That town's name is 'Fahrmann', which is [[Ara]]'s hometown. | ||
*Through Drabaki's weapon descriptions it is revealed that Drabaki was a snake banned from the heavens with a chance to return to its proper place through patience. After thousands of years, a snake becomes a serpent and from there it becomes a huge serpent (Imoogi) and once the Imoogi finds a Cintamani it becomes a dragon. | |||
**In KR '''Drabaki's Jewel''' is called '''Drabaki's Cintamani'''. | |||
*Drabaki would later return in a Henir-Infused form in [[Twisted Time and Space - Fahrmann's Peak|Twisted Time and Space - Fahrmann's Peak]], which recycled much of this raid's mechanics, along with adding a few new ones. | |||
== Alternative Names == | |||
{{AlternateLanguages | |||
|Color={{ColorSel|Misc}} | |||
|KR=파르만 봉우리 |KRName=Fahrmann's Peak | |||
|TW=帕爾曼高峰 |TWName=Fahrmann's Peak | |||
|CN=帕尔曼之峰 |CNName=Fahrmann's Peak | |||
|FR=Sommet du mont Parman |FRName=Peak of Parman Mount | |||
|DE=Gipfel des Parman |DEName=Peak of Parman | |||
|IT=Cima del Parman |ITName=Peak of Parman | |||
|ES=Cúspide del Parmán |ESName=Peak of Parman | |||
|UK=Peak of Parman | |||
}} | |||
<br> | <br> | ||
{{Hunting Fields}} | {{Dungeons|name=a|Orient=Other}}{{Hunting Fields|name=b|Orient=Other}} | ||
{{Guides}} | {{Guides}} | ||
Latest revision as of 05:16, 20 June 2021

Warning: The information in this page is from an old version of Elsword and is no longer available.

Entering Fahrmann's Peak
- After hunting certain number of monsters in Hamel and Sander's fields, 'Gate of Time' opens. The Highlighted blue text is the area where the Gate is located. In KR, the 'Gate of Time' leading to Fahrmann's Peak is exclusively found in Sander fields.
- When the Gate of Time opens a notice can be seen by people in both fields and towns (If you're in PvP, Sparring or Dungeons, you won't see the notice).
- You can use the Gate of Time opening notice to see which field boss battle you can enter.

- Gate of Time remains open for 15 minutes before disappearing.
- Dungeon, PvP queuing is cancelled when entering the Gate of Time.
- After entering the boss field, you have to wait 10 minutes before re-entering.
- You can exit the boss field during the battle, and as long as Gate of Time remains, you can enter mid battle.
- You cannot re-enter for 10 minutes after you've entered once.
- You cannot join mid-battle when Boss's HP is less than 10%.
- You cannot join mid-battle if the time limit is 60 seconds or less.
- You must have at least more than 0.01 Stamina while raiding. Otherwise, You'll see that the others are fighting thin air.
Battle with the Giant Boss
- Maximum of 12 people can enter the Gate of Time into the Boss field.
- When Boss field is full with 12 people, new boss field is created.
- First character to enter the boss field can see the Giant boss emerging.
- There is a 12 minute time limit for the Giant Boss. When the time limit is up, the battle results in defeat.
Field Boss rewards
- Depending on damage dealt by you, you can acquire following items. Field Boss Cube, Ancient Steel Gem, Ancient Guardian Gem..etc
- Ancient Steel Gem and Ancient Guardian Gem are materials used to craft Ancient Steel Wedge and Ancient Guardian Wedge items. These items can be crafted from Glave NPC.
- You can acquire with low probability a Drabaki's Jewel, which contains your character's respective weapon. (Trade is not possible)
- Every weapon is untradeable and +9.
| Icon | Name | Stats |
|---|---|---|
        
|
Warden of Darkness Weapon [Unique] |
Lv70 Weapon: [2 Unidentified Effects] |
         
|
Warden of Darkness Weapon [Unique] |
Lv75 Weapon: [2 Unidentified Effects] |
|
|
Warden of Darkness Weapon [Unique] |
Lv80 Weapon: [2 Unidentified Effects] |
Boss: Warden of Darkness Drabaki

Moves
- Meteors: Drabaki periodically summons meteors that will damage players in its radius.
- Atrium: While switching to any position, Drabaki's body will create pits that continuously damage players.
- Crush: Drabaki slams his tail vertically onto players.
- Swipe: Drabaki uses his tail to sweep the field.
- Blitz: Drabaki takes aim at players, then charge his head into the ground.
- Dusk Inferno: After its health drops to a certain point, Drabaki positions it's head and starts sweeping the field with dark fire. It will perform this 2 times.
- Corrupt Downfall: After its health drops to a certain point, Drabaki casts a dark orb into the sky. High amounts of meteors will then fall randomly on the field.
- Transition - A: Drabaki changes positions by sliding around the map, it's new position will be on the far left. It can use Blitz and both tail attacks in this position.
- After staying in it's new position for a while, it can move to Position B or back to it's original position. Same rules apply for Transition - B.
- Vile Shockwave: While in Position A, Drabaki will cast a dark orb downward. The orb will travel vertically, pass through platforms, and create multiple shockwaves when it hits the ground.
- Transition - B: Drabaki changes positions by sliding around the map, it's new position will be on the far right. It can use both tail attacks in this position.
- Dusk Blaze: While in Position B, Drabaki will exhale dark fire to damage players.
- Abyss: While in Position B, Drabaki will create a large dark orb and transform it into a void. The void will absorb and continuously damage players.
- Final Attack: When Drabaki dies, he will create pits larger than normal (about the AoE of his original Position), deal lethal damage.
- This move is indicated of very long cutscene, when he dies.
Information
Attack Pattern Changes
Raid Bosses will periodically change their locations after set amounts of time and use different attacks when their HP drops to a certain point.
- Transition: 120 seconds after the start of the raid, Drabaki will always transition. From there on, it will then transition after every 60 seconds.
- Dusk Inferno: At 70% HP, Drabaki will begin to mix Dusk Inferno in with its attacks.
- Corrupt Downfall: At 70% HP, Drabaki will begin to mix Corrupt Downfall in with its attacks.
- Awakening: In their original positions, Raid Bosses will awaken and increase their power levels when their HP reaches 40%.
Strategy
- Raid Boss Drabaki Video Guide
- Meteors: Simply avoid the warning light when meteor falls.
- Atrium: Avoid going to its pit when he moves to another Position.
- Crush: Simply avoid the warning light when he slam his tail.
- Be cautions, in Transition A, its tail can reach his head.
- Swipe: In his original position and Transition A, top platform when attack his head is safe. In Transition B, this move will miss if you stand at platform 2 from bottom.
- Blitz: Simply avoid the warning light when he slam his head.
- Dusk Inferno: Go to the right if you're in top platform, then when Drabaki is about sweep to the right, go to left.
- Corrupt Downfall: See Meteors to see how to avoid this move.
- Vile Shockwave: Avoid going below his head. Top platform is safe.
- Dusk Blaze: Use any Special Active that gives invincible frames or get below his head.
- Abyss: Go to the left of his tail to avoid sucking to the void or use long invinciblity Special Actives.
- Final Attack: If you're in middle, you can't do anything to avoid this move since you cannot move during Drabaki die cutscenes.
Music
Drabaki - field_raid002
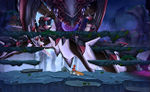
Gallery
-
-
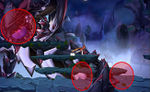
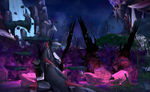
Indication of the appropriate places to combat DraBaki.
-
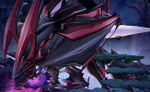
-
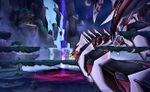
-
DraBaki attacking in Transition - B.


Trivia
- In the poster of Drabaki, there is a town on top of the mountain. That town's name is 'Fahrmann', which is Ara's hometown.
- Through Drabaki's weapon descriptions it is revealed that Drabaki was a snake banned from the heavens with a chance to return to its proper place through patience. After thousands of years, a snake becomes a serpent and from there it becomes a huge serpent (Imoogi) and once the Imoogi finds a Cintamani it becomes a dragon.
- In KR Drabaki's Jewel is called Drabaki's Cintamani.
- Drabaki would later return in a Henir-Infused form in Twisted Time and Space - Fahrmann's Peak, which recycled much of this raid's mechanics, along with adding a few new ones.
Alternative Names
| Server | Name | Translation |
|---|---|---|
| 파르만 봉우리 | Fahrmann's Peak | |
| 帕爾曼高峰 | Fahrmann's Peak | |
| 帕尔曼之峰 | Fahrmann's Peak | |
| Gipfel des Parman | Peak of Parman | |
| Cúspide del Parmán | Peak of Parman | |
| Sommet du mont Parman | Peak of Parman Mount | |
| Cima del Parman | Peak of Parman | |
| Peak of Parman | ||
- Other
- Region 1~6
- Region 7~12
- Region 13~18
- Region 19~20
- Laby
- Noah
- Lithia
- Miscellaneous
| Event | Challenge Mode | Guild | ||
|---|---|---|---|---|
| {{ }} | {{ }} | {{ }} | {{ }} | {{ }} |
- Other
- Region 1~6
- Region 7~12
- Region 13~18
- Region 19~20
General Guides
{{
}}
Story
Gameplay
Modes
Combat
Character Progression
Systems
Summons
Items
Equipment
Functionality
Cash
Miscellaneous
Other Media
