Bethma Lake (Night): Difference between revisions
No edit summary |
CheeseLuvas (talk | contribs) |
||
| Line 1: | Line 1: | ||
[[File:3-3select.png|right]] | [[File:3-3select.png|right]] | ||
= | =Bethma Lake (Night)= | ||
After having [[besma#Toma|Toma]] destroy the Hypnotizing Orbs, [[besma#Chacha Buch|Chacha Buch]] explains that it must be the evil work of '''Kayak the Shaman'''. He then sends Elsword and the others to raid '''Bethma Lake''' during the '''night''' in hopes of discovering the location of '''Kayak'''. | |||
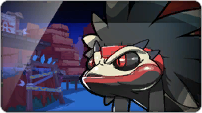
Upon arriving there, they discover that the lake has been overrun with '''Shadow Lizardmen'''. They only appear during the night and are much more ruthless compared to normal lizardmen. After the leader of the '''Shadow Lizardmen''' was defeated, he drops a piece of a torn map. Elsword and the others defeat the rest of the lizardmen and find all of the map pieces. They bring the pieces back to [[besma#ChachaBuch|Chacha Buch]]. He tells the group that he will combine the pieces and tell them where it leads them. | |||
==Mobs== | ==Mobs== | ||
Revision as of 15:20, 11 June 2011

Bethma Lake (Night)
After having Toma destroy the Hypnotizing Orbs, Chacha Buch explains that it must be the evil work of Kayak the Shaman. He then sends Elsword and the others to raid Bethma Lake during the night in hopes of discovering the location of Kayak.
Upon arriving there, they discover that the lake has been overrun with Shadow Lizardmen. They only appear during the night and are much more ruthless compared to normal lizardmen. After the leader of the Shadow Lizardmen was defeated, he drops a piece of a torn map. Elsword and the others defeat the rest of the lizardmen and find all of the map pieces. They bring the pieces back to Chacha Buch. He tells the group that he will combine the pieces and tell them where it leads them.
Mobs
Dark Lizardman (Spear): An inquisitive lizardman that keeps looking around. Deals quick, short attacks with its spear. It can now turn transparent.
Dark Lizardman (Club): A bigger, stronger lizardman who uses a club and is armoured. Deals quick, strong attacks with the club. Can activate super armour when doing heavy attacks.
FireKomodo: Similar to the Yellow Salamander, it attacks by charging towards you but can now breathe fire at you causing the burn ailment.
Armadillo: The armadillo is always angry, even at night. Exactly the same as the one in 3-1.
Obstacles
Fire Breathing Totem: A peculiarly decorated totem that can breathe fire, causing the burn ailment.
Mini Boss, Giant Dark Lizardman
This Lizardman is the same as the bigger dark lizardman, but is even bigger and faster. Furthermore, it can activate super armour more frequently making it rather annoying to defeat for beginners.
Boss, Dark Lizardman
The Dark Kitdeun is angry at the death of the other Twin Lizardmen. This Lizardman looks the same except for a dark palette of colours on its skin and it also holds two blades now. Attack style is the same except that he can now join two scimitars to throw as a boomerang. He can also charge towards you with super armour and hack at you randomly, dealing substantial damage.
Videos
