The Rage of Behemoth

From Elwiki
The Rage of Behemoth

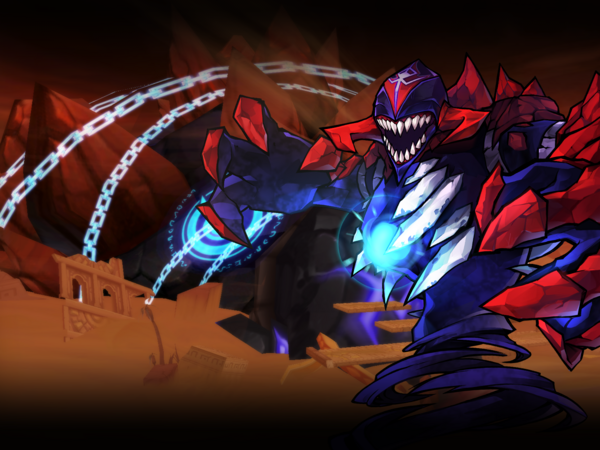
Historical Battle, The Final Battle to Seal away an enraged Behemoth in the desert.

Description
Transported to Sander's past where we face an enraged Behemoth.
Recommended Level
99
Required Combat Power
2,500,000
Entry Requirements
{{
  • 5 weekly entries permitted. Entry count is shared with other Secret Dungeons.
  • Must be Level 99 or higher.
}}
Ally
{{ {{
Ally Image Ally Description Ally Moves
Sylphid - A Sylphid from the Caluso Tribe that will transport you to your intended destination.
  • Mass Teleport: Slyphid will teleport you to get close to Behemoth.
  • Sylph's Aura: Slyphid will give you a buff that increases Action Speed and Movement Speed when the party reaches the fourth room.

}}

}}
Mobs
{{ {{
Monster Image Monster Description Monster Moves
Enraged Vegar Trock - An upgraded version of the Vegar Trock.
  • Punch: The Trock will perform a basic punch attack.
Enraged Rocky Trock - An upgraded version of the Rocky Trock.
  • Block: Rocky Trocks will defend against any attack from their front side.
  • Counterattack: While being attacked from the front they can dish out a quick slap.
  • Punch: The Trock will perform a basic punch attack.
Enraged Caskey - An upgraded version of the Caskey.
  • Bite: The Caskey will latch onto a target then repeatedly gnaw on them with heavy hitstun.
Enraged Fogta Trock - An upgraded version of the Fogta Trock.
  • Self-Destruct: The Trock will plump up and explode.
Enraged Oba Trock - An upgraded version of the Oba Trock.
  • Boomerang: The Oba Trock will throw their boomerang which can hurt both on its way forward and back.
  • Boomerang Barrage: The Oba Trock will march forward while swinging its boomerang back and forth.
  • Boomerang Ram: The Oba will position his boomerang like a horn then charge forward in super armor.
Enraged Iron Trock - An upgraded version of the Rash Iron Trock.
  • Heavy Swing: Attack with a heavy downward swing.
  • Club Swing: The Trock will swing his club several times.

}}

}}
General
{{ {{
Monster Image General Description General Moves
Brutal Vegar Trock - A powerful Enraged Vegar Trock that is stronger and has substantially more health.
  • Punch: The Trock will perform a basic punch attack.
Brutal Iron Trock - A powerful Enraged Iron Trock that is stronger and has substantially more health.
  • Club Swing: The Trock will swing his club several times.
Brutal Rocky Trock - A powerful Enraged Rocky Trock that is stronger and has substantially more health.
  • Block: Rock Trocks will defend against any attack front their front side.
  • Counterattack: While being attacked from the front they can dish out a quick slap.
  • Punch: The Trock will perform a basic punch attack.
Brutal Oba Trock - A powerful Enraged Oba Trock that is stronger and has substantially more health.
  • Boomerang: The Oba Trock will throw their boomerang which can hurt both on its way forward and back.
  • Boomerang Barrage: The Oba Trock will march forward while swinging its boomerang back and forth.
  • Boomerang Ram: The Oba will position his boomerang like a horn then charge forward in super armor.

}}

}}
Mini Boss
{{ {{
Monster Image Boss Description Boss Moves
Enraged Archon - A stronger and faster version of Trock Cerberus.
  • Claw: Enraged Archon will slash with his claws.
  • Charge: Enraged Archon will dash into his targets while continuously headbutting them.

}}

}}
Obstacles
{{ {{
Obstacles Image Obstacles Description
Launch Pad - Jumping on this platform will propel you into the air at a given direction.
Desert Winds - These strong winds will push you one way or the other if you don't push against it.
Sealing Device - A device designed to help seal Behemoth when activated. These must be activated to progress.

}}

}}
Boss
{{ {{
Monster Image Boss Description Boss Moves
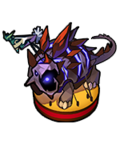
Enraged Manifestation - A manifestation of the Behemoth's anger. The root of the war that befell Sander many years ago.
  • Slash: A basic attack where the manifestation will swing its claws downward. This can be avoided by moving to the side opposite of the manifestation's glowing arm.
  • Night Slash: The manifestation will swing its claws to create a dark-red wave that can drag players away while continuously damaging them. This can be avoided by moving directly beneath the manifestation, the wave will still hit players that are on the lowest platform if they aren't directly underneath the boss.
  • Shadow Ball: The manifestation will summon a purple sphere that will constantly follow and damage anyone that touches it. Due to way the attack homes onto players, it will trap players and is able to pull off a substantial amount of damage in a short time.
  • Sand Prison: Similar to Chieftain Trockta, a bone-like cage will be summoned to imprison all players while the manifestation becomes invincible. The cage will explode if it's not destroyed after a certain duration, dealing heavy damage to every member of your party. If successfully destroyed in time, the manifestation will be stunned for 3 seconds.
  • Sand Hand: After a warning appears on the screen, the manifestation will swing its claw downward, summoning a larger claw to smash one side of the stage. This can be avoided by moving to the side opposite of the manifestation's glowing arm.
  • Head Smash: The manifestation will summon a vacuum that drags players into it (does no damage). The manifestation will then return to Behemoth. As it returns to the Behemoth's body, a random Shadow Doppelganger of the El Search Party for each member of your party will be summoned to fight against you. Behemoth will then roar to stun any targets and proceeds to smash its head onto the stage (area will be highlighted by a large yellow circle).

}}

}}
Dialogue
  • Dungeon Start Cutscene
  • Mid Dungeon Dialogue
  • Boss Intro Dialogue
  • Dungeon Victory Quotes
  • Vapor: Hmm... Let's see. You brought this El Fragment near the heart.. A strange power flows out of it.. Hm? Wo-.. woah!!!!!!
  • {Player}: (Mmnn... Vapor, what happ-..?)
  • Veiga: You awake? I don't recognize your face, are you new?
  • {Player}: (Who is this... Vegar? No..)
  • Veiga: Everyone's a bit confused like you at firs...
  • Behemoth: (HOWL!!!!)
  • Veiga: We must seal it quickly.... Are you ready? Then let's get this show on the road! May the wind protect you!!!
Reward
{{
Image Item Name How to Obtain Effect
Barrier's Fragment Obtained by playing the dungeon. Quantity: 100

Throw at A tree imbued with the El energy to gain rewards.

El Reward Obtained by playing the dungeon. Quantity: 5

Exchange for rewards at Ariel.

ED Obtained by playing the dungeon. ED Gain: 20,000,000
EXP Obtained by playing the dungeon. EXP Gain: 200,000,000
}}
Gallery
Videos
Trivia
{{
  • During the development, this dungeon was initially called "모래바람의 기억 (Sand Tempest's Memory)".
  • It is revealed in the game files that this dungeon was originally intended to have another miniboss, Enraged Summoner, a stronger version of the Chieftain Trockta.
}}
Updates
{{
Date Changes
KR NA
11/09/2023 12/06/2023
  • Level Requirement increased from 70-90 to 99.
  • CP Requirement increased from 15000 to 2500000.
  • Dungeon shortened.
}}
Alternative Names
{{
Server Name Translation
South Korea 폭주의 베히모스 Runaway Behemoth
Taiwan (Traditional Chinese) 暴走的貝西莫斯 Runaway Behemoth
China (Simplified Chinese) 暴走的贝希摩斯 Runaway Behemoth
Germany Rasender Behemoth Raging Behemoth
Spain Behemoth furioso Raging Behemoth
France Behemoth déchaîné Raging Behemoth
Italy Behemoth Forsennato Raging Behemoth
Poland Szalejący Behemot Raging Behemoth
United Kingdom Raging Behemoth
Brazil Frenesi de Behemoth Frenzy of Behemoth
}}


  • Other
  • Region 1~6
  • Region 7~12
  • Region 13~18
  • Region 19~20
  • Laby
  • Noah
  • Lithia
  • Miscellaneous