Crimson Cradle of Flames
- For the series of Challenge Mode raid dungeons, see Crimson Cradle of Flames (Challenge Mode)


Crimson Cradle of Flames
| “ | An area opened up at the center of the tower, blood red, and hollow.
|
” |

- Story Mode
- Normal Mode
180,000

- Up to 6 players can enter, requiring a minimum of at least 3 people. (Normal)
- 1~4 players. (Story)
- Only three Resurrection Stones can be used to revive.
- Players are given a 15 second penalty before they can resurrect themselves.
- Bosses can only be frozen or petrified 3 times each (every hit is 1 count) at a time. When this limit is exceeded, they become invulnerable to that debuff for 60 seconds.
- Freezing or petrifying can be attempted again after 30 seconds, but you will not be able to chain it further. This also resets the 3-step chain's cooldown to 60 seconds.
 Enviromental Debuff - Demon RealmEnviromental Debuff - Demon Realm
- The El's power does not reach into this realm, Attack and HP will be reduced by 50%.
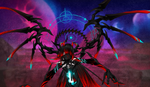
Phase 1: Malice
The initial shell housing the corrupted Master of Fire. A colossal boss in a similar bane to Eltrion, with equally powerful attack that take full advantage of the stage. Large shells will travel across the map and act as obstacles. Most notably, Rosso in later portions of the fight is capable of destroying portions of the stage itself.
Phase 2: Recluse
Out of the rubble of his shell, a half corrupted Rosso will appear, brandishing his scythe, he enters battle in much a similar style to his weapon in previous dungeons.
Phase 3: Dark Recluse
The corruption afflicted on Rosso has taken complete control over the Master of Fire. This form, at his absolute peak of power, takes advantage of nearly all the gimmicks leading up to this fight. The boss will regenerate HP if it is able to defeat a player or if players are too far away from it.
}}| Monster Image | Monster Description | Monster Moves |
|---|---|---|
  |
Blood Rage - Shell like structures summoned by Malice. They will both act as barriers and means of attacking players. |
Note:
}} |
| Obstacles Image | Obstacles Description |
|---|---|
| Pitfall - Areas without any ground, either to the side of the map or created by Rosso himself. Unlike pitfalls in other dungeons, falling down these pits will quickly tick away at player's HP until they die, effectively making them instant death. | |

|
Grey Thorns - Thorns that can only be destroyed using combos or actives.
|

|
Red Thorns - Thorns that can only be destroyed using special actives.
}} |
| Monster Image | Boss Description | Boss Moves |
|---|---|---|
  |
Malice - A dark colossus made out of volcanic rock by a corrupted Rosso, reawakened by the remnant of the Red Eye. The beam will petrify players. |
Attacks highlighted in red bypass Invincibility frames. Note:
|
  |
Recluse - A corrupted Rosso, half dark, half light with the power of the Crimson Eye wielding his scythe. |
Attacks highlighted in red bypass Invincibility frames. Note:
|
  |
Dark Recluse - A corrupted Rosso empowered by encasing himself in the dark ruble of the tower, his body is now completely consumed in darkness. At peak power, he won't give up without putting up a fight. |
Attacks highlighted in red bypass Invincibility frames. Note:
}} |
 Add: Oi, what do we do now?
 Elsword: I'm certain he's still in there. It's just that his cage became that monstrous body instead of the orb!
 Malice: Kee, Keeheeheehee...!! KYAHAHAHAHA!
| Icon | Name | Stats | Enhancement Bonuses |
|---|---|---|---|
             
|
Flames of Judgement - Demonic Weapon |
Lv99 Weapon: [Unidentified Stats] [Unidentified Stats] [Unidentified Stats] Resistance to Fire Attributes +50 +1% chance of inflicting burning effect (Applies only to fire element) Adaptation +5% (Dungeon) When attacking, 2% chance of firing Black Titan's Beam (Cooldown: 60 secs) (Dungeon) |
Enhancement +9: Special Mystic Stone Slot opens, MP Cost -5% (Dungeon)(Max 35%) |
| Image | Name | Boss | Character | Stats | Set Effects |
|---|---|---|---|---|---|
 |
Lv99 Accessory (Weapon): All Skill Damage +10% (Hyper Active/Wedding Skills excluded) When attacking, All Resistances decrease by -15 for 10 seconds (Max 10 Stacks) (Dungeon) When attacking, All Resistances decrease by -5 for 10 seconds (Max 10 Stacks) (Match) |
2 Pieces:
3 Pieces:
|
-

-
-

-
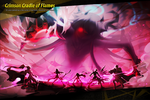
Old loading image.


- The characters featured on the loading screen are Comet Crusader, Daybreaker, Knight Emperor, Rage Hearts, and Bluhen.
| Date | Changes | |
|---|---|---|
| KR | NA | |
| 07/26/2018 | 08/08/2018 |
|
| 08/09/2018 | - |
|
| 08/23/2018 | - |
|
| 08/14/2019 | - |
|
| 03/12/2020 | 04/08/2020 |
|
| 11/19/2020 | 12/16/2020 |
|
| Server | Name | Translation |
|---|---|---|
| 홍염의 요람 | Cradle of Crimson Flames | |
| 紅炎の揺りかご | Cradle of Crimson Flames | |
| 红炎的摇篮 | Cradle of Crimson Flames | |
| Blutflammen-Grube | Pit of Bloody Flames | |
| Fosa de llamas sanguíneas | Pit of Bloody Flames | |
| Caveau de la Flamme sanguinaire | Burial Vault of the Bloody Flame | |
| Fossa della Fiamma Sanguinaria | Pit of the Bloody Flame | |
| Jama Płomieni Krwi | Pit of Bloody Flames | |
| Berço das Chamas Escarlates | Cradle of Scarlet Flames |
- Region 13~18
- Region 1~6
- Region 7~12
- Region 19~21
- Laby
- Noah
- Lithia
- Other
- Miscellaneous
| Rigomor | Master Road | Pruinaum Outskirts | |||
|---|---|---|---|---|---|
| {{ }} | {{ }} | {{ }} | {{ }} | {{ }} | {{ }} |
- Region 13~18
- Region 1~6
- Region 7~12
- Region 19~21
- Other