Template:AbilitàSpeciali: Difference between revisions
No edit summary |
Shironsaki (talk | contribs) m (Text replacement - "Spirit Energy" to "Energy") |
||
| (14 intermediate revisions by 5 users not shown) | |||
| Line 1: | Line 1: | ||
{| style="font-size: 1em; width: 100%; border: 1px #ccc solid; border-radius: 0px;" cellpadding="0" cellspacing="0" | {| style="font-size: 1em; width: 100%; border: 1px #ccc solid; border-radius: 0px;" cellpadding="0" cellspacing="0" | ||
|- | |- | ||
| style="font-size: 1.25em; text-align: center; | | style="font-size: 1.25em; text-align: center; 0px 0px 0px black; border-bottom: 1px #000 solid; background-color: lightblue; background-image: linear-gradient(to bottom, #505050 0%, black 100%);" class="textfloat" | '''Abilità dei Personaggi''' | ||
|- | |- | ||
| | | | ||
| Line 7: | Line 7: | ||
{{tabs|name=system | {{tabs|name=system | ||
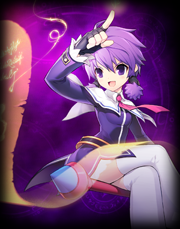
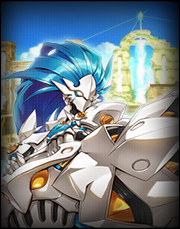
|tab1=Elsword|contents1=[[File:Wotsposter2.png|link=Way of the Sword/it|left]] | |tab1=Elsword|contents1=[[File:Wotsposter2.png|link=Way of the Sword/it|left]] | ||
'''[[Way of the Sword/it|La | '''[[Way of the Sword/it|La Strada della Spada]]''' | ||
---- | ---- | ||
Quando sei nei panni di [[Elsword/it|Elsword]], ci sarà un indicatore supplementare sotto l'interfaccia del combattimento. '''La | Quando sei nei panni di [[Elsword/it|Elsword]], ci sarà un indicatore supplementare sotto l'interfaccia del combattimento. '''La Strada della Spada''' (conosciuta anche come Strada della spada o WotS) ti consente di intraprendere la strada per lo "Spadaccino della vitalità" o lo "Spadaccino della distruzione" per un certo periodo. | ||
Essa si riempirà di furia distruttiva (colore rosso) o di forza della vitalità (colore blu) a seconda della skill o della combo utilizzata. | Essa si riempirà di furia distruttiva (colore rosso) o di forza della vitalità (colore blu) a seconda della skill o della combo utilizzata. | ||
| Line 16: | Line 16: | ||
Da notare che il sistema utilizzato non è ciò che potrebbe sembrare all'inizio. Gli attacchi di tipo vitalità toglieranno vitalità dalla barra, portando la barra verso distruzione; gli attacchi di tipo distruzione toglieranno distruzione dalla barra, portando la barra verso vitalità. | Da notare che il sistema utilizzato non è ciò che potrebbe sembrare all'inizio. Gli attacchi di tipo vitalità toglieranno vitalità dalla barra, portando la barra verso distruzione; gli attacchi di tipo distruzione toglieranno distruzione dalla barra, portando la barra verso vitalità. | ||
|tab2=Aisha|contents2=[[File:Aishposter2.png|link= | |tab2=Aisha|contents2=[[File:Aishposter2.png|link=Memorize/it|left]] | ||
'''[[ | '''[[Memorize/it|Memorizzazione delle Skill]]''' | ||
---- | ---- | ||
Quando Aisha rigenera il mana per circa 1.5 secondi, è capace di memorizzare una skill da uno slot skill a uno slot della memorizzazione. Comparirà l'icona di una nota sopra al personaggio e le skills possibili da memorizzare sono evidenziate. | Quando Aisha rigenera il mana per circa 1.5 secondi, è capace di memorizzare una skill da uno slot skill a uno slot della memorizzazione. Comparirà l'icona di una nota sopra al personaggio e le skills possibili da memorizzare sono evidenziate. | ||
Quando la nota appare e premi un tasto associato a una skill, il mana verrà consumato e il conto alla rovescia verrà aggiunto, ma la skill non verrà attivata. Al posto di attivarsi, verrà aggiunta allo slot di memorizzazione. Quando la memorizzazione avrà successo, la nota sopra il personaggio diventerà grande. Aisha è capace di memorizzare fino a 3 skills contemporaneamente. Premendo il tasto "V" attiverai la prima skill che hai memorizzato senza utilizzare gli MP e senza avviare il conto alla rovescia di essa. Ciò consente ad Aisha di utilizzare due volte di fila una stessa abilità. | Quando la nota appare e premi un tasto associato a una skill, il mana verrà consumato e il conto alla rovescia verrà aggiunto, ma la skill non verrà attivata. Al posto di attivarsi, verrà aggiunta allo slot di memorizzazione. Quando la memorizzazione avrà successo, la nota sopra il personaggio diventerà grande. Aisha è capace di memorizzare fino a 3 skills contemporaneamente. Premendo il tasto "V" attiverai la prima skill che hai memorizzato senza utilizzare gli MP e senza avviare il conto alla rovescia di essa. Ciò consente ad Aisha di utilizzare due volte di fila una stessa abilità. | ||
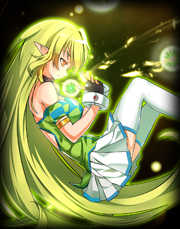
|tab3=Rena|contents3=[[File:Renposter2.png|link= | |tab3=Rena|contents3=[[File:Renposter2.png|link=Nature's Force System/it|left]] | ||
'''[[ | '''[[Nature's Force System/it|Energia della Natura]]''' | ||
---- | ---- | ||
'''Energia della Natura''' è un sistema esclusivo per gli Elfi. L'interfaccia del sistema è situata sotto la barra degli MP o sotto gli slots delle skills. Rena è capace di caricare la barra delle sfere della natura con attacchi come i calci e le frecce. Dopo l'utilizzo di '''7''' calci o frecce, '''1''' sfera verrà aggiunta a Rena. Quando Rena ha 3 sfere della natura (1 in [[Awakening Mode/it|Accrescipotere]]), ottiene un effetto di stato che aumenta la '''velocità di movimento, il recupero degli MP e la riduzione del danno.''' | '''Energia della Natura''' è un sistema esclusivo per gli Elfi. L'interfaccia del sistema è situata sotto la barra degli MP o sotto gli slots delle skills. Rena è capace di caricare la barra delle sfere della natura con attacchi come i calci e le frecce. Dopo l'utilizzo di '''7''' calci o frecce, '''1''' sfera verrà aggiunta a Rena. Quando Rena ha 3 sfere della natura (1 in [[Awakening Mode/it|Accrescipotere]]), ottiene un effetto di stato che aumenta la '''velocità di movimento, il recupero degli MP e la riduzione del danno.''' | ||
| Line 38: | Line 38: | ||
Ricevi anche un bonus quando l'accrescipotere finisce. In base alla dimensione del nucleo, ricevi un ammontare di HP ed MP: ricevi una piccola porzione se il nucleo non è presente e approssimativamente il 10% di HP e 100MP se il nucleo è al massimo della sua grandezza. | Ricevi anche un bonus quando l'accrescipotere finisce. In base alla dimensione del nucleo, ricevi un ammontare di HP ed MP: ricevi una piccola porzione se il nucleo non è presente e approssimativamente il 10% di HP e 100MP se il nucleo è al massimo della sua grandezza. | ||
|tab5=Eve|contents5=[[File:Eveposter2.png|link= | |tab5=Eve|contents5=[[File:Eveposter2.png|link=Core Release/it|left]] | ||
'''[[ | '''[[Core Release/it|Nucleo Nasod]]''' | ||
---- | ---- | ||
Quando Eve attiva l'accrescipotere(non neccessariamente il terzo) entra nella modalità '''Cuore della regina''' e rilascia un Nucleo Nasod che l'aiuterà in battaglia, con funzioni offensive e defensive. La potenza del Nucleo sarà maggiore se attivato con il terzo accrescipotere. | Quando Eve attiva l'accrescipotere(non neccessariamente il terzo) entra nella modalità '''Cuore della regina''' e rilascia un Nucleo Nasod che l'aiuterà in battaglia, con funzioni offensive e defensive. La potenza del Nucleo sarà maggiore se attivato con il terzo accrescipotere. | ||
| Line 47: | Line 47: | ||
Quando Eve viene attaccata(non in aria), il Nucleo passa in modalità difensiva e ricopre Eve assorbendo i danni. Premendo Z o X in posizione di difesa, Eve passerà alle spalle del nemico. Dopo ciò il Nucleo scompare e riapparirà dopo alcune Hits. | Quando Eve viene attaccata(non in aria), il Nucleo passa in modalità difensiva e ricopre Eve assorbendo i danni. Premendo Z o X in posizione di difesa, Eve passerà alle spalle del nemico. Dopo ciò il Nucleo scompare e riapparirà dopo alcune Hits. | ||
|tab6=Chung|contents6=[[File:Chungposter2.png|link= | |tab6=Chung|contents6=[[File:Chungposter2.png|link=Freiturnier/it|left]] | ||
'''[[ | '''[[Freiturnier/it|Freiturnier]]''' | ||
---- | ---- | ||
Chung's '''Ammunition Supply''' is one of his most notable and interesting features. Many of his skills are ammo-reliant. Skills such as [[Detonation/it|Detonation]] and [[Lunatic Blow/it|Lunatic Blow]] use up all of Chung's ammo, but increase in power based on how much ammo was used. Other skills such as [[Aiming Shot/it|Aiming Shot]] or [[Steel Edge/it|Steel Edge]] use only one. Many of Chung's X attacks use ammo too. | Chung's '''Ammunition Supply''' is one of his most notable and interesting features. Many of his skills are ammo-reliant. Skills such as [[Detonation/it|Detonation]] and [[Lunatic Blow/it|Lunatic Blow]] use up all of Chung's ammo, but increase in power based on how much ammo was used. Other skills such as [[Aiming Shot/it|Aiming Shot]] or [[Steel Edge/it|Steel Edge]] use only one. Many of Chung's X attacks use ammo too. | ||
| Line 55: | Line 55: | ||
Whenever Chung is hit while he has a blue outline (e.g., the third attack of the ZZZ combo. Like super armor, it cannot be seen if unit graphics are not set to high), he switches to a guarding stance which gives 66% damage reduction. However, he will stagger after guarding around 5-6 hits or an attack that [[Status Effects/it|stuns or flattens]]. | Whenever Chung is hit while he has a blue outline (e.g., the third attack of the ZZZ combo. Like super armor, it cannot be seen if unit graphics are not set to high), he switches to a guarding stance which gives 66% damage reduction. However, he will stagger after guarding around 5-6 hits or an attack that [[Status Effects/it|stuns or flattens]]. | ||
|tab7=Ara|contents7=[[File:Araposter2.png|link= | |tab7=Ara|contents7=[[File:Araposter2.png|link=Eun's Power/it|left]] | ||
'''[[ | '''[[Eun's Power/it|Modalità Eun]]''' | ||
---- | ---- | ||
By using the hairpin of Eun (design varies on her class), Ara is able to go into a 3rd awakening bead transformation called the Eun Mode. While in this mode, her appearance changes, in which her hairstyle will change(hairstyle varies on her class) and become fully white, 9 spectral tails will also appear on her back, giving her the looks of the Gumiho. Equipped accessory will not be shown in this mode. | By using the hairpin of Eun (design varies on her class), Ara is able to go into a 3rd awakening bead transformation called the Eun Mode. While in this mode, her appearance changes, in which her hairstyle will change(hairstyle varies on her class) and become fully white, 9 spectral tails will also appear on her back, giving her the looks of the Gumiho. Equipped accessory will not be shown in this mode. | ||
Ara has a unique combo system which involves using | Ara has a unique combo system which involves using Energy. Energy is shown as beads below your HP bar. New players start with a 4 bead gauge, but can expand by 1 bead every 10th level (e.g. level 20 will give you 6 beads, level 30 will give you 7 beads) up to 10 beads. | ||
Ara is able to cancel active skills by using another skill/active skill right before the previous skill used ends. This will cancel the active skill's final hit which prevents KD, but also gains extra | Ara is able to cancel active skills by using another skill/active skill right before the previous skill used ends. This will cancel the active skill's final hit which prevents KD, but also gains extra Energy depending on the skill. For example, if you used [[Exorcism Stance 3: Shadoweave/it|Shadow Knot]] (which usually gains 1 spirit energy when used) and cancel with [[Tiger Stance 2: Tiger Claw/it|Tiger Claw]], you will gain 5 Energy instead (1 from using Shadow Knot + 4 from cancel bonus as stated in description). | ||
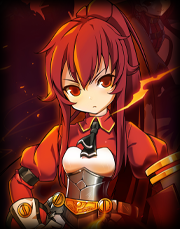
|tab8=Elesis|contents8=[[File:Elesisposter2.png|link=Chivalry System/it|left]] | |tab8=Elesis|contents8=[[File:Elesisposter2.png|link=Chivalry System/it|left]] | ||
'''[[Chivalry System/it|La via della cavalleria]]''' | '''[[Chivalry System/it|La via della cavalleria]]''' | ||
| Line 71: | Line 71: | ||
Note that the system they use is not what what it may appear to be at first; gale-based attacks take away gale from the gauge, leaning the gauge towards annihilation; annihilation-based attacks take away annihilation from the gauge, leaning the gauge towards gale; this is why only attacks that use the gauge area affected in the respective aura. | Note that the system they use is not what what it may appear to be at first; gale-based attacks take away gale from the gauge, leaning the gauge towards annihilation; annihilation-based attacks take away annihilation from the gauge, leaning the gauge towards gale; this is why only attacks that use the gauge area affected in the respective aura. | ||
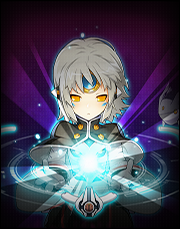
|tab9=Add|contents9=[[File:Addposter2.png|link= | |tab9=Add|contents9=[[File:Addposter2.png|link=Dynamo Point System/it|left]] | ||
'''[[ | '''[[Dynamo Point System/it|Punti Dinamo]]''' | ||
---- | ---- | ||
Unlike other characters' awakening, Add's awakening is called the Dynamo mode ( | Unlike other characters' awakening, Add's awakening is called the Dynamo mode ({{DCM}}). Another name for {{DCM}} is '''Configuration Mode'''. When he is not in the {{DCM}}, every hit he does will charge up the DP gauge. When you have at least 100 charge, Add is able to awaken like any other character at the cost of 50 Charge and all surrounding targets will be damaged. While in the DP mode, his stance and dynamos will be changed. Every hit he does will decrease the gauge. Pressing awaken hot key again will deactivate the DP mode. Like awakening, Add will gain a damage boost when in {{DCM}}. Unlike a normal awakening, when Add goes into DP mode, the screen will not freeze. Able to execute DP combos extension depending on job advancements. Able to negate the usage of DP for a skill which uses DP. | ||
When Add goes into DP mode, 1 DP counter will be added to the counters below his portrait. DP Counters are used to power up his skills. Skills will only be boosted if Add is in DP mode. | When Add goes into DP mode, 1 DP counter will be added to the counters below his portrait. DP Counters are used to power up his skills. Skills will only be boosted if Add is in DP mode. | ||
Latest revision as of 17:15, 30 April 2023
| Abilità dei Personaggi |
 Quando sei nei panni di Elsword, ci sarà un indicatore supplementare sotto l'interfaccia del combattimento. La Strada della Spada (conosciuta anche come Strada della spada o WotS) ti consente di intraprendere la strada per lo "Spadaccino della vitalità" o lo "Spadaccino della distruzione" per un certo periodo. Essa si riempirà di furia distruttiva (colore rosso) o di forza della vitalità (colore blu) a seconda della skill o della combo utilizzata.
Da notare che il sistema utilizzato non è ciò che potrebbe sembrare all'inizio. Gli attacchi di tipo vitalità toglieranno vitalità dalla barra, portando la barra verso distruzione; gli attacchi di tipo distruzione toglieranno distruzione dalla barra, portando la barra verso vitalità. |