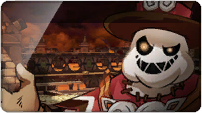
Burning Hope Bridge

Burning Hope Bridge
Known for its tricky landscape.
Map Layout
| Difficulty | Map |
|---|---|
| Normal | 
|
| Hard / Very Hard | 
|
Mobs
Arc Glitter Spearman: The same as the Glitter Spearman from Feita, except that it has a horn, has grey skin, wears shiny golden armour and wields a flashier spear. Its attacks are also faster and stronger.
Arc Glitter Protector: The same as the Glitter Shielder from Feita, except that it has a horn, has grey skin, wears shiny golden armour and wields a flashier shield. It also attacks more frequently.
Arc Glitter Dasher: The same as the Glitter Pounder from Feita, except that it has a horn, has grey skin, wears shiny golden armour and wields a flashier hammer. It also attacks ALOT more frequently and can be a hindrance to you. (Keeps doing the leaping hammer attack which breaks your combos.)
Arc Glitter Sniper: The same as the Glitter Archer from Feita, except that it has a horn, has grey skin, wears shiny golden armour and wields a flashier bow. It also attacks ALOT more frequently and much faster than usual.
Cockatrigle: A big, yellow chicken-like animal that utilises quick pecking moves and super-armoured laser attacks which can cause a very slight burning ailment.
Siege Tower: A tower like wooden structure that consists of a Arc Glitter Sniper and a Glitter Rock Thrower. When destroyed, it can flatten you if it falls on you.
Glitter Rock Thrower: A Glitter who throws rocks down from high places. (immobile)
Wyvern: A yellow wyvern with brown spots over its body. Similar to in attacks to its Feita Counterparts, but releases mini-meteors from its mouth instead of high-frequency waves. It is inadvisable to stand in front of a wyvern when he vomits meteors as it can juggle you, dealing very substantial damage.
Obstacles
Cannons:You can flip the direction of the cannon by hitting it a few times or destroying it. Can be quite annoying at times.
Pits of Doom: You fall into them and a chunk of HP is pulled away from you.
Faraway Archers: These archers fire up to 3 arrows per archer from a distance at you. These archers cannot be killed. Can be killed with Guide Arrow (Unsure whether Scare Chase could)
Midboss: Invincible Vardon
Name: Invincible Vardon
One of the Elrios' best. Boasts great defense and weight.
It has the same attacks as the Arc Glitter Panzer, but when it falls from jumps it can cause earthquake effects.
The only difference is that it is bigger, is capable of using Fatal Fury, and gives you a body slam.
- Its guard is lowered as it both prepares and uses Fatal Fury.
Boss: Crazy Puppet
A pyromaniac puppet who apparently destroyed part of the Bridge of Hope.
Moves
Puppet throw: Throws 3 puppets that explode in a matter of seconds. Being hit with a puppet as it's thrown will result in it exploding immediately dealing many times more damage than if it had just exploded on it's own.
Fiery Whack: Clubs you with a burning stick in a variety of unorthodox movements.
Ignite: The Crazy Puppet can set aflame any portion of the map for a period of time.
Puppet Soul Transfer: The Crazy Puppet laughs in a sinister manner as a red orb pops out from its hat and then falls lifelessly to the ground. At this moment, the Crazy Puppet is intangible and numerous puppets are summoned. The player must find the 'odd puppet out' (that wears a red hat, a red scarf, and has a third 'horn') and destroy it within 15 seconds, eliminating the remaining puppets and taking a chunk out of the Crazy Puppet's health (the more remaining puppets, the more HP is taken out). If the player fails to do so, the Crazy Puppet will laugh maniacally, going into overdrive - having super armor and enhanced speed for 30 seconds. The remaining puppets on the field then explode.
Tactics
Small range power moves, especially those that are low cost, such as Mega Electon Ball will make tackling the soul puppet easier. Wide range skills like Bloody Accel, Hypersonic Stab, and Valkyrie's Javelin can effectively take care of the numerous amounts of puppets in times of desperation.
Notes
- The puppets summoned/spawned during Puppet Soul Transfer are highly immune to knockback, and have too much hp to kill quickly without using skills, so make sure you have the mp to use a skill strong enough to wipe your target(s) out.
- The puppets summoned/spawned during Puppet Soul Transfer like to jump VERY frequently, so make sure you time it right so your Special Active freezes them where it will hit.
- Sometimes, as the Crazy Puppet uses Puppet Soul Transfer, it will instantly recoil in pain, losing hp, as though you killed the odd puppet. It will return to its normal state as usual, but the puppets spawned will remain.
- The puppets spawned have no attacks, and will only move around a lot.
Boss Drops
| Image | Name | Class | Stats | |
|---|---|---|---|---|
 |
Baradon's Flail | Elsword |
Lv50 Weapon: Physical Attack +3250 Magical Attack +2738 Max HP +671 Critical Hit Rate +3% Action Speed +3% Dropped by Miniboss "Invincible Vardon" | |
 |
Puppet Bomb |
Common |
Accessory (Bottom Piece): Physical / Magical Attack +30 Critical Hit Rate +1% | |
