Bethma Lake (Night)/fr: Difference between revisions
mNo edit summary |
No edit summary |
||
| Line 1: | Line 1: | ||
{{Languages|3-3}} | {{Languages|3-3}} | ||
[[File:3- | {{DISPLAYTITLE:3-3 : Lac de Besma de nuit}} | ||
=Bethma Lake (Night)= | [[File:3-3FR.png|right]] | ||
=Lac de Besma de nuit= | |||
<center>{{quotation|You've headed to '''Bethma Lake(Night)''' again in the middle of the night.}}</center> | |||
{| width="100%" style="font-size:1em; line-height:1.5em;" | |||
| valign="top" style="border:2px solid #f7812b; border-radius: 1px;"| | |||
{| cellspacing="2" cellpadding="5" rules="all" style="margin:0.5em 0.5em 0.5em 0.5em; empty-cells:show;" | |||
|valign="top" width="100%" align="center" style="border:1px solid; border-color:#000000; background: #f7812b; color:#FFFFFF;" colspan="12"| '''Description:''' | |||
|- | |||
|width="100%" colspan="12" align="center" style="border:1px solid; border-color:#000000; font-size:1em; line-height:1.5em;" valign="top"| | |||
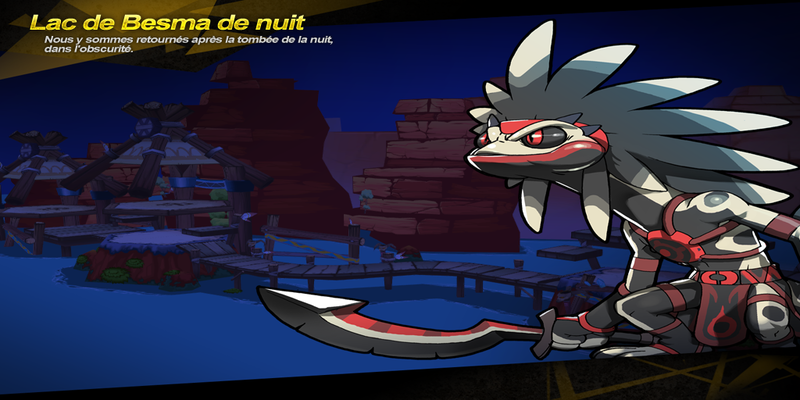
After having [[Bethma#Toma|Toma]] destroy the Hypnotizing Orbs, [[Bethma#Chacha Buch|Chacha Buch]] explains that it must be the evil work of '''Kayak the Shaman'''. He then sends Elsword and the others to raid '''Bethma Lake''' during the '''night''' in hopes of discovering the location of '''Kayak'''. | After having [[Bethma#Toma|Toma]] destroy the Hypnotizing Orbs, [[Bethma#Chacha Buch|Chacha Buch]] explains that it must be the evil work of '''Kayak the Shaman'''. He then sends Elsword and the others to raid '''Bethma Lake''' during the '''night''' in hopes of discovering the location of '''Kayak'''. | ||
Upon arriving there, they discover that the lake has been overrun with '''Shadow Lizardmen'''. They only appear during the night and are much more ruthless compared to normal lizardmen. After the leader of the '''Shadow Lizardmen''' was defeated, he drops a piece of a torn map. Elsword and the others defeat the rest of the lizardmen and find all of the map pieces. They bring the pieces back to [[Bethma#ChachaBuch|Chacha Buch]]. He tells the group that he will combine the pieces and tell them where it leads them. | Upon arriving there, they discover that the lake has been overrun with '''Shadow Lizardmen'''. They only appear during the night and are much more ruthless compared to normal lizardmen. After the leader of the '''Shadow Lizardmen''' was defeated, he drops a piece of a torn map. Elsword and the others defeat the rest of the lizardmen and find all of the map pieces. They bring the pieces back to [[Bethma#ChachaBuch|Chacha Buch]]. He tells the group that he will combine the pieces and tell them where it leads them. | ||
|- | |- | ||
|rowspan="4" | [[File:3-3newFR.png|800px]] | |||
|align="center" style="border:1px solid; border-color:#000000; background: #f7812b; color:#FFFFFF;" colspan="12" | '''Recommended Level:''' | |||
|- | |- | ||
| | | style="border:1px solid; border-color:#000000;" align="center" colspan="12" | 23-25 | ||
| | |||
|- | |- | ||
| ''' | | align="center" style="border:1px solid; border-color:#000000; background: #f7812b; color:#FFFFFF;" colspan="12" | '''Appropriate Item Level:''' | ||
|- | |- | ||
| | | style="border:1px solid; border-color:#000000;" align="center" colspan="12" | | ||
13 | |||
|- | |- | ||
| | |valign="top" width="100%" align="center" style="border:1px solid; border-color:#000000; background: #f7812b; color:#FFFFFF;" colspan="12"| '''Dungeon Layout:''' | ||
|- | |- | ||
|width="100%" colspan="12" align="center" style="border:1px solid; border-color:#000000; font-size:1em; line-height:1.5em;" valign="top"| | |||
{{tabs|name=-|tab1=Normal|contents1=[[Image:Sing.png]] |tab2=Hard|contents2=[[Image:Sing.png]] |tab3=Very Hard|contents3=[[Image:Sang.png]]}} | |||
|- | |- | ||
| | |valign="top" align="center" style="border:1px solid; border-color:#000000; background: #f7812b; color:#FFFFFF;" width="100%" colspan="12"| '''Mobs:''' | ||
| ''' | |||
|- | |- | ||
| [[File: | | colspan="12" style="border:1px solid; border-color:#000000;" valign="top" width="100%" | | ||
| ''' | *[[File:3-3-1.jpg|60px]] | ||
'''Fire Komodo''' - A Komodo that helps the '''Lizardmen''' tribe attack you. But unlike the last ones, this one can breathe fire! | |||
*[[File:DNA1.jpg|60px]] | |||
'''Shadow Lizardman''' - A '''Lizardman''' wielding a long spear, this lizardman can also hide himself in the shadows for sneak attacks! | |||
*[[File:3-3-3.jpg|60px]] | |||
'''Saurus Warrior''' - An upgraded, bigger version of the '''Lizardman Saurus''', this can pack an even bigger punch! | |||
*[[File:3-3-4.jpg|60px]] | |||
'''Armadillo''' - A small armadillo that uses its shell to roll over you. | |||
*[[File:3-2-1.jpg|60px]] | |||
'''Shaman Lizardman ''' - A skinny lizardmen that is capable of casting spells and healing others. | |||
|- | |- | ||
| | |valign="top" align="center" style="border:1px solid; border-color:#000000; background: #f7812b; color:#FFFFFF;" width="100%" colspan="12"| '''Mini Boss:''' | ||
| ''' | |||
|- | |- | ||
| [[File: | | colspan="12" style="border:1px solid; border-color:#000000;" valign="top" width="100%" | | ||
*[[File:3-3-mboss.jpg|60px]] | |||
'''Saurus Supervisor''' - Leader of '''Lizardmen Sauruses''', he is also the strongest, especially with his gigantic spiked club. | |||
<br> | |||
'''Moves:''' | |||
<br> | |||
-''Hammer:'' A simple super armor strike with his club. | |||
<br> | |||
-''Knock Up:'' Saurus Supervisor prepares himself then swings his club launching targets into the air. | |||
<br> | |||
-''Double Attack:'' A two hit combo with his club. | |||
'''Note:''' | |||
-Has a stoic threshold of 20 hits. | |||
|- | |- | ||
| | |valign="top" width="100%" align="center" style="border:1px solid; border-color:#000000; background: #f7812b; color:#FFFFFF;" colspan="12"| '''Obstacles:''' | ||
| ''' | |||
|- | |- | ||
| [[File: | |width="100%" colspan="12" style="border:1px solid; border-color:#000000; font-size:1em; line-height:1.5em;" valign="top"| | ||
*[[File:3-2-trap.jpg|60px]] | |||
'''Totem''' - An inert Totem that stands still. But don't get too close to it or else fire will come out of its mouth straight at you!<br> | |||
|- | |- | ||
| | |valign="top" width="100%" align="center" style="border:1px solid; border-color:#000000; background: #f7812b; color:#FFFFFF;" colspan="12"| '''Boss:''' | ||
| ''' | |||
|- | |- | ||
| [[File: | |width="100%" colspan="12" style="border:1px solid; border-color:#000000; font-size:1em; line-height:1.5em;" valign="top"| | ||
*[[File:3-3-boss.jpg|60px]] | |||
'''Shadow Warrior''' - Although this boss may look like the '''Lizardman Warriors''' from '''[[3-1|Dragon Road]]''', the Shadow Lizardman is much stronger than you think. With agile capabilities making him hard to aim at, the Shadow Lizardman also uses its duel swords for a flurry of attacks! | |||
<br> | |||
''Swipe:'' The Lizardman will run over to you and use its dual swords to repeatedly hit you. | '''Moves:''' | ||
<br> | |||
''Boomerang:'' A very strong skill, the Shadow Lizardman will throw its swords across the field like a boomerang slashing anything that gets in its way. If you are behind it when their swords return, you will be hit. | -''Swipe:'' The Lizardman will run over to you and use its dual swords to repeatedly hit you. | ||
<br> | |||
-''Combo Attack:'' The Lizardman Warriors will do a spinning sword combo that sends you flying. | |||
<br> | |||
-''Boomerang:'' A very strong skill, the Shadow Lizardman will throw its swords across the field like a boomerang slashing anything that gets in its way. If you are behind it when their swords return, you will be hit. | |||
<br> | <br> | ||
-''[[Parry]]:'' Like [[Elsword]]'s [[Parry]] skill, the boss will put up a stance and if you hit him during it, he'll deflect your attack and counter you with his swords, sending you high up into the air. | |||
'''Note:''' | |||
-Has a stoic threshold of 20 hits. | |||
|- | |- | ||
|valign="top" align="center" style="border:1px solid; border-color:#000000; background: #f7812b; color:#FFFFFF;" width="50%" colspan="6"| '''Boss Drops:''' | |||
|valign="top" align="center" style="border:1px solid; border-color:#000000; background: #f7812b; color:#FFFFFF;" width="50%" colspan="6"| '''BGMs:''' | |||
|- | |- | ||
| | | colspan="6" style="border:1px solid; border-color:#000000;" valign="top" width="50%" | | ||
| | {{tabs|name=1|tab1=Shadow Cannon|contents1={{:3-3Bdrop1}} |tab2=Enchanted Ceremonial Sword|contents2={{:3-3Bdrop3}}|tab3=Headdress of Darkness|contents3={{:3-3Bdrop2}}}} | ||
| | | colspan="6" style="border:1px solid; border-color:#000000;" valign="top" align="center" width="50%" | | ||
| colspan=" | === Dungeon === | ||
''' | [http://www.youtube.com/watch?v=OfkrGGUrZw0 '''''music012_stage'''''] | ||
=== Boss === | |||
[http://www.youtube.com/watch?v=pGkEWNkpvz4 '''''music015_boss'''''] | |||
|- | |||
|valign="top" width="100%" align="center" style="border:1px solid; border-color:#000000; background: #f7812b; color:#FFFFFF;" colspan="12"| '''Videos:''' | |||
|- | |- | ||
| | |width="100%" colspan="12" align="center" style="border:1px solid; border-color:#000000; font-size:1em; line-height:1.5em;" valign="top"| | ||
[http://www.youtube.com/watch?v=BDJMkJbE5ks '''Click here for Bethma Lake (Night) Video'''] | |||
|} | |||
''' | |||
|} | |} | ||
<br> | |||
<br | |||
{{Donjons}} | {{Donjons}} | ||
Revision as of 21:00, 20 July 2014

Lac de Besma de nuit
| “ | You've headed to Bethma Lake(Night) again in the middle of the night.
|
” |
| |||||||||||||||||||||||||||||||||||||||||||||||||||||||||||||||||||||||||||||||||||||||||||||||||||||||||||||||||||||||||||||||||||||||||||||||||||||||||||||||||||||||||||||||||||||||||||||||||||||||||||||||||||||||||||||||||||||||||||||||||||||||||||


