Dragon Nest: Abyss

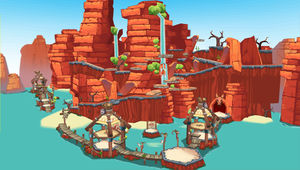
Dragon Nest (Abyss) (Dragon Road: Hell)

This is a Secret Dungeon. In order to enter, you must:
- Complete all dungeons in Bethma on Very Hard.
- Have a Map in your inventory. (Secret Map is needed when entering Hell mode)
Mobs
| Monster Image | Monster Description |
|---|---|
| Heavily Armoured Big, Dark Lizardman Similar to the Big, Dark Lizardman (Club) in Besma Lake (Night), except that its armour has more intricate patterns and it now wears a helmet. It also super armours itself extremely frequently when attacking and when it is hit too many times. It will usually drop it's Super Armor before attacking unlike the normal version. | |
| Black-Eyed Lizard-Wizard Similar to the Lizard-Wizards seen in the Besma Region, except that it can summon multiple magic missiles in a row, and super armor itself while healing on Hell Mode. | |
| Lizardman Warrior Similar to the Lizardman Warriors in Dragon Road, except that it can use a spinning whirlwind attack whenever it reaches it's stoic threshold on Hell Mode. | |
| Cautious Dark Lizardman Similar to the Dark Lizardman (Spear), in Besma Lake (Night), except that it can now throw spears (while in super armour) and wears a helmet. | |
| Red Salamander Similar to the Red Salamanders seen in the Besma Region, except that it breathes fire faster and more often. It also super armours itself right when it breathes fire and when struck. |
Obstacles
Geyser: A hole that spits fire at intervals and can cause burning damage.
Miniboss: Giant Dark Lizardman Warrior
A giant version of the Dark Lizardman Warrior in Besma Lake (Night), except that it is larger and has much higher attack speed.
Subboss: Kayak the Shadow Shaman
Kayak the Shadow Shaman from Dragon's Nest is back now with better powers. His moves are exactly the same except he immediately summons a clone, the Kayak the Shadow Shaman to aid in battle. Both have the same skills and abilities the main difference being the clone has roughly half as much HP. The clone will die automatically if it's original is killed.
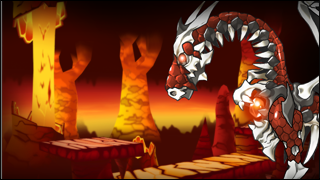
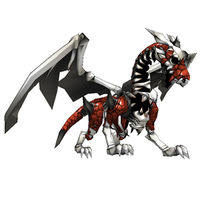
Boss: Ancient Bone Dragon

At the end of the sub-boss battle, Kayak the Shadow Shaman, summons the Ancient Bone Dragon which will breathe flame at the center of the stage immediately after it's summoned. (Though this is a cutscene, the flame can still injure you substantially.) The Ancient Bone Dragon then flies to the right of the screen and the fight starts.
Moves
Fire Bones: The dragon steps up with its front leg onto the platform, which will propel you upwards, then fires a few bones at you dealing rather substantial damage.
Head-whack: The dragon steps back, then swings its head to the right, dealing moderate damage while propelling you upwards.
Dragon Fire: The dragon breathes smoke momentarily, then steps up with its front leg onto the platform, which will propel you upwards, then breathes a long stretch of fire, continuously juggling you. This deals extremely high combo damage and the burning ailment will further intensify it. It will often use this move after a successful Head-whack.
Aerial Dragon Fire: The dragon will usually try to use this skill right at the start of the fight. It flies up and flies to the other end of the cave and then back while breathing fire on the ground, on Hell Mode it will not only do this twice but the delay between breaths will be less after each pass. If you get caught by the fire breath, you will be stun-locked due to the rapid hits. There is roughly a 30 second cool-down period after this skill where it will not be able to activate this skill again, it will also tend to not use this skill as often when being actively attacked.
Fire Rain: The dragon fires a bolt of fire up into the air, and flames rain onto the middle battleground.
Smoking: When you reduce the Ancient Bone Dragon's health to about 1/4, the dragon will start smoking. While it is in this state, you will receive damage as you attack it, even with ranged attacks such as arrows, fireballs and electrons (Special Actives are an exception). This effect can kill if your HP is low enough.
Summon Gargoyle: On Hell Difficulty it will summon two Gargoyles that fight identically to Wyverns at the start. If there are no Gargoyles alive after Aerial Dragon Fire it will summon two more to replace them.
Tactics
- When the Dragon flies up to use Aerial Dragon Fire, that is a signal to run to the furthest left platform in order to avoid getting burnt by the flames. Then quickly run back to the furthest right platform once the flames have died down.
- As the dragon's 'location' is fixed to the right side of the screen throughout the fight you can use special actives near the right side of the screen to skill delay it still as it does this.
- Beware of geysers in a party as they are triggered by proximity and by running across the center area almost all of them will usually be activated.
- When the Dragon is about to do use Dragon Fire, run to the middle battlefield and stick to the right wall, to avoid getting roasted. Another more advanced tactic is to jump over the ledge just after the Dragon slams its claw down and breathes fire, enabling you get some hits in while the Dragon's body is stretched out. This is useful for skills with wide hitboxes such as Valkyrie's Javelin, noted Rising Slash, noted Flying Impact, etc. If you attempt this tactic, your timing must be perfect.
- Ravens may instead run against the right side of the platform and the dragon will just barely miss him with it's initial launching attack.
- Renas may do a slide kick against the platform or double jump over the dragon's head for the same purpose, timing must be perfect.
- An option every class has to avoid the launch is to run against the same platform and use a skill\awakening for invincibility frames just outside the range where it will skill delay the dragon. This will allow players to remain in position to attack during Dragon Fire.
- The Light element may prove useful with this boss, as it creates windows of opportunities for attacking, Aisha's Binding Circle is also effective.
- It is best to mana-break (hold Z up to 100MP) if you are hit by his combo attacks, such as Dragon Fire and Aerial Dragon Fire, to minimize the damage you receive.
- Large AoE moves such as Dimension Link Guardian, Gungnir, Nuclear, Valkyrie's Javelin, Sword Fire, Crescent Kick, Meteor Shower, Blizzard Shower, and Aceldama work very well against this boss. Most of these are especially effective when the boss is using his Dragon Fire attack.
- Ravens can use Burning Rush to stay in place whenever the Dragon attacks, and then follow up with Valkyrie's Javelin for the damage. It can help prevent you from getting hit by Dragon Fire and his other moves which throw you.(In NA this has been patched. Meaning you will still stay in place, but will still receive damage from the dragon.)
- Elswords may use Stoic for the same purpose.
- A simple effective strategy to defeat it in a party is to stun-lock the dragon, denying it any opportunity to attack until it dies.
- A Combat Ranger's Low Kick, Nature enchanted weapons, and other Attack Speed lowering effects make keeping the dragon stun-locked much easier as Attack Speed is also responsible for the speed in recovering from hit stun.
