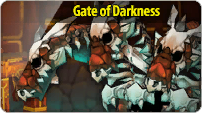
Gate of Darkness (Season 2)

Gate of Darkness (Season 2)
Unlike other dungeons, the Gate of Darkness can only be accessed on certain times. When the dungeon opens, only Normal difficulty can be accessed. Higher difficulties can be accessed when all players of the server completed the dungeon a certain amount of times.
- The dungeon opens at every weekend 00:00, 13:00, and 18:00 PST (NA server time) for one hour.
This dungeon has a unique gameplay. It involves battling waves of mobs, both bosses and normal monsters.
There are 15 rounds per play. Each wave ends with a pop out image showing the next round number.
The goal of this dungeon is to protect the "El Crystal" at the far left of the map from the monsters.
All players and mobs will be normalized to Level 1. In addition to that, potions, drinks, and food consumable items that recovers HP at a fixed amount are changed, reducing their effectiveness.
On Normal and Hard there is one El Crystal and one portal that spawns monsters. On Very Hard there are two portals that spawn monsters, and two pathways for each portal.
In the background of the map, there is a Dark Bone Dragon. This dragon will continuously charge up various attacks to interrupt the players' progress of defending each wave. It cannot be attacked, and will flee after the final round.
If you allow the El Crystal to be attacked, right before it changes colors on the minimap it will tell you "the El power is spreading, the aura of darkness is growing weaker" and one of the dragon heads will return to sleep.
Miscellaneous Tips
- Dark element is recommended.
- A cheap method of obtaining one is to Dark II enchant a level 1 weapon at the cost of 4 dark shards.
- It is best for everyone to camp at a place where all the monsters will have to pass through to make it easier for everyone to collect drops.
- On Very Hard it is recommended that everyone eventually retreat to where the top and bottom paths converge.
- Avoid using long range attacks such as Phoenix Strike, Magic Missile, and Shooting Star.
- There are respawning boxes near the crystal that drop healing items if healing is required.
- Stand under the platforms to avoid Draco Meteors.
- Stand on top of the platforms to avoid Fissure.
- On Very Hard stand one platform below the top platform to avoid this attack.
| Monster Image | Boss Description | Boss Moves |
|---|---|---|
| Dark Proxy | ||
| Dark Crasher | ||
| Dark Stinger | ||
| Dark Morfos | ||
| Dark Uno Hound | ||
| Dark Crazy Puppet | ||
| Teach the Dark Golem | ||
| Dark Dullahan | ||
| Darkness - Appears throughout most of the later rounds. Looks like a giant Shadow Blast. Explodes on contact with the El Crystal dealing around 10,000 damage (enough to kill most players at full health). After the Hunting Fields patch it has had its HP increased from ~15k to ~50k. | ||
| Dark Bone Dragon - The Dark Bone Dragon will be the main obstacle of the dungeon. At the beginning of the dungeon, only one of the Dragon's heads will be awake. As you progress through the dungeon, the 2nd and 3rd head will awaken. The Dragon's attack range is dependent on the amount of heads that are awake. Each head will send out attacks onto 1/4th of the map while the far-left 1/4 of the stage will be untouched by the Dragon's attacks. |
|
There will be rewards for completing the Gate of Darkness.
Elrios Guardian Hero Buff
After completing the dungeon, you will receive theto your current stats.
to your current stats.
After the Hunting Fields update, the buff will last until GoD is over. If the buff is gained after GoD is completed it will remain for several hours but it will have significantly reduced stats, this is because the buff it gives is proportional to the current progress in defending the crystals which defaults to 0 when the event is not active.
| Buff Level | Increase in Additional Damage | Increase in Damage Reduction |
|---|---|---|
| 1 (0~2 Crystals) | 5% | 5% |
| 2 (3~4 Crystals) | 12% | 12% |
| 3 (5 Crystals) | 30% | 30% |
Special Drops
The following items can only be obtained from playing in this dungeon.
Potions and Elixirs
While playing in this dungeon, you can obtain materials to craft the Grace Potions and Blessing Elixirs. These are powerful potions of the Ancient Gods that can grant various effects, such as increasing your damage output or give you better regenerative abilities. These can be crafted at any Alchemist NPCs in town.
- These potions may only be used in dungeons.
- Any time left will be carried over into the lobby and next dungeons entered.
In NA server, the requirements to craft potions and elixirs are 3 Wyvern's Scale Pieces, 1 Darkness Soul, 20 Alchemy Essences, and a fee of 10,000 ED.
In KR server, these potions are no longer available.
Wyvern Accessories
While playing in this dungeon, you can obtain materials to craft the Wyvern accessories and materials to even upgrade them. These accessories can be crafted at any Accessory merchants in town.
- Wyvern Set
- Darkened Wyvern Set
Wyvern Set
| Image | Name | Crafting Requirements | Stats | Set Bonus |
|---|---|---|---|---|

|
Wyvern's Headgear | 17 Wyvern's Scale Pieces 13 Hexonight 12,000 ED |
Face Accessory (Middle) Physical / Magical Attack +8 Physical / Magical Defense +5 HP Increase +3% |
2 Pieces Bonus:
Awakening Charge Speed +5% 4 Pieces Bonus: Awakening Charge Speed +10% |

|
Wyvern's Wings | 20 Wyvern's Scale Pieces 16 Hexonight 12,000 ED |
Accessory (Top Piece): Physical / Magical Attack +15 Critical +1% | |

|
Wyvern's Tail | 10 Wyvern's Scale Pieces 8 Hexonight 12,000 ED |
Accessory (Bottom Piece): Physical Attack +15 Magical Defense +10 Action Speed +1% | |

|
Wyvern's Hexacore | 7 Wyvern's Scale Pieces 5 Hexonight 12,000 ED |
Accessory (Arm): Magical Attack +15 Physical Defense +10 Critical +1% |
- On Very Hard, it is possible to go into the portal and clog up the monsters. They will continue to come out as planned but stay in the portal with you making them easier to kill. You will be pushed out of the portal by shielded mobs and Darkness. This strategy is only effective depending on the class. Female classes have the easiest time getting in and out of the portal and can take out shielded mobs fast enough to keep more mobs from getting through.
- It's recommended for Male classes to take the bottom row when present while Females clog up the top portal(you only need 1 top portal camping with someone picking up the drops below)
- These strategies are no longer recommended after the Hunting Fields patch as drops are no longer shared and each player must pick up their own drops individually.
- The old name for Gate of Darkness used to be Eye of Prodigy.


