Doom Bringer: Difference between revisions
Gameboy224 (talk | contribs) Tag: Undo |
Gameboy224 (talk | contribs) No edit summary |
||
| (94 intermediate revisions by 18 users not shown) | |||
| Line 3: | Line 3: | ||
|name=Edward Grenore (Add) | |name=Edward Grenore (Add) | ||
|color={{ColorSel|Character|Add}} | |color={{ColorSel|Character|Add}} | ||
|image=[[File:Portrait - Doom Bringer.png| | |image=[[File:Portrait - Doom Bringer (Infobox).png|350px|link=File:Portrait - Doom Bringer NoFX.png]] | ||
|class=[[File: | |class=[[File:Mini Icon - Doom Bringer.png]] Doom Bringer | ||
|weapon= | |weapon= Nasod Dynamo, Nasod Armor Body Augmentation | ||
|age=21 | |age=21 | ||
|race=Human | |race={{tt|Human|Nasod augmented}} | ||
|tree=[[ | |ESP=Tenacity Skill Cooldown Decrease | ||
|RD=[[File:Korean Flag.png|20px]] 30 November 2017<br>[[File:Flag | |tree=<dfn>{{</dfn> | ||
{{Class Tree| | |||
| 1-0=[[File:Icon - Add.png|40px|link=Add]] | |||
| 1-1=[[File:Icon - Psychic Tracer.png|40px|link=Psychic Tracer]] | |||
| 1-2=[[File:Icon - Lunatic Psyker.png|40px|link=Lunatic Psyker]] | |||
| 1-3=[[File:Icon - Doom Bringer.png|40px|link=Doom Bringer]] | |||
}} | |||
<dfn>}}</dfn> | |||
|RD=[[File:Korean Flag.png|20px]] 30 November 2017<br>[[File:American Flag.png|20px]] 20 December 2017<br>[[File:Brazil Flag.png|20px]] 20 December 2017<br>[[File:Japanese Flag.png|20px]] 27 December 2017<br>[[File:Chinese Flag.png|20px]] 27 December 2017<br>[[File:Taiwanese Flag.png|20px]] 18 January 2018<br>[[File:European Union Flag.png|20px]] 28 June 2018 | |||
|MRD=[[File:Korean_Flag.png|20px]] 13 February 2020<br>[[File:American Flag.png|20px]] 11 March 2020<br>[[File:European Union Flag.png|20px]] 9 September 2020 | |||
|video={{#ev:youtube|yEKaNIG2ayM||center||||autoresize}} | |||
|stat= | |stat= | ||
{{CharStats | {{CharStats | ||
| Speed=2 | | Speed=2 | ||
| Range=2 | | Range=2 | ||
| Line 18: | Line 27: | ||
| Damage=M | | Damage=M | ||
}}}} | }}}} | ||
<center>{{quotation| | <center>{{quotation|Anything that stands in my way will be crushed!}}</center> | ||
<br> | <br> | ||
= [[File:Icon - Doom Bringer.png]] Doom Bringer = | = [[File:Icon - Doom Bringer.png]] Doom Bringer = | ||
'''[Embodiment of Destruction, one to overcome laws of physics]''' | |||
=== Background === | === Background === | ||
{{Background | |||
|NA= | |||
The ultimate embodiment of destruction that defies the laws of physics. | |||
In search for ultimate power, Add discovers power that defies the laws of physics. | |||
To overcome his limit of having to rely on tools and resources, Add fuses himself with the Nasod Armor for ultimate power. | |||
|KR= | |||
“덤빌 테면 덤벼 봐. 미립자 이하로 조각조각 분해해주지 애송이…! 크하하학!!” | |||
물리법칙을 초월한 궁극적인 파괴의 화신. 나소드 아머와 완벽히 일체화하여 인간으로서의 한계를 넘은 전직. | |||
절대적인 힘만을 추구한 광기의 끝은, 아무에게도 지지 않을 절대적인 힘을 원하며 물리법칙을 뒤엎는 힘으로 이어졌다. | |||
‘압도적인 힘으로… 파괴할 뿐이다!!’ | |||
도구와 자원에 의해 발생하는 힘은 한계가 있는 법. 모든 약점을 극복하기 위해 연구를 계속해나간 애드는 결국 나소드 아머와의 일체화를 이루어낸다. | |||
|KRT= | |||
''"Challenge me if you dare. You morons will find yourself reduced to mere particles…! Kuhahaha!!"'' | |||
The ultimate embodiment of destruction that ignores the laws of physics. A job path that fully integrates the Nasod Armor to overcome human limitation. | The ultimate embodiment of destruction that ignores the laws of physics. A job path that fully integrates the Nasod Armor to overcome human limitation. | ||
| Line 40: | Line 60: | ||
There are limits to power that relies on resources and tools. To overcome all known weaknesses, Add continues his research until he decided to fuse himself with the Nasod Armor. | There are limits to power that relies on resources and tools. To overcome all known weaknesses, Add continues his research until he decided to fuse himself with the Nasod Armor. | ||
}} | |||
<br> | <br> | ||
== Third Class Advancement == | == Third Class Advancement == | ||
Completing the following advancement quest or using the Item Mall item: '''Nasod Armor Fusion''' [[File:Job Change - {{PAGENAME}}.png|30px]] will change your job to '''{{PAGENAME}}'''. | |||
{{JobChange|3rd|Add| | |||
| <!-- [Quest 1 Description] -->The fierce battle with Hennon destroyed parts of Elrianode, revealing the hidden sanctum.<br>One of "Elriabrunnr" that attracts El energy, this sanctum used to be a training ground for ancient Elrians.<br>There's something strangely compelling about this site.<br>To become stronger let's visit the Elrian Sanctum | |||
| <!-- [Quest 2 Description] -->Due to Elrianode not being fully restored, the Elrian sanctum also seemed influenced by chaos. There's also voices... However, the voices led straight back to the entrance. Let's ask Denif about this phenomena and about these Trace of Primordial Chaos. | |||
| <!-- [Quest 3 Description] -->According to Denif, the sanctum reflects one's "determination." Everyone's experience in the sanctum will be slightly different.<br>But since the sanctum seems to be influenced by Henir, he will make something that will help with exploring the sanctum as long as he has the right ingredients. | |||
| <!-- [Quest 4 Description] -->Denif was able to make a compass that works even in midst of Henir energy.<br>But something is missing...<br>Maybe the voices you heard is the key. It's time to find the answers. Let's start pondering while defeating more Henir Mutated Monsters. | |||
| <!-- [Quest 5 Description] -->"Are you prepared to meet your doom?" That was the first thing the mysterious being said to him. It was vague without much context, but enough to infer who it was.<br>Humans are weak. HE was weak. It was to overcome that weakness that pushed himself to find ultimate power. But even now, Add was limited by his weak human body. His human body was fragile, and he was always running low on resources. He needed a solution that will resolve all of his weak points.<br>With experience and knowledge he gained from traveling with the El Search Party, Add found a solution, but was unable to find a medium for that power. But the mysterious presence asked him, "Are you prepared?"<br>That was a question that only he could understand, that held the key to solving his problem.<br>He needed to use his own body as the medium, fuse completely with his Nasod Armor to achieve ultimate power of destruction.<br>Only those who don't fully believe in their abilities need to "prepare" themselves.<br>There was only one thing he needed to do. March towards his goal without looking back, destroying everything that stands in his path.<br>Add headed towards the sanctum. "He" was waiting for his answer at the heart of the sanctum. | |||
<!-- Mod Skill Below --> | |||
|Quake Buster|Psychic Storm|EMP Shock}} | |||
<br> | |||
== {{MasterOverlay|Doom Bringer|Adrian}} [[Master Class]] Advancement == | |||
{{JobChange|Master|Adrian}} | |||
<br> | <br> | ||
{{clearfix}} | |||
== Skill Tree == | == Skill Tree == | ||
{{:Skill Tree: Doom Bringer}} | {{:Skill Tree: Doom Bringer}} | ||
{{SkillNav - Doom Bringer}} | |||
<br> | <br> | ||
== Additional | {{clearfix}} | ||
== Additional Commands == | |||
{{SkillText|Combo|Nasod Armor Combo}} | |||
{{SkillText|Combo|3}} | {{SkillText|Combo|3}} | ||
{| cellspacing="0" cellpadding="5" border="1" width="100%" style="border-collapse: collapse;" | {| class="wikitable" cellspacing="0" cellpadding="5" border="1" width="100%" style="border-collapse: collapse;" | ||
|- | |- | ||
! width="30%" |Image | ! width="30%" |Image | ||
| Line 58: | Line 99: | ||
! width="25%" |Damage | ! width="25%" |Damage | ||
|- | |- | ||
| [[File: | | [[File:Combo - Doom Bringer 1.png|520px]] | ||
| | | | ||
After doing {{CZ}}, create a mid ranged electric shock and perform an electrified back kick. | After doing a single {{CZ}}, create a mid ranged electric shock and perform an electrified back kick. | ||
| | | | ||
{{CZ}} 190% Phy. Damage<br> | {{CZ}} 190% Phy. Damage<br>{{CX}} 152% Mag. Damage x2<br>{{CNAX}} 323% Mag. Damage | ||
{{CX}} 152% Mag. Damage x2<br> | |||
{{CNAX}} 323% Mag. Damage | |||
|- | |- | ||
| [[File: | | [[File:Combo - Doom Bringer 2.png|520px]] | ||
| | | | ||
{{CDRU}}<br> | Extend [[Psychic Tracer]]'s {{CDRU}}{{CZ}}{{CX}} or {{CDRU}}{{CZ}}{{CZ}}{{CX}} combo with additional plasma eruptions. | ||
{{CZ}} 186% Mag. Damage (3 MP)<br> | | | ||
{{CX}} 86% Mag. Damage x3 + 107% Mag. Damage<br> | {{CDRU}}<br>{{CZ}} 186% Mag. Damage (3 MP)<br>{{CX}} 86% Mag. Damage x3 + 107% Mag. Damage<br>{{CNAX}} 418% Mag. Damage | ||
{{CNAX}} 418% Mag. Damage | |||
|} | |} | ||
<br> | <br> | ||
| Line 86: | Line 118: | ||
== Gallery == | == Gallery == | ||
:''Full Gallery: [[Add/Gallery]] | |||
{{:Doom Bringer/Artwork}} | |||
{{:Doom Bringer/Misc}} | |||
<br> | <br> | ||
== Trivia == | == Trivia == | ||
*As '''Doom Bringer''', Add ends up becoming what his mother wanted to stop his father from turning him into: a living weapon made from fusing a human with Nasod technology. However, it was not through his father's plan to control him, but by his own will. | |||
**'''Doom Bringer''' ends up being the only Add who truly follows his mother's last wish, letting go of the past to focus on the present. Even if he doesn't admit it, it was due to the El Search Party, the friends, and bonds that he formed. | |||
*It is the first time '''Add''''s neck is fully exposed, making his scar visible. | *It is the first time '''Add''''s neck is fully exposed, making his scar visible. | ||
*The black lines around '''Doom Bringer''''s arms and visible near his chest are parts of his Nasod Armor fused into his body. | *The black lines around '''Doom Bringer''''s arms and visible near his chest are parts of his Nasod Armor fused into his body. The lines represent [[Wikipedia:Signal trace|'Signal Traces']] that conducts and flows electricity around his body, lighting up when Nasod Armor is active, though this isn't reflected in-game. | ||
**These markings are part of Doom Bringer's promo top and gloves. | **These markings are part of Doom Bringer's promo top and gloves. | ||
*'''Doom Bringer''''s promotional costume and artwork features three tail-like belts hanging behind him, a visual nod at this being the path's '''third''' job, as [[Psychic Tracer]] and [[Lunatic Psyker]] have 1 and 2 such belts respectively. | *'''Doom Bringer''''s promotional costume and artwork features three tail-like belts hanging behind him, a visual nod at this being the path's '''third''' job, as [[Psychic Tracer]] and [[Lunatic Psyker]] have 1 and 2 such belts respectively. | ||
| Line 118: | Line 133: | ||
*The abbreviation for '''Doom Bringer''' is ''B'' instead of ''D'' to prevent confusion with [[Dominator]]. | *The abbreviation for '''Doom Bringer''' is ''B'' instead of ''D'' to prevent confusion with [[Dominator]]. | ||
*Oddly, '''Doom Bringer''''s earphones are part of his promotional top piece instead of his hair, unlike [[Psychic Tracer]] and [[Lunatic Psyker]]. The same applies to [[Dominator]]. | *Oddly, '''Doom Bringer''''s earphones are part of his promotional top piece instead of his hair, unlike [[Psychic Tracer]] and [[Lunatic Psyker]]. The same applies to [[Dominator]]. | ||
*As revealed in his Master Road epic quest, Add turned down the offer by [[Adrian]] to return to his past as he did not want to become like him; to abandon his allies and escape alone. | |||
*[[Story/Chapter 58|In the Abyss]], [[Elesis]] notices Add scratching on his neck scar due to anxiety while being affected by demonic energy in the Abyss and ties a handkerchief around it, asking him to focus on the handkerchief rather then the itchiness of the scar. | |||
**After escaping the Abyss, it is revealed that the handkerchief originally belonged to [[Lu/Ciel|Ciel]]. | |||
<br> | <br> | ||
Latest revision as of 15:25, 29 May 2024
| “ | Anything that stands in my way will be crushed!
|
” |
 Doom Bringer
[Embodiment of Destruction, one to overcome laws of physics]
Background
- In-game Version
- Nexon Version
The ultimate embodiment of destruction that defies the laws of physics.
In search for ultimate power, Add discovers power that defies the laws of physics.
To overcome his limit of having to rely on tools and resources, Add fuses himself with the Nasod Armor for ultimate power.
Third Class Advancement
Completing the following advancement quest or using the Item Mall item: Nasod Armor Fusion ![]() will change your job to Doom Bringer.
will change your job to Doom Bringer.
Upon advancing to third job, you will receive a [New Power: Force] cube which contains:
- Force Passive: Illipia's Aura
- Force Active: Hyper Acceleration • Haunting Spirit
- Force[Mod]: Quake Buster • Psychic Storm • EMP Shock
You can advance into Master Class upon reaching Rigomor.
Master Class Advancement
Complete the following advancement quest or using the Item Mall item: Mark of Awakening (Doom Bringer) ![]() to advance to Master Class.
to advance to Master Class.
- Clear any Rigomor dungeon 5 times.
- Collect 20 Ancient Memory from any Boss in Rigomor region dungeons.
- Clear any Master Road dungeon (Normal/Hell) once.
- Collect 10 Origin Artifacts from any Master Road dungeon (Normal/Hell).
- Clear any Master Road dungeon (Normal/Hell) 5 times.
Artifact System will be unlocked after achieving Master Class.
Skill Tree
| Skills | Passives | ||||
|---|---|---|---|---|---|

|

|
Level 99 | |||
Able to only choose 1 out of 2 Force Mod Skills. |
Able to only choose 1 out of 2 Force Mod Skills. | ||||

| |||||
- Symmetric Identity
Additional Commands
 : While in Dynamo Configuration Mode (Awakening), pressing  or  during any commands with  icon border or after certain skills will activate  [Nasod Armor Command].

 : All damage values for new and preexisting commands receive a 1.15x multiplier during 3rd job.
| Image | Description | Damage |
|---|---|---|

|
After doing a single |
323% Mag. Damage |

|
Extend Psychic Tracer's |
418% Mag. Damage |
Videos
Gallery
- Full Gallery: Add/Gallery
Artwork
-
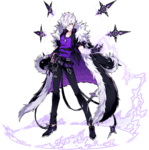
Doom Bringer's Portrait.
-
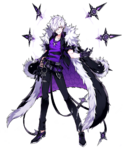
Doom Bringer's Portrait without effects.
-
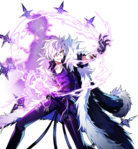
Doom Bringer's Master Class Skill Cut-in.
-
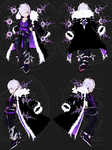
Doom Bringer's Epic Quest portrait.
-
Doom Bringer's Epic Quest portrait wearing a handkerchief given by Elesis.
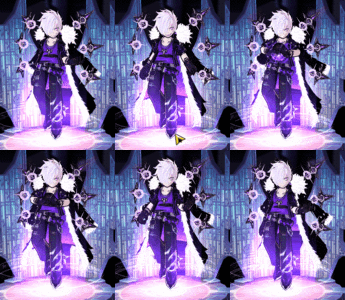
-
Facial Expressions.
-
Doom Bringer's chibi artwork.
-
Alternative chibi artwork.
-
Doom Bringer's chibi artwork.
-
No One Will Save You artwork.
-
Nasod Dynamo artwork.
Miscellaneous
-
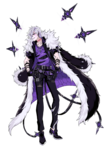
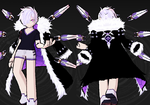
Idle pose and Promo avatar.
-
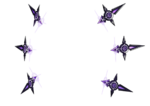
Promo Accessory: Top Piece Slot.
-
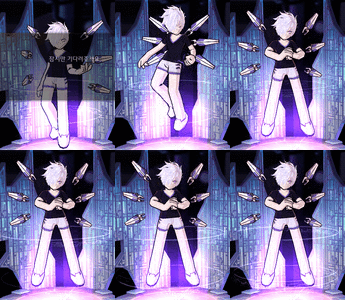
Ready Animation.
-
Doom Bringer Idle Motion Animation.
Trivia
- As Doom Bringer, Add ends up becoming what his mother wanted to stop his father from turning him into: a living weapon made from fusing a human with Nasod technology. However, it was not through his father's plan to control him, but by his own will.
- Doom Bringer ends up being the only Add who truly follows his mother's last wish, letting go of the past to focus on the present. Even if he doesn't admit it, it was due to the El Search Party, the friends, and bonds that he formed.
- It is the first time Add's neck is fully exposed, making his scar visible.
- The black lines around Doom Bringer's arms and visible near his chest are parts of his Nasod Armor fused into his body. The lines represent 'Signal Traces' that conducts and flows electricity around his body, lighting up when Nasod Armor is active, though this isn't reflected in-game.
- These markings are part of Doom Bringer's promo top and gloves.
- Doom Bringer's promotional costume and artwork features three tail-like belts hanging behind him, a visual nod at this being the path's third job, as Psychic Tracer and Lunatic Psyker have 1 and 2 such belts respectively.
- Doom Bringer was the first 3rd Job design to be shown off.
- The abbreviation for Doom Bringer is B instead of D to prevent confusion with Dominator.
- Oddly, Doom Bringer's earphones are part of his promotional top piece instead of his hair, unlike Psychic Tracer and Lunatic Psyker. The same applies to Dominator.
- As revealed in his Master Road epic quest, Add turned down the offer by Adrian to return to his past as he did not want to become like him; to abandon his allies and escape alone.
- In the Abyss, Elesis notices Add scratching on his neck scar due to anxiety while being affected by demonic energy in the Abyss and ties a handkerchief around it, asking him to focus on the handkerchief rather then the itchiness of the scar.
- After escaping the Abyss, it is revealed that the handkerchief originally belonged to Ciel.
Alternative Names


