Gate of the Setting Sun: Difference between revisions
From Elwiki
EraHalocline (talk | contribs) No edit summary |
Gameboy224 (talk | contribs) No edit summary |
||
| (19 intermediate revisions by 6 users not shown) | |||
| Line 1: | Line 1: | ||
{{Languages|Gate of the Setting Sun}} | {{Languages|Gate of the Setting Sun}} | ||
{{ | {{RaidPage | ||
| Orient= | | Orient=3 | ||
| Color={{ColorSel|Master|Solace4}} | | Color={{ColorSel|Master|Solace4}} | ||
| DunButton=14-6 Button.png | | DunButton=14-6 Button.png | ||
| SmallPic=14-6 Small ( | | SmallPic=14-6 Small (Normal).png | ||
| BigPic= | | BigPic=15-6new2.png | ||
| BigPic2=15-6Hnew2.png | |||
| DunName=Gate of the Setting Sun | | DunName=Gate of the Setting Sun | ||
| Quotation= | | Quotation=Beyond the great gates, the setting sun heats the ground. | ||
| Description=In order to find the answer again, you face the Sun Master. | | Description=In order to find the answer again, you face the Sun Master. | ||
| LvNeed=99 | | LvNeed=99 | ||
| LvFit | | LvFit=300000 | ||
| XEntryReq=< | | LvFitHell=600000 | ||
| XEntryReq=<dfn>{{</dfn> | |||
*Must have reached level 99 and completed the quest '''[Dungeon] Master Road Entry'''. | *Must have reached level 99 and completed the quest '''[Dungeon] Master Road Entry'''. | ||
< | <dfn>}}</dfn> | ||
| Detail=< | | Detail=<dfn>{{</dfn> | ||
*Only 1 Resurrection Stone can be used to revive in '''Hell''' mode. | *Only 1 Resurrection Stone can be used to revive in '''Hell''' mode. | ||
====Environmental Debuff - Light of the Sun ==== | ===={{se|555|Environmental Debuff - Light of the Sun|tt=no}} ==== | ||
*The Sun's light purifies everything touch you, Attack and HP will be reduced by 30% (70% on Phase 2). Effects are reduced by '''Adaptation'''. | *The Sun's light purifies everything touch you, Attack and HP will be reduced by 30% (70% on Phase 2). Effects are reduced by '''Adaptation'''. | ||
<span style="display:none"> | <dfn>}}</dfn> | ||
|Phase1Name=Master Solace | |||
|Phase1=<span style="display:none">{{</span> | |||
| | == Phase Gimmick == | ||
The '''Mark of Light''' gauge will appear under Solace's health bar at the start of the fight, with 5 empty marks. Whenever Solace lands a hit on a player, that player will receive the '''Sunlight''' debuff, decreasing movement and jump speed for 30 seconds. Being hit by any of Solace's attacks while you have the '''Sunlight''' debuff will remove the debuff and add 1 Mark of Light to the gauge. After he gains 5 marks, Solace will enter an empowered state for 30 seconds, dealing higher damage and enhancing some of his attacks. | |||
== Boss == | |||
{| class="wikitable" border="1" cellpadding="5" style="border-spacing: 0; border: 1px #000 solid; border-collapse: collapse; width: 100%; vertical-align: top;" | |||
|+ [[File:Icon - Warning.png|20px]] Attacks highlighted in {{color|red|red}} bypass invincibility frames. | |||
|- | |||
! colspan=3 | Master Solace | |||
|- | |||
| align=center width=5% | {{tt|[[File:MRSolaceIngameHead.png|60px]]|[[File:Mob - Master Solace (Phase 1).png|150px]]}} | |||
| colspan=2 align=center width=95% | The El Master of Light. | |||
|- | |||
! colspan=2 width=50% | Boss Attacks !! width=50% | Tips | |||
|- | |- | ||
| | | colspan=2 | | ||
*'''Slash:''' Solace slashes players in front once. | |||
| | | | ||
|- | |||
| colspan=2 | | |||
*'''<font color=red>Shield Bash:</font>''' Solace bashes players in front with his shield, inflicting heavy hitstun, before following up with a slash attack. | *'''<font color=red>Shield Bash:</font>''' Solace bashes players in front with his shield, inflicting heavy hitstun, before following up with a slash attack. | ||
| | |||
|- | |||
| colspan=2 | | |||
*'''<font color=red>Light Pillar:</font>''' Solace will raise his sword into the air, causing a pillar of light to appear on top of a designated player. Solace can target multiple players at once with this attack. The width of the pillar of light is increased while Solace is empowered. | *'''<font color=red>Light Pillar:</font>''' Solace will raise his sword into the air, causing a pillar of light to appear on top of a designated player. Solace can target multiple players at once with this attack. The width of the pillar of light is increased while Solace is empowered. | ||
| | |||
|- | |||
| colspan=2 | | |||
*'''<font color=red>Rain of Light:</font>''' Solace casts the '''Light Pillar''' attack in rapid succession. | *'''<font color=red>Rain of Light:</font>''' Solace casts the '''Light Pillar''' attack in rapid succession. | ||
| | |||
|- | |||
| colspan=2 | | |||
*'''<font color=red>Solar Bomb:</font>''' Solace will summon a small orb of solar energy which slowly follows a target, gradually speeding up as it travels, exploding on contact. The orb persists indefinitely until it hits a player and deals a certain percentage of your current HP. | *'''<font color=red>Solar Bomb:</font>''' Solace will summon a small orb of solar energy which slowly follows a target, gradually speeding up as it travels, exploding on contact. The orb persists indefinitely until it hits a player and deals a certain percentage of your current HP. | ||
| | |||
|- | |||
| colspan=2 | | |||
*'''<font color=red>Shield Guard:</font>''' When Solace's MP bar is filled, he will enter a defensive stance for a short period, with golden wings appearing at his back. Whenever Solace is attacked during this stance, he will create a tracking sword that homes in on players and deals significant damage. | *'''<font color=red>Shield Guard:</font>''' When Solace's MP bar is filled, he will enter a defensive stance for a short period, with golden wings appearing at his back. Whenever Solace is attacked during this stance, he will create a tracking sword that homes in on players and deals significant damage. | ||
| | |||
|- | |||
| colspan=2 | | |||
*'''<font color=red>Blinding Light:</font>''' Solace charges up his shield with light energy before causing it to burst forward ahead of him, stunning players in range. | *'''<font color=red>Blinding Light:</font>''' Solace charges up his shield with light energy before causing it to burst forward ahead of him, stunning players in range. | ||
| | |||
|- | |||
| colspan=2 | | |||
*'''<font color=red>Solar Pillar:</font>''' Solace summons a solar pillar that persists in the battlefield, damaging anyone that comes in contact with it. | *'''<font color=red>Solar Pillar:</font>''' Solace summons a solar pillar that persists in the battlefield, damaging anyone that comes in contact with it. | ||
| | |||
|- | |||
| colspan=2 | | |||
*'''<font color=red>Wall of Light:</font>''' Solace's first phase ultimate attack. He will warp to the center and become invincible, while creating a '''Solar Pillar''' somewhere on the map if none are active currently. From the side of the map, walls of light will slowly sweep to the other side of the map before exploding, doing massive damage. These walls must be attacked and destroyed to create a safe area in their path. Any active '''Solar Pillars''' will disappear after this attack. | *'''<font color=red>Wall of Light:</font>''' Solace's first phase ultimate attack. He will warp to the center and become invincible, while creating a '''Solar Pillar''' somewhere on the map if none are active currently. From the side of the map, walls of light will slowly sweep to the other side of the map before exploding, doing massive damage. These walls must be attacked and destroyed to create a safe area in their path. Any active '''Solar Pillars''' will disappear after this attack. | ||
'''''Attacks highlighted in | | | ||
|} | |||
<dfn>}}</dfn> | |||
|Phase2Name=Master Solace (Hell Mode Only) | |||
|Phase2=<span style="display:none">{{</span> | |||
== Phase Gimmick == | |||
The '''Mark of Light''' gauge will appear under Solace's health bar at the start of the fight, with 5 empty marks. Whenever Solace lands a hit on a player, that player will receive the '''Sunlight''' debuff, decreasing movement and jump speed for 30 seconds. Being hit by any of Solace's attacks while you have the '''Sunlight''' debuff will remove the debuff and add 1 Mark of Light to the gauge. After he gains 5 marks, Solace will enter an empowered state for 30 seconds, dealing higher damage and enhancing some of his attacks. | |||
== Boss == | |||
{| class="wikitable" border="1" cellpadding="5" style="border-spacing: 0; border: 1px #000 solid; border-collapse: collapse; width: 100%; vertical-align: top;" | |||
|+ [[File:Icon - Warning.png|20px]] Attacks highlighted in {{color|red|red}} bypass invincibility frames. | |||
|- | |||
! colspan=3 | Master Solace | |||
|- | |||
| align=center width=5% | {{tt|[[File:MRSolace2IngameHead.png|60px]]|[[File:Mob - Master Solace (Phase 2).png|200px]]}} | |||
| colspan=2 align=center width=95% | Upon reaching 150 bars of HP, Solace will enter Phase 2. The El Master of Sun passes through the gates, Solace emerges imbued in the power of light. | |||
|- | |- | ||
| | ! colspan=2 width=50% | Boss Attacks !! width=50% | Tips | ||
| ''' | |- | ||
| colspan=2 | | |||
*'''Slash:''' Solace slashes players in front once. | |||
| | | | ||
<font color=red> | |- | ||
Solace | | colspan=2 | | ||
*'''<font color=red>Light Pillar:</font>''' The size of the light pillar is larger by default, and increases even further while Solace is empowered. | *'''<font color=red>Shield Bash:</font>''' Solace bashes players in front with his shield, inflicting heavy hitstun, before following up with a slash attack. | ||
*'''<font color=red>Solar | | | ||
|- | |||
| colspan=2 | | |||
*'''<font color=red>Light Pillar:</font>''' Solace will raise his sword into the air, causing a pillar of light to appear on top of a designated player. Solace can target multiple players at once with this attack. The width of the pillar of light is increased while Solace is empowered. The size of the light pillar is larger by default, and increases even further while Solace is empowered. | |||
| | |||
|- | |||
| colspan=2 | | |||
*'''<font color=red>Rain of Light:</font>''' Solace casts the '''Light Pillar''' attack in rapid succession. | |||
| | |||
|- | |||
| colspan=2 | | |||
*'''<font color=red>Solar Bomb:</font>''' Solace will summon a small orb of solar energy which slowly follows a target, gradually speeding up as it travels, exploding on contact. The orb persists indefinitely until it hits a player and deals a certain percentage of your current HP. | |||
| | |||
|- | |||
| colspan=2 | | |||
*'''<font color=red>Shield Guard:</font>''' When Solace's MP bar is filled, he will enter a defensive stance for a short period, with golden wings appearing at his back. Whenever Solace is attacked during this stance, he will create a tracking sword that homes in on players and deals significant damage. | |||
| | |||
|- | |||
| colspan=2 | | |||
*'''Shields of Light:''' Hitting Solace too much while he's guarding with '''<font color=red>Shield Guard</font>''' will cause him to create a set of four '''Shields of Light''' that spin around and absorb the damage for him. The shields break after a certain amount of damage is dealt. | *'''Shields of Light:''' Hitting Solace too much while he's guarding with '''<font color=red>Shield Guard</font>''' will cause him to create a set of four '''Shields of Light''' that spin around and absorb the damage for him. The shields break after a certain amount of damage is dealt. | ||
| | |||
*It is advised that summoners make sure their summons don't hit Solace while he's guarding, even if they can do so without taking damage, as it will make '''Shields of Light''' appear. | *It is advised that summoners make sure their summons don't hit Solace while he's guarding, even if they can do so without taking damage, as it will make '''Shields of Light''' appear. | ||
< | |- | ||
| colspan=2 | | |||
*'''<font color=red>Blinding Light:</font>''' Solace charges up his shield with light energy before causing it to burst forward ahead of him, stunning players in range. | |||
| | |||
|- | |||
| colspan=2 | | |||
*'''<font color=red>Solar Pillar:</font>''' Solace summons a solar pillar that persists in the battlefield, damaging anyone that comes in contact with it. The damage of the pillar is significantly increased. | |||
| | |||
|- | |||
| colspan=2 | | |||
*'''<font color=red>Wall of Light:</font>''' Solace's first phase ultimate attack. He will warp to the center and become invincible, while creating a '''Solar Pillar''' somewhere on the map if none are active currently. From the side of the map, walls of light will slowly sweep to the other side of the map before exploding, doing massive damage. These walls must be attacked and destroyed to create a safe area in their path. Any active '''Solar Pillars''' will disappear after this attack. | |||
| | |||
|- | |||
| colspan=2 | | |||
*'''<font color=red>Gate of the Setting Sun:</font>''' Solace's ultimate attack, he will charge energy in the center of the stage while the field is filled with various prisms of light in the shape of a diamond, triangle, and four-sided star. When destroyed, each prism will provide one buff, one of each must be broken in order to gain immunity to Solace's attack. | |||
**After performing this, Solace will be fatigued and have his defense reduced drastically temporarily. | |||
**Solace's overall defense will decrease each time he performs this attack. | |||
| | |||
*Prisms can '''ONLY''' be destroyed with '''command attacks'''. | |||
*The prisms applies the buff in a small area after being destroyed. weak-command classes should go with stronger-command classes so they can get the buffs. | |||
|} | |||
<dfn>}}</dfn> | |||
*Solace's defense is insanely high at the start of the hell phase. As he uses '''Gate of the Setting sun''' multiple times, his defense starts to get progressively reduced. | *Solace's defense is insanely high at the start of the hell phase. As he uses '''Gate of the Setting sun''' multiple times, his defense starts to get progressively reduced. | ||
| BDrop={{tabs|divclass=forceland|name=1|tab1=Sun Aura Insignia|contents1={{:14-6Bdrop1}}|tab2=[Force] Sol Dominion|contents2={{:14-6Bdrop2}}}} | | BDrop={{tabs|divclass=forceland|name=1|tab1=Sun Aura Insignia|contents1={{:14-6Bdrop1}}|tab2=[Force] Sol Dominion|contents2={{:14-6Bdrop2}}}} | ||
| SBGM=[http://www.youtube.com/watch?v= | | SBGM=[http://www.youtube.com/watch?v=mrQYNiTRczM '''''li_masterdom_soles_01'''''] | ||
[http://www.youtube.com/watch?v= | [http://www.youtube.com/watch?v=PvvucP7lMLw '''''li_masterdom_soles_02'''''] | ||
|Gallery= | |Gallery= | ||
<gallery widths=150px heights=150px> | <gallery widths=150px heights=150px> | ||
File:14-6 Small ( | File:14-6 Small (Hell).png|Small dungeon image (Hell) | ||
File:Gate of the Setting Sun Teaser 1.png | File:Gate of the Setting Sun Teaser 1.png | ||
File:Gate of the Setting Sun Teaser 2.png | File:Gate of the Setting Sun Teaser 2.png | ||
File:Gate of the Setting Sun Teaser 3.png | File:Gate of the Setting Sun Teaser 3.png | ||
File:Gate of the Setting Sun Teaser 4.png | File:Gate of the Setting Sun Teaser 4.png | ||
File:14-6(Hell).png|Old loading image (Hell). | |||
File:Portrait - Solace (Master Road).png|[[Solace|Master Solace]] | File:Portrait - Solace (Master Road).png|[[Solace|Master Solace]] | ||
File:SolaceCutin2.png|[[Solace|Master Solace]]'s Skill Cut-in. | File:SolaceCutin2.png|[[Solace|Master Solace]]'s Skill Cut-in. | ||
| Line 104: | Line 188: | ||
'''Hell Mode:''' | '''Hell Mode:''' | ||
*{{StoryIcon|Solace5}} '''Solace:''' ''I'll leave finding the answer to you.'' | *{{StoryIcon|Solace5}} '''Solace:''' ''I'll leave finding the answer to you.'' | ||
'''Failure:''' | |||
*{{StoryIcon|Solace5}} '''Solace:''' ''Your conviction is lacking.'' | |||
|tab5=Dungeon Victory Quote | |tab5=Dungeon Victory Quote | ||
|contents5= | |contents5= | ||
| Line 111: | Line 197: | ||
*'''Raven:''' '' '' | *'''Raven:''' '' '' | ||
}} | }} | ||
|Trivia=< | |Trivia=<dfn>{{</dfn> | ||
*The '''Mark of Light''' gauge is a callback to his '''Mark of Judgement''' gauge during his fight in [[Solace's Fortress]]. | *The '''Mark of Light''' gauge is a callback to his '''Mark of Judgement''' gauge during his fight in [[Solace's Fortress]]. | ||
*The swords summoned during his '''Shield Guard''' act identical to the swords summoned by the [[Titles/Elysion|Eclipse]] title. | *The swords summoned during his '''Shield Guard''' act identical to the swords summoned by the [[Titles/Elysion|Eclipse]] title. | ||
< | <dfn>}}</dfn> | ||
|Updates=< | |Updates=<dfn>{{</dfn> | ||
{| cellpadding="5" border="1" style="border-collapse: collapse; text-align: center;" | {| cellpadding="5" border="1" style="border-collapse: collapse; text-align: center;" | ||
|- style="background:{{ColorSel|Master|Solace4}}" | |- style="background:{{ColorSel|Master|Solace4}}" class="textfloat | ||
! colspan=2 | Date !! rowspan=2 | Changes | ! colspan=2 | Date !! rowspan=2 | Changes | ||
|- style="background:{{ColorSel|Master|Solace4}}" | |- style="background:{{ColorSel|Master|Solace4}}" class="textfloat | ||
! KR !! NA | ! KR !! NA | ||
|- | |- | ||
| 02/27/2020 || 03/25/2020 || align="left" | | | 02/27/2020 || 03/25/2020 || align="left" | | ||
*'''Gate of the Setting Sun''' added. | *'''Gate of the Setting Sun''' added. | ||
|- | |||
| 05/13/2021 || 06/23/2021 || align="left" | | |||
*Phase 2 damage reduction decreased. | |||
|- | |||
| 07/06/2023 || 08/02/2023 || align="left" | | |||
*{{buff|Boss HP reduced.}} | |||
*Hell Mode: | |||
**{{buff|Phase 2 Damage Reduction reduced.}} | |||
**{{buff|No longer utilizes Hyper Armor except for the Ultimate Attack.}} | |||
**{{buff|Resurrection limit increased from 1 to 3}} | |||
|} | |} | ||
< | <dfn>}}</dfn> | ||
|AltLang= | |AltLang= | ||
{{AlternateLanguages | {{AlternateLanguages | ||
Latest revision as of 20:35, 18 March 2025

.png)
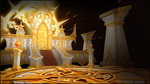
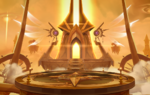
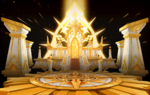
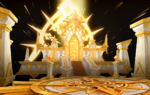
Gate of the Setting Sun
| “ | Beyond the great gates, the setting sun heats the ground.
|
” |
- Normal Mode
- Hell Mode


Description
In order to find the answer again, you face the Sun Master.
Recommended Level
99
Required Combat Power
- Normal Mode
- Hell Mode
300,000
Entry Requirements
{{
- Must have reached level 99 and completed the quest [Dungeon] Master Road Entry.
Details
{{
- Only 1 Resurrection Stone can be used to revive in Hell mode.
 Environmental Debuff - Light of the SunEnvironmental Debuff - Light of the Sun
- The Sun's light purifies everything touch you, Attack and HP will be reduced by 30% (70% on Phase 2). Effects are reduced by Adaptation.
- Phase 1
- Phase 2
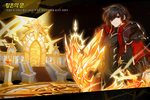
Phase 1 - Master Solace
Phase Gimmick
The Mark of Light gauge will appear under Solace's health bar at the start of the fight, with 5 empty marks. Whenever Solace lands a hit on a player, that player will receive the Sunlight debuff, decreasing movement and jump speed for 30 seconds. Being hit by any of Solace's attacks while you have the Sunlight debuff will remove the debuff and add 1 Mark of Light to the gauge. After he gains 5 marks, Solace will enter an empowered state for 30 seconds, dealing higher damage and enhancing some of his attacks.
Boss
| Master Solace | ||
|---|---|---|
 |
The El Master of Light. | |
| Boss Attacks | Tips | |
|
||
|
||
|
||
|
||
|
||
|
||
|
||
|
||
|
||

Dialogue
 Solace: I cannot give you the answer you desire. If you wish to find something, find it yourself.
{{
}}
| Image | Name | Boss | Character | Stats | Set Effects |
|---|---|---|---|---|---|
 |
Face Accessory (Bottom): [Unidentified * 1] |
2 Pieces:
3 Pieces:
|
![[Force] Sol Dominion](/w/File:HQ_Shop_Item_311522.png)
Gallery
-
Small dungeon image (Hell)
-
-
-
-
-
Old loading image (Hell).
-

-
Master Solace's Skill Cut-in.
.png)


.png)
.png)
Trivia
{{
- The Mark of Light gauge is a callback to his Mark of Judgement gauge during his fight in Solace's Fortress.
- The swords summoned during his Shield Guard act identical to the swords summoned by the Eclipse title.
Updates
{{
}}
| Date | Changes | |
|---|---|---|
| KR | NA | |
| 02/27/2020 | 03/25/2020 |
|
| 05/13/2021 | 06/23/2021 |
|
| 07/06/2023 | 08/02/2023 |
|
Alternative Names
{{
}}
| Server | Name | Translation |
|---|---|---|
| 황혼의 문 | Twilight Gate | |
| Tor der Dämmerung | Twilight Gate | |
| Portal del Ocaso | Gate of the Setting Sun | |
| Porte du crépuscule | Twilight Gate | |
| Porta dell'Alba | Daybreak Gate | |
| Brama Zmierzchu | Twilight Gate | |
| Twilight Gate | ||
| Portão do Crepúsculo | Twilight Gate | |
- Region 13~18
- Region 1~6
- Region 7~12
- Region 19~22
- Laby
- Noah
- Lithia
- Other
- Miscellaneous
| Rigomor | Master Road | Pruinaum Outskirts | |||
|---|---|---|---|---|---|
| {{ }} | {{ }} | {{ }} | {{ }} | {{ }} | {{ }} |
- Region 13~18
- Region 1~6
- Region 7~12
- Region 19~22
- Other