Birth of Origin: Difference between revisions
From Elwiki
Shironsaki (talk | contribs) No edit summary |
Gameboy224 (talk | contribs) No edit summary |
||
| (17 intermediate revisions by 2 users not shown) | |||
| Line 17: | Line 17: | ||
:''Main Article: [[Raid Solo Mode]]'' | :''Main Article: [[Raid Solo Mode]]'' | ||
---- | ---- | ||
*Up to 4 players can enter, requiring a minimum of at least | *Up to 4 players can enter, requiring a minimum of at least 3 people. (Normal) | ||
**2~4 players. (Story) | |||
*Only three Resurrection Stones can be used to revive. | *Only three Resurrection Stones can be used to revive. | ||
*Players are given a 15 second penalty before they can resurrect themselves. | *Players are given a 15 second penalty before they can resurrect themselves. | ||
| Line 54: | Line 55: | ||
! colspan=3 | Earl of Abyss Ran | ! colspan=3 | Earl of Abyss Ran | ||
|- | |- | ||
| align=center width=5% | [[File: | | align=center width=5% | {{tt|[[File:Mob Icon - Earl of Abyss Ran.jpg|60px]]|[[File:Mob - Earl of Abyss Ran.jpg|250px]]}} | ||
| colspan=2 align=center width=95% | The Earl of Shadow in the flesh. | | colspan=2 align=center width=95% | The Earl of Shadow in the flesh. | ||
|- | |- | ||
| Line 121: | Line 122: | ||
! colspan=3 | Shadow of Greed | ! colspan=3 | Shadow of Greed | ||
|- | |- | ||
| align=center width=5% | [[File:Shadow | | align=center width=5% | {{tt|[[File:Mob Icon - Shadow Of Greed.jpg|60px]]|[[File:Mob - Shadow Of Greed.jpg|250px]]}} | ||
| colspan=2 align=center width=95% | Ran transformed through the power of the Seed of Life and the Abyss. | | colspan=2 align=center width=95% | Ran transformed through the power of the Seed of Life and the Abyss. | ||
|- | |- | ||
| Line 197: | Line 198: | ||
! colspan=3 | King of Abyss | ! colspan=3 | King of Abyss | ||
|- | |- | ||
| align=center width=5% | [[File:King of Abyss. | | align=center width=5% | {{tt|[[File:Mob Icon - King of Abyss.jpg|60px]]|[[File:Mob - King of Abyss.jpg|300px]]}} | ||
| colspan=2 align=center width=95% | The power of the Abyss has become Ran's as he mutates further. He has become the Abyss's avatar, the King of Abyss. | | colspan=2 align=center width=95% | The power of the Abyss has become Ran's as he mutates further. He has become the Abyss's avatar, the King of Abyss. | ||
|- | |- | ||
| Line 212: | Line 213: | ||
|- | |- | ||
| colspan=2 | | | colspan=2 | | ||
*{{color|red|Barrage|b=1}}: Holds an arm out towards the center of the arena, and summons countless orbs that spread outwards from his hand | *{{color|red|Barrage|b=1}}: Holds an arm out towards the center of the arena, and summons countless orbs that spread outwards from his hand. | ||
| | | | ||
*Players are able to avoid some of the incoming damage by matching energy types with the incoming orb. eg: As a blue orb approaches, the player switches to Shadow Energy. After the blue orb passes, and before a purple orb makes contact, the player switches to Abyss Energy. | *Players are able to avoid some of the incoming damage by matching energy types with the incoming orb. eg: As a blue orb approaches, the player switches to Shadow Energy. After the blue orb passes, and before a purple orb makes contact, the player switches to Abyss Energy. | ||
|- | |||
| colspan=2 | | |||
*{{color|red|Abyss Devour|b=1}}: Ran will gradually darken the screen before it goes pitch black, killing all targets. Several sigils will appear around the map in either Shadow Blue or Abyss Purple, standing on these sigil with the appropriate energy active will generate a shield which will protect you from the attack. | |||
| | |||
*Regardless of Ran's current energy state, sigils of both colors will appear. Naturally being protected by a shield of Ran's opposing color will allow you to still deal damage to the boss while under it's protection. | |||
|- | |||
| colspan=2 | | |||
*{{color|red|Unstable Abyss Power|b=1}}: Ran create several sigils around the map or corresponding energy colors, if allowed remain on the field for too long, they will explode, dealing lethal damage. Contacting the sigil while in the appropriate energy state will cause them to disappear. Each player will have a specific energy state, each corresponding to a sigil around the map. | |||
*{{color|#9F6811|'''Solo Mode Variation''':}} | |||
**You will be applied with 1 energy state while a different random energy state will be around the map. Destroy both sigil to avoid damage. | |||
| | |||
|- | |||
| colspan=2 | | |||
*{{color|red|Absorption of Power|b=1}}: Ran will draw in energy orbs which will travel from across the map. If Ran absorbs the energy orb, he will heal a significant portion of his health. Stop the orb by touching them while in the corresponding energy state. If two orbs are gathered before they contact Ran, a Light Orb will appear and strike Ran, forcing him to switch energy states and increasing the damage dealt to him. | |||
| | |||
*The first orb is always imbued with Abyss energy and the second which appears after the first is gathered will be Shadow energy. | |||
*While the Abyss orb starts at the furthest point of the map, the Shadow orb spawns relative to where the Abyss orb was gathered. | |||
*Ran is completely docile during the entirety of this move, making it an extremely good opportunity to deal damage before gathering the orbs, which would cause him to proceed to '''Switch Energy'''. | |||
|- | |||
| colspan=2 | | |||
*{{color|red|Colossal Abyss Crystal|b=1}}: A large Abyss Crystal will start descending from the top of the map, if it hits the bottom floor, or contacts a player, it will explode, dealing massive damage. The Crystal must be destroyed before it touches the ground. After sustaining a certain amount of damage, the crystal will shrink to a much smaller size. | |||
| | |||
*If you are hit by the attack, potion effectiveness will be decreased significantly for a period of time. | |||
|- | |||
| colspan=2 | | |||
*{{color|red|Alternate Space: Rope of Confession|b=1}}: The screen will turn black as players are teleported to a separate map with the '''Abyss Worshiper''' in the background. The Abyss Worshiper will proceed to perform their '''Rope of Confession''' attack. | |||
| | |||
*No notable alteration from [[Sunken Holy Ground]] version. | |||
|- | |||
| colspan=2 | | |||
*{{color|red|Alternate Space: Spider Web Explosion|b=1}}: The screen will turn black as players are teleported to a separate map with the '''Abyss Fanatic''' in the background. The Abyss Fanatic will proceed to perform their '''Spider Web Explosion''' attack. | |||
| | |||
*No notable alteration from [[Sunken Holy Ground]] version. | |||
|- | |||
| colspan=2 | | |||
*{{color|red|Alternate Space: Final Laser|b=1}}: The screen will turn black as players are teleported to a separate map with the '''Dreaming Hatchling''' in the background. The Dreaming Hatchling will proceed to perform their '''Final Laser''' attack. | |||
| | |||
*No notable alteration from [[Blooming Mineral Field]] version. | |||
|- | |||
| colspan=2 | | |||
*{{color|red|Alternate Space: Starlight Explosion|b=1}}: The screen will turn black as players are teleported to a separate map with the '''Awakened Myuriconus''' in the background. The Myuriconus will proceed to perform their '''Starlight Explosion''' attack. | |||
| | |||
*No notable alteration from [[Blooming Mineral Field]] version. | |||
|- | |||
| colspan=2 | | |||
*{{color|red|Alternate Space: Dream Eater|b=1}}: The screen will turn black as players are teleported to a separate map with the '''Dream Eater''' in the background. The Dream Eater will proceed to perform their '''Space Division''' attack. | |||
| | |||
*Dream Eater will always perform the attack 3 times. | |||
|- | |||
| colspan=2 | | |||
*{{color|red|Alternate Space: Rain of Orbs|b=1}}: The screen will turn black as players are teleported to a separate map with the '''Nightmare Keeper''' in the background. The Nightmare Keeper will proceed to perform their '''Rain of Orbs''' attack. | |||
| | |||
*No notable alteration from [[Nightmare's Crib]] version. | |||
|- | |||
| colspan=2 | | |||
*{{color|red|Berserk|b=1}}: At 5x HP, Ran will regenerate to 120x HP, as a last resort Ran will throw everything he has in one chaotic mess of an attack. Ran will perform an alternate version '''Barrage''' while also performing '''Colossal Abyss Crystal'''. A series of blackholes will also appear randomly around the map for a period of time in the midst of this attack. | |||
| | |||
*The version of '''Barrage''' performed during this attack is a bit different, expanding from his core instead of an outstretched hand. | |||
*The '''Barrage''' will continue indefinitely till Ran is forced to switch positions from '''Absorption of Power'''. | |||
|} | |} | ||
<span style="display:none">}}</span> | <span style="display:none">}}</span> | ||
Latest revision as of 20:01, 28 May 2025
- English

Birth of Origin
| “ | The origin of Abyss, with hints of old civilization. What seemed like permanent fixtures shift for the King of Abyss...
|
” |
Description
Despite the contamination of demonic energy and injuries, the heroes raise their weapons to protect the world. Move forward. The end of Abyss awaits.
Recommended Level
99
Required Combat Power
- Story Mode
- Normal/Solo Mode
2,500,000
Entry Requirements
Solo Mode
- Main Article: Raid Solo Mode
- Up to 4 players can enter, requiring a minimum of at least 3 people. (Normal)
- 2~4 players. (Story)
- Only three Resurrection Stones can be used to revive.
- Players are given a 15 second penalty before they can resurrect themselves.
- Bosses can only be frozen or petrified 3 times each (every hit is 1 count) at a time. When this limit is exceeded, they become invulnerable to that debuff for 60 seconds.
- Freezing or petrifying can be attempted again after 30 seconds, but you will not be able to chain it further. This also resets the 3-step chain's cooldown to 60 seconds.
Details
- Most enemy attacks in this dungeon ignore players' physical and magical defense (either fully or partially).
 Enviromental Debuff - Demon RealmEnviromental Debuff - Demon Realm
- The El's power does not reach into this realm, Attack and HP will be reduced by 90%. Enemies will have a 30% chance to resist your critical hits.
Boss Defenses
| Boss Name | Defense (Raw) | Defense (Percentage) |
|---|---|---|
| Ran (Phase 1) | 21883 | 83.91% |
| Shadow of Greed (Phase 2) | 10746 | 71.92% |
| King of Abyss (Phase 3) |
- Phase 1
- Phase 2
- Phase 3
Phase 1 - Earl of Abyss Ran
Phase Gimmick

Ran will periodically generate Abyss Crystals randomly across the map. These crystals are counted as obstacles and cannot be destroyed by regular means. They will pulse occasionally, drawing in nearby players with a weak suction effect, and dealing a small amount of damage to them. Additionally, these crystals are involved in many of Ran's attacks and will respond to certain attacks.
Boss
| Earl of Abyss Ran | ||
|---|---|---|
| The Earl of Shadow in the flesh. | ||
| Boss Attacks | Tips | |
|
| |
|
| |
|
| |
|
| |
|
| |
|
||
|
| |
Dialogue
{{
}}
| Image | Name | Boss | Character | Stats |
|---|---|---|---|---|
 |
Can be obtained once a week from clearing the dungeon with Submergence of Abyss - Phantom Weapon equipped.
|
Trivia
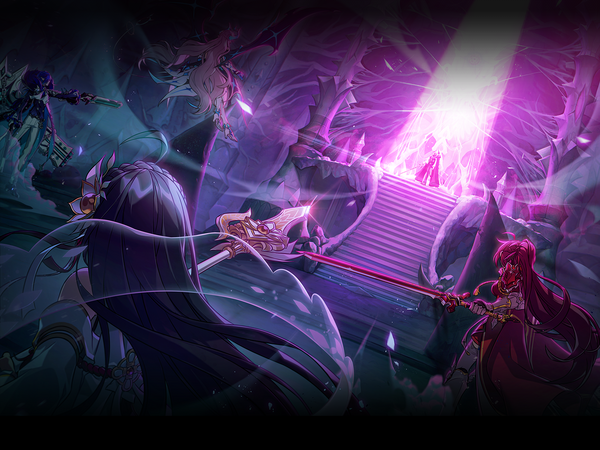
- The characters featured on the loading screen are Apsara, Empire Sword and Innocent.
Updates
| Date | Changes | ||
|---|---|---|---|
| KR | NA | ||
| 08/04/2022 | 8/31/2022 |
| |
| 08/11/2022 | 8/31/2022 |
| |
| 09/01/2022 | 9/28/2022 |
| |
| 07/20/2023 | 08/16/2023 |
| |
| 09/12/2024 | 09/25/2024 |
| |
| 04/24/2025 | 05/22/2025 |
| |
Alternative Names
{{
}}
| Server | Name | Translation |
|---|---|---|
| 근원의 산실 | The Origin's Source | |
| 根源の産室 | Nursery Room of the Primordial Source | |
| 根源的产室 | The Origin's Source |
- Region 19~22
- Region 1~6
- Region 7~12
- Region 13~18
- Laby
- Noah
- Lithia
- Other
- Miscellaneous
| Abyss | Monaterra | Doom Aporia | |||
|---|---|---|---|---|---|
| {{ }} | {{ }} | {{ }} | {{ }} |
- Region 19~22
- Region 1~6
- Region 7~12
- Region 13~18
- Other


