Blooming Mineral Field: Difference between revisions
From Elwiki
m (Text replacement - "Abyssal Core" to "Heart Core") |
Shironsaki (talk | contribs) No edit summary |
||
| (5 intermediate revisions by 3 users not shown) | |||
| Line 1: | Line 1: | ||
{{Languages|Blooming Mineral Field}} | {{Languages|Blooming Mineral Field}} | ||
{{ | {{RaidPage | ||
| Orient=4 | | Orient=4 | ||
| Color={{ColorSel|Village|19}} | | Color={{ColorSel|Village|19}} | ||
| Line 12: | Line 11: | ||
| LvNeed=99 | | LvNeed=99 | ||
| LvFit=5000000 | | LvFit=5000000 | ||
| LvFitStory=2500000 | |||
| XEntryReq=<span style="display:none">{{</span> | | XEntryReq=<span style="display:none">{{</span> | ||
| Line 19: | Line 19: | ||
====Demon Realm==== | ====Demon Realm==== | ||
*The El's power does not reach into this realm, Attack and HP will be reduced by 90%. Enemies will have a 20% chance to resist your critical hits. | *The El's power does not reach into this realm, Attack and HP will be reduced by 90%. Enemies will have a 20% chance to resist your critical hits. | ||
====Boss Defenses==== | |||
{| class="wikitable" | |||
! Boss Name !! Defense (Raw) !! Defense (Percentage) | |||
|- | |||
| '''Dreaming Hatchling''' || rowspan=2 | {{calc|get_def|3.5|100}} || rowspan=2 | {{calc|get_def|3.5|100|true}} | |||
|- | |||
| '''Awakened Myuriconus''' | |||
|} | |||
<span style="display:none">}}</span> | <span style="display:none">}}</span> | ||
| | |Phase1Name=Dreaming Hatchling | ||
| | |Phase1=<span style="display:none">{{</span> | ||
<center>'''???.'''</center> | |||
== Phase Gimmick == | |||
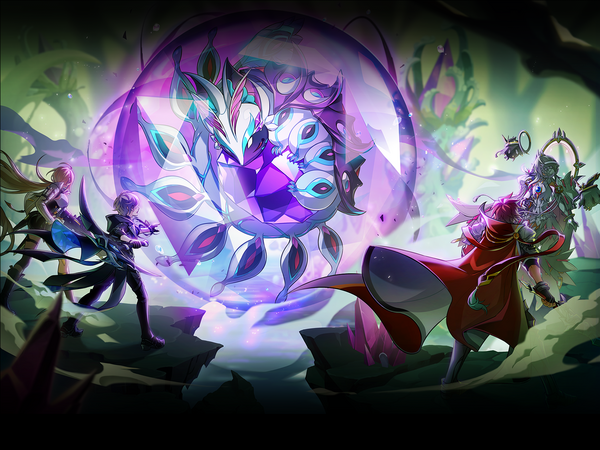
'''Barrier''' - At the start of the raid, the boss will be encased in a barrier. There are multiple mineral blocks that will spawn around the map. Destroy them the deplete the barrier. | |||
*'''Head Hunter''' is recommend to be taken off when attacking mineral blocks. | |||
*''' | |||
''' | '''Barrier Regeneration''': After the barrier is depleted, you can attack the boss. Re-equip '''Head Hunter''' to burst down the boss. Mineral blocks will still spawn around the map. Destroy them to slow down the rate at which the barrier regenerates. After awhile, the barrier will be regenerated and you need to destory mineral blocks again. | ||
* | ---- | ||
==Boss== | |||
{| class="wikitable" border="1" cellpadding="5" style="border-spacing: 0; border: 1px #000 solid; border-collapse: collapse; width: 100%; vertical-align: top;" | |||
|+ [[File:Icon - Warning.png|20px]] Attacks highlighted in {{color|red|red}} bypass invincibility frames. | |||
|- | |||
! width=50% | Boss Attacks !! width=50% | Tips | |||
|- | |||
| | |||
*'''{{color|red|Target}}:''' The player targeted will explode and take lethal damage. To make them not take damage, gather near the player. | |||
| | |||
*It is possible to get through this pattern with just 2 players sticking together. | |||
|- | |- | ||
| | | | ||
| ''' | *'''{{color|red|Surge}}:''' Myuriconus will release waves to nearby players that debuff you with Attack decreased. | ||
| | | | ||
*''' | *Debuff will disappear either when duration ends or cleansed with debuff removal skills. | ||
|- | |||
| | |||
*'''{{color|red|Mini Laser}}''': Myuriconus will either rotate letting out a laser beam or spawn laser in a random spot. | |||
| | |||
*Rotate lasers can be dodged if you hug the boss close enough. | |||
|- | |||
| | |||
*'''{{color|red|Side Laser}}''': Myuriconus will blast off lasers on one side of the map if there are more than 5 minerals spawned there. After the laser, all the minerals on that side will disappear. | |||
| | |||
|- | |||
| | |||
*'''{{color|red|Fog Explosion}}''': There will be areas of fog summoned in the map, it’ll explode soon after. | |||
| | |||
|- | |||
| | |||
*'''{{color|red|Final Laser}}''': The ultimate attack. If the barrier finish regenerating, Myuriconus will release lasers that are instant-kill and ignore any resurrection effects. | |||
| | |||
*You can avoid this ultimate attack by running to empty spots. | |||
|} | |||
<span style="display:none">}}</span> | |||
|Phase2Name=Awakened Myuriconus | |||
|Phase2=<span style="display:none">{{</span> | |||
<span style="display:none">}}</span> | <span style="display:none">}}</span> | ||
| BDrop={{tabs|divclass=forceland|name=1|tab1=Swirling Phantasma|contents1={{:19-2Bdrop1}} |tab2=Heart Core Shard|contents2={{:19-2Bdrop2}}}} | | BDrop={{tabs|divclass=forceland|name=1|tab1=Swirling Phantasma|contents1={{:19-2Bdrop1}} |tab2=Heart Core Shard|contents2={{:19-2Bdrop2}}}} | ||
| SBGM=[http://www.youtube.com/watch?v=5MrKBeQ247o '''''music096_boss'''''] | | SBGM=[http://www.youtube.com/watch?v=5MrKBeQ247o '''''music096_boss'''''] | ||
| Line 75: | Line 95: | ||
{{tabs | {{tabs | ||
|name=Dialog | |name=Dialog | ||
|tab1=Phase 1 Dialogue | |||
|contents1= | |||
*{{StoryIcon|Aps}} '''Ara:''' ''I found the fake El! But what is that attached to it? A'' | |||
*{{StoryIcon|CEs}} '''Eve:''' ''That thing claimed the fake El before we did.'' | |||
*{{StoryIcon|KE}} '''Elsword:''' ''I'm sorry, but we're here to get rid of it. You better give it up!'' | |||
|tab2=Phase 2 Dialogue | |||
|contents2= | |||
*{{StoryIcon|Lib}} '''Noah:''' ''It got stronger after absorbing the fake El... What do we do?'' | |||
*{{StoryIcon|Blu}} '''Ain:''' ''Should we be worried? We accomplished the goal of getting'' | |||
*{{StoryIcon|Blu}} '''Ain:''' ''What's left with dealing with the one... that absorbed the fake El.'' | |||
*{{StoryIcon|DyB}} '''Rena:''' ''... Oh? That's an interesting plant. We should us that.'' | |||
---- | |||
*{{StoryIcon|Min}} '''Rose:''' ''Now! Zero! Take it away!'' | |||
*{{StoryIcon|Zero}} '''Zero:''' ''Oi, (WHISTLE)! This way!'' | |||
*{{StoryIcon|Myuriconus}} '''Myuriconus:''' ''...!!'' | |||
|tab4=Dungeon Victory Quote | |tab4=Dungeon Victory Quote | ||
|contents4= | |contents4= | ||
| Line 139: | Line 174: | ||
| 09/01/2022 || 9/28/2022 || align="left" | | | 09/01/2022 || 9/28/2022 || align="left" | | ||
*{{buff|Phase 1 all Laser pattern range decreased.}} | *{{buff|Phase 1 all Laser pattern range decreased.}} | ||
|- | |||
| 07/20/2023 || 08/16/2023 || align="left" | | |||
*1st Phase (Dreaming Hatchling) | |||
**{{Buff|Barrier HP decreases even more when destroying minerals.}} | |||
**{{Buff|Recovery duration increases after the barrier is destroyed.}} | |||
*2nd Phase (Awakened Myuriconus) | |||
**{{Buff|Teleport pattern cooldown is increased.}} | |||
**{{Buff|Sea Current Adaptation buff stack obtained through plants is increased from 5 to 8.}} | |||
**{{Buff|When Nightmare’s Crib dungeon is cleared while playing against Awakened Myuriconus boss monster, 20 Sea Current Adaptation stacks will be applied}} | |||
|} | |} | ||
<span style="display:none">}}</span> | <span style="display:none">}}</span> | ||
Latest revision as of 16:46, 10 June 2024
- English

Blooming Mineral Field
| “ | Blooming Mineral Field.
|
” |
Description
When they followed the El energy to the mineral field, the El Search Party finds the thief.
Recommended Level
99
Required Combat Power
- Story Mode
- Normal Mode
2,500,000
Entry Requirements
Details
- Most enemy attacks in this dungeon ignore players' physical and magical defense (either fully or partially).
Demon Realm
- The El's power does not reach into this realm, Attack and HP will be reduced by 90%. Enemies will have a 20% chance to resist your critical hits.
Boss Defenses
| Boss Name | Defense (Raw) | Defense (Percentage) |
|---|---|---|
| Dreaming Hatchling | 21883 | 83.91% |
| Awakened Myuriconus |
- Phase 1
- Phase 2
Phase 1 - Dreaming Hatchling
Phase Gimmick
Barrier - At the start of the raid, the boss will be encased in a barrier. There are multiple mineral blocks that will spawn around the map. Destroy them the deplete the barrier.
- Head Hunter is recommend to be taken off when attacking mineral blocks.
Barrier Regeneration: After the barrier is depleted, you can attack the boss. Re-equip Head Hunter to burst down the boss. Mineral blocks will still spawn around the map. Destroy them to slow down the rate at which the barrier regenerates. After awhile, the barrier will be regenerated and you need to destory mineral blocks again.
Boss
Dialogue
{{
}}
| Image | Name | Boss | Character | Stats | Set Effects |
|---|---|---|---|---|---|
 |
Accessory (Bottom Piece): |
2 Pieces:
3 Pieces:
|
{{
}}
Trivia
Updates
| Date | Changes | |
|---|---|---|
| KR | NA | |
| 08/04/2022 | 8/31/2022 |
|
| 09/01/2022 | 9/28/2022 |
|
| 07/20/2023 | 08/16/2023 |
|
- Region 19~20
- Region 1~6
- Region 7~12
- Region 13~18
- Laby
- Noah
- Lithia
- Other
- Miscellaneous


