Solace's Fortress

From Elwiki
(Redirected from 10-6)

Solace's Fortress

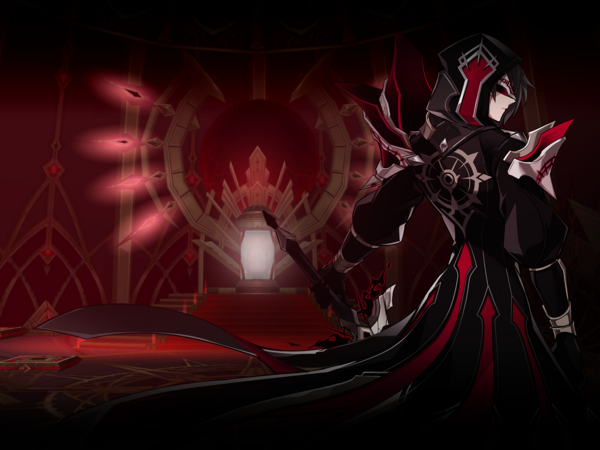
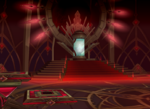
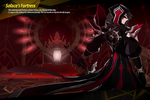
The underground fortress where Solace, the Master of the Sun, is supposedly hiding the abducted El Lady. The last battle in Elysion finally begins.

Description
The underground fortress where Solace, the Sun Master, is supposedly hiding the abducted El Lady.
Recommended Level
95-97
Required Combat Power
12,320
Dungeon Layout
Details
{{

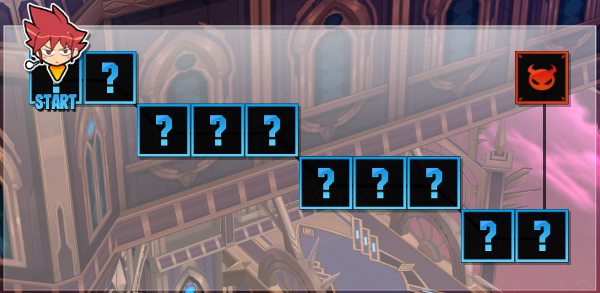
Fortress Descent

Starting off the dungeon, players will be chased by a powerful descending laser that deals a significant amount of damage. Defeat the monsters and open the path further down until you reach the Spear Organic Core which will deactivate the laser.

Security Lasers

Before entering the outer lab, laser checkpoints will be stationed throughout the map. If none of the lasers are tripped, players will be able to skip the first room of the following segment. Destroy the Spear Organic Cores to deactivate the lasers before progressing.

Protecting Herbaon

Deep into the corridor area, Herbaon will help open the path. Herbaon will take a total of 20 seconds to open the way while a Surveillan will attack from the background. If Herbaon is hit, he will be stunned and his progress halted. Maneuver around and divert Surveillan's aim away from Herbaon. Additionally, monsters will continuously spawn onto the field and attack both players and Herbaon alike.

Scabbards

The final path leading to Solace will be blocked by large scabbards. Light Scabbards can only be harmed by command attacks while Dark Scabbards can only be harmed with skills. Furthermore, a slow but heavy hitting laser will approach players from the left side of the screen.

}}
Ally
{{ {{
Ally Image Ally Description
Herbaon - Defend Herbaon as he destroys one of the cores in Solace's Fortress and helps open the gate into the inner core. It will take him 20 seconds to destroy the core.

}}

}}
Mobs
{{ {{
Monster Image Monster Description Monster Moves
Sealed Emperor Lance - A corrupted lance wielding angel Nasod.
  • Double Stab: Stabs twice leaving behind a sphere of dark energy.
  • Spear Barrage: Performs a rapid barrage of spear stabs in front of it, finishing off with an explosion of dark energy.
  • Death Counter: When defeated, it will either release a sigil that explodes, bursts into flames, or releases a laser bar which spins in a circle.
Sealed Emperor Orb - A corrupted magician like angel Nasod who attacks with energy rather than a weapon.
  • Energy Tracker: Casts a ball of dark energy that homes in on players and implodes on impact.
  • Silencer: Shoots out a cloud of dark energy in front of itself that inflicts  Enemy DebuffSilenceEnemy DebuffSilence.
  • Death Counter: When, defeated it will either release a sigil that explodes, bursts into flames, or releases a laser bar which spins in a circle.
Sealed Emperor Shield - A corrupted large hammer wielding angel Nasod.
  • Judgement: Release a large pillar of dark energy out of its body upwards.
  • Army Shield: After performing Judgement, it will enter a defensive stance. Its defense will increase significantly and they will grant temporary invincibility to surrounding mobs.
  • Smash: Perform a downward smash with its hammer which stuns players.
  • Ram: Perform a shield ram, typically followed up by either its Smash or Judgement attack.
  • Dark Lasso: Fire one large dark orb forward which he can use to pull you closer to him.
  • Death Counter: When defeated, it will either release a sigil that explodes, bursts into flames, or releases a laser bar which spins in a circle.

Note:

  • Does not receive proper hitstun, will instead flinch in super armor allowing it to retaliate.
Sealed Emperor Bow - A corrupted bow wielding angel Nasod archer.
  • Arrow Shot: Fires a single arrow straight forward.
  • Arrow Barrage: Backflips then follows up with three consecutive arrow shots.
  • Homing Shot: Fires four sets of three arrows that home in at players from a distance.
  • Death Counter: When defeated, it will either release a sigil that explodes, bursts into flames, or releases a laser bar which spins in a circle.
Command Organic Core - A floating bio-mechanical core capable of creating other cores.
  • Core Summon: Summons a Diamond Organic Core.
  • Seal of Curse: Fires an explosion orb that decrease all attack and action speed.
Diamond Organic Core - A bio-mechanical core that attacks similarly to a Hernacyd Fear.
  • Saw: Rushes at players spinning like a saw.
  • Latched Self-Destruct: Latches onto a target then tries to self-destruct.
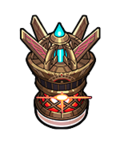
Spear Organic Core - A bio-mechanical security core that can cloak itself. Destroy it in order to deactivate the security lasers.
  • Cloak: Turns invisible, concealing itself.
  • Spike Burst: Extends its spikes outwards hitting nearby players.
  • Cross Laser: Fires a laser both horizontally and vertically.

}}

}}
Mini Boss
{{ {{
Monster Image Boss Description Boss Moves
COPY_S - A duplicate of CODE-Maya. It is not necessary to defeat her in order to progress the stage.
  • Teleport: If players are on the opposite platform to Maya, she will teleport to the other platform.
  • Suction Disk: She will create a small black hole with her power disk then makes it explode, launching players a great distance forward. Maya will always use this attack if she teleports to a player.
  • Disk Boomerang: Slashes her disks around herself then throws her power disks forward. The power disks will return to her side.
  • Sharp Fall: Maya will assault kick into the air then dive straight down releasing a shockwave of lingering energy.
  • Overclock Movement - Energy Burst: Dashes forward taking any players nearby her with her, then creates a saw with her disks dealing several powerful hits and pushing players away.
  • Dual Advance: Teleports to the center of the lower platform then sends her two disks in opposite directions, pushing any players hit off the map before returning to Maya's side. At the same time, Maya will leap into the air and create a large sphere of electrical energy in the air.
  • Invincibility: If she is within close proximity of the Diceon Core, both her and the core will become completely invincible.
Diceon Core - The core device powering CODE_S. Destroy the core and CODE_S will cease to function.
  • Invincibility: If Maya is within close proximity of the Diceon Core, both her and the core will become completely invincible.

}}

}}
Obstacles
{{ {{
Obstacles Image Obstacles Description
Pitfalls - The place is very high up, don't fall or you'll lose a set percentage of HP.
Lasers - Powerful lasers which fire at players. The lasers do not inflict hitstun, but will deal multiple hits of damage.
Security Lasers - A laser that deals continuous damage to players and completely drains players' MP. If you manage to avoid getting hit by all lasers in stage 2, you will skip stages 3. Destroy the Spear Organic Core in order to deactivate the laser.
Lava - Molten minerals in containers all around Solace's Fortress. Players standing in lava will take continuous damage.
Portal - Portals which will take players to different parts of the fortress.
Moving Platforms - Platforms that are not in a fixed position and will travel in a variety of patterns.
Dark Fan - Moving devices which deal multiple hits and drag players along.
Spike Pump - Mechanical devices that function as moving platforms and extremely spiky hazards.
Dark Surveillan - A remodeled Surveillan that has been stationed inside Solace's Fortress. It cannot be attacked in the background, and will fire once at each player per round.
Light Scabbard - A giant scabbard that can only be harmed with commands.
Dark Scabbard - A giant scabbard that can only be harmed with skills.
Energy Bolt - A giant laser stream of electricity that will creep up on players slowly.
Diceon Core - The core device powering the surrounding Nasods.

}}

}}
Boss
{{ {{
Monster Image Boss Description Boss Moves
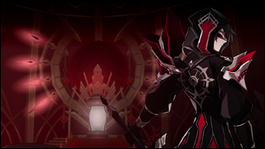
Solace - The Master of the Sun. The one responsible for the disappearance of the El Lady and the El Explosion.
  • Mark of Judgement: At the start of the fight, Solace's health bar will be engulfed by five [Marks of Judgement]. The marks will change depending on the outcome of [Judgement] moves. When the mark gauge is filled completely, Solace will burn HP from any player that attacks him, equal to 10% of the damage inflicted.
    • When a player fails a [Judgement] attack, they will be inflicted with the [Conviction of Sun] debuff that reduces their attack power and movement speed and adds one gauge to the mark.
    • When a player evades a [Judgement] attack, they will gain  Self BuffEl's BlessingSelf BuffEl's Blessing which increases their action speed and movement speed and removes one gauge from the mark.
  • [Judgement] Confusion Stigma: Solace will inflict players with a Mark of the Sun that counts down until it explodes. The player fails the attack if the mark overlaps with the mark of other players or Solace when the timer hits 0.
    • The player can still clear the judgement should their Mark overlaps with Solace's if they are invulnerable when the countdown ends. This doesn't work with other player's Marks however.
  • [Judgement] Darkness Flame: Solace will warp to the center of the stage, summoning 3 Dark Scabbards and 3 Light Scabbards in 6 spots on the stage in a random order. If Solace is allowed to recover 3 of these scabbards, he will cause a stage wide explosion dealing massive damage to everyone, and gains one [Mark of Judgement] per player. If the player prevents this by destroying the scabbards or keeping him occupied by having him attack you, Solace will be weakened for a period of time allowing you to deal damage to him uninterrupted.
  • [Judgement] Ignition Rain: Solace sends dark swords up from the ground, knocking players up and binding them in the air. He will then warp to the center of the stage while causing the swords to fall back down and embed themselves into the ground. Solace will then detonate the swords causing a huge pillar of fire to erupt from the ground. The bind can be escaped by tapping the directional keys quickly. The player fails the attack if they are hit by the pillars of fire. One of the two flotation devices on either side of the stage will activate allowing the player to jump out of reach and avoid the pillars of fire.
    • The device that gets enabled depends on Solace's orientation. If Solace is facing towards the screen, then the flotation device on the right side of the arena is enabled. If Solace's back is facing towards the screen, then it's on the left (Alternatively, go to the side opposite of Solace's raised hand).
    • If the attack is not avoided by the intended method of the launch pad, you will not get the  Self BuffEl's BlessingSelf BuffEl's Blessing buff and will still receive the [Conviction of Sun] debuff.
  • Teleport: Solace can blink across the map at will.
  • Explosive Dodge: Solace dodges after being flinched and moves forward through the player while being completely immune. When he dodges away, the area he once stood explodes in a small aura.
    • The immunity lasts until Solace moves again after the slash.
  • Slash Combo: Performs several consecutive slashes, finishing by using Rising Wave which launches targets.
  • Sword Fall Combo: Summons multiple swords which will strike the ground at a diagonal angle. He will follow up with a series of slashes launching players into the air, then sending a barrage of homing swords at players.
  • Rising Slashes: Solace will create a suction vortex dealing multiple hits, then cause a blade to pierce out of the ground in front and behind himself. After he may summon six more blades in a circle around himself. He may follow that by sending two large flaming blades outwards across the map.

Note:

  • Immune to debuffs.
  • Upon reaching 14 bars of HP, Solace will enter his second phase.
Solace (Phase 2) - Solace, unmasked, in a dimension of his own creation.

Solace is able to use all the abilities from Phase 1 with the exception of [Judgement] Darkness Flame.

  • Final Trial: Solace immediately fills up the [Mark of Judgement] gauge at the start of the phase, burning HP from players as before. Players are given a 60 second time limit to both reduce Solace's HP as quickly as possible, as well as to deplete the gauge.
    • While the trial is active, players will also be inflicted with a  Enemy DebuffBurnEnemy DebuffBurn, steadily depleting their HP for the entire duration.
  • Space of the Black Sun: Upon reaching 4 bars of health within the initial 60 seconds of the fight, if Solace's [Mark of Judgement] still has at least one gauge filled, it will grant him full immunity to any source of damage for the remainder of the initial 60 second timer, and will be removed once it reaches 0.
    • As such you should clear the mark entirely first (only possible with 3 or more people) before lowering his HP to prevent him from triggering this skill.

Note:

  • Immune to debuffs.

}}

}}
Dialogue
  • Dungeon Start Cutscene
  • Mid Dungeon Dialogue
  • Boss Intro Cutscene
  • Mid Boss Dialogue
  • Phase 2 Intro Custcene
  • Boss Outro Quote
  • Dungeon Victory Quote
  • Nasod Bird: (Whistle - dead)
  • Spear Organic Core: Target mismatch - alert system reactivated.
{{
Image Name Boss Character Stats
Elysion's Hernacyd Blade
Solace
Raven

Lv86 Blade:

Physical Attack +5078

Magical Attack +5078


[Unidentified * ?]

[Unidentified * ?]

2% chance of double attack (Except special active skills)

Critical +6%

}}
Gallery
Trivia
{{
  • During the development, this dungeon was initially called "솔레스의 탑 (Solace's Tower)".
  • Despite being left-handed, Solace's sword flies into his right hand in his introduction cutscene.
  • Although li_dungeon008 was renamed as li_stage_elysion003, if there is a li_dungeon008 in the "music" folder, the dungeon still uses li_dungeon008 instead of li_stage_elysion003 in the corridor area before reaching the inner core.
  • Despite Solace Phase 2 utilizing a completely different design, his dialogue portrait still utilizes his previous design.
}}
Updates
{{
Date Changes
KR NA
08/25/2016 01/04/2017
  • Solace's Fortress added.
06/18/2020 06/17/2020
  • ED drop rate decreased.
07/08/2021 08/04/2021
  • 3rd stage summons improved.
07/06/2023 08/02/2023
  • Monster / Boss Monster HP within the dungeon is decreased.
  • Solace’s defense is decreased.
  • Phase 2
    • Solace’s black sun area invincibility is removed.
    • Solace’s special pattern cooldown is decreased.
    • Solace’s awakening duration is decreased.
    • When Solace is awakened, damage reduction effect is removed.
    • When Solace is awakened, damage reflection effect is removed.
    • Removed Solace’s HP recovery when a character dies while Solace is awakened.
}}
Alternative Names
{{
Server Name Translation
South Korea 솔레스의 요새 Solace's Fortress
Germany Solace-Festung Solace's Fortress
Spain Fortaleza de Solace Solace's Fortress
France Forteresse de Solace Solace's Fortress
Poland Twierdza Solace Solace's Fortress
United Kingdom Solace Fortress
Brazil Fortaleza de Solace Solace's Fortress
}}


  • Region 7~12
  • Region 1~6
  • Region 13~18
  • Region 19~20
  • Laby
  • Noah
  • Lithia
  • Other
  • Miscellaneous