Crimson Cradle of Flames: Difference between revisions
From Elwiki
m (Text replacement - "<span style="display:none">{{</span>" to "<dfn>{{</dfn>") |
Gameboy224 (talk | contribs) No edit summary |
||
| (6 intermediate revisions by 3 users not shown) | |||
| Line 1: | Line 1: | ||
:''For the series of [[Challenge Mode]] raid dungeons, see [[Crimson Cradle of Flames (Challenge Mode)]]'' | |||
{{Languages|Crimson Cradle of Flames}} | {{Languages|Crimson Cradle of Flames}} | ||
{{ | {{RaidPage | ||
| Orient=3 | | Orient=3 | ||
| Color={{ColorSel|Village|13}} | | Color={{ColorSel|Village|13}} | ||
| Line 20: | Line 21: | ||
*Bosses can only be frozen or petrified 3 times each (every hit is 1 count) at a time. When this limit is exceeded, they become invulnerable to that debuff for 60 seconds. | *Bosses can only be frozen or petrified 3 times each (every hit is 1 count) at a time. When this limit is exceeded, they become invulnerable to that debuff for 60 seconds. | ||
**Freezing or petrifying can be attempted again after 30 seconds, but you will not be able to chain it further. This also resets the 3-step chain's cooldown to 60 seconds. | **Freezing or petrifying can be attempted again after 30 seconds, but you will not be able to chain it further. This also resets the 3-step chain's cooldown to 60 seconds. | ||
==== | ===={{se|441|Enviromental Debuff - Demon Realm|tt=no}}==== | ||
*The El's power does not reach into this realm, Attack and HP will be reduced by 50%. | *The El's power does not reach into this realm, Attack and HP will be reduced by 50%. | ||
<dfn>}}</dfn> | |||
|Phase1Name=Malice | |||
|Phase1=<span style="display:none">{{</span> | |||
<center>'''The initial shell housing the corrupted Master of Fire.'''</center> | |||
== | == Boss == | ||
{| class="wikitable" border="1" cellpadding="5" style="border-spacing: 0; border: 1px #000 solid; border-collapse: collapse; width: 100%; vertical-align: top;" | |||
|+ [[File:Icon - Warning.png|20px]] Attacks highlighted in {{color|red|red}} bypass invincibility frames. | |||
|- | |||
! colspan=3 | Malice | |||
|- | |||
| colspan=3 align=center | | |||
A dark colossus made out of volcanic rock by a corrupted Rosso, reawakened by the remnant of the Red Eye. The beam will petrify players. | |||
|- | |||
! width=60px | Monster Image !! width=50% | Boss Attacks !! width=50% | Tips | |||
|- | |||
| rowspan=3 | {{tt|[[File:12-7-1_boss.png|60px]]|[[File:Mob - Malice.png|300px]]}} | |||
| | |||
*'''Laser Vision:''' Raise its head as a blue sigil shines on an eye, firing a beam out of its eye, dragging it across the map. The beam will petrify players for a period of time. | |||
| | |||
*The direction that a beam will fire across can be figured out based on which arm is raised and which stays grounded. If his right arm is raised (your left), it's beam will sweep from right to left. Vice versa if his left arm is raised. | |||
|- | |||
| | |||
*'''<font color=red>Destruction Smash</font>:''' The boss will laugh before slamming its arms into the stage. This attack will then cause Thorn Pillars to raise out of the ground, indicated by a red light. These pillars are especially notable since they destroy segments of the stage itself, making the battle increasingly harder. | |||
| | |||
*The boss's hands do not bypass invincibility frames, but deal damage and launch you. | |||
*Stand at the far left side or right side to minimize platform destroying effect. At the time he laugh you should focus on move to edge of the stage as soon as possible. | |||
*You can use that strategy 4 times (2 on each side). The boss hand will land on the edge of platform after first four are destroyed. End the battle before fifth slam is advised. | |||
|- | |||
| | |||
*'''<font color=red>Orbs of Chaos:</font>''' Malice places its hands at the sides and summon many orbs to slowly raise upwards. These orbs will deal damage depending on their size, maneuver around the orbs to avoid taking damage. | |||
| | |||
*Malice can still be damage during this phase by homing attacks. | |||
*Despite orbs seemingly covering the entire map, characters that can fly or hover can stay on the outskirts of the map to remain safe as no orbs arise at the very edges of the map. | |||
|- | |||
! colspan=3 | Notes | |||
|- | |||
| colspan=3 | | |||
*The lower boss HP, the quicker boss moves will executed. At the point of 30 HP bars or lower you have about 3 seconds before react to his moves. | |||
*His move rotation will be : Laser vision (another shot will be used when his HP is low), Destruction Smash , Then Orbs of Chaos. | |||
*While most will commonly attack the head, his hands do have hitboxes too. Useful to know as if Malice has low HP and shells are close to the head, you can attack the hands and be safe (incase shells self-destruct during the cutscene). | |||
|} | |||
== | == Mobs == | ||
{| class="wikitable" border="1" cellpadding="5" style="border-spacing: 0; border: 1px #000 solid; border-collapse: collapse; width: 100%; vertical-align: top;" | |||
|+ [[File:Icon - Warning.png|20px]] Attacks highlighted in {{color|red|red}} bypass invincibility frames. | |||
== | |- | ||
! width=60px | Monster Image !! width=50% | Monster Description !! width=50% | Monster Moves | |||
|- | |||
|{{tt|[[File:Blood Rage.png|60px]]|[[File:Mob - Blood Rage.png|250px]]}} | |||
| | |||
|[[File:Blood Rage.png|60px]] | |||
|'''Blood Rage''' - Shell like structures summoned by Malice. They will both act as barriers and means of attacking players. | |'''Blood Rage''' - Shell like structures summoned by Malice. They will both act as barriers and means of attacking players. | ||
| | | | ||
| Line 41: | Line 79: | ||
*'''Quick Spin:''' It will retreat into the background and then roll on the lower level, hitting players. | *'''Quick Spin:''' It will retreat into the background and then roll on the lower level, hitting players. | ||
*'''Self-Destruct:''' Upon being destroyed, they will explode dealing significant amount of damage to players near them. | *'''Self-Destruct:''' Upon being destroyed, they will explode dealing significant amount of damage to players near them. | ||
|} | |||
<span style="display:none">}}</span> | <span style="display:none">}}</span> | ||
| | |Phase2Name=Recluse | ||
|Phase2=<span style="display:none">{{</span> | |||
<center>'''Out of the rubble of his shell, a half corrupted Rosso will appear, brandishing his scythe.'''</center> | |||
== Boss == | |||
{| class="wikitable" border="1" cellpadding="5" style="border-spacing: 0; border: 1px #000 solid; border-collapse: collapse; width: 100%; vertical-align: top;" | |||
|+ [[File:Icon - Warning.png|20px]] Attacks highlighted in {{color|red|red}} bypass invincibility frames. | |||
|- | |||
! colspan=3 | Recluse | |||
|- | |||
| colspan=3 align=center | | |||
A corrupted Rosso, half dark, half light with the power of the Crimson Eye wielding his scythe. | |||
|- | |- | ||
| | ! width=60px | Monster Image !! width=50% | Boss Attacks !! width=50% | Tips | ||
| | |||
|- | |- | ||
|[[File: | | rowspan=6 | {{tt|[[File:12-7-2_boss.png|60px]]|[[File:Mob - Recluse.png|300px]]}} | ||
| | |||
*'''Vertical Swing:''' Recluse will swing its scythe vertically towards the camera. Leaves behinds a flame trail which will inflict the Ember of Combustion debuff. | |||
|[[File: | |||
| ''' | |||
| | | | ||
|- | |- | ||
| | | | ||
*'''Horizontal Swing:''' Recluse will swing its scythe horizontally towards the camera. Leaves behinds a flame trail which will inflict the Ember of Combustion debuff. | *'''Horizontal Swing:''' Recluse will swing its scythe horizontally towards the camera. Leaves behinds a flame trail which will inflict the Ember of Combustion debuff. | ||
| | |||
|- | |||
| | |||
*'''Reaper:''' Slash a purple scythe into the ground at a distance in front of it, then pull it inwards. Targets hit are not able to move for a period of time. | *'''Reaper:''' Slash a purple scythe into the ground at a distance in front of it, then pull it inwards. Targets hit are not able to move for a period of time. | ||
| | |||
|- | |||
| | |||
*'''Land Breaker:''' Swing a red scythe horizontally then slash it into the ground with a wide area of effect. Upon pulling his scythe back, spikes will be left behind to act as an obstacle. | *'''Land Breaker:''' Swing a red scythe horizontally then slash it into the ground with a wide area of effect. Upon pulling his scythe back, spikes will be left behind to act as an obstacle. | ||
**These spikes will self-destruct after a certain amount of time has passed. | **These spikes will self-destruct after a certain amount of time has passed. | ||
| | |||
|- | |||
| | |||
*'''<font color=red>Fire Pillars:</font>''' The screen will focus onto Recluse in a cutscene, he'll then cause fire pillars to shoot out of the ground underneath certain players that last 3 seconds. These fire pillars will also destroy parts of the map, making battling increasingly difficult. He is completely invincible during this attack. | *'''<font color=red>Fire Pillars:</font>''' The screen will focus onto Recluse in a cutscene, he'll then cause fire pillars to shoot out of the ground underneath certain players that last 3 seconds. These fire pillars will also destroy parts of the map, making battling increasingly difficult. He is completely invincible during this attack. | ||
| | |||
*Ground will not be destroyed in Story Mode. | |||
|- | |||
| | |||
*'''<font color=red>Horizon Beams</font>:''' A cutscene will play where Recluse's eye will glow. Six rows of eye will appear, a black line will indicate which rows will have a laser fire, only one row is safe during this. The attack will fire four sets of lasers. | *'''<font color=red>Horizon Beams</font>:''' A cutscene will play where Recluse's eye will glow. Six rows of eye will appear, a black line will indicate which rows will have a laser fire, only one row is safe during this. The attack will fire four sets of lasers. | ||
**All stage parts that destroyed from '''<font color=red>Fire Pillars</font>''' will be restored during this move's cutscene. | **All stage parts that destroyed from '''<font color=red>Fire Pillars</font>''' will be restored during this move's cutscene. | ||
| | |||
|- | |||
! colspan=3 | Notes | |||
|- | |||
| colspan=3 | | |||
*The Ember of Combustion debuff will burn 5% MP per second. | |||
|} | |||
<span style="display:none">}}</span> | |||
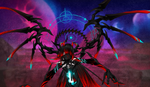
|Phase3Name=Dark Recluse | |||
|Phase3=<span style="display:none">{{</span> | |||
<center>'''The corruption afflicted on Rosso has taken complete control over the Master of Fire.'''</center> | |||
== Phase Gimmick == | |||
The boss will regenerate HP if it is able to defeat a player or if players are too far away from it. | |||
== Boss == | |||
{| class="wikitable" border="1" cellpadding="5" style="border-spacing: 0; border: 1px #000 solid; border-collapse: collapse; width: 100%; vertical-align: top;" | |||
|+ [[File:Icon - Warning.png|20px]] Attacks highlighted in {{color|red|red}} bypass invincibility frames. | |||
|- | |- | ||
| | ! colspan=3 | Dark Recluse | ||
|- | |||
| colspan=3 align=center | | |||
A corrupted Rosso empowered by encasing himself in the dark ruble of the tower, his body is now completely consumed in darkness. At peak power, he won't give up without putting up a fight. | |||
|- | |||
! width=60px | Monster Image !! width=50% | Boss Attacks !! width=50% | Tips | |||
|- | |||
| rowspan=7 | {{tt|[[File:12-7-3_boss.png|60px]]|[[File:Mob - Dark Recluse.png|300px]]}} | |||
| | | | ||
*'''Vertical Swing:''' Dark Recluse will swing its scythe vertically towards the camera. Leaves behinds a flame trail which will inflict the Ember of Retribution debuff. | *'''Vertical Swing:''' Dark Recluse will swing its scythe vertically towards the camera. Leaves behinds a flame trail which will inflict the Ember of Retribution debuff. | ||
| | |||
|- | |||
| | |||
*'''Horizontal Swing:''' Dark Recluse will swing it scythe horizontally towards the camera. Leaves behinds a flame trail which will inflict the Ember of Retribution debuff. | *'''Horizontal Swing:''' Dark Recluse will swing it scythe horizontally towards the camera. Leaves behinds a flame trail which will inflict the Ember of Retribution debuff. | ||
| | |||
|- | |||
| | |||
*'''Reaper:''' Slash the scythe into the ground at a distance in front of it, then pull it inwards. Targets hit are not able to move for a period of time. | *'''Reaper:''' Slash the scythe into the ground at a distance in front of it, then pull it inwards. Targets hit are not able to move for a period of time. | ||
| | |||
|- | |||
| | |||
*'''Land Breaker:''' Swing a red scythe horizontally then slash it into the ground with a wide area of effect. Upon pulling his scythe back, spikes will be left behind to act as an obstacle. | *'''Land Breaker:''' Swing a red scythe horizontally then slash it into the ground with a wide area of effect. Upon pulling his scythe back, spikes will be left behind to act as an obstacle. | ||
**These spikes will self-destruct after a certain amount of time has passed. | **These spikes will self-destruct after a certain amount of time has passed. | ||
| | |||
|- | |||
| | |||
*'''Meteor Rain:''' Dark Recluse will shoot fireballs into the sky, causing meteors to fall on top of players, leaving behind a trail of fire. They are signaled by a purple beam of light. | *'''Meteor Rain:''' Dark Recluse will shoot fireballs into the sky, causing meteors to fall on top of players, leaving behind a trail of fire. They are signaled by a purple beam of light. | ||
| | |||
|- | |||
| | |||
*'''<font color=red>Death Prison:</font>''' The boss will imprison a player in a shell. If the shell is not destroyed within 20 seconds, the player is immediately killed. | *'''<font color=red>Death Prison:</font>''' The boss will imprison a player in a shell. If the shell is not destroyed within 20 seconds, the player is immediately killed. | ||
**The shells are color coated much like the spikes, grey shells only take combo/active damage while red shells only take special active damage. | **The shells are color coated much like the spikes, grey shells only take combo/active damage while red shells only take special active damage. | ||
| | |||
*The prison will be healed if you attack them with the Ember of Retribution debuff. | |||
*This attack can only be used if there is more than one player. | |||
|- | |||
| | |||
*'''<font color=red>Thorn Pillars:</font>''' The boss will move above the center of the map before making Thorn Pillars to raise out of the ground, indicated by a red light. These pillars are especially notable since they destroy segments of the stage itself, making the battle increasingly harder. | *'''<font color=red>Thorn Pillars:</font>''' The boss will move above the center of the map before making Thorn Pillars to raise out of the ground, indicated by a red light. These pillars are especially notable since they destroy segments of the stage itself, making the battle increasingly harder. | ||
| | |||
*'''The central platform however is immune to being destroyed. So stay in center as you can.''' | |||
*This move have exactly 60 seconds cooldown. Boss will tend to use this move when it is ready. | |||
*The cooldown can be extended by using debuffs that render the boss immune ([[Status Effects/Freeze|Freezing]] or [[Status Effects|Petrifying]]). | |||
*Do note that if party host quit from search party (from disconnected or whatever) will make 60 seconds cooldown become unknown. Making boss move harder to predict. | |||
| | |||
|- | |||
! colspan=3 | Notes | |||
|- | |||
| colspan=3 | | |||
*The Ember of Retribution debuff will burn 5% MP per second and heal fire enemies hit instead of harm them. | *The Ember of Retribution debuff will burn 5% MP per second and heal fire enemies hit instead of harm them. | ||
|} | |||
<span style="display:none">}}</span> | <span style="display:none">}}</span> | ||
|Dialogue= | |Dialogue= | ||
| Line 159: | Line 232: | ||
| YSet=<dfn>{{</dfn> | | YSet=<dfn>{{</dfn> | ||
{{:Flames of Judgement-Demonic}} | {{:Flames of Judgement-Demonic}} | ||
< | <dfn>}}</dfn> | ||
| BDrop={{:12-7Bdrop1}} | | BDrop={{:12-7Bdrop1}} | ||
| SBGM=[http://www.youtube.com/watch?v=tw-uld1o1sY '''''li_boss_raid009'''''] | | SBGM=[http://www.youtube.com/watch?v=tw-uld1o1sY '''''li_boss_raid009'''''] | ||
| Line 175: | Line 248: | ||
|Trivia=<dfn>{{</dfn> | |Trivia=<dfn>{{</dfn> | ||
*The characters featured on the loading screen are [[Comet Crusader]], [[Daybreaker]], [[Knight Emperor]], [[Rage Hearts]], and [[Bluhen]]. | *The characters featured on the loading screen are [[Comet Crusader]], [[Daybreaker]], [[Knight Emperor]], [[Rage Hearts]], and [[Bluhen]]. | ||
< | <dfn>}}</dfn> | ||
|Updates=<dfn>{{</dfn> | |Updates=<dfn>{{</dfn> | ||
{| cellpadding="5" border="1" style="border-collapse: collapse; text-align: center;" | {| cellpadding="5" border="1" style="border-collapse: collapse; text-align: center;" | ||
| Line 218: | Line 291: | ||
*Normal Mode difficulty decreased. | *Normal Mode difficulty decreased. | ||
|} | |} | ||
< | <dfn>}}</dfn> | ||
|AltLang= | |AltLang= | ||
{{AlternateLanguages | {{AlternateLanguages | ||
Revision as of 04:45, 9 February 2025
- For the series of Challenge Mode raid dungeons, see Crimson Cradle of Flames (Challenge Mode)


Crimson Cradle of Flames
| “ | An area opened up at the center of the tower, blood red, and hollow.
|
” |

Description
An area opened up at the center of the tower, blood red, and hollow.
Recommended Level
99
Required Combat Power
- Story Mode
- Normal Mode
180,000
Details
{{
- Up to 6 players can enter, requiring a minimum of at least 3 people. (Normal)
- 1~4 players. (Story)
- Only three Resurrection Stones can be used to revive.
- Players are given a 15 second penalty before they can resurrect themselves.
- Bosses can only be frozen or petrified 3 times each (every hit is 1 count) at a time. When this limit is exceeded, they become invulnerable to that debuff for 60 seconds.
- Freezing or petrifying can be attempted again after 30 seconds, but you will not be able to chain it further. This also resets the 3-step chain's cooldown to 60 seconds.
 Enviromental Debuff - Demon RealmEnviromental Debuff - Demon Realm
- The El's power does not reach into this realm, Attack and HP will be reduced by 50%.
- Phase 1
- Phase 2
- Phase 3
Phase 1 - Malice
Boss
| Malice | ||
|---|---|---|
|
A dark colossus made out of volcanic rock by a corrupted Rosso, reawakened by the remnant of the Red Eye. The beam will petrify players. | ||
| Monster Image | Boss Attacks | Tips |
  |
|
|
|
| |
|
| |
| Notes | ||
| ||
Mobs
| Monster Image | Monster Description | Monster Moves |
|---|---|---|
  |
Blood Rage - Shell like structures summoned by Malice. They will both act as barriers and means of attacking players. |
|


Dialogue
 Add: Oi, what do we do now?
 Elsword: I'm certain he's still in there. It's just that his cage became that monstrous body instead of the orb!
 Malice: Kee, Keeheeheehee...!! KYAHAHAHAHA!
{{
}}
| Image | Name | Boss | Character | Stats | Set Effects |
|---|---|---|---|---|---|
 |
Lv99 Accessory (Weapon): All Skill Damage +10% (Hyper Active/Wedding Skills excluded) When attacking, All Resistances decrease by -15 for 10 seconds (Max 10 Stacks) (Dungeon) When attacking, All Resistances decrease by -5 for 10 seconds (Max 10 Stacks) (Match) |
2 Pieces:
3 Pieces:
|
Gallery
-

-
-

-
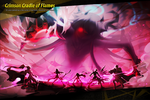
Old loading image.


Trivia
{{
- The characters featured on the loading screen are Comet Crusader, Daybreaker, Knight Emperor, Rage Hearts, and Bluhen.
Updates
{{
}}
| Date | Changes | |
|---|---|---|
| KR | NA | |
| 07/26/2018 | 08/08/2018 |
|
| 08/09/2018 | - |
|
| 08/23/2018 | - |
|
| 08/14/2019 | - |
|
| 03/12/2020 | 04/08/2020 |
|
| 11/19/2020 | 12/16/2020 |
|
Alternative Names
{{
}}
| Server | Name | Translation |
|---|---|---|
| 홍염의 요람 | Cradle of Crimson Flames | |
| 紅炎の揺りかご | Cradle of Crimson Flames | |
| 红炎的摇篮 | Cradle of Crimson Flames | |
| Blutflammen-Grube | Pit of Bloody Flames | |
| Fosa de llamas sanguíneas | Pit of Bloody Flames | |
| Caveau de la Flamme sanguinaire | Burial Vault of the Bloody Flame | |
| Fossa della Fiamma Sanguinaria | Pit of the Bloody Flame | |
| Jama Płomieni Krwi | Pit of Bloody Flames | |
| Berço das Chamas Escarlates | Cradle of Scarlet Flames |
- Region 13~18
- Region 1~6
- Region 7~12
- Region 19~22
- Laby
- Noah
- Lithia
- Other
- Miscellaneous
| Rigomor | Master Road | Pruinaum Outskirts | |||
|---|---|---|---|---|---|
| {{ }} | {{ }} | {{ }} | {{ }} | {{ }} | {{ }} |
- Region 13~18
- Region 1~6
- Region 7~12
- Region 19~22
- Other