Template:SpecialAbilities/pl: Difference between revisions
From Elwiki
m (Text replacement - "(\[\[ *:?|link *=) *Ara(%27|')s[_ ]Features\/([^]]*)\]\]" to "${1}Power of Eun/${3}]]") |
No edit summary |
||
| Line 1: | Line 1: | ||
{| | <noinclude>{{DISPLAYTITLE:Special Abilities}}</noinclude> | ||
|- | {{Section | ||
| | | SectionSty=text-align: center; | ||
| | | SectionCls=section-border | ||
| hStyles=font-size: 1.25em; | |||
| Title0=[[Template:SpecialAbilities|'''Character Systems''']] | |||
{{tabs|name=system | | Content0={{tabs|name=system|divclass=forceland | ||
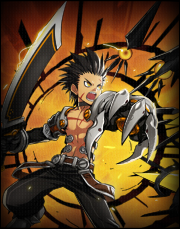
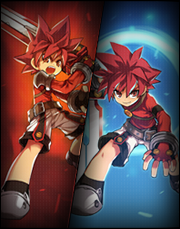
|tab1=Elsword|contents1=[[File:Wotsposter2.png|link=Way of the Sword|left]] | |tab1=Elsword|contents1=[[File:Wotsposter2.png|link=Way of the Sword/pl|left]] | ||
'''[[Way of the Sword/pl|Droga Miecza]]''' | '''[[Way of the Sword/pl|Droga Miecza]]''' | ||
---- | ---- | ||
Kiedy grasz [[Elsword/pl| | Kiedy grasz [[Elsword/pl|Elswordem]], będziesz miał dodatkowy wskaźnik pod paskiem many. Jest to '''Droga Miecza''', pozwalająca ci uaktywnić jedną z dwóch aur, '''Aurę Destrukcji''' i '''Aurę Witalności''' na określony czas. | ||
W zależności od kombo jakich używasz (Z oraz X) lub używasz umiejętności, wskażnik będzie niebieski (Aura Witalności) albo czerwony (Aura Destrukcji) | W zależności od kombo jakich używasz (Z oraz X) lub używasz umiejętności, wskażnik będzie niebieski (Aura Witalności) albo czerwony (Aura Destrukcji). Jeśli któraś z nich się uaktywni, otrzymasz różne korzyści. | ||
Należy pamiętać, że | Należy pamiętać, że ten system nie jest taki prosty jak się wydaje na pierwszy rzut oka. Ataki oparte na Witalności ładują wskaźnik Destrukcji, natomiast ataki oparte na Destrukcji ładują wskaźnik Witalności. To dlatego aura ma wpływ tylko na umiejętności jej używających. | ||
|tab2=Aisha|contents2=[[File:Aishposter2.png|link=Memorize|left]] | |tab2=Aisha|contents2=[[File:Aishposter2.png|link=Memorize|left]] | ||
'''[[Memorize/pl|Zapamiętywanie]]''' | '''[[Memorize/pl|Zapamiętywanie]]''' | ||
---- | ---- | ||
Zapamiętywanie jest to system Aishy, który umożliwia nam zapamiętanie do trzech umiejętności, aby móc ich użyć ponownie z | Zapamiętywanie jest to system Aishy, który umożliwia nam zapamiętanie do trzech umiejętności, aby móc ich użyć ponownie z zerowym kosztem many, jednakże ze zmniejszoną efektywnością (70% pierwotnych obrażeń). | ||
Aisha po dwóch sekundach stania w bezruchu może zapamiętać od jednej do trzech wybranych umiejętności specjalnych, poświęcając ilość many potrzebną na aktywowanie tych umiejętności, oraz gdy je zapamięta, musi odczekać określoną ilość sekund (czas regeneracji danej umiejętności), aby jej użyć bez zapamiętywania. | Aisha po dwóch sekundach stania w bezruchu może zapamiętać od jednej do trzech wybranych umiejętności specjalnych, poświęcając ilość many potrzebną na aktywowanie tych umiejętności, oraz gdy je zapamięta, musi odczekać określoną ilość sekund (czas regeneracji danej umiejętności), aby jej użyć bez zapamiętywania. | ||
Naciśniecie przycisku V aktywuje pierwszą umiejętnością, którą zapamiętałeś. Dzięki temu możesz użyć tej samej umiejętności dwa razy pod rząd. | |||
|tab3=Rena|contents3=[[File:Renposter2.png|link=Nature's Force System|left]] | |tab3=Rena|contents3=[[File:Renposter2.png|link=Nature's Force System|left]] | ||
'''[[Nature's Force System/pl|Energia Przyrody]]''' | '''[[Nature's Force System/pl|Energia Przyrody]]''' | ||
---- | ---- | ||
''' | Gdy grasz [[Rena/pl|Reną]], będziesz mieć dostęp do jej indywidualnego paska nazywanego '''Energią Przyrody'''. System ten wyróżnia się 5 paskami pod twoim paskiem many. Każdy pasek '''EP''' reprezentuje '''kulę przyrody''', którą jesteś w stanie zdobyć w trakcie używania kombo ({{CZ}}/{{CX}}) i umiejętności aktywnych. Po 3 uderzeniach 1 kula pojawi się i zacznie latać wokół postaci. | ||
Kiedy używasz [[Awakening Mode/pl|Dopalacza Mocy]], twoja wartość EP jednorazowo wzrośnie do 5. Jeżeli już masz paski EP, otrzymasz dodatkowe 15 MP za każdy niezużyty pasek. Gdy posiadasz przynajmniej 1 kulę przyrody, otrzymasz '''buff pasywny''', który zwiększa twoją prędkość, aktywne i pasywne ładowanie many oraz mana potrzebna na strzały zmniejszy się. | |||
Gdy masz przynajmniej 1 EP, będziesz mógł użyć ich do '''wzmocnienia niektórych umiejętności'''. Większość Umiejętności Specjalnych, jeżeli posiadasz wystarczającą liczbę EP, od razu zużyje całość, którą potrzebuje przy pierwszym uderzeniu. Kule zadają rozpryskujące obrażenia i ignorują obronę. | |||
Dodatkowo, jeśli użyjesz trzeciego stopnia Dopalacza Mocy, twoje EP wzrośnie do 5 i nie będzie się kończyć, dopóki nie skończy się Dopalacz Mocy. | |||
|tab4=Raven|contents4=[[File:Ravposter2.png|link=Anger of Raven|left]] | |tab4=Raven|contents4=[[File:Ravposter2.png|link=Anger of Raven|left]] | ||
'''[[Anger of Raven/pl | '''[[Anger of Raven/pl/Gniew Ravena]]''' | ||
---- | ---- | ||
Gdy [[Raven/pl|Raven]] odpali [[Awakening Mode/pl|Dopalacz Mocy]] , | Gdy [[Raven/pl|Raven]] odpali [[Awakening Mode/pl|Dopalacz Mocy]], tuż za nim pojawi się Nazo-Rdzeń zwany '''Gwiazdą Furii'''. Pomaga on Raven'owi w walce defensywnie i ofensywnie. Gwiazda posiada pięć stopni Mocy (Tuż po odpaleniu ma rozmiar 2). Im jest większe, tym potężniejsze się staje. Rdzeń zwiększa swój poziom mocy, gdy Raven zadaje obrażenia, lub gdy je otrzymuje(wolniejsze ładowanie niż przy zadawaniu ciosów). | ||
Tryb Ofensywny, gdy Raven uderza swojego przeciwnika umiejętnością aktywną np. [[Burning Rush/pl|Płomienne Łowy]], lub umiejętnością specjalną np. [[Power Assault/pl|Pchnięcie Mocy]], a przeciwnik przeżyje rdzeń zacznie lecieć w stronę wroga (zamienia się w kształt podobny do sztyletu, na poziomie 2 i wyżej), pod kątem po użyciu umiejętności. Jeżeli wrogowie nie zostali uderzeni, wróci za ciebie pozostając w tym samym rozmiarze. | Tryb Ofensywny, gdy Raven uderza swojego przeciwnika umiejętnością aktywną np. [[Burning Rush/pl|Płomienne Łowy]], lub umiejętnością specjalną np. [[Power Assault/pl|Pchnięcie Mocy]], a przeciwnik przeżyje rdzeń zacznie lecieć w stronę wroga (zamienia się w kształt podobny do sztyletu, na poziomie 2 i wyżej), pod kątem po użyciu umiejętności. Jeżeli wrogowie nie zostali uderzeni, wróci za ciebie pozostając w tym samym rozmiarze. | ||
Tryb Defensywny, kiedy Raven zostanie uderzony z przodu , rdzeń przekształca się w tarczę, która zmniejsza obrażenia. Tarcza trwa krótko i rdzenia traci poziom za każdym razem gdy zmienia się w tarczę. Jeśli rdzeń jest na poziom 1, gdy Raven się broni, znika i dopalacz mocy trzeba uaktywnić jeszcze raz, aby pojawił się ponownie. Raven nie może się poruszać w trakcie animacji pojawienia się | Tryb Defensywny, kiedy Raven zostanie uderzony z przodu, rdzeń przekształca się w tarczę, która zmniejsza obrażenia. Tarcza trwa krótko i rdzenia traci poziom za każdym razem gdy zmienia się w tarczę. Jeśli rdzeń jest na poziom 1, gdy Raven się broni, znika i dopalacz mocy trzeba uaktywnić jeszcze raz, aby pojawił się ponownie. Raven nie może się poruszać w trakcie animacji pojawienia się bossa lub minibossa, ale może użyć [[Shadow Step/pl|Ucieczki w Cienie]], która dla niego zakończy animacje. W wersji Tajwańskiej, Raven może anulować animację bossa przesuwając lub przy użyciu innych umiejętności. | ||
|tab5=Eve|contents5=[[File:Eveposter2.png|link=Core Release|left]] | |tab5=Eve|contents5=[[File:Eveposter2.png|link=Core Release|left]] | ||
'''[[Core Release | '''[[Core Release]]''' & '''[[Code: Recovery]]''' | ||
---- | ---- | ||
When Eve | When entering [[Awakening Mode]] as [[Eve]], a '''Queen's Core''' will be generated. The core has 3 levels, and will follow and support you by changing itself during offensive and defensive situations. Additionally, Eve has access to a special skill called [[Code: Recovery]], which can be activated by pressing V to recover some HP. This skill will have additional effects based on the chosen job path. | ||
While awakened, every hit you do will '''level up''' the Queen's Core. A core level up is indicated when it lights up for 1 second. The higher the level of the core, the more damage will be dealt by the Queen's Laser, and the number of times it is able to defend you increases. | |||
When a '''Special Active''' is used while the core is active, it will trigger the '''Queen's Laser''', a thin '''blue''' laser dealing damage to anything in its path. If you entered awakening mode with 3 '''beads''', the laser will be far more powerful, indicated by the '''red''' color. The powerful red laser is able to deal splash damage. | |||
When | When you are attacked while on the ground while the core is active, the Queen's Core will switch to a '''defensive mode''' and surround you with a force field to '''absorb the damage'''. While the core is defending you, you can press {{CZ}} or {{CX}} to '''phase backwards''' out of harms way. After defending you, the core will '''disappear''' until enough hits are dealt again. | ||
|tab6=Chung|contents6=[[File:Chungposter2.png|link=Freiturnier|left]] | |tab6=Chung|contents6=[[File:Chungposter2.png|link=Freiturnier|left]] | ||
'''[[Freiturnier | '''[[Freiturnier]]''' | ||
---- | ---- | ||
Chung's '''Ammunition Supply''' is one of his most notable and interesting features. Many of his skills are ammo-reliant. Skills such as [[ | [[Chung]]'s '''Ammunition Supply''' is one of his most notable and interesting features. Many of his skills are ammo-reliant. Skills such as [[Siege Shelling]] and [[Lunatic Blow]] use up all of Chung's ammo, but increase in power based on how much ammo was used. Other skills such as [[Aiming Shot]] or [[Scare Chase]] use only one. Many of Chung's {{CX}} attacks use ammo too. | ||
Despite being covered in chains when empty, Chung's third '''[[Awakening Mode|awakening]] bead''' is obtained like any other. It has a different appearance to indicate when Berserk Mode is ready. When Berserk Mode is activated, Chung is enveloped in his full Freiturnier armor (notably including the helmet) stored inside his suit's '''Guardian Stone''', a special object that increases his fighting ability. | Despite being covered in chains when empty, Chung's third '''[[Awakening Mode|awakening]] bead''' is obtained like any other. It has a different appearance to indicate when Berserk Mode is ready. When Berserk Mode is activated, Chung is enveloped in his full Freiturnier armor (notably including the helmet) stored inside his suit's '''Guardian Stone''', a special object that increases his fighting ability. | ||
Whenever Chung is hit while he has a blue outline (e.g., the third attack of the | Whenever Chung is hit while he has a blue outline (e.g., the third attack of the {{CZ}}{{CZ}}{{CViZ}} combo), he switches to a '''Heavy Stance''', a guarding stance which gives 67% damage reduction. However, he will stagger after guarding 5~6 hits and will be unaffected by [[Status Effects|Stun and Flattening]]. | ||
While guarding, Chung is able to counterattack. | |||
|tab7=Ara|contents7=[[File:Araposter2.png|link=Power of Eun|left]] | |tab7=Ara|contents7=[[File:Araposter2.png|link=Power of Eun|left]] | ||
'''[[Power of | '''[[Power of Eun]]''' | ||
---- | ---- | ||
By using the hairpin of Eun (design varies on her class), Ara is able to go into a 3rd awakening bead transformation called the | By using the hairpin of Eun (design varies on her class), [[Ara]] is able to go into a 3rd awakening bead transformation called the Celestial Fox Mode. While in this mode, her appearance changes, in which her hairstyle will change(hairstyle varies on her class) and become fully white, 9 spectral tails will also appear on her back, giving her the looks of the Gumiho. Equipped accessory will not be shown in this mode. | ||
Ara has a unique combo system which involves using Spirit Energy. Spirit Energy is shown as beads below your HP bar. New players start with a | Ara has a unique combo system which involves using Spirit Energy. Spirit Energy is shown as beads below your HP bar. New players start with a 10 bead gauge. | ||
Ara is able to cancel active skills by using another skill/active skill right before the previous skill used ends. This will cancel the active skill's final hit which prevents KD, but also gains extra Spirit Energy depending on the skill. For example, if you used [[Exorcism Stance 3 : Shadoweave]] (which | Ara is able to cancel active skills by using another skill/active skill right before the previous skill used ends. This will cancel the active skill's final hit which prevents KD, but also gains extra Spirit Energy depending on the skill. For example, if you used [[Exorcism Stance 3 : Shadoweave]] (which costs 2 spirit energy when used) and cancel with [[Tiger Stance 2 : Tiger Claw]], you will gain 2 Spirit Energy instead (-2 from using Shadow Knot +4 from cancel bonus as stated in description). | ||
|tab8=Elesis|contents8=[[File:Elesisposter2.png|link=Chivalry System|left]] | |tab8=Elesis|contents8=[[File:Elesisposter2.png|link=Chivalry System|left]] | ||
'''[[Chivalry System | '''[[Chivalry System|Chivalry]]''' | ||
---- | ---- | ||
Podczas grania [[Elesis/pl|Elesis]] pod paskiem MP będzie dodatkowy pasek. Ten pasek '''Rycerskości''' umożliwi ci aktywowanie aury "Rycerza Wichury" lub "Rycerza Zagłady" na pewien okres czasu. | Podczas grania [[Elesis/pl|Elesis]] pod paskiem MP będzie dodatkowy pasek. Ten pasek '''Rycerskości''' umożliwi ci aktywowanie aury "Rycerza Wichury" lub "Rycerza Zagłady" na pewien okres czasu. | ||
| Line 73: | Line 82: | ||
Kiedy Add wchodzi w tryb PDY, pod jego portretem zapełnia się 1 z 6 kulek. Są one wykorzystywanie do wzmacniania umiejętności. Zostaną one zużyte tylko jeśli Add jest w trybie PDY. | Kiedy Add wchodzi w tryb PDY, pod jego portretem zapełnia się 1 z 6 kulek. Są one wykorzystywanie do wzmacniania umiejętności. Zostaną one zużyte tylko jeśli Add jest w trybie PDY. | ||
|tab10=Lu/Ciel|contents10=[[File:LuCielposter2.png|link=Combination|left]] | |tab10=Lu/Ciel|contents10=[[File:LuCielposter2.png|link=Combination|left]] | ||
'''[[Combination|Kombinacja]]''' | '''[[Combination/pl|Kombinacja]]''' | ||
---- | ---- | ||
Będąc podwójną postacią z stylem gry opartym na zmianie postaci, Lu i Ciel nie dzielą many i posiadają specjalny system znany jako '''Kombinacja'''. Kiedy zarówno Lu lub Ciel zmieniają się nieaktywna postać będzie odnawiać 15 MP na sekundę (6 MP w PvP). Z tego powodu umiejętności zarówno Lu, jak i Ciela zadają mniejsze obrażenia i posiadają wysokie koszty many. Ma to na celu zachęcenie graczy do przełączania się między nimi, w celu zadania jak największej ilości obrażeń. | Będąc podwójną postacią z stylem gry opartym na zmianie postaci, Lu i Ciel nie dzielą many i posiadają specjalny system znany jako '''Kombinacja'''. Kiedy zarówno Lu lub Ciel zmieniają się nieaktywna postać będzie odnawiać 15 MP na sekundę (6 MP w PvP). Z tego powodu umiejętności zarówno Lu, jak i Ciela zadają mniejsze obrażenia i posiadają wysokie koszty many. Ma to na celu zachęcenie graczy do przełączania się między nimi, w celu zadania jak największej ilości obrażeń. | ||
Lu i Ciel posiadają czwarty wskaźnik nazywany "Wskaźnikiem Kombinacji". Wskaźnik Kombinacji posiada 10 części. Ten wskaźnik jest wykorzystywany wyłącznie do Umiejętności Kombinacji. Umiejętności Kombinacji nie zużywają many, ale mogą być użyte tylko wtedy, gdy wskaźnik jest zapełniony. Każdy fragment jest zapełniany, gdy gracz przełącza się między postaciami za pomocą kombo lub umiejętności | Lu i Ciel posiadają czwarty wskaźnik nazywany "Wskaźnikiem Kombinacji". Wskaźnik Kombinacji posiada 10 części. Ten wskaźnik jest wykorzystywany wyłącznie do Umiejętności Kombinacji. Umiejętności Kombinacji nie zużywają many, ale mogą być użyte tylko wtedy, gdy wskaźnik jest zapełniony. Każdy fragment jest zapełniany, gdy gracz przełącza się między postaciami za pomocą kombo lub umiejętności. | ||
|tab11=Rose|contents11=[[File:ECPPoster.png|link=ECP System|left]] | |||
'''[[ECP System]]''' | |||
---- | |||
The "ECP System" enables [[Rose]] to use a special resource called '''ECP''', as well as wield 4 different firearms: '''Revolvers, Musket, Auto-Guns, and Hand Cannons.''' | |||
'''Revolvers''' will attack with quick shots at a medium range, '''Muskets''' can fire strong shots at large range, in exchange for a low firing rate, '''Auto-Guns''' utilize multiple shots at a very quick rate with a smaller range and '''Hand Cannons''' use the strongest shots but have a short range and a firing slow firing rate. | |||
Instead of MP, all of Rose's actives will consume ECP, a resource that will recover itself naturally over time, indicate by the yellow gauge below your MP. When the ECP gauge is depleted, Rose will enter '''Overstrike Mode''', allowing her combos and skills to do additional damage, but preventing you from using Active skills until the ECP gauge recovers itself completely, during which it will flash in a bright red. | |||
|tab12=Ain|contents12=[[File:AuthorityPoster.png|link=Power System|left]] | |||
'''[[Power System]]''' | |||
---- | |||
Power System is a system exclusive to [[Ain]] which allows him to switch between "Cycle Magic" and "Creation Magic". When in the default state, attacking enemies will charge the Power Gauge. After the Power Gauge is filled, it will turn blue and you will shift into Creation Mode. During this time, you will be able to switch between Cycle and Creation magic with the V key (default key). | |||
Unlike other characters, Ain only has 1 bead for awakening. However, he can awaken during his awakening to ascend another stage. | |||
<br><br><br><br> | |||
|tab13=Laby|contents13=[[File:LabySpecial.png|link=Sentimental Point System|left]] | |||
'''[[Sentimental Point System]]''' | |||
---- | |||
[[Laby]] can enhance her command attacks and certain special actives by using '''Sentimental Points'''. When available, Sentimental Points are automatically consumed when Laby uses special actives that use them and when she performs her command attacks, one for each applicable command attack. Attacks enhanced by Sentimental Points receive effects ranging from increased damage to ignoring a percentage of defense. Laby can regenerate Sentimental Points by using [[Inner Aurora]] or some of her other skills. | |||
Laby also automatically enters awakening when her awakening gauge is full, so she can use her single awakening bead to instead perform a special awakening skill that damages enemies around her and puts them into a '''Groggy''' state, while recovering her Sentimental Points as well. | |||
<br><br><br> | |||
}} | |||
}} | }} | ||
Revision as of 18:56, 23 February 2019
| Character Systems |
|---|
 Kiedy grasz Elswordem, będziesz miał dodatkowy wskaźnik pod paskiem many. Jest to Droga Miecza, pozwalająca ci uaktywnić jedną z dwóch aur, Aurę Destrukcji i Aurę Witalności na określony czas. W zależności od kombo jakich używasz (Z oraz X) lub używasz umiejętności, wskażnik będzie niebieski (Aura Witalności) albo czerwony (Aura Destrukcji). Jeśli któraś z nich się uaktywni, otrzymasz różne korzyści. Należy pamiętać, że ten system nie jest taki prosty jak się wydaje na pierwszy rzut oka. Ataki oparte na Witalności ładują wskaźnik Destrukcji, natomiast ataki oparte na Destrukcji ładują wskaźnik Witalności. To dlatego aura ma wpływ tylko na umiejętności jej używających. |