Dragon Nest: Abyss/fr: Difference between revisions
(Created page with "{{Languages|3-x}} right =Dragon Nest: Abyss= right|300px|The basic overview of 3-X This is a Secret Dungeon. In order to ...") |
No edit summary |
||
| Line 1: | Line 1: | ||
{{Languages|3-x}} | {{Languages|3-x}} | ||
[[File:3- | {{DISPLAYTITLE:3-X : Les abîmes}} | ||
[[File:3-xFR.png|right]] | |||
=Dragon Nest | =Les abîmes= | ||
<center>{{quotation|Kayak's conspiracy isn't over yet. The gate of the '''Dragon Nest opens wide''' into the Abyss, The land of the accursed.}}</center> | |||
{| width="100%" style="font-size:1em; line-height:1.5em;" | |||
| valign="top" style="border:2px solid #f7812b; border-radius: 1px;"| | |||
{| cellspacing="2" cellpadding="5" rules="all" style="margin:0.5em 0.5em 0.5em 0.5em; empty-cells:show;" | |||
|valign="top" width="100%" align="center" style="border:1px solid; border-color:#000000; background: #f7812b; color:#FFFFFF;" colspan="12"| '''Description:''' | |||
|- | |||
|width="100%" colspan="12" align="center" style="border:1px solid; border-color:#000000; font-size:1em; line-height:1.5em;" valign="top"| | |||
Even though the team believed that the conflict with the Lizardmen was over, Kayak was still at large and news has sprung up of his latest plan. | |||
|- | |||
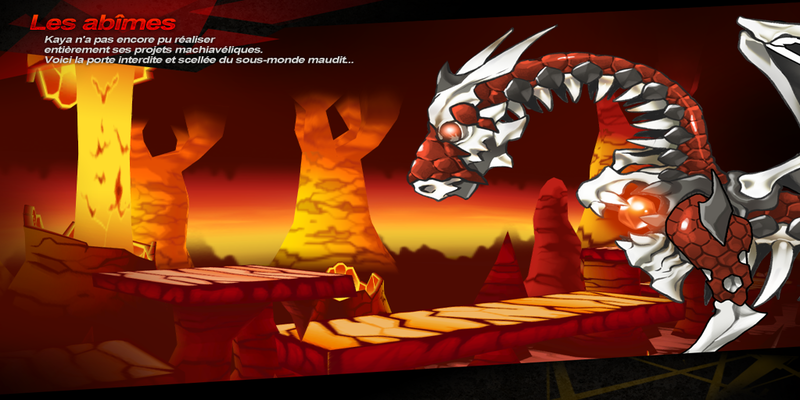
|rowspan="6" | [[File:3-xnewFR.png|800px]] | |||
|align="center" style="border:1px solid; border-color:#000000; background: #f7812b; color:#FFFFFF;" colspan="12" | '''Recommended Level:''' | |||
|- | |||
| style="border:1px solid; border-color:#000000;" align="center" colspan="12" | 50-60 | |||
|- | |||
| align="center" style="border:1px solid; border-color:#000000; background: #f7812b; color:#FFFFFF;" colspan="12" | '''Appropriate Item Level (Normal):''' | |||
|- | |||
| style="border:1px solid; border-color:#000000;" align="center" colspan="12" | 70 | |||
|- | |||
| align="center" style="border:1px solid; border-color:#000000; background: #f7812b; color:#FFFFFF;" colspan="12" | '''Appropriate Item Level (Hell):''' | |||
|- | |||
| style="border:1px solid; border-color:#000000;" align="center" colspan="12" | 85 | |||
|- | |||
|valign="top" width="100%" align="center" style="border:1px solid; border-color:#000000; background: #f7812b; color:#FFFFFF;" colspan="12"| '''Entry Requirements:''' | |||
|- | |||
|width="100%" colspan="12" style="border:1px solid; border-color:#000000; font-size:1em; line-height:1.5em;" valign="top"| | |||
<tabber> | <tabber> | ||
NA= | NA= | ||
*Complete all dungeons in Bethma on Very Hard. | *Complete all dungeons in Bethma on Very Hard. | ||
*Have a Map of the Abyss in your inventory. (Hidden Map of the Abyss is needed when entering Hell mode) | *Have a Map of the Abyss in your inventory. (Hidden Map of the Abyss is needed when entering Hell mode) | ||
*Must be Level 50 or higher. | *Must be Level 50 or higher. (If soloing, you can enter at level 48) | ||
|-| | |-| | ||
KR= | KR= | ||
| Line 17: | Line 40: | ||
*Must be Level 60 or higher. | *Must be Level 60 or higher. | ||
</tabber> | </tabber> | ||
|- | |||
|valign="top" align="center" style="border:1px solid; border-color:#000000; background: #f7812b; color:#FFFFFF;" width="100%" colspan="12"| '''Mobs:''' | |||
|- | |||
| colspan="12" style="border:1px solid; border-color:#000000;" valign="top" width="100%" | | |||
*[[File:Dunno.png|60px]] | |||
'''Saurus Guardian''' - Similar to the '''Saurus Guardians''' in [[3-3|Bethma Lake (Night)]], except that its armor has more intricate patterns and it now wears a helmet. It also super armors itself frequently when attacking and possesses a stoic threshold. It will usually drop its super armor before attacking unlike the normal version.<br> | |||
*[[File:DNA2.jpg|60px]] | |||
'''Shadow Shaman Lizardman''' - Similar to the Shaman Lizardmen seen in the Bethma Region, except that it can summon [[High Magician]]'s [[Magic Missile]] in a row, and super armor itself while healing on Hell Mode.<br> | |||
*[[File:3-1-boss.jpg|60px]] | |||
'''Lizardman Warrior''' - Similar to the [[3-1|Lizardman Warriors]] in [[3-1|Dragon Road]], except that it can use a spinning whirlwind attack whenever it reaches its stoic threshold on Hell Mode.<br> | |||
*[[File:3-3-boss.jpg|60px]] | |||
'''Shadow Warrior''' - Similar to the [[3-3|Shadow Warrior]] in [[3-3|Bethma Lake (Night)]], but their attack are similar to '''Lizardman Warrior'''. This version only has one sword and so cannot transform it into a boomerang like the boss version.<br> | |||
*[[File:DNA3.jpg|60px]] | |||
'''Shadow Lizardman''' - Similar to the '''Shadow Lizardmen''', in [[3-3|Bethma Lake (Night)]], except that it can now throw spears (while in super armor) and wears a helmet.<br> | |||
*[[File:3-3-1.jpg|60px]] | |||
'''Fire Komodo''' - Similar to the Fire Komodos seen in the Bethma Region, except that it breathes fire faster and more often. It also super armors itself before & during it breathes fire and when struck. Also, whenever attacked they will gain super armor for the duration of their stun animation, unlike Crossbowmen Soldier in [[2-x]] it only gain super armor when hit from behind. | |||
*These enemies drop Heated Scales needed for crafting and are more common on the 'bottom' route through the stage.<br> | |||
*[[File:3-4-1.jpg|60px]] | |||
'''Flame Bat''' - Similar to the Flame Bats seen in the Bethma Region, it will try to latch onto players and self destruct, its explosion does enormous damage.<br> | |||
*[[File:Dunno.png|60px]] | |||
'''Bone Gargoyle''' - Flying gargoyle skeletons that attack in a similar manner to [[5-1|Wyverns]].<br> | |||
== General == | |||
*[[File:Dunno.png|60px]] | |||
'''Saurus General''': This mob's attack is virtually similar to regular mobs but its stoic lasts longer. | |||
*[[File:Dunno.png|60px]] | |||
'''Dark Berauk''': This mob's attack is virtually similar when he appears as a miniboss in [[3-4]]. | |||
*[[File:Dunno.png|60px]] | |||
'''Lizardman General''': This mob's attack is virtually similar to '''Lizardman Warrior'''. | |||
*[[File:3-3-boss.jpg|60px]] | |||
'''Shadow Warrior''': This mob's attack is virtually similar to when it appears as a boss in [[3-3]]. | |||
*[[File:Dunno.png|60px]] | |||
'''Captain Vescoo''': This mob's attack is virtually similar to when it appears as a field boss in [[Bethma]]. | |||
|- | |||
|valign="top" align="center" style="border:1px solid; border-color:#000000; background: #f7812b; color:#FFFFFF;" width="100%" colspan="12"| '''Mini Boss:''' | |||
|- | |||
| colspan="12" style="border:1px solid; border-color:#000000;" valign="top" width="100%" | | |||
*[[File:3-4-mboss.jpg|60px]] | |||
'''Dark Berauk''' - A stronger version of the boss of [[3-2|Bethma Lake]], fights identically to the boss version minus the ability to summon more minions. | |||
<br> | |||
'''Moves:''' | |||
<br> | <br> | ||
'''Moves:''' | |||
<br> | |||
-''Energy Ball:'' Berauk fires a ball of energy at you. | |||
<br> | |||
-''Thunder:'' Berauk will summon a smashing thunder in front of him. | |||
<br> | |||
-''Power Accelerator:'' Berauk will buff his attack power. | |||
<br> | |||
-''[[Magic Missile]]:'' Berauk will cast a flying '''[[Magic Missile]]''' from his hands that'll follow you! | |||
<br> | |||
-''[[Lightning Shower]]:'' Berauk's strongest skill: the boss will raise his staff high into the air when he has full MP and cast multiple '''Thunders''' all around him. They are much more quicker and are harder to dodge. | |||
'''Note:'''<br> | |||
-Appears only in the 'top' route through the stage.<br> | |||
-In Luto Mode, Dark Berauk is a regular enemy that appears throughout the stage.<br> | |||
* | -8/28/2013 KR: This miniboss becomes a General monster because there is no bottom path anymore.<br> | ||
*[[File:3-3-boss.jpg|60px]] | |||
'''Shadow Warrior (Large)''' - A giant version of the Shadow Warrior boss in [[3-3|Bethma Lake (Night)]], except that it is larger and has much higher attack speed. | |||
<br> | <br> | ||
'''Moves:''' | |||
<br> | |||
-''Swipe:'' The Lizardman will run over to you and use its dual swords to repeatedly hit you. | |||
<br> | |||
-''Boomerang:'' A very strong skill, the Shadow Lizardman will throw its swords across the field like a boomerang slashing anything that gets in its way. If you are behind it when their swords return, you will be hit. | |||
<br> | <br> | ||
-''[[Parry]]:'' Like [[Elsword]]'s [[Parry]] skill, the boss will put up a stance and if you hit him during it, he'll deflect your attack and counter you with his swords, sending you high up into the air. | |||
==Obstacles== | '''Note:'''<br> | ||
'''Geyser | -This enemy can drop the same accessory as the stage boss version.<br> | ||
'''Large Boulder | -In Luto Mode this is a regular enemy that appears throughout the stage.<br> | ||
|- | |||
|valign="top" width="100%" align="center" style="border:1px solid; border-color:#000000; background: #f7812b; color:#FFFFFF;" colspan="12"| '''Obstacles:''' | |||
|- | |||
|width="100%" colspan="12" style="border:1px solid; border-color:#000000; font-size:1em; line-height:1.5em;" valign="top"| | |||
*[[File:3-2-trap.jpg|60px]] | |||
'''Totem''' - An inert Totem that stands still. But don't get too close to it or else fire will come out of its mouth straight at you!<br> | |||
*[[File:3-4-trap.jpg|60px]] | |||
'''Geyser''' - A hole that spits fire at intervals and can cause burning damage. They are triggered by proximity<br> | |||
*[[File:Dunno.png|60px]] | |||
'''Large Boulder''' - A giant boulder that is pushed down hills ahead of the smaller boulders, flattens players for a long period of time and does extremely high damage. | |||
*In Luto Mode there is an endless stream of these boulders. | *In Luto Mode there is an endless stream of these boulders. | ||
*8/28/2013 KR : | *8/28/2013 KR : In Luto Mode these boulders only roll once, which are then followed by Small Boulders like Normal and Hell Mode. | ||
*It's still possible to avoid triggering the boulder. See [https://www.youtube.com/watch?v=evWDJM2LKN8 Video]. Only [[Yama Raja]] can use this trick. | |||
'''Small Boulder | *[[File:Dunno.png|60px]] | ||
*You can generally tell how close they are by listening to the rumbling sounds of their movement. | '''Small Boulder''' - A small boulder that rolls down hills knocking down players and dealing minor damage. | ||
*You can generally tell how close they are by listening to the rumbling sounds of their movement.<br> | |||
|- | |||
|valign="top" width="100%" align="center" style="border:1px solid; border-color:#000000; background: #f7812b; color:#FFFFFF;" colspan="12"| '''Boss:''' | |||
|- | |||
|width="100%" colspan="12" style="border:1px solid; border-color:#000000; font-size:1em; line-height:1.5em;" valign="top"| | |||
*[[File:Dunno.png|60px]] | |||
'''Kayak the Shadow Shaman''' - The boss from [[3-4|Dragon's Nest]] is back. His moves are exactly the same except he immediately summons a clone to aid in battle. | |||
<br> | <br> | ||
'''Moves:''' | |||
<br> | |||
-''Summon:'' Kayak will immediately summon a clone to aid in battle. | |||
<br> | |||
-''Whack:'' Whacks you with his staff. | |||
<br> | |||
-''[[Chain Fireball]]:'' Kayak puts his arm in front of himself and fires three fireballs. | |||
<br> | <br> | ||
-''[[Magic Missile]]:'' Like '''Berauk''', Kayak can also summon a weakened version of [[Magic Missile]] that follows you. | |||
<br> | <br> | ||
-''Bonfire:'' Kayak will raise one of his hands and summon two fiery pillars that enables him for more space. If you touch one, you'll get burned, so watch out! | |||
'''Kayak | |||
<br> | <br> | ||
-''Multiple Geyser:'' Kayak is capable of using an enhanced version of [[Elsword]]'s [[Triple Geyser]] skill. Raising his staff, Kayak will summon four Geysers all around him, doing very heavy damage to all those near him. | |||
*[[File:Dunno.png|60px]] | |||
[[File: | '''Kayak the Shadow Shaman (Clone)''' - Identical to the boss in many ways, even the name is exactly the same. It has same abilities as the boss, the main difference being the clone has roughly half as much HP and is slightly darker in appearance. The clone will die automatically if its original is killed. | ||
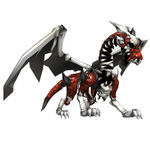
At the end of the sub-boss battle, '''Kayak the Shadow Shaman''', summons the '''Ancient Bone Dragon''' which will breathe flame at the center of the stage immediately after it's summoned. (Though this is a cutscene, the flame can still injure you substantially.) The Ancient Bone Dragon then flies to the right of the screen and the fight starts. | *[[File:Ancient_Bone_Dragon_Head.jpg|120px]] '''Ancient Bone Dragon''' | ||
At the end of the sub-boss battle, '''Kayak the Shadow Shaman''', summons the '''Ancient Bone Dragon''' which will breathe flame at the center of the stage immediately after it's summoned. (Though this is a cutscene, the flame can still injure you substantially.) The Ancient Bone Dragon then flies to the right of the screen and the fight starts. | |||
===Moves=== | ===Moves=== | ||
| Line 76: | Line 156: | ||
'''Head-whack''': The dragon steps back, then swings its head to the right, dealing moderate damage while propelling you upwards.<br/> | '''Head-whack''': The dragon steps back, then swings its head to the right, dealing moderate damage while propelling you upwards.<br/> | ||
'''Dragon Fire''': The dragon breathes smoke momentarily, then steps up with its front leg onto the platform, which will propel you upwards, then breathes a long stretch of fire, continuously juggling you. This deals extremely high combo damage and the burning ailment will further intensify it. It will often use this move after a successful '''Head-whack'''.<br/> | '''Dragon Fire''': The dragon breathes smoke momentarily, then steps up with its front leg onto the platform, which will propel you upwards, then breathes a long stretch of fire, continuously juggling you. This deals extremely high combo damage and the burning ailment will further intensify it. It will often use this move after a successful '''Head-whack'''.<br/> | ||
'''Aerial Dragon Fire''': The dragon will usually try to use this skill right at the start of the fight. It flies up and | '''Aerial Dragon Fire''': The dragon will usually try to use this skill right at the start of the fight. It flies up and over to the other end of the cave and then back while breathing fire on the ground, on Hell or Luto Mode it will not only do this twice but the delay between breaths will be less after each pass. If you get caught by the fire breath, you will be stun-locked due to the rapid hits. There is roughly a 30 second cool-down period after this skill where it will not be able to activate this skill again, it will also tend to not use this skill as often when being actively attacked.<br/> | ||
'''Fire Rain''': The dragon fires a bolt of fire up into the air, and flames rain onto the middle battleground.<br/> | '''Fire Rain''': The dragon fires a bolt of fire up into the air, and flames rain onto the middle battleground.<br/> | ||
'''Overheat''': When you reduce the Ancient Bone Dragon's health to about 1/4, the dragon will start smoking. While it is in this state, you will receive damage, [[Status_Effects|Burned]] status, and MP gain will be reduced to zero on each hit made on it, even with ranged attacks such as arrows, fireballs and electron balls (Special Actives are an exception). This effect can kill if your HP is low enough.<br/> | '''Overheat''': When you reduce the Ancient Bone Dragon's health to about 1/4, the dragon will start smoking. While it is in this state, you will receive damage, [[Status_Effects|Burned]] status, and MP gain will be reduced to zero on each hit made on it, even with ranged attacks such as arrows, fireballs and electron balls (Special Actives are an exception). This effect can kill you if your HP is low enough.<br/> | ||
* | *Since you receive damage, you can trigger an effect that normally activates when attacked. | ||
*You will still gain 3 MP for each hit made on the dragon because of the damage taken from attacking it, this allows you to gain MP from attacks that do not normally generate MP as well. | *You will still gain 3 MP for each hit made on the dragon because of the damage taken from attacking it, this allows you to gain MP from attacks that do not normally generate MP as well. | ||
'''Summon Gargoyle''': On Hell Difficulty it will summon two Gargoyles that fight identically to Wyverns at the start. If there are no Gargoyles alive after '''Aerial Dragon Fire''' it will summon two more to replace them. | '''Summon Gargoyle''': On Hell Difficulty it will summon two Gargoyles that fight identically to Wyverns at the start. If there are no Gargoyles alive after '''Aerial Dragon Fire''' it will summon two more to replace them. | ||
*8/28/2013 KR: | *8/28/2013 KR: | ||
**It won't summon any Gargoyles anymore. And Gargoyles will appear as normal mobs. | **It won't summon any Gargoyles anymore. And Gargoyles will appear as normal mobs. | ||
{| class="wikitable collapsible collapsed" | |||
= | ! style="background:#f7812b; color:#FFFFFF;" | '''Tactics''' | ||
*When the Dragon flies up to use '''Aerial Dragon Fire''', that is a signal to run to the furthest left platform in order to avoid getting burnt by the flames. Then quickly run back to the furthest right platform once the flames have died down.<br/> | |- | ||
|*When the Dragon flies up to use '''Aerial Dragon Fire''', that is a signal to run to the furthest left platform in order to avoid getting burnt by the flames. Then quickly run back to the furthest right platform once the flames have died down.<br/> | |||
**Ravens may go to the top right part of the nearest platform and hold UP to continuously jump, if done correctly all the flames will completely fail to harm him. | **Ravens may go to the top right part of the nearest platform and hold UP to continuously jump, if done correctly all the flames will completely fail to harm him. | ||
***Properly positioned Raven can simply stand still on the top right part of the platform nearest to the dragon and not take any damage as well. | ***Properly positioned Raven can simply stand still on the top right part of the platform nearest to the dragon and not take any damage as well. | ||
| Line 94: | Line 175: | ||
**Iron Paladin may [[Guard]] through the attack. | **Iron Paladin may [[Guard]] through the attack. | ||
**Elswords may find it easier to [[stoic]] and jump repeatedly to minimize contact with the flames. | **Elswords may find it easier to [[stoic]] and jump repeatedly to minimize contact with the flames. | ||
**As the dragon's 'location' is fixed to the right side of the screen throughout the fight you can use special actives near the right side of the screen to skill delay it still as it does this. | **As the dragon's 'location' is fixed to the right side of the screen throughout the fight, you can use special actives near the right side of the screen to skill delay it still as it does this. | ||
**Beware of geysers in a party as they are triggered by proximity and by running across the center area almost all of them will usually be activated. | **Beware of geysers in a party as they are triggered by proximity and by running across the center area almost all of them will usually be activated. | ||
*The dragon's '''Head-whack''' can be avoided by double jumping or [[Chung]]'s >>^X, but timing is vital. | *The dragon's '''Head-whack''' can be avoided by double jumping or [[Chung]]'s >>^X, but timing is vital. | ||
*When the Dragon is about to | *When the Dragon is about to use '''Dragon Fire''', run to the middle battlefield and stick to the right wall, to avoid getting roasted. | ||
**Another more advanced tactic is to jump over the ledge just after the Dragon slams its claw down and breathes fire, enabling you get some hits in while the Dragon's body is stretched out. This is useful for skills with wide hitboxes such as [[Valkyrie's Javelin]], noted [[Rising Slash]], noted [[Flying Impact]], etc. If you attempt this tactic, your timing must be perfect.<br/> | **Another more advanced tactic is to jump over the ledge just after the Dragon slams its claw down and breathes fire, enabling you get some hits in while the Dragon's body is stretched out. This is useful for skills with wide hitboxes such as [[Valkyrie's Javelin]], noted [[Rising Slash]], noted [[Flying Impact]], etc. If you attempt this tactic, your timing must be perfect.<br/> | ||
**Be warned that because of the geysers, if one activates nearby, it may launch you right into the flame breath. | **Be warned that because of the geysers, if one activates nearby, it may launch you right into the flame breath. | ||
| Line 108: | Line 189: | ||
*Ravens can use [[Burning Rush]] to stay in place whenever the Dragon attacks, and then follow up with [[Valkyrie's Javelin]] for the damage. It can help prevent you from getting hit by '''Dragon Fire''' and his other moves which throw you. (In NA this has been patched. Meaning you will still stay in place, but will still receive damage from the dragon.) | *Ravens can use [[Burning Rush]] to stay in place whenever the Dragon attacks, and then follow up with [[Valkyrie's Javelin]] for the damage. It can help prevent you from getting hit by '''Dragon Fire''' and his other moves which throw you. (In NA this has been patched. Meaning you will still stay in place, but will still receive damage from the dragon.) | ||
**Elswords may use [[Stoic]] for the same purpose. | **Elswords may use [[Stoic]] for the same purpose. | ||
*An option to defend against '''Impaling Bone Spears''' for characters that cannot stoic through its launch animation is to back up against the platform. Its launching attack will knockdown instead launching the player into the pit and all the spears will miss. | *An option to defend against '''Impaling Bone Spears''' for characters that cannot stoic through its launch animation is to back up against the platform. Its launching attack will knockdown instead of launching the player into the pit and all the spears will miss. | ||
**If you are extremely quick you can jump around and over the dragon's claw just before it fires and escape its attack that way, timing as well as control must be perfect as coming in contact with many parts of its body will launch as well. | **If you are extremely quick you can jump around and over the dragon's claw just before it fires and escape its attack that way, timing as well as control must be perfect as coming in contact with many parts of its body will launch as well. | ||
*A simple effective strategy to defeat it in a party is to stun-lock the dragon, denying it any opportunity to attack until it dies. | *A simple, effective strategy to defeat it in a party is to stun-lock the dragon, denying it any opportunity to attack until it dies. | ||
**A [[Combat Ranger]]'s [[Low Kick]], Nature enchanted weapons, and other Attack Speed lowering effects make keeping the dragon stun-locked much easier as Attack Speed is also responsible for the speed in recovering from hit stun. | **A [[Combat Ranger]]'s [[Low Kick]], Nature enchanted weapons, and other Attack Speed lowering effects make keeping the dragon stun-locked much easier as Attack Speed is also responsible for the speed in recovering from hit stun. | ||
<br> | <br> | ||
|} | |||
===Additional Information (NA) === | ===Additional Information (NA) === | ||
| Line 119: | Line 201: | ||
**Its defense reduces damage by ~33% on Normal Mode and by ~45% on Hell Mode. (needs more testing) | **Its defense reduces damage by ~33% on Normal Mode and by ~45% on Hell Mode. (needs more testing) | ||
**It has around ~5.4M HP (21 Lifebars) on Normal Mode and on Hell Mode it has around ~5.5M HP (35 Lifebars). (needs more testing) | **It has around ~5.4M HP (21 Lifebars) on Normal Mode and on Hell Mode it has around ~5.5M HP (35 Lifebars). (needs more testing) | ||
|- | |- | ||
|valign="top" width="100%" align="center" style="border:1px solid; border-color:#000000; background: #f7812b; color:#FFFFFF;" colspan="12"| '''Secret Set:''' | |||
|- | |||
|width="100%" colspan="12" style="border:1px solid; border-color:#000000; font-size:1em; line-height:1.5em;" valign="top"| | |||
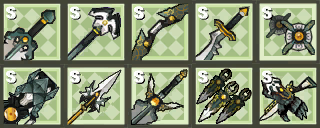
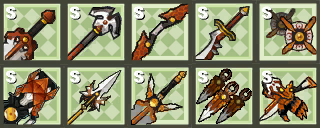
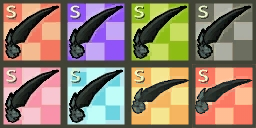
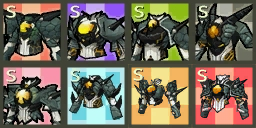
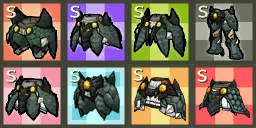
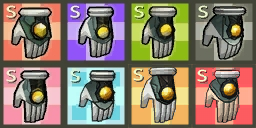
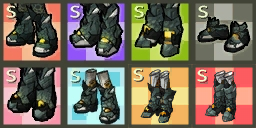
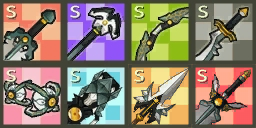
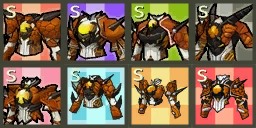
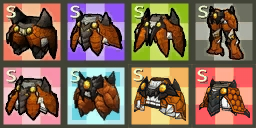
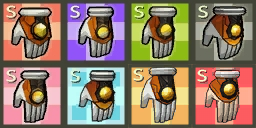
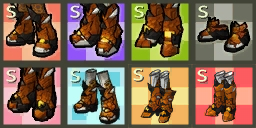
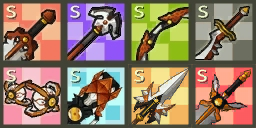
{{tabs|name=1|tab1=Dragonic-Origin|contents1={{:DragOrg}} |tab2=(Old) Dragonic-Caligo|contents2={{:DragCal}}}} | |||
|- | |||
|valign="top" align="center" style="border:1px solid; border-color:#000000; background: #f7812b; color:#FFFFFF;" width="50%" colspan="6"| '''Trivia:''' | |||
|valign="top" align="center" style="border:1px solid; border-color:#000000; background: #f7812b; color:#FFFFFF;" width="50%" colspan="6"| '''BGMs:''' | |||
|- | |- | ||
| | | colspan="6" style="border:1px solid; border-color:#000000;" align="center" width="60%" valign="top"| | ||
| | *Earlier versions of Ancient Bone Dragon did not have geysers in the center of the battlefield, it also used to have a stoic threshold where it would gain super armor after taking a certain number of hits to prevent players from stun-locking it. In that version Light element weapons would also reset its animation to its standing pose, negating any attack it was in the process of using. | ||
| | **The Ancient Bone Dragon also used to have much less HP but regenerate several times faster. | ||
*In the earliest versions of this stage there was no Ancient Bone Dragon, the player would fight Kayak the Shadow Shaman along with his clone and two ordinary Lizardmen and the stage would be cleared after they were defeated without the summoning of the Ancient Bone Dragon being successful. | |||
''' | *If a player looks to the right edge of the stage while fighting '''Kayak the Shadow Shaman''' they may see the name '''Ancient Bone Dragon''' floating in the air, this is because the dragon has already been placed into that room as an enemy and is waiting to be activated after Kayak's death. | ||
**The dragon may be de-buffed by Elemental Masters with the [[Abundance of Energy]] passive before it has properly spawned due to this. | |||
**Also due to this, the wait time on '''Aerial Dragon Fire''' has already expired before it has properly spawned and it may use it right at the start of the fight. | |||
**A very rare glitch sometimes occurs where the dragon is activated prematurely and the player is then forced to fight both Kayak and the Ancient Bone Dragon at the same time because of this as well. | |||
*Before a certain update, the Luto boulders were infamous for going out of its way to roll over players who managed to get past its dropping point before continuing normally. | |||
**This caused various NA players to be wary of Abyss Luto and for them to nickname the Luto Boulder names like "God Boulder" or "Boulder with a hatred of mankind" | |||
| colspan="6" style="border:1px solid; border-color:#000000;" align="center" width="60%" valign="top"| | |||
=== Dungeon === | |||
[http://www.youtube.com/watch?v=ybuH_w31xpE '''''music018_stage'''''] | |||
[http://www.youtube.com/watch?v=xAVrtxgBcFs '''''music019_stage'''''] | |||
[http://www.youtube.com/watch?v=mPNtxmifAt0 '''''music022_stage'''''] | |||
''' | |||
=== Luto Mode === | |||
[https://www.youtube.com/watch?v=uVKoXEUjAPU '''''music033_stage'''''] | |||
''' | |||
=== Boss === | |||
[http://www.youtube.com/watch?v=rbFD3sWpqs8 '''''music011_boss'''''] | |||
|- | |- | ||
| | |valign="top" width="100%" align="center" style="border:1px solid; border-color:#000000; background: #f7812b; color:#FFFFFF;" colspan="12"| '''Gallery:''' | ||
''' | |||
|- | |- | ||
| | |width="100%" colspan="12" style="border:1px solid; border-color:#000000; font-size:1em; line-height:1.5em;" valign="top"| | ||
| | <br><gallery widths=150px heights=150px> | ||
File:3-xExterior.jpg|Dragon Nest: Abyss exterior. | |||
| | File:Ancient_Bone_Dragon.jpg|Ancient Bone Dragon | ||
</gallery> | |||
|- | |- | ||
| | |valign="top" width="100%" align="center" style="border:1px solid; border-color:#000000; background: #f7812b; color:#FFFFFF;" colspan="12"| '''Videos:''' | ||
| | |||
''' | |||
|- | |- | ||
| | |width="100%" colspan="12" align="center" style="border:1px solid; border-color:#000000; font-size:1em; line-height:1.5em;" valign="top"| | ||
[http://www.youtube.com/watch?feature=endscreen&NR=1&v=FPJ_5b1yLis '''Shooting Guardian & Fury Guardian 3-X Run'''] | |||
| | |||
''' | |||
[http://www.youtube.com/watch?v=T2mtq4O2vEY '''Infinity Sword 3-X Run by BurntBrigade'''] | |||
|} | |||
|} | |} | ||
<br> | <br> | ||
{{Donjons}} | {{Donjons}} | ||
Revision as of 21:08, 20 July 2014
Les abîmes
| “ | Kayak's conspiracy isn't over yet. The gate of the Dragon Nest opens wide into the Abyss, The land of the accursed.
|
” |
| ||||||||||||||||||||||||||||||||||||||||||||||||||||||||||||||||||||||||||||||||||||||||||||||||||||||||||||||||||||||||||||||||||||||||||||||||||||||||||||||||||||||||||||||||||||||||||||||||||||||||||||||||||||||||||||||||||||||||||||||||||||||||||||||||||||||||||||||||||||||||||||||||||||||||||||||||||||||||||||||||||||||||||||||||||
