Velder's Hallucination
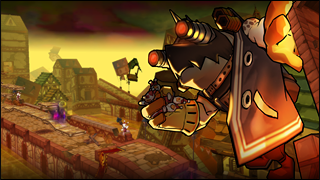
This is a Secret Dungeon. In order to enter, you must:
- Complete all dungeons in Velder on all difficulties.
- Have an Alchemy Stimulant in your inventory. (Powerful Alchemy Stimulant is needed when entering Hell mode)
Velder's Hallucination
Sullen Joaquin has been found studying forbidden alchemy. Elsword and his friends returned to Velder in order to investigate him. As they encounter Joaquin, he throws a potion at them, trapping them in an illusion known as Velder's Hallucination.
Mobs
NOTE: Most Bloody Glitter monsters are capable of drinking potions whenever their health reaches about 30%. In Hell mode, they will drink their potions at 50% HP. After drinking their potions, they will receive various effects such as increasing their size and damage, granting them super-armored status, or increasing their mana regeneration rate.
- They will have 90% damage reduction and super armor when they are drinking a potion but this can be prevented by using a launching attack or skill just as they would normally drink a potion. Sometimes they will gain the effect of the potion anyways when launched, though the animation for drinking the potion will still be skipped.
- Arc Glitter Guard:
This is a same variant of the Glitter Guards that you have encountered throughout Velder. - Arc Glitter Panzer:
This is a same variant of the Glitter Panzer that you have encountered throughout Velder. - Arc Glitter Sniper:
This is a same variant of the Glitter Sniper that you have encountered throughout Velder. - Demoniac Cannon:
This is a same variant of the Demoniac Cannon that you have encountered throughout Velder.
- Bloody Glitter Spearman:
This is a stronger variant of the Glitter Spearman that you have encountered throughout Velder.
- Bloody Glitter Sniper:
This is a stronger variant of the Glitter Sniper that you have encountered throughout Velder.
- Bloody Glitter Defender:
This is a stronger variant of the Glitter Defender that you have encountered throughout Velder. When they attack with their shields, spikes will appear from them. They are now capable of reflecting projectiles with their shields whenever they are defending.
- If they gain super armor from drinking a potion they will no longer be able to reflect projectiles.
- Bloody Glitter Guard:
This is a stronger variant of the Glitter Guard that you have encountered throughout Velder.
- Bloody Glitter Dasher:
This is a stronger variant of the Glitter Dasher that you have encountered throughout Velder.
- Bloody Wyvern: This is a stronger variant of the Wyverns that you have encountered throughout Velder.
- Bloody Uno Hound: This is a smaller variant of Uno Hound. It will use the same moves that the regular Uno Hound will and possesses much more attack speed.
- Puppet Stone: These are the red puppets that you have encountered when you fought against Crazy Puppet. These puppets will move around and try to get close to you. When they are close, they will dance a little and explode, damaging players close to it and killing itself.
- Bloody Glitter Bomber: This is a stronger variant of the Glitter Rock Thrower. But instead of rocks, this Glitter holds a case full of bombs on their back and is no longer immobile.
- Joaquin's Hallucination (Crazy Puppet): During this stage, you will encounter Crazy Puppet as a hallucination. It will attack only with its staff by swinging it in front or behind it, leaving a field of fire behind after swinging.
- Puppet Stones will be summoned in large numbers by these and if these puppets dance near it, it will regain HP.
- Bloody Glitter Commanders: This is a stronger variant of the Arc Glitter Commanders that you have encountered in Velder. These Glitters are now stronger and are able to use Raven's combos. In addition to being able to pull off Raven's sword combos, they can also use Power Assault and Charged Bolt in the same style whenever they have the appropriate amount of mana.
- Bloody Glitter Archer: This is a stronger variant of the Arc Glitter Snipers that you have encountered in Velder. Unlike the Bloody Glitter Sniper, these archers will be wearing green armor. These archers are now stronger and are able to use Rena's pre-rebalance combos of firing arrows. In addition to being able to shoot arrows like Rena, they can also use Assault Kick and Perfect Storm in the same style whenever they have the appropriate amount of mana.
- Bloody Glitter Magician: This is a stronger variant of the Glitter Necromancers that you have encountered in Feita. Instead of shooting ghosts from their wands, they can shoot fireballs in the same method as Aisha. In addition to being able to shoot fireballs like Aisha, they can also use Chain Fireball and Gust Screw in the same style whenever they have the appropriate amount of mana.
- Zombie Glitter: As the name would suggest, this is a reanimated Glitter corpse. They will slowly move towards any player and attack by biting them.
- Bloody Glitter Assassin: This is a stronger variant of the Arc Glitter Assassins that you have encountered throughout Velder. They are now capable of using Shadow Step with Shadow Piercing along with their regular attacks.
- Zombie Glitter Grave: Produces one Zombie Glitter at a time until destroyed, has an extremely large amount of HP.
- For each Zombie Glitter it produces it will lose a bit of HP.
Potions
As you progress through the dungeon, you will encounter various cauldrons filled with potions. If you destroy them, you will receive the effects based off of what potion you just destroyed.
- Berserk: Your character size will increase substantially (and so do your attacks) and you will receive a 100% critical hit buff for its duration.
- Optical: Your character will have the ability to instantly kill enemies, when you touch them or hit them (except for Crazy Puppet/Joaquin's Hallucination) for its duration.
- Mana: Your character will gain massive mana regeneration for its duration.
Obstacles
As you progress through the dungeon, you will re-encounter previous opponents that will try to stop you. They only appear in the background, meaning you cannot attack them or stop them from attacking.
- Crazy Puppet: Will ignite a small fire on the field that burns anyone within.
- Spriggan: Will occasionally execute a Dark Energy Splash from underneath, which does substantial damage.
- Uno Hound: Will shoot lasers with its eyes across the field and back, potentially dragging your character across the field while dealing substantial damage.
- Joaquin: Will create obstacles that do damage and block your path. He can throw Puppet Stones onto the field and create portals to uplift buildings from the ground or drop them from the air.
Boss: Joaquin's Hallucination
Moves
- Magic Shield: Joaquin will set up a shield that will drastically reduce all damage taken while drinking his potion to recover his health at an alarming rate.
- He appears to be limited to using this ability 3~6 times total, and may vary depending on his skill selection and difficulty mode. (Needs more research)
- He can heal up to almost half of his total HP each time he uses this skill.
- Joaquin will not use this skill for the same HP threshold twice, however he will remember to use 'missed' thresholds.
- He cannot use this skill while in Dwarf mode.
- His identified HP threshold points are 25.5, 23, 13, and 4 life bars on Normal Mode. (This may not be a full list.)
- Hallucination AKA Puppet Debuff: When you are in a party, Joaquin will randomly debuff one of the characters in your group. All attacks that the debuffed character makes will damage their teammates as well, including Special Actives. It is very possible to kill your own teammates while you are suffering from the debuff's effects.
- [10-24-12] Patch changes(?) seem to have made it so that the person Hallucinating is randomized per each player. This means that everyone can see someone different as being under the effect and be killed by them without the other person even realizing they are under the effect.
- Possible Glitch: The electrical aura of Raven's Nasod Core may continue to damage party members even after Hallucination has subsided.
- Dwarf: Joaquin will drink a potion and after flexing, he will release ghosts in all directions from his body, potentially dealing high damage. If you are standing close to him when he uses this it is possible to get hit by multiple ghosts. After the ghosts move off-screen, Joaquin will be minimized, therefore reducing his hitbox and making attacks difficult to use. Additionally he will gain super armor, 100% critical rate buff, and he will not possess a collision hitbox causing players to pass through him for the duration.
- Much like for his Magic Shield this appears based on HP thresholds, however this shares many of the same HP thresholds as well.
- Rather than using Magic Shield and healing, it is possible that he will use this skill instead, which appears to count against the usage of his healing skill for a threshold point. However the reverse does not always seem to apply.
- Identified HP threshold points on Normal Mode are at 25.5, 23, 18.8, and 13 life bars. (This may not be a full list.)
- The ghosts released count as magic projectiles and can be blocked\reflected\absorbed by skills like Reflect Kick, Phoenix Talon, and Statue of Glory.
- Post KR Jan.10 2013 patch: Joaquin is now significantly larger than before when minimized. (About the same size as a player character, but still does not possess a collision hitbox.)
- Thunderstorm: Joaquin will release several clouds in the air which will regularly shoot lightning at intervals, an electric effect will appear in the clouds over the player if this has targeted them. This move can be avoided if you move far away.
- Each bolt will strike a player twice when they are on the ground.
- It is dangerous for multiple players to be in the same area when he uses this.
- Thunder: Joaquin can create smaller clouds in the air that will shoot a single bolt of lightning that can inflict status ailments such as Curse, Burn, Poison, and Confusion.
- Puppet Summoning: Joaquin will occasionally spawn Puppet Stones to distract and attack you.
- Zombie Summoning: Joaquin will occasionally create Zombie Glitter Graves at both ends of the map to spawn Zombie Glitters to slow you down.
- Building Crash: Throughout the battle, Joaquin will repeatedly create large portals in the air that will create buildings from the background and have them crash into the ground. These buildings will do damage and will act as large barricades to limit you from moving around the stage.
- Combustion: Joaquin can still use his old move where he toss black powder around him and ignite them to create an explosion.
- The resulting explosion's hitbox is significantly larger than the actual explosion would indicate.
- Potion Fling: In the same style as the Arc Glitter Alchemists, Joaquin will throw a potion at you to create a cloud that can inflict various status ailments.
- This cloud is larger and the effects are more potent than the version used by Glitter Alchemists.
Countering Magic Shield
- Hoakin's shield will always show up first but do not use skills first, wait until he start drinking his potion then activate skills.
- Skill-ing when he just set up his shield WON'T cancel his healing.
- Any special active that deals multiple hits can also cancel out his shield.
- These following skills can cancel Hoakin's shield and healing:
- Final Strike (Full shield destruction from vortex, even though it does neither hits or damage)
- Aging (Full shield destruction with a direct hit)
- Sweep Rolling (Full shield destruction)
- Blizzard Shower (One layer destroyed per shard?)
- Meteor Shower (Mechanics unknown, but usually destroys 2 layers)
- Ignition Crow (without overheat, the fire will break the shield)
- Plasma Cutter (Destroys 3 Layers through hit count)
- Nuclear (Destroys (usually) 2 Layers through hit count)
- Gungnir (Destroys 1 Layer through hit count)
- Aero-Strafe (Destroys 1 Layer)
- Spear Burst (Destroys 1 Layer)
- Atomic Blaster (Destroys 1 Layer)
- Generate Black Hole (Destroys 1 Layer)
- Code Empress's (Dash) ZZZ Combo (Destroys 2 Layers)
- Code Battle Seraph's (Dash + Jump) XZ Combo when combined with Energetic Heart and Thousand Star (Destroys 3 layers through hit count)
- As of "The Fields" patch in KR, most methods of destroying the shield, including but not limited to: Code Empress's (Dash) ZZZ, Sweep Rolling, Ignition Crow, Spear Burst, and Atomic Blaster no longer destroy the shield.
- It may no longer be possible to destroy the shield by any method other than though hit count after that patch, or it may be that the shield is not even destructible anymore.
- In Henir and on Normal Mode the shield has roughly 3 layers and takes a total of 80 hits to destroy completely through hit count.
- Estimating from this, it takes roughly 27 hits to destroy each layer through sheer number of hits.
- On Hell Mode the shield has roughly 5 layers (needs more testing).
- By abusing lag or relying on freezes, you can effectively demolish this boss with the shield not activating at all (or once).
- It must be done BEFORE he finishes his Lightning AoE.
Tactics
Basic Tactics:
- Classes that can destroy the shield should have the MP or potions required to have their shield breaking skill be available at any moment.
- Classes that cannot destroy the shield should focus on dealing damage, even if there is no 'shield breaker' Joaquin can only heal a limited amount of times.
- Keep an eye out for Hallucination\Puppet Debuff and do not perform any attack until it is clear who is affected.
- This can be hard to spot when he is in Dwarf mode.
Other Information
- Has near immunity to all elements, roughly 450\500 resistance to everything.
- Assuming Level 60:
- Joaquin has roughly 6M HP on Normal Mode and 8M HP on Hell Mode (31 Life-bars in both modes).
- He has about ~29.5% damage reduction on Normal Mode and ~52% damage reduction on Hell Mode. (needs more testing)
Drops

