Temple of Trials: Difference between revisions
From Elwiki
IceSoulMOG (talk | contribs) No edit summary |
Shironsaki (talk | contribs) No edit summary |
||
| (17 intermediate revisions by 7 users not shown) | |||
| Line 7: | Line 7: | ||
| BigPic=7-Xnew2.png | | BigPic=7-Xnew2.png | ||
| DunName=Temple of Trials | | DunName=Temple of Trials | ||
| Quotation= | | Quotation=A hidden place surrounded by suspicion. We need to save the fallen White Colossus. | ||
| Description=The shrine is at the end of Hamel, a hidden place unknown to anyone. Rumor has it, there lies the power of the Guardian Stone. | | Description=The shrine is at the end of Hamel, a hidden place unknown to anyone. Rumor has it, there lies the power of the Guardian Stone. | ||
| LvNeed= | | LvNeed=99 | ||
| LvFit= | | LvFit=1500000 | ||
| XEntryReq=< | | XEntryReq=<dfn>{{</dfn> | ||
* | *5 weekly entries permitted. Entry count is shared with other Secret Dungeons. | ||
*Must be Level 99 or higher. | |||
*Must be Level | <dfn>}}</dfn> | ||
< | | Ally=<dfn>{{</dfn> | ||
| Ally=< | |||
|[[File:Sasha6-X.png|60px]] | |[[File:Sasha6-X.png|60px]] | ||
|'''[[Sasha|Water Priestess Sasha]]''' - When you start this dungeon, there will be an NPC named Sasha. She will follow the El Search Party and tell you what the Temple of Trials is. | |'''[[Sasha|Water Priestess Sasha]]''' - When you start this dungeon, there will be an NPC named Sasha. She will follow the El Search Party and tell you what the Temple of Trials is. | ||
| Line 23: | Line 22: | ||
*'''Water Shield:''' Sasha gives you a shield that 25% Damage Reduction for up to 3 hits. | *'''Water Shield:''' Sasha gives you a shield that 25% Damage Reduction for up to 3 hits. | ||
*'''Fully Heal:''' After each trial, she will fully heal your HP when you go back to the start in order of the Trials. | *'''Fully Heal:''' After each trial, she will fully heal your HP when you go back to the start in order of the Trials. | ||
< | <dfn>}}</dfn> | ||
| AllyATK=true | | AllyATK=true | ||
| Mob=< | | Mob=<dfn>{{</dfn> | ||
*All mobs except Ancient Magmanta | *All mobs except Ancient Magmanta can activate stoic after 30 hits. | ||
|[[File:BrutalWalkerHead.png|60px]] | |[[File:BrutalWalkerHead.png|60px]] | ||
|'''Brutal Walker''' - Same as '''Shadow Port Walker''' but will super armor during first and last hit. | |'''Brutal Walker''' - Same as '''Shadow Port Walker''' but will be in super armor during first and last hit. | ||
| | | | ||
*'''Claw Attack:''' A basic 3 hit combo with their claws. | *'''Claw Attack:''' A basic 3 hit combo with their claws. | ||
| Line 60: | Line 59: | ||
| | | | ||
*'''Lightning Bolt:''' The Linker shoots a bolt of lightning out of his hands. | *'''Lightning Bolt:''' The Linker shoots a bolt of lightning out of his hands. | ||
<dfn>}}</dfn> | |||
| General=<dfn>{{</dfn> | |||
< | |||
| General=< | |||
|[[File:ColdheartedBrutalWalkerHead.png|60px]] | |[[File:ColdheartedBrutalWalkerHead.png|60px]] | ||
|'''Cold-hearted Brutal Walker''' - A powerful '''Brutal Walker''' that is stronger and has substantially more health. | |'''Cold-hearted Brutal Walker''' - A powerful '''Brutal Walker''' that is stronger and has substantially more health. | ||
| Line 102: | Line 95: | ||
'''Notes:''' | '''Notes:''' | ||
*Has a stoic threshold of 30 hits. | *Has a stoic threshold of 30 hits. | ||
<dfn>}}</dfn> | |||
| MiniBoss=<dfn>{{</dfn> | |||
< | |||
| MiniBoss=< | |||
|[[File:ShadowPriestHead.png|60px]] | |[[File:ShadowPriestHead.png|60px]] | ||
|'''Shadow Priest (2x)''' - A [[Resiam Outskirts|Shadow Master]] who's using its dark powers to restrain Helputt. | |'''Shadow Priest (2x)''' - A [[Resiam Outskirts|Shadow Master]] who's using its dark powers to restrain Helputt. | ||
| Line 147: | Line 110: | ||
|'''[[Helputt|Fallen Guardian: Helputt]]''' - [[Chung]]'s father, who is being controlled by the demons. His fighting stance and style is similar to that of [[Chung]]. He cannot be defeated and will finish you off with a near fatal attack. | |'''[[Helputt|Fallen Guardian: Helputt]]''' - [[Chung]]'s father, who is being controlled by the demons. His fighting stance and style is similar to that of [[Chung]]. He cannot be defeated and will finish you off with a near fatal attack. | ||
| | | | ||
*'''[[Iron Paladin]] | *'''[[Iron Paladin]] Commands:''' He will use his Destroyer to mimic Chung's combos, such as ZZZX, XXX, XXZX, and [[Iron Paladin]]'s ZZX. | ||
**Helputt will always have the [[Land Demolisher - Heavy Arms|Land Demolisher]] buff active passively. | **Helputt will always have the [[Land Demolisher - Heavy Arms|Land Demolisher]] buff active passively. | ||
**During his XXZX combo, he will not be in Stoic during the Z portion of the combo. | **During his XXZX combo, he will not be in Stoic during the Z portion of the combo. | ||
| Line 158: | Line 121: | ||
*'''[[Pain of Caladbolg]]:''' Release a devastating war cry, dealing high damage. | *'''[[Pain of Caladbolg]]:''' Release a devastating war cry, dealing high damage. | ||
*'''[[Scare Chase]]:''' Fires a red homing missile. | *'''[[Scare Chase]]:''' Fires a red homing missile. | ||
*'''Death Howling:''' After his HP drops down low enough, everybody including Helputt will be placed in scripted area and he'll unleash his final attack reduced everybody's HP to 1 and | *'''Death Howling:''' After his HP drops down low enough, everybody including Helputt will be placed in scripted area and he'll unleash his final attack reduced everybody's HP to 1 and inflict {{se||Faint}}. | ||
<dfn>}}</dfn> | |||
| Obstacle= | |||
| Boss=<dfn>{{</dfn> | |||
< | |||
| Obstacle= | |||
| Boss=< | |||
|[[File:Corrupt_Destroyer_Helputt.png|60px]] | |[[File:Corrupt_Destroyer_Helputt.png|60px]] | ||
|'''[[Helputt|Fallen Guardian: Helputt]]''' - Chung's father, who is being controlled by the demons. His fighting stance and style is similar to that of [[Chung]]. | |'''[[Helputt|Fallen Guardian: Helputt]]''' - Chung's father, who is being controlled by the demons. His fighting stance and style is similar to that of [[Chung]]'s. | ||
| | | | ||
*'''[[Iron Paladin]] | *'''[[Iron Paladin]] Commands:''' He will use his Destroyer to mimic Chung's combos, such as ZZZX, XXX, XXZX, and [[Iron Paladin]]'s ZZX. | ||
**Helputt will always have the [[Land Demolisher - Heavy Arms|Land Demolisher]] buff active passively. | **Helputt will always have the [[Land Demolisher - Heavy Arms|Land Demolisher]] buff active passively. | ||
**During his XXZX combo, he will not be in Stoic during the Z portion of the combo. | **During his XXZX combo, he will not be in Stoic during the Z portion of the combo. | ||
| Line 206: | Line 141: | ||
*'''[[Scare Chase]]:''' Fires a red homing missile. | *'''[[Scare Chase]]:''' Fires a red homing missile. | ||
**After the 03/18/2015 KR patch, explosion damage increased, almost similar to [[City in the Sky|Eltrion]]'s missile damage, so it's best to use any special active that gives invincibility frames to avoid being tracked by the missiles. | **After the 03/18/2015 KR patch, explosion damage increased, almost similar to [[City in the Sky|Eltrion]]'s missile damage, so it's best to use any special active that gives invincibility frames to avoid being tracked by the missiles. | ||
*'''Heavy Stance:''' Sometimes when Helputt is attacked, he will automatically enter heavy stance mode ( | *'''Heavy Stance:''' Sometimes when Helputt is attacked, he will automatically enter heavy stance mode (with super armor) and he may use a counterattack through his X combo. | ||
**During Heavy Stance, he will | **During Heavy Stance, he will reduce all incoming damage by 99%. | ||
'''Strategy:''' | '''Strategy:''' | ||
*There are less chances of mistakes being made if Helputt is cornered; once the fight starts, make an effort to push him against a wall. | *There are less chances of mistakes being made if Helputt is cornered; once the fight starts, make an effort to push him against a wall. | ||
*You can prevent being targeted by Helputt's Scare Chase if you use a skill with invincibility frames. This is especially necessary if you are going solo. If you use a Special Active with short invincibility frames, be sure that Helputt is out of range from the delay or you risk being targeted after the delay ends. | *You can prevent being targeted by Helputt's Scare Chase if you use a skill with invincibility frames. This is especially necessary if you are going solo. If you use a Special Active with short invincibility frames, be sure that Helputt is out of range from the delay or you risk being targeted after the delay ends. | ||
*Helputt has no [[Stoic Thresholds|Stoic Threshold]], making it possible to keep him in an infinite stunlock using attacks with no KD value. | *Helputt has no [[Stoic Thresholds|Stoic Threshold]], making it possible to keep him in an infinite stunlock using attacks with no KD value. | ||
< | <dfn>}}</dfn> | ||
| | | Reward=<dfn>{{</dfn> | ||
{| cellpadding="5" border="1" style="border-collapse: collapse;" width=100% | |||
|- | |||
! width="5%" | Image | |||
! width="15%" | Item Name | |||
! width="25%" | How to Obtain | |||
! width="55%" | Effect | |||
|- | |||
| [[File:HQ_Shop_Item_154066.png]] | |||
| Barrier's Fragment | |||
| Obtained by playing the dungeon. | |||
| Quantity: 100 | |||
Throw at [[A tree imbued with the El energy]] to gain rewards. | |||
|- | |||
| [[File:HQ_Shop_Item_154065.png]] | |||
| El Reward | |||
| Obtained by playing the dungeon. | |||
| Quantity: 5 | |||
Exchange for rewards at [[Ariel]]. | |||
|- | |||
| [[File:Dunno.png]] | |||
| ED | |||
| Obtained by playing the dungeon. | |||
| ED Gain: 10,000,000 | |||
|- | |||
| [[File:Dunno.png]] | |||
| EXP | |||
| Obtained by playing the dungeon. | |||
| EXP Gain: 200,000,000 | |||
|} | |||
<dfn>}}</dfn> | |||
|Dialogue= | |Dialogue= | ||
{{ | {{tabber | ||
| | |$divclass=tabber-vertical | ||
| | |Dungeon Intro Dialogue= | ||
{{*}}{{StoryIcon|Sasha}} '''Sasha''': ''This is the secret temple that Helputt was talking about...'' | |||
{{*}}{{StoryIcon|Sasha}} '''Sasha''': '' | |Mid Dungeon Dialogue= | ||
| | |||
{{*}}{{StoryIcon|Sasha}} '''Sasha''': ''불길한 기운이 느껴지고 있습니다. 어서 서둘러야 해요!!'' | {{*}}{{StoryIcon|Sasha}} '''Sasha''': ''불길한 기운이 느껴지고 있습니다. 어서 서둘러야 해요!!'' | ||
{{*}}{{StoryIcon|Sasha}} '''Sasha''': '' | {{*}}{{StoryIcon|Sasha}} '''Sasha''': ''Helputt's aura can be sensed....We must hurry!!'' | ||
{{*}}{{StoryIcon|Sasha}} '''Sasha''': '' | {{*}}{{StoryIcon|Sasha}} '''Sasha''': ''I have a bad feeling about this!'' | ||
| | ---- | ||
''Upon retreating from Helputt:'' | |||
{{*}}{{StoryIcon|Shadow Master2}} '''Shadow Priest''': '' | {{*}}{{StoryIcon|Sasha}} '''Sasha''': ''May you endure and pass through the Temple of Trials...'' | ||
{{*}}{{StoryIcon|Shadow Master2}} '''Shadow Priest''': '' | ---- | ||
{{*}}{{StoryIcon|Helputt2}} '''Helputt''': '' | ''Upon defeating Guardian Knight of Trials:'' | ||
{{*}}{{StoryIcon|Sasha}} '''Sasha''': ''You have opened your eyes to a new power... But I need to practice my battle skills.'' | |||
{{*}}{{StoryIcon|Helputt2}} '''Helputt''': '' | ---- | ||
Helputt uses '''Death Howling''': | ''Upon defeating Guardian Magician of Trials:'' | ||
{{*}}{{StoryIcon|Helputt2}} '''Helputt''': '' | {{*}}{{StoryIcon|Sasha}} '''Sasha''': ''I have a bad feeling about this....Let's hurry.'' | ||
{{*}}{{StoryIcon|Sasha}} '''Sasha''': '' | |Mini Boss Dialogue= | ||
{{*}}{{StoryIcon|Helputt2}} '''Helputt''': '' | {{*}}{{StoryIcon|Shadow Master2}} '''Shadow Priest''': ''Sooner or later... they will become our slaves forever...'' | ||
| | {{*}}{{StoryIcon|Shadow Master2}} '''Shadow Priest''': ''May you fall deep into shadows of evil...'' | ||
{{*}}{{StoryIcon|Helputt2}} '''Helputt''': ''Ar...gh!...'' | |||
{{*}}{{StoryIcon| | ''Upon defeating Shadow Priest:'' | ||
{{*}}{{StoryIcon|Helputt2}} '''Helputt''': ''Ah....Don't you dare come any closer!!'' | |||
{{*}}{{StoryIcon| | ''Helputt uses '''Death Howling''':'' | ||
{{*}}{{StoryIcon|Helputt2}} '''Helputt''': ''How dare you weaklings challenge demons!!'' | |||
{{* | {{*}}{{StoryIcon|Sasha}} '''Sasha''': ''Self-improvement requires discipline. I need more time to improve. I'll have to retreat for now.'' | ||
| | {{*}}{{StoryIcon|Helputt2}} '''Helputt''': ''This is it. I will exterminate you!!'' | ||
| | |Boss Intro Cutscene={{*}}{{StoryIcon|Helputt2}} '''Helputt''': ''Surrender to the demons!!'' | ||
| | |Boss Outro Cutscene={{*}}{{StoryIcon|Helputt}} '''Helputt''': ''I'll be fine. Leave Now!! Be strong, my son...'' | ||
| | |Dungeon Victory Quote= | ||
{{CharsTabs | |||
|EL= | |||
*'''Elsword''': ''-'' | |||
*'''Elsword''': ''-'' | |||
*'''Elsword''': ''-'' | |||
|AI= | |||
*'''Aisha''': ''-'' | |||
*'''Aisha''': ''-'' | |||
*'''Aisha''': ''-'' | |||
|RN= | |||
*'''Rena''': ''-'' | |||
*'''Rena''': ''-'' | |||
*'''Rena''': ''-'' | |||
|RA= | |||
*'''Raven''': ''-'' | |||
*'''Raven''': ''-'' | |||
*'''Raven''': ''-'' | |||
|EV= | |||
*'''Eve''': ''The power aura coming from the Guardian Stone is similar to that coming from the El.'' | |||
*'''Eve''': ''-'' | |||
*'''Eve''': ''-'' | |||
|CS= | |||
*'''Chung''': ''Fa...Father!!!!!!!!''<!--Why so many exclamation points?!--> | |||
*'''Chung''': ''-'' | |||
*'''Chung''': ''-'' | |||
|AR= | |||
*'''Ara''': ''-'' | |||
*'''Ara''': ''-'' | |||
*'''Ara''': ''-'' | |||
|ES= | |||
*'''Elesis''': ''As expected of Hamel's White Colossus... Sir Helputt, we will never forget your assistance here.'' | |||
*'''Elesis''': ''I'm sorry, Chung. I'm sure no words can comfort you at this moment... But I'm sure we'll save Sir Helputt one day.<br>I will make sure that happens!'' | |||
*'''Elesis''': ''Even demon schemes were not able to crush Sir Helputt's indominable will...'' | |||
|AD= | |||
*'''Add''': ''-'' | |||
*'''Add''': ''-'' | |||
*'''Add''': ''-'' | |||
|LC= | |||
*'''Lu/Ciel''': ''You're a truly righteous person... I hope we can survive to meet again.'' | |||
*'''Lu/Ciel''': ''Helputt...Was that his name? His eyes were filled with sorrow.'' | |||
*'''Ciel''': ''That was a battle fought with true strength. If I hesitated for even a second, I may not have won.'' | |||
*'''Ciel''': ''-'' | |||
|RS= | |||
*'''Rose''': ''-'' | |||
*'''Rose''': ''-'' | |||
*'''Rose''': ''-'' | |||
|AN= | |||
*'''Ain''': ''-'' | |||
*'''Ain''': ''-'' | |||
*'''Ain''': ''-'' | |||
}} | |||
}} | }} | ||
| SBGM=[http://www.youtube.com/watch?v=QJ05Y9_pZrA '''''music046_stage'''''] | | SBGM=[http://www.youtube.com/watch?v=QJ05Y9_pZrA '''''music046_stage'''''] | ||
| Line 273: | Line 278: | ||
File:6-xArmorConcept.png|Concepts art of the armors and weapon craft-able from '''Temple of Trials'''. | File:6-xArmorConcept.png|Concepts art of the armors and weapon craft-able from '''Temple of Trials'''. | ||
</gallery> | </gallery> | ||
| Trivia=<dfn>{{</dfn> | |||
| Trivia=< | |||
*There is a glitch where, if you awaken right before teleporting into Helputt's room, only your weapon (and tails if you're '''Ara''') will appear, and you will be invincible against all attacks. However, you can still attack in this state. | *There is a glitch where, if you awaken right before teleporting into Helputt's room, only your weapon (and tails if you're '''Ara''') will appear, and you will be invincible against all attacks. However, you can still attack in this state. | ||
**This state of invincibility and avatar invisibility will wear off once your awakening mode ends. | **This state of invincibility and avatar invisibility will wear off once your awakening mode ends. | ||
*Hamel Secret Dungeon Development Story. [https://elwiki.net/babel/?p=755] | *Hamel Secret Dungeon Development Story. [https://elwiki.net/babel/?p=755] | ||
< | <dfn>}}</dfn> | ||
|Updates=<dfn>{{</dfn> | |||
{| cellpadding="5" border="1" style="border-collapse: collapse; text-align: center;" | |||
|- style="background:{{ColorSel|Village|7}}" class="textfloat" | |||
! colspan=2 | Date !! rowspan=2 | Changes | |||
|- style="background:{{ColorSel|Village|7}}" class="textfloat" | |||
! KR !! NA | |||
|- | |||
| 11/09/2023 || 12/06/2023 || align="left" | | |||
*Level Requirement increased from 70-90 to 99. | |||
*CP Requirement increased from 15000 to 1500000. | |||
*Dungeon shortened. | |||
|- | |||
| 14/03/2024 || 04/24/2024 || align="left" | | |||
*The miniboss appearance time is reduced. | |||
*A skip function for the boss ending cutscene is added. | |||
|} | |||
<dfn>}}</dfn> | |||
|AltLang= | |AltLang= | ||
{{AlternateLanguages | {{AlternateLanguages | ||
Latest revision as of 18:22, 8 April 2024


Temple of Trials
| “ | A hidden place surrounded by suspicion. We need to save the fallen White Colossus.
|
” |

Description
The shrine is at the end of Hamel, a hidden place unknown to anyone. Rumor has it, there lies the power of the Guardian Stone.
Recommended Level
99
Required Combat Power
1,500,000
Entry Requirements
{{
- 5 weekly entries permitted. Entry count is shared with other Secret Dungeons.
- Must be Level 99 or higher.
Ally
{{
{{
}}
| Ally Image | Ally Description | Ally Moves |
|---|---|---|

|
Water Priestess Sasha - When you start this dungeon, there will be an NPC named Sasha. She will follow the El Search Party and tell you what the Temple of Trials is. |
}} |
Mobs
{{
{{
}}
- All mobs except Ancient Magmanta can activate stoic after 30 hits.
| Monster Image | Monster Description | Monster Moves |
|---|---|---|

|
Brutal Walker - Same as Shadow Port Walker but will be in super armor during first and last hit. |
|

|
Brutal Defender - An enhanced version of Shadow Port Defender. |
|

|
Brutal Charger - Same as Shadow Port Charger. |
|

|
Brutal Voider - Same as Shadow Port Voider. Can absorb magical projectiles and use their energy to heal themselves 10% of their maximum HP. |
|

|
Brutal Trickster - Same as Shadow Port Trickster. |
|

|
Twinky Linker - Same as Shadow Linker but instead will using Soul Link this mobs now can use Lightning. |
}} |
General
{{
{{
}}
| Monster Image | General Description | General Moves |
|---|---|---|

|
Cold-hearted Brutal Walker - A powerful Brutal Walker that is stronger and has substantially more health. |
Notes:
|

|
Cold-hearted Brutal Stinger - A powerful Brutal Stinger that is stronger and has substantially more health. |
Notes:
|

|
Cold-hearted Brutal Charger - A powerful Brutal Charger that is stronger and has substantially more health. |
Notes:
|

|
Cold-hearted Brutal Defender - A powerful Brutal Defender that is stronger and has substantially more health. |
Notes:
}} |
Mini Boss
{{
{{
}}
| Monster Image | Boss Description | Boss Moves |
|---|---|---|

|
Shadow Priest (2x) - A Shadow Master who's using its dark powers to restrain Helputt. |
Notes:
|

|
Fallen Guardian: Helputt - Chung's father, who is being controlled by the demons. His fighting stance and style is similar to that of Chung. He cannot be defeated and will finish you off with a near fatal attack. |
}} |
Boss
{{
{{
}}
| Monster Image | Boss Description | Boss Moves |
|---|---|---|
|
|
Fallen Guardian: Helputt - Chung's father, who is being controlled by the demons. His fighting stance and style is similar to that of Chung's. |
Strategy:
}} |
Dialogue
- Dungeon Intro Dialogue
- Mid Dungeon Dialogue
- Mini Boss Dialogue
- Boss Intro Cutscene
- Boss Outro Cutscene
- Dungeon Victory Quote
 Sasha: This is the secret temple that Helputt was talking about...
Reward
{{
}}
| Image | Item Name | How to Obtain | Effect |
|---|---|---|---|

|
Barrier's Fragment | Obtained by playing the dungeon. | Quantity: 100
Throw at A tree imbued with the El energy to gain rewards. |

|
El Reward | Obtained by playing the dungeon. | Quantity: 5
Exchange for rewards at Ariel. |

|
ED | Obtained by playing the dungeon. | ED Gain: 10,000,000 |
|
|
EXP | Obtained by playing the dungeon. | EXP Gain: 200,000,000 |
Gallery
-
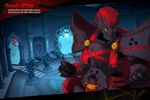
Old loading image.
-

Helputt's corrupted form.
-

Helputt's true armor form after he has been purified from the demons.
-

Concept art of Helputt.
-

Concept art of the Strength Guardian.
-

Concept art of the Mind Guardian.
-
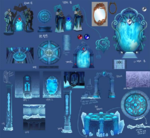
Concept art of the artifacts found in the temple.
-

Concepts art of the armors and weapon craft-able from Temple of Trials.


Trivia
{{
- There is a glitch where, if you awaken right before teleporting into Helputt's room, only your weapon (and tails if you're Ara) will appear, and you will be invincible against all attacks. However, you can still attack in this state.
- This state of invincibility and avatar invisibility will wear off once your awakening mode ends.
- Hamel Secret Dungeon Development Story. [1]
Updates
{{
}}
| Date | Changes | |
|---|---|---|
| KR | NA | |
| 11/09/2023 | 12/06/2023 |
|
| 14/03/2024 | 04/24/2024 |
|
Alternative Names
{{
}}
| Server | Name | Translation |
|---|---|---|
| 시련의 신전 | Temple of Trials | |
| 試煉神殿 | Temple of Trials | |
| 试炼之神殿 | Temple of Trials | |
| Tempel der Prüfungen | Temple of Tests | |
| Templo de las Pruebas | Temple of Trials | |
| Temple des épreuves | Temple of Tests | |
| Tempio delle Prove | Temple of Trials | |
| Świątynia Próby | Temple of Trials | |
| Temple of Testing | ||
| Templo das Provações | Temple of Trials | |
- Other
- Region 1~6
- Region 7~12
- Region 13~18
- Region 19~20
- Laby
- Noah
- Lithia
- Miscellaneous
| Event | Challenge Mode | Guild | ||
|---|---|---|---|---|
| {{ }} | {{ }} | {{ }} | {{ }} | {{ }} |
- Other
- Region 1~6
- Region 7~12
- Region 13~18
- Region 19~20
