Nature's Force System/fr: Difference between revisions
m (Text replacement - "(\[\[ *:?|link *=) *Freezing[_ ]Arrow[_ ]-[_ ]Sting\/([^]]*)\]\]" to "${1}Freezing Arrow/${2}]]") |
No edit summary |
||
| Line 1: | Line 1: | ||
{{Languages|Nature's Force System}} | {{Languages|Nature's Force System}}{{DISPLAYTITLE:Énergie de la nature}} | ||
{{DISPLAYTITLE: | [[File:NSteaser.png|thumb|150px|Image promotionnelle]] | ||
Chaque personnage possède ses propres fonctionnalités qui le distinguent parmi tous les autres. | |||
| | <br> | ||
== Énergie de la nature == | |||
[[Image:Ns1.png]]<br> | |||
Le système d'Énergie de la nature est indiquée sous la barre des PM mais aussi visuellemennt, les orbes représentent le nombre d''''EN'''. | |||
<br> | |||
=== Increasing Amount of Nature Orbs === | |||
Rena is able to charge up the nature orb gauge by hitting targets with basic kicks, arrow commands, and Active skills. After '''3''' commands, '''1''' bar of the nature orb gauge is filled. | |||
<br> | <br> | ||
{{ | |||
E.g., using {{CDRU}}{{CX}}{{CX}}{{CX}} is three commands despite having five hits total.<br> | |||
| | |||
When [[Awakening Mode|Awakening]], 5 NF bars will be filled. If you receive NF when your orbs are already full, you will instead receive 15 MP for each extra NF.<br> | |||
* | |||
* | As the bars fill, certain graphical effects will surround Rena: | ||
*1 bar: A faint green orb appears. | |||
*2 bars: The orb has a green trail. | |||
* | *3 bars: The orb becomes more luminous. | ||
* | *4 bars: A second orb appears. It has the same appearance as the previous stage. | ||
* | *5 bars: A third orb appears. Same appearance. | ||
**Since the number of orbs do not match the number of bars filled, they aren't a good indicator of your gauge's current status. | |||
[[Image:NF2.png]] | |||
[[Image: | |||
<br> | <br> | ||
[[Image:Ns4.png|300px|right]] | |||
=== Nature's Force Buff === | |||
When Rena has at least 1 bar in her nature orb gauge, she gains a passive buff that increases '''all speed, passive MP recovery, arrow MP gain''' and decreases her '''arrow MP usage'''. | |||
<br> | <br> | ||
<br> | |||
=== Nature's Force Damage Boost === | |||
[[Image:NF5.png|300px|right]] | |||
When Rena has at least 1 bar in her nature bars gauge, she is able to boost the damage done by commands and Special Active skills. When Special Actives are used, the explosion boosts only the first hit of the skill. The explosion has an AoE damage, this means it can hit unlimited targets at once in its range. | |||
*At the end of each combo, an orb will explode on the target. However, this does not apply to single hit combos (E.g: ↑Z). | |||
**Some combos removed the orb detonation after a later patch on the same day. | |||
***Sniping Ranger: ↑↑X[X], →→X[X] | |||
***Combat Ranger: ↑↑Z[Z] | |||
***Night Watcher: →→↑Z[Z], →→Z[X], ZZZ[X] | |||
**All three arrows of Rena's XXX↑[X] and XXXv[X] can each detonate one orb. | |||
*The list below shows the maximum number of bars used for each eligible skill. | |||
**If a Special Active skill is used with less than the maximum number of bars, the explosion damage is equal to the number of bars available. | |||
**Some Special Active skills (e.g., [[Karma]]) do not use bars. | |||
{| cellpadding="3" style="border-collapse: collapse; border: 0px solid rgb(0, 0, 0); width=100%; valign=top;" | {| cellpadding="3" style="border-collapse: collapse; border: 0px solid rgb(0, 0, 0); width=100%; valign=top;" | ||
|- | |- | ||
| | | | ||
| valign="top" | | | valign="top" | | ||
'''[[ | '''[[Rena]]/<br>Base''' | ||
{| border="1" style="border-collapse: collapse;" cellpadding="1" | {| border="1" style="border-collapse: collapse;" cellpadding="1" | ||
|- | |- | ||
| width="40" | [[Image: | | width="40" | [[Image:Rail Stinger.PNG]]<br> | ||
| width="150" | [[ | | width="150" | [[Rail Stinger]]<br>: 1 Bar<br> | ||
|- | |- | ||
| width="40" | [[Image: | | width="40" | [[Image:Perfect Strom.PNG]] | ||
| width="150" | [[ | | width="150" | [[Perfect Storm]]<br>: 2 Bars<br> | ||
|- | |- | ||
| width="40" | [[Image: | | width="40" | [[Image:Aero Tornado.PNG]] | ||
| width="150" | [[ | | width="150" | [[Aero Tornado]]<br>: 3 Bars<br> | ||
|- | |- | ||
| width="40" | [[Image:Assault Kick.PNG]]<br> | | width="40" | [[Image:Assault Kick.PNG]]<br> | ||
| width="150" | [[Assault Kick | | width="150" | [[Assault Kick]]<br>: 1 Bar<br> | ||
|- | |- | ||
| width="40" | [[Image: | | width="40" | [[Image:Phoenix Strike.PNG]] | ||
| width="150" | [[Phoenix Strike]]<br>: 3 Bars<br> | |||
| width="150" | [[ | |||
|} | |} | ||
| valign="top" | | | valign="top" | | ||
'''[[ | '''[[Combat Ranger]]/<br>[[Wind Sneaker]]/<br>[[Anemos]]''' | ||
{| border="1" style="border-collapse: collapse;" cellpadding="1" | {| border="1" style="border-collapse: collapse;" cellpadding="1" | ||
|- | |- | ||
| width="40" | [[Image: | | width="40" | [[Image:Crecent Kick.png]] | ||
| width="150" | [[ | | width="150" | [[Crescent Kick]] ([[Crescent Kick (Force)|Force]])<br>: 2 Bars<br> | ||
|- | |- | ||
| width="40" | [[Image: | | width="40" | [[Image:Spinning Kick.png]] | ||
| width="150" | [[ | | width="150" | [[Spinning Kick]]<br>: 1 Bar<br> | ||
|- | |- | ||
| width="40" | [[Image: | | width="40" | [[Image:TAI-HO-MING.png]] | ||
| width="150" | [[ | | width="150" | [[Dive Kick Bombing]]<br>: 3 Bars<br> | ||
|- | |- | ||
| width="40" | [[ | | width="40" | [[File:Violent Attack.PNG]] | ||
| width="150" | [[ | | width="150" | [[Violent Attack]] ([[Violent Attack (Force)|Force]])<br>: 3 Bars<br> | ||
|- | |- | ||
| width="40" | [[Image: | | width="40" | [[Image:SHOCK HO.png]] | ||
| width="150" | [[ | | width="150" | [[Sharp Fall]] ([[Sharp Fall (Force)|Force]])<br>: 2 Bars<br> | ||
|- | |- | ||
| width="40" | [[Image: | | width="40" | [[Image:WSs1.png]] | ||
| width="150" | [[ | | width="150" | [[Slide Double Kick]]<br>: 1 Bar<br> | ||
|- | |- | ||
| width="40" | [[ | | width="40" | [[File:WSTrans1.png]] | ||
| width="150" | [[ | | width="150" | [[Spinning Crescent]]<br>: 1 Bars<br> | ||
|- | |- | ||
| width="40" | [[ | | width="40" | [[File:WSTrans3.png]] | ||
| width="150" | [[ | | width="150" | [[Gyro Kick]]<br>: 2 Bar<br> | ||
|- | |- | ||
| width="40" | [[ | | width="40" | [[File:WSTrans6.png]] | ||
| width="150" | [[Wind | | width="150" | [[Tempest (Wind Sneaker)|Tempest]]<br>: 3 Bar<br> | ||
|} | |} | ||
| valign="top" | | | valign="top" | | ||
'''[[ | '''[[Sniping Ranger]]/<br>[[Grand Archer]]/<br>[[Daybreaker]]''' | ||
{| border="1" style="border-collapse: collapse;" cellpadding="1" | {| border="1" style="border-collapse: collapse;" cellpadding="1" | ||
|- | |- | ||
| width="40" | [[Image: | | width="40" | [[Image:Guide Arrow.png]] | ||
| width="150" | [[ | | width="150" | [[Guided Arrow]]<br>: 2 Bars<br> | ||
|- | |- | ||
| width="40" | [[Image: | | width="40" | [[Image:Wind Ward.png]] | ||
| width="150" | [[ | | width="150" | [[Wind Wall]] ([[Wind Wall (Force)|Force]])<br>: 1 Bars<br> | ||
|- | |- | ||
| width="40" | [[Image: | | width="40" | [[Image:Crazy Shot.png]] | ||
| width="150" | [[ | | width="150" | [[Crazy Shot]] ([[Crazy Shot (Force)|Force]])<br>: 3 Bars<br> | ||
|- | |- | ||
| width="40" | [[Image: | | width="40" | [[Image:SI Aero-Strafe.png]] | ||
| width="150" | [[ | | width="150" | [[Aero Strafe]]<br>: 2 Bars<br> | ||
|- | |- | ||
| width="40" | [[Image: | | width="40" | [[Image:Wind Blast.png]] | ||
| width="150" | [[ | | width="150" | [[Wind Blast]]<br>: 2 Bars<br> | ||
|- | |- | ||
| width="40" | [[Image:GAs1.png]] | |||
| width="150" | [[Freezing Arrow]] ([[Freezing Arrow (Force)|Force]])<br>: 1 Bar<br> | |||
| width="40" | [[Image: | |||
| width="150" | [[ | |||
|- | |- | ||
| width="40" | [[ | | width="40" | [[File:GATrans1.png]] | ||
| width="150" | [[ | | width="150" | [[Blast Arrow]]<br>: 1 Bars<br> | ||
|- | |- | ||
| width="40" | [[ | | width="40" | [[File:GATrans3.png]] | ||
| width="150" | [[ | | width="150" | [[Cutlass Wind]]<br>: 2 Bar<br> | ||
|- | |- | ||
| width="40" | [[ | | width="40" | [[File:GATrans6.png]] | ||
| width="150" | [[ | | width="150" | [[Ace in the Hole]]<br>: 3 Bar<br> | ||
|} | |} | ||
| valign="top" | | | valign="top" | | ||
'''[[Trapping Ranger | '''[[Trapping Ranger]]/<br>[[Night Watcher]]/<br>[[Twilight]]''' | ||
{| border="1" style="border-collapse: collapse;" cellpadding="1" | {| border="1" style="border-collapse: collapse;" cellpadding="1" | ||
|- | |- | ||
| width="40" | [[Image:Fatality.png]] | | width="40" | [[Image:Fatality.png]] | ||
| width="150" | [[Fatality | | width="150" | [[Fatality]]<br>: 2 Bars<br> | ||
|- | |- | ||
| width="40" | [[Image: | | width="40" | [[Image:Humming Wind.png]] | ||
| width="150" | [[ | | width="150" | [[Humming Wind]]<br>: 1 Bars<br> | ||
|- | |- | ||
| width="40" | [[Image: | | width="40" | [[Image:Callofruin.png]] | ||
| width="150" | [[ | | width="150" | [[Call of Ruin]] ([[Call of Ruin (Force)|Force]])<br>: 3 Bars<br> | ||
|- | |- | ||
| width="40" | [[Image: | | width="40" | [[Image:TA fungus.png]] | ||
| width="150" | [[ | | width="150" | [[Trapping Arrow - Fungus]] ([[Trapping Arrow - Fungus (Force)|Force]])<br>: 2 Bars<br> | ||
|- | |- | ||
| width="40" | [[Image: | | width="40" | [[Image:NWSActive2.png]] | ||
| width="150" | [[ | | width="150" | [[Gliding Strike]] ([[Gliding Strike (Force)|Force]])<br>: 2 Bars<br> | ||
|- | |- | ||
| width="40" | [[Image: | | width="40" | [[Image:NWSActive1.png]] | ||
| width="150" | [[ | | width="150" | [[Furious Engage]]<br>: 1 Bar<br> | ||
|- | |- | ||
| width="40" | [[ | | width="40" | [[File:NWTrans1.png]] | ||
| width="150" | [[ | | width="150" | [[Seed of Wrath : Icicle]]<br>: 1 Bars<br> | ||
|- | |- | ||
| width="40" | [[ | | width="40" | [[File:NWTrans3.png]] | ||
| width="150" | [[ | | width="150" | [[Rage Fungus]]<br>: 2 Bar<br> | ||
|- | |- | ||
| width="40" | [[ | | width="40" | [[File:NWTrans6.png]] | ||
| width="150" | [[ | | width="150" | [[Eradication]]<br>: 3 Bar<br> | ||
|} | |||
|} | |||
<br> | |||
== Feature Information == | |||
{| cellpadding="5" border="1" style="border-collapse: collapse; text-align: center" | |||
|- style="background-color: {{ColorSel|CharLight|Rena}}" | |||
! rowspan=2 | Bars !! colspan=3 | Explosion !! colspan=4 | Buff | |||
|- style="background-color: {{ColorSel|CharLight|Rena}}" | |||
! Damage Per Bar !! Skill Modifier !! Max Bars<br>Used !! All Speed<br>Increase !! Passive MP<br>Recovery !! Arrow MP Gain<br>Increase !! Arrow MP Usage<br>Decrease | |||
|- | |- | ||
| | | align=left | 1 || rowspan=5 | 370% || rowspan=5 | +20% || rowspan=5 | 3 || % || +0.4 MP/3 seconds || 5% || 10% | ||
| | |||
|- | |- | ||
| | | align=left | 2 || % || +0.8 MP/3 seconds || 10% || 20% | ||
| | |||
|- | |- | ||
| | | align=left | 3 || % || +1.2 MP/3 seconds || 15% || 30% | ||
| | |||
|- | |- | ||
| | | align=left | 4 || % || +1.6 MP/3 seconds || 20% || 40% | ||
| | |||
|- | |- | ||
| | | align=left | 5 || % || +2 MP/3 seconds || 25% || 50% | ||
| | |||
| | |||
|} | |} | ||
<br> | |||
== Specialization == | |||
{| cellspacing="0" cellpadding="5" border="1" style="border-collapse: collapse; width: 100%;" | |||
|- | |- | ||
! width="6%" | Character | |||
! width="46%" | [[Image:HQ Shop Item 72550.png]]{{Gap}}Specialization A | |||
! width="46%" | [[Image:HQ Shop Item 72560.png]]{{Gap}}Specialization B | |||
|- | |- | ||
| | | [[File:RenaNEW.png|center|link=Rena]] || x% chance of gaining extra NF (Max: 50%) || MP Usage decreases by how many NF consumed (Max: 40%) | ||
[[ | |} | ||
<br> | <br> | ||
== Tips and Details == | |||
*Damage is based on the player's average attack power. | |||
*The explosion hits all targets in range and '''ignores defense and guard'''. After the Rena Reborn update (07/23/2015 KR Patch), it no longer inflicts hitstun, meaning it no longer prevents knockdown. | |||
<br> | <br> | ||
== Updates == | |||
*01/02/2014 KR | |||
**Nature's Spirit system added. | |||
*01/28/2014 KR | |||
**Commands required to gain a nature orb reduced from seven to six. | |||
**Skills increase your Nature's Spirit command count on activation. | |||
*07/23/2015 KR | |||
**System revamped. | |||
*08/27/2015 KR | |||
**Adjusted damage reduction buff per 1 NF point which was set too high. | |||
*02/04/2016 KR | |||
**MP recovery effect decreased. | |||
**Damage Reduction effect removed. | |||
*04/21/2016 (KR) / 05/18/2016 (NA) | |||
**Change to be recovered NF more easily when using combo. | |||
*08/11/2016 KR | |||
**Fixed issue where NF consume is affected by Specialization B and Skill Trait. | |||
*05/18/2017 KR | |||
**Fixed issue where cannot gain NF when awaken during entering the next stage. | |||
*11/02/2017 (KR) / 11/15/2017 (NA) | |||
**Passive MP Recovery decreased. | |||
<br> | <br> | ||
{{HabilitésSpéciales}} | {{HabilitésSpéciales}} | ||
{{MainGuides/fr}} | {{MainGuides/fr}} | ||
Revision as of 14:04, 21 July 2018

Chaque personnage possède ses propres fonctionnalités qui le distinguent parmi tous les autres.
Énergie de la nature

Le système d'Énergie de la nature est indiquée sous la barre des PM mais aussi visuellemennt, les orbes représentent le nombre d'EN.
Increasing Amount of Nature Orbs
Rena is able to charge up the nature orb gauge by hitting targets with basic kicks, arrow commands, and Active skills. After 3 commands, 1 bar of the nature orb gauge is filled.
E.g., using ![]()
![]()
![]()
![]() is three commands despite having five hits total.
is three commands despite having five hits total.
When Awakening, 5 NF bars will be filled. If you receive NF when your orbs are already full, you will instead receive 15 MP for each extra NF.
As the bars fill, certain graphical effects will surround Rena:
- 1 bar: A faint green orb appears.
- 2 bars: The orb has a green trail.
- 3 bars: The orb becomes more luminous.
- 4 bars: A second orb appears. It has the same appearance as the previous stage.
- 5 bars: A third orb appears. Same appearance.
- Since the number of orbs do not match the number of bars filled, they aren't a good indicator of your gauge's current status.


Nature's Force Buff
When Rena has at least 1 bar in her nature orb gauge, she gains a passive buff that increases all speed, passive MP recovery, arrow MP gain and decreases her arrow MP usage.
Nature's Force Damage Boost

When Rena has at least 1 bar in her nature bars gauge, she is able to boost the damage done by commands and Special Active skills. When Special Actives are used, the explosion boosts only the first hit of the skill. The explosion has an AoE damage, this means it can hit unlimited targets at once in its range.
- At the end of each combo, an orb will explode on the target. However, this does not apply to single hit combos (E.g: ↑Z).
- Some combos removed the orb detonation after a later patch on the same day.
- Sniping Ranger: ↑↑X[X], →→X[X]
- Combat Ranger: ↑↑Z[Z]
- Night Watcher: →→↑Z[Z], →→Z[X], ZZZ[X]
- All three arrows of Rena's XXX↑[X] and XXXv[X] can each detonate one orb.
- Some combos removed the orb detonation after a later patch on the same day.
- The list below shows the maximum number of bars used for each eligible skill.
- If a Special Active skill is used with less than the maximum number of bars, the explosion damage is equal to the number of bars available.
- Some Special Active skills (e.g., Karma) do not use bars.


Feature Information
| Bars | Explosion | Buff | |||||
|---|---|---|---|---|---|---|---|
| Damage Per Bar | Skill Modifier | Max Bars Used |
All Speed Increase |
Passive MP Recovery |
Arrow MP Gain Increase |
Arrow MP Usage Decrease | |
| 1 | 370% | +20% | 3 | % | +0.4 MP/3 seconds | 5% | 10% |
| 2 | % | +0.8 MP/3 seconds | 10% | 20% | |||
| 3 | % | +1.2 MP/3 seconds | 15% | 30% | |||
| 4 | % | +1.6 MP/3 seconds | 20% | 40% | |||
| 5 | % | +2 MP/3 seconds | 25% | 50% | |||
Specialization
| Character |  Specialization A Specialization A
|
 Specialization B Specialization B
|
|---|---|---|
| x% chance of gaining extra NF (Max: 50%) | MP Usage decreases by how many NF consumed (Max: 40%) |
Tips and Details
- Damage is based on the player's average attack power.
- The explosion hits all targets in range and ignores defense and guard. After the Rena Reborn update (07/23/2015 KR Patch), it no longer inflicts hitstun, meaning it no longer prevents knockdown.
Updates
- 01/02/2014 KR
- Nature's Spirit system added.
- 01/28/2014 KR
- Commands required to gain a nature orb reduced from seven to six.
- Skills increase your Nature's Spirit command count on activation.
- 07/23/2015 KR
- System revamped.
- 08/27/2015 KR
- Adjusted damage reduction buff per 1 NF point which was set too high.
- 02/04/2016 KR
- MP recovery effect decreased.
- Damage Reduction effect removed.
- 04/21/2016 (KR) / 05/18/2016 (NA)
- Change to be recovered NF more easily when using combo.
- 08/11/2016 KR
- Fixed issue where NF consume is affected by Specialization B and Skill Trait.
- 05/18/2017 KR
- Fixed issue where cannot gain NF when awaken during entering the next stage.
- 11/02/2017 (KR) / 11/15/2017 (NA)
- Passive MP Recovery decreased.
| Systèmes des personnages |
|---|
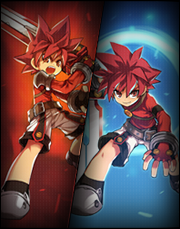 Elsword a accès à la jauge de la Voie de l'épée visible sous la barre des PM. Celle-ci permet d'activer l'aura de vitalité ou l'aura de destruction pendant une période de temps. En fonction du type de combos ( Avec l'aura de vitalité, Elsword gagne plus de PM avec les attaques de vitalité et celles-ci voient leur coût en PM réduit, la vitesse d'Elsword augmente aussi. Avec l'aura de destruction, toutes les attaques de destruction infligent beaucoup plus de dégâts. Sachez que le système n'est pas ce qu'il en a l'air à première vue : les attaques de vitalité font baisser la vitalité et monter la destruction ; les attaques de destruction font baisser la destruction et monter la vitalité. C'est pourquoi seules les attaques qui consomment la jauge sont affectées par les bonus de leur aura respective.
|


| Guides généraux | ||||||||||||||||||||||||||||
|---|---|---|---|---|---|---|---|---|---|---|---|---|---|---|---|---|---|---|---|---|---|---|---|---|---|---|---|---|
{{
|