Power-ups: Difference between revisions
From Elwiki
IceSoulMOG (talk | contribs) (→Potion) |
|||
| (26 intermediate revisions by 7 users not shown) | |||
| Line 1: | Line 1: | ||
{{Languages| | {{Languages|Power-ups}} __FORCETOC__ | ||
[[File:DropConsumable.jpg|thumb|Power-ups]] | |||
When playing in dungeons or participating in PvP, you may encounter special items that could enhance your gameplay. These items can take the form of a Potion, an Aura buff, or a Goddess Stone. In PvE, these items will appear randomly from destroyed chests and defeated buffed monsters. In PvP, these items will randomly appear in the stage while it constantly changes its location and the type of effect it can provide. | When playing in dungeons or participating in PvP, you may encounter special items that could enhance your gameplay. These items can take the form of a Potion, an Aura buff, or a Goddess Stone. In PvE, these items will appear randomly from destroyed chests and defeated buffed monsters. In PvP, these items will randomly appear in the stage while it constantly changes its location and the type of effect it can provide. | ||
<br> | |||
== Goddess Stone == | == Goddess Stone == | ||
Goddess Stones are circular stones that can summon the powers of a goddess to assist you. | Goddess Stones are circular stones that can summon the powers of a goddess to assist you. | ||
{| cellpadding="5" border="1" style="border-collapse: collapse; | {| class="wikitable sortable" cellspacing="0" cellpadding="5" border="1" style="border-collapse: collapse; width: 85%;" | ||
|- | |- | ||
! width=1% | Stone | ! width="1%" | Stone | ||
! width="1%" | Icon | |||
! width="20%" | Name | |||
! class="unsortable" | Effects | |||
|- | |- | ||
| | | [[File:Dryad's Fury.png|center]] | ||
| align="center" | {{se|107}} | |||
| Dryad's Fury | | Dryad's Fury | ||
| Dryad will summon vines to immobilize all targets within range without damaging them. All targets that are caught will not be able to jump, attack, or move. | | Dryad will summon vines to immobilize all targets within range without damaging them. All targets that are caught will not be able to jump, attack, or move. | ||
|- | |- | ||
| | | [[File:Oryed's Fury.png|center]] | ||
| align="center" | N/A | |||
| Oryed's Fury | | Oryed's Fury | ||
| Oryed will create a volcanic eruption at the base of all targets within range. All targets that are hit will be slightly launched into the air. | | Oryed will create a volcanic eruption at the base of all targets within range. All targets that are hit will be slightly launched into the air. | ||
|- | |- | ||
| | | [[File:Raul's Fury.png|center]] | ||
| align="center" | {{se||Faint|label=no}} | |||
| Raul's Fury | | Raul's Fury | ||
| Raul will summon a lightning bolt from the sky to damage all targets within range. All targets that are hit will be | | Raul will summon a lightning bolt from the sky to damage all targets within range. All targets that are hit will be {{se||Faint|fainted|icon=no|tt=no}} for a few seconds. | ||
|- | |- | ||
| | | [[File:Illipia's Touch.png|center]] | ||
| align="center" | N/A | |||
| Illipia's Touch | | Illipia's Touch | ||
| Illipia will create an area where you or any teammate within range can recover 2% HP each second. The area will last for 10 seconds before disappearing. | | Illipia will create an area where you or any teammate within range can recover 2% HP each second. The area will last for 10 seconds before disappearing. | ||
|- | |- | ||
| [[ | | [[File:NOIMAGE.png|center]] | ||
| align="center" | N/A | |||
| Failure | | Failure | ||
| All four Goddess Stones have a small chance of not activating its effects. If the stone fails to activate, '''William Phoru''' will spawn as an enemy | | All four Goddess Stones have a small chance of not activating its effects. If the stone fails to activate, '''William Phoru''' will spawn as an enemy to attack a player who picks up the Failed Goddess Stone. | ||
|} | |} | ||
<br> | |||
=== Tips and Details === | === Tips and Details === | ||
*When Dryad's Fury is activated in PvP, trapped players are able to change the direction in which they are facing while they are immobilized and can perform [[Mana Break]]. | *When {{se|107|Dryad's Fury||ed}} is activated in PvP, trapped players are able to change the direction in which they are facing while they are immobilized and can perform [[Mana Break]]. | ||
*If Illipia's Touch is active as you are progressing to the next room in a dungeon stage, it will automatically deactivate once the barrier to the next room is lifted. | *If Illipia's Touch is active as you are progressing to the next room in a dungeon stage, it will automatically deactivate once the barrier to the next room is lifted. | ||
*After the lightning from Raul's Fury appear, an afterimage will remain for 2 seconds on the spot that it hits. Any targets that enter that area will be | *After the lightning from Raul's Fury appear, an afterimage will remain for 2 seconds on the spot that it hits. Any targets that enter that area will be fainted. | ||
<br> | <br> | ||
=== Gallery === | === Gallery === | ||
<gallery heights=150px widths=150px> | <gallery heights=150px widths=150px> | ||
File:Summon Dryad.png|Goddess Dryad | |||
File:Summon Illipia.png|Goddess Illipia | |||
File:Summon Oryed.png|Goddess Oryed | |||
File:Summon Raul.png|Goddess Raul | |||
</gallery> | </gallery> | ||
<br> | <br> | ||
== Aura == | == Aura == | ||
{| cellpadding="5" border="1" style="border-collapse: collapse; | {| class="wikitable sortable" cellspacing="0" cellpadding="5" border="1" style="border-collapse: collapse; width: 85%;" | ||
|- | |- | ||
! width=1% | Aura Image | ! width="1%" | Aura | ||
! width="1%" | Image | |||
! width="1%" | Icon | |||
! width="20%" | Name | |||
! class="unsortable" | Effects | |||
|- | |- | ||
| | | [[File:Bravery Aura.png|center]] | ||
| [[File: | | [[File:Marker Brave Symbol01.png|center]] | ||
| align="center" | {{se|041}} | |||
| Bravery Aura | | Bravery Aura | ||
| The Bravery Aura will increase your Physical Attack power by 70% for 17 seconds. | | The Bravery Aura will increase your Physical Attack power by 70% for 17 seconds. | ||
|- | |- | ||
| | | [[File:Defense Aura.png|center]] | ||
| [[File: | | [[File:Marker Protect Symbol01.png|center]] | ||
| align="center" | {{se|043}} | |||
| Defense Aura | | Defense Aura | ||
| The Defense Aura will increase your Physical Defense by 20% for 17 seconds. | | The Defense Aura will increase your Physical Defense by 20% for 17 seconds. | ||
|- | |- | ||
| | | [[File:Magic Power Aura.png|center]] | ||
| [[File: | | [[File:Marker Magic Symbol01.png|center]] | ||
| align="center" | {{se|042}} | |||
| Magic Power Aura | | Magic Power Aura | ||
| The Magic Power Aura will increase your Magical Attack power by 70% for 17 seconds. | | The Magic Power Aura will increase your Magical Attack power by 70% for 17 seconds. | ||
|- | |- | ||
| | | [[File:Magic Defense Aura.png|center]] | ||
| [[File: | | [[File:Marker Antimagic Symbol01.png|center]] | ||
| align="center" | {{se|044}} | |||
| Magic Defense Aura | | Magic Defense Aura | ||
| The Magic Defense Aura will increase your Magical Defense by 20% for 17 seconds. | | The Magic Defense Aura will increase your Magical Defense by 20% for 17 seconds. | ||
|- | |- | ||
| | | [[File:Unaggressive Aura.png|center]] | ||
| [[File: | | [[File:Marker Inviolable Symbol01.png|center]] | ||
| align="center" | {{se|045}} | |||
| Unaggressive Aura | | Unaggressive Aura | ||
| The Unaggressive Aura will grant you Super Armor for 10 Seconds. | | The Unaggressive Aura will grant you {{se|045|Super Armor||icon=no}} for 10 Seconds. | ||
|- | |- | ||
| [[File:NOIMAGE.png]] | | [[File:NOIMAGE.png|center]] | ||
| [[File: | | [[File:NOIMAGE.png|center]] | ||
| align="center" | {{se|106}} | |||
| Failure | | Failure | ||
| The five aforementioned Auras have a small chance of not activating its effects. If they fail to activate, you will receive the | | The five aforementioned Auras have a small chance of not activating its effects. If they fail to activate, you will receive the {{se|106|Weakened Body||sd|icon=no}} debuff, which will reduce Physical Attack, Magical Attack, Physical Defense, and Magical Defense for 20 Seconds. | ||
|} | |} | ||
<br> | |||
=== Tips and Details === | === Tips and Details === | ||
*All Auras cannot stack with other Auras. Obtaining a new Aura while another is active will remove the previous one. | *All Auras cannot stack with other Auras. Obtaining a new Aura while another is active will remove the previous one. | ||
<br> | |||
== Potion == | == Potion == | ||
{| cellpadding="5" border="1" style="border-collapse: collapse; | {| class="wikitable sortable" cellspacing="0" cellpadding="5" border="1" style="border-collapse: collapse; width: 85%;" | ||
|- | |- | ||
! width=1% | Potion | ! width="1%" | Potion | ||
! width="1%" | Image | |||
! width="1%" | Icon | |||
! width="20%" | Name | |||
! class="unsortable" | Effects | |||
|- | |- | ||
| [[File:Awakening Potion.png|center]] | |||
| [[File: | |||
| [[File:Rage.png|center]] | | [[File:Rage.png|center]] | ||
| align="center" | {{se|001}}<br>{{se|167}}<br>{{se|970}}<br>{{se|971}}<br>{{se|972}} | |||
| Awakening Potion | | Awakening Potion | ||
| The Awakening Potion will automatically activate [[Awakening | | The Awakening Potion will automatically activate [[Awakening Mode]] for its recipient. If it's already active when the player picks up this potion, they will instead receive extra time to the duration of their current Awakening.<br>If an [[Add]] player uses this potion, they will recover DP instead. It will not automatically activate Dynamo Configuration mode.<br> If an [[Ain]] uses this potion while awakened, he will ascend to the next awakening stage and have a 30 second increase to the current amount of time left. | ||
|- | |- | ||
| [[File:Dwarf's Potion.png|center]] | |||
| [[File: | |||
| [[File:Dwarf.png|center]] | | [[File:Dwarf.png|center]] | ||
| align="center" | {{se|040}} | |||
| Dwarf's Potion | | Dwarf's Potion | ||
| The Dwarf's Potion will reduce the size of your character, which will also reduce the range of your attacks and make you less vulnerable to attacks. It will also give you a buff where you will recover 10 MP per second for 17 Seconds. | | The Dwarf's Potion will reduce the size of your character, which will also reduce the range of your attacks and make you less vulnerable to attacks. It will also give you a buff where you will recover 10 MP per second for 17 Seconds. | ||
|- | |- | ||
| [[File:Giant's Potion.png|center]] | |||
| [[File: | |||
| [[File:Giant.png|center]] | | [[File:Giant.png|center]] | ||
| align="center" | {{se|038}} | |||
| Giant's Potion | | Giant's Potion | ||
| The Giant's Potion will increase the size of your character, which will also increase the range of your attacks and leave you more vulnerable to attacks. It will also increase the damage of your skills by 50% for 17 Seconds. | | The Giant's Potion will increase the size of your character, which will also increase the range of your attacks and leave you more vulnerable to attacks. It will also increase the damage of your skills by 50% for 17 Seconds. | ||
|- | |- | ||
| [[File:Sprinter's Potion.png|center]] | |||
| [[File: | |||
| [[File:Sprinter.png|center]] | | [[File:Sprinter.png|center]] | ||
| align="center" | {{se|039}} | |||
| Sprinter's Potion | | Sprinter's Potion | ||
| The Sprinter's Potion will increase your Movement and Jump Speed by 20% for 17 Seconds. You will also receive a grey afterimage when you move around. | | The Sprinter's Potion will increase your Movement and Jump Speed by 20% for 17 Seconds. You will also receive a grey afterimage when you move around. | ||
|- | |- | ||
| [[File:NOIMAGE.png|center]] | | [[File:NOIMAGE.png|center]] | ||
| [[File:Failure.png|center]] | | [[File:Failure.png|center]] | ||
| align="center" | {{se|098}} | |||
| Failure | | Failure | ||
| The four aforementioned Potions have a small chance of not activating its effects. If they fail to activate, you will receive the | | The four aforementioned Potions have a small chance of not activating its effects. If they fail to activate, you will receive the {{se|098|Big Head||sd|icon=no}} debuff, which will enlarge the size of your head while lowering your Movement and Jump Speed for 20 Seconds. | ||
|} | |} | ||
<br> | |||
=== Tips and Details === | === Tips and Details === | ||
*All Potions except the Awakening Potion will not stack with other Potions. | *All Potions except the Awakening Potion will not stack with other Potions. | ||
*The Awakening Potion is affected by your Awakening Time and DP Gain stat. | *The Awakening Potion is affected by your Awakening Time and DP Gain stat. | ||
<br> | |||
== Recovery Items == | |||
Recovery items are special items that only appears in dungeons and fields. They will never appear in any PvP modes. | |||
{| cellpadding="5" border="1" style="border-collapse: collapse;" | |||
|- | |||
! colspan=3 | Food !! colspan=3 | Fruit !! colspan=3 | Miscellaneous | |||
|- | |||
! Image !! Name !! Recovery Effect !! Image !! Name !! Recovery Effect !! Image !! Name !! Recovery Effect | |||
|- | |||
| [[File:Egg.png|64px]] | |||
| Egg | |||
| 10% HP Recovery | |||
| [[File:Blueberry.png|64px]] | |||
| Blueberry | |||
| 50 MP Recovery | |||
| [[File:Essence of Life 25.png|64px]] | |||
| Essence of Life | |||
| 25% HP Recovery | |||
|- | |||
| [[File:Seasoned Chicken.png|64px]] | |||
| Seasoned Chicken | |||
| 25% HP Recovery | |||
| [[File:Pear.png|64px]] | |||
| Pear | |||
| 100 MP Recovery | |||
| [[File:Essence of Life 50.png|64px]] | |||
| Essence of Life | |||
| 50% HP Recovery | |||
|- | |||
| [[File:Smoked Turkey.png|64px]] | |||
| Smoked Turkey | |||
| 50% HP Recovery | |||
| [[File:Pineapple.png|64px]] | |||
| Pineapple | |||
| 150 MP Recovery | |||
|- | |||
| [[File:Roasted Mutton.png|64px]] | |||
| Roasted Mutton | |||
| 100% HP Recovery | |||
|} | |||
<br> | |||
=== Tips and Details === | |||
*The effects of these items can be enhanced by the Recovery Item Effect Increase stat. | |||
<br> | <br> | ||
{{Guides}} | {{Guides}} | ||
Latest revision as of 16:44, 28 January 2024
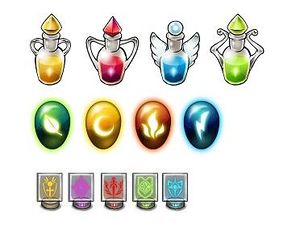
When playing in dungeons or participating in PvP, you may encounter special items that could enhance your gameplay. These items can take the form of a Potion, an Aura buff, or a Goddess Stone. In PvE, these items will appear randomly from destroyed chests and defeated buffed monsters. In PvP, these items will randomly appear in the stage while it constantly changes its location and the type of effect it can provide.
Goddess Stone
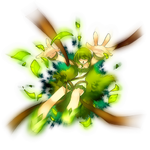
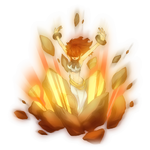
Goddess Stones are circular stones that can summon the powers of a goddess to assist you.
| Stone | Icon | Name | Effects |
|---|---|---|---|
 |
Dryad's Fury | Dryad will summon vines to immobilize all targets within range without damaging them. All targets that are caught will not be able to jump, attack, or move. | |
 |
N/A | Oryed's Fury | Oryed will create a volcanic eruption at the base of all targets within range. All targets that are hit will be slightly launched into the air. |
 |
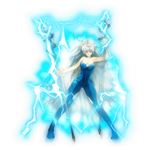
Raul's Fury | Raul will summon a lightning bolt from the sky to damage all targets within range. All targets that are hit will be faintedfainted for a few seconds. | |
 |
N/A | Illipia's Touch | Illipia will create an area where you or any teammate within range can recover 2% HP each second. The area will last for 10 seconds before disappearing. |
 |
N/A | Failure | All four Goddess Stones have a small chance of not activating its effects. If the stone fails to activate, William Phoru will spawn as an enemy to attack a player who picks up the Failed Goddess Stone. |
Tips and Details
- When
 Enemy DebuffDryad's FuryEnemy DebuffDryad's Fury is activated in PvP, trapped players are able to change the direction in which they are facing while they are immobilized and can perform Mana Break.
 - If Illipia's Touch is active as you are progressing to the next room in a dungeon stage, it will automatically deactivate once the barrier to the next room is lifted.
- After the lightning from Raul's Fury appear, an afterimage will remain for 2 seconds on the spot that it hits. Any targets that enter that area will be fainted.
Gallery
-
Goddess Dryad
-
Goddess Illipia
-
Goddess Oryed
-
Goddess Raul
Aura
| Aura | Image | Icon | Name | Effects |
|---|---|---|---|---|
 |
 |
Bravery Aura | The Bravery Aura will increase your Physical Attack power by 70% for 17 seconds. | |
 |
 |
Defense Aura | The Defense Aura will increase your Physical Defense by 20% for 17 seconds. | |
 |
 |
Magic Power Aura | The Magic Power Aura will increase your Magical Attack power by 70% for 17 seconds. | |
 |
 |
Magic Defense Aura | The Magic Defense Aura will increase your Magical Defense by 20% for 17 seconds. | |
 |
 |
Unaggressive Aura | The Unaggressive Aura will grant you Self BuffSuper ArmorSelf BuffSuper Armor for 10 Seconds. | |
 |
 |
Failure | The five aforementioned Auras have a small chance of not activating its effects. If they fail to activate, you will receive the Self DebuffWeakened BodySelf DebuffWeakened Body debuff, which will reduce Physical Attack, Magical Attack, Physical Defense, and Magical Defense for 20 Seconds. |
Tips and Details
- All Auras cannot stack with other Auras. Obtaining a new Aura while another is active will remove the previous one.
Potion
| Potion | Image | Icon | Name | Effects |
|---|---|---|---|---|
 |
 |
Awakening Potion | The Awakening Potion will automatically activate Awakening Mode for its recipient. If it's already active when the player picks up this potion, they will instead receive extra time to the duration of their current Awakening. If an Add player uses this potion, they will recover DP instead. It will not automatically activate Dynamo Configuration mode. If an Ain uses this potion while awakened, he will ascend to the next awakening stage and have a 30 second increase to the current amount of time left. | |
 |
 |
Dwarf's Potion | The Dwarf's Potion will reduce the size of your character, which will also reduce the range of your attacks and make you less vulnerable to attacks. It will also give you a buff where you will recover 10 MP per second for 17 Seconds. | |
 |
 |
Giant's Potion | The Giant's Potion will increase the size of your character, which will also increase the range of your attacks and leave you more vulnerable to attacks. It will also increase the damage of your skills by 50% for 17 Seconds. | |
 |
 |
Sprinter's Potion | The Sprinter's Potion will increase your Movement and Jump Speed by 20% for 17 Seconds. You will also receive a grey afterimage when you move around. | |
 |
 |
Failure | The four aforementioned Potions have a small chance of not activating its effects. If they fail to activate, you will receive the Self DebuffBig HeadSelf DebuffBig Head debuff, which will enlarge the size of your head while lowering your Movement and Jump Speed for 20 Seconds. |
Tips and Details
- All Potions except the Awakening Potion will not stack with other Potions.
- The Awakening Potion is affected by your Awakening Time and DP Gain stat.
Recovery Items
Recovery items are special items that only appears in dungeons and fields. They will never appear in any PvP modes.
Tips and Details
- The effects of these items can be enhanced by the Recovery Item Effect Increase stat.
General Guides
{{
}}
Story
Gameplay
Modes
Combat
Character Progression
Systems
Summons
Items
Equipment
Functionality
Cash
Miscellaneous
Other Media
