Character Systems: Difference between revisions
IceSoulMOG (talk | contribs) |
No edit summary |
||
| Line 4: | Line 4: | ||
==[[Elsword]]: [[Way of the Sword]]== | ==[[Elsword]]: [[Way of the Sword]]== | ||
[[File:Wotsposter2.png|link=Way of the Sword|left]] | [[File:Wotsposter2.png|link=Way of the Sword|left]] | ||
When playing [[Elsword]], | When playing as [[Elsword]], you will have access to a special gauge known as '''Way of the Sword'''. This gauge will enable you to activate '''Aura of Vitality''' or '''Aura of Destruction''' for a period of time. Depending on the type of commands ({{CZ}}/{{CX}}) or skills you use, the gauge will lean towards either vitality or destruction. | ||
While the '''Aura of Vitality''' is active, you will gain more MP from vitality-based attacks, while the MP cost for vitality-based skills will be reduced. Your speed will also be increased. | |||
While the '''Aura of Destruction''' is active, you will immediately bounce back any attack that hits you, knocking down nearby enemies and triggering super armor for 6 seconds in which time you cannot trigger the effect again. All destruction-based attacks will also deal vastly more damage. | |||
Note that the system they use is not what what it may appear to be at first; vitality-based attacks take away vitality from the gauge, leaning the gauge towards destruction; destruction-based attacks take away destruction from the gauge, leaning the gauge towards vitality; this is why only attacks that use the gauge | Note that the system they use is not what what it may appear to be at first; vitality-based attacks take away vitality from the gauge, leaning the gauge towards destruction; destruction-based attacks take away destruction from the gauge, leaning the gauge towards vitality; this is why only attacks that use the gauge will receive benefits while in their respective aura. | ||
==[[Aisha]]: [[Memorize]]== | ==[[Aisha]]: [[Memorize]]== | ||
[[File:Aishposter2.png|link=Memorize|right]] | [[File:Aishposter2.png|link=Memorize|right]] | ||
While regenerating MP as [[Aisha]], you will able to '''memorize''' a skill from your skill slots into a memorized skill slot. A memo will appear above you after charging MP for 1.5 seconds, and skills that are able to be memorized will be highlighted. | |||
When the | When the memo appears and you activate an eligible skill, the skill will go on '''cooldown''' and the required '''MP''' will be consumed, but it will not be activated. Instead, it will be '''stored''' in her memorized skill slots. Successfully memorizing a skill will cause the memo above you to flash. You are able to memorize a maximum 3 skills, but you cannot memorize the same skill more than once. | ||
Pressing V will activate the first skill you memorized for '''no additional cost''', but at a small '''damage penalty'''. This allows you to activate the same skill twice in a row if you memorize the skill once beforehand. | |||
==[[Rena]]: [[Nature's Force System|Nature's Force]]== | ==[[Rena]]: [[Nature's Force System|Nature's Force]]== | ||
[[File:Renposter2.png|link=Nature's Force System|left]] | [[File:Renposter2.png|link=Nature's Force System|left]] | ||
'''Nature's Force''' | When playing as [[Rena]], you will have access to a special bar called '''Nature's Force'''. The system is indicated by a set of 5 bars below your MP bar. Each '''NF''' bar represents a '''nature orb''', which you are able to gain by using commands ({{CZ}}/{{CX}}) and Active skills. After 3 hits, 1 orb will appear to float around you. | ||
When [[Awakening Mode|Awakening]], you will receive 5 NF. If you already have NF available, you will receive 30 MP for every excessive bar. When you have at least 1 nature orb, she gains a '''passive buff''' that increases your speed, passive MP recovery and the MP gained from arrows, as well as decreases the MP used for firing arrows. | |||
When | When you have at least 1 or more nature orbs, you are able to use those orbs '''alongside certain skills'''. For most Special Actives, if the required amount of nature orbs are available as indicated on each skill, the first hit will cause the respective amount of orbs to '''detonate''' on the target. The orbs deal splash damage and ignore defense. | ||
==[[Raven]]: [[Anger of Raven]]== | ==[[Raven]]: [[Anger of Raven]]== | ||
[[File:Ravposter2.png|link=Anger of Raven|right]] | [[File:Ravposter2.png|link=Anger of Raven|right]] | ||
When [[Awakening Mode]] | When entering [[Awakening Mode]] as [[Raven]], a '''Nasod Core''' will appear behind you that will assist you in battle both offensively and defensively. The core has five '''levels'''; the bigger it is, the stronger it becomes. It grows as you deal damage, take damage (slower rate than doing damage), or when you use a '''Special Active'''. The core is level 2 upon first awakening. Additionally, when 3 '''beads''' are used to awaken, an '''aura of electricity''' will appear around you, dealing damage to nearby enemies. | ||
Offensively, when | Offensively, when you hit a target with an active like [[Breaking Fist]] or a special active like [[Power Assault]] and it survives the attack, the Core will '''propel itself''' at the target in a straight line by turning into '''dagger'''-like shape when it is at least level 2. If no enemies are hit, it will return behind you at the same level it was before launching. If it does hit, it pierces through all targets hit as it travels a set distance, without knocking down. | ||
Defensively, when | Defensively, when you are hit by an attack in front while on the ground, the core transforms into a '''shield''' that '''reduces damage'''. The shield lasts a short time and the core loses a level each time it forms the shield. If the core is level 1 when it defends you, it will disappear afterward and requires the usual conditions to reappear. You cannot move during the guarding animation, but [[Shadow Step]] can be used to dash out of it. | ||
==[[Eve]]: [[Core Release]]== | ==[[Eve]]: [[Core Release]]== | ||
[[File:Eveposter2.png|link=Core Release|left]] | [[File:Eveposter2.png|link=Core Release|left]] | ||
When [[Eve]] | When entering [[Awakening Mode]] as [[Eve]], a '''Queen's Core''' will be generated. The core has 3 levels, and will follow and support you by changing itself during offensive and defensive situations. Additionally, Eve has access to a special skill called [[Code : Recovery]], which can be activated by pressing V to recover some HP. This skill will have additional effects based on the chosen job path. | ||
While awakened, every hit you do will '''level up''' the Queen's Core. A core level up is indicated when it lights up for 1 second. The higher the level of the core, the more damage will be dealt by the Queen's Laser, and the number of times it is able to defend you increases. | |||
When a '''Special Active''' is used while the core is active, it will trigger the '''Queen's Laser''', a thin '''blue''' laser dealing damage to anything in its path. If you entered awakening mode with 3 '''beads''', the laser will be far more powerful, indicated by the '''red''' color. The powerful red laser is able to deal splash damage. | |||
When | When you are attacked while on the ground while the core is active, the Queen's Core will switch to a '''defensive mode''' and surround you with a force field to '''absorb the damage'''. While the core is defending you, you can press {{CZ}} or {{CX}} to '''phase backwards''' out of harms way. After defending you, the core will '''disappear''' until enough hits are dealt again. | ||
==[[Chung]]: [[Freiturnier]]== | ==[[Chung]]: [[Freiturnier]]== | ||
| Line 70: | Line 77: | ||
==[[Lu/Ciel]]: [[Combination]]== | ==[[Lu/Ciel]]: [[Combination]]== | ||
[[File:LuCielposter2.png|link=Combination|right]] | [[File:LuCielposter2.png|link=Combination|right]] | ||
Being a duo character with a tag-team playstyle, Lu and Ciel do not share | Being a duo character with a tag-team playstyle, Lu and Ciel do not share MP and also have a special system known as Combination. When either Lu or Ciel is tagged out, the inactive character will rapidly recover 6 MP per second (1.5 MP in PvP). This MP recovery, combined with fast, short skills and the special '''Combination Gauge''', encourage players to keep switching between the two in order to maximize damage. | ||
The combination gauge can be filled with '''Combination Points''', which are used in specific situations, such as '''Combination Skills'''. These skills cost no MP, but can usually only be used when the combination gauge is full. Combination points are gained every time the player switches, be it through a normal combo or a skill. Combos require you to land the switching attack to actually grant you any CP, however. | |||
<br> | <br> | ||
== [[Rose]]: [[ECP System]] == | == [[Rose]]: [[ECP System]] == | ||
[[File:ECPPoster.png|link=ECP System|left]] | [[File:ECPPoster.png|link=ECP System|left]] | ||
The "ECP System" | The "ECP System" enables [[Rose]] to use a special resource called '''ECP''', as well as wield 4 different firearms: '''Revolvers, Musket, Auto-Guns, and Hand Cannons.''' | ||
'''Revolvers''' will attack with quick shots at a medium range, '''Muskets''' can fire strong shots at large range, in exchange for a low firing rate, '''Auto-Guns''' utilize multiple shots at a very quick rate with a smaller range and '''Hand Cannons''' use the strongest shots but have a short range and a firing slow firing rate. | |||
Instead of MP, all of Rose's actives will consume ECP, a resource that will recover itself naturally over time, indicate by the yellow gauge below your MP. When the ECP gauge is depleted, Rose will enter '''Overstrike Mode''', allowing her combos and skills to do additional damage, but preventing you from using Active skills until the ECP gauge recovers itself completely, during which it will flash in a bright red. | |||
<br> | <br> | ||
Revision as of 04:30, 27 May 2016
Every character in Elsword has their own unique features that sets them apart from other characters.
Elsword: Way of the Sword
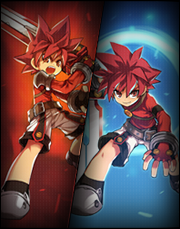
When playing as Elsword, you will have access to a special gauge known as Way of the Sword. This gauge will enable you to activate Aura of Vitality or Aura of Destruction for a period of time. Depending on the type of commands (![]() /
/![]() ) or skills you use, the gauge will lean towards either vitality or destruction.
) or skills you use, the gauge will lean towards either vitality or destruction.
While the Aura of Vitality is active, you will gain more MP from vitality-based attacks, while the MP cost for vitality-based skills will be reduced. Your speed will also be increased. While the Aura of Destruction is active, you will immediately bounce back any attack that hits you, knocking down nearby enemies and triggering super armor for 6 seconds in which time you cannot trigger the effect again. All destruction-based attacks will also deal vastly more damage.
Note that the system they use is not what what it may appear to be at first; vitality-based attacks take away vitality from the gauge, leaning the gauge towards destruction; destruction-based attacks take away destruction from the gauge, leaning the gauge towards vitality; this is why only attacks that use the gauge will receive benefits while in their respective aura.
Aisha: Memorize

While regenerating MP as Aisha, you will able to memorize a skill from your skill slots into a memorized skill slot. A memo will appear above you after charging MP for 1.5 seconds, and skills that are able to be memorized will be highlighted.
When the memo appears and you activate an eligible skill, the skill will go on cooldown and the required MP will be consumed, but it will not be activated. Instead, it will be stored in her memorized skill slots. Successfully memorizing a skill will cause the memo above you to flash. You are able to memorize a maximum 3 skills, but you cannot memorize the same skill more than once.
Pressing V will activate the first skill you memorized for no additional cost, but at a small damage penalty. This allows you to activate the same skill twice in a row if you memorize the skill once beforehand.
Rena: Nature's Force
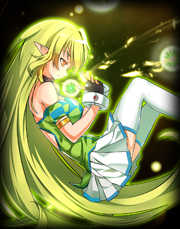
When playing as Rena, you will have access to a special bar called Nature's Force. The system is indicated by a set of 5 bars below your MP bar. Each NF bar represents a nature orb, which you are able to gain by using commands (![]() /
/![]() ) and Active skills. After 3 hits, 1 orb will appear to float around you.
) and Active skills. After 3 hits, 1 orb will appear to float around you.
When Awakening, you will receive 5 NF. If you already have NF available, you will receive 30 MP for every excessive bar. When you have at least 1 nature orb, she gains a passive buff that increases your speed, passive MP recovery and the MP gained from arrows, as well as decreases the MP used for firing arrows.
When you have at least 1 or more nature orbs, you are able to use those orbs alongside certain skills. For most Special Actives, if the required amount of nature orbs are available as indicated on each skill, the first hit will cause the respective amount of orbs to detonate on the target. The orbs deal splash damage and ignore defense.
Raven: Anger of Raven
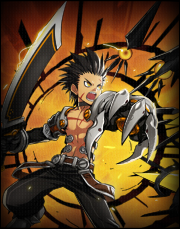
When entering Awakening Mode as Raven, a Nasod Core will appear behind you that will assist you in battle both offensively and defensively. The core has five levels; the bigger it is, the stronger it becomes. It grows as you deal damage, take damage (slower rate than doing damage), or when you use a Special Active. The core is level 2 upon first awakening. Additionally, when 3 beads are used to awaken, an aura of electricity will appear around you, dealing damage to nearby enemies.
Offensively, when you hit a target with an active like Breaking Fist or a special active like Power Assault and it survives the attack, the Core will propel itself at the target in a straight line by turning into dagger-like shape when it is at least level 2. If no enemies are hit, it will return behind you at the same level it was before launching. If it does hit, it pierces through all targets hit as it travels a set distance, without knocking down.
Defensively, when you are hit by an attack in front while on the ground, the core transforms into a shield that reduces damage. The shield lasts a short time and the core loses a level each time it forms the shield. If the core is level 1 when it defends you, it will disappear afterward and requires the usual conditions to reappear. You cannot move during the guarding animation, but Shadow Step can be used to dash out of it.
Eve: Core Release
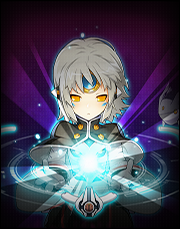
When entering Awakening Mode as Eve, a Queen's Core will be generated. The core has 3 levels, and will follow and support you by changing itself during offensive and defensive situations. Additionally, Eve has access to a special skill called Code : Recovery, which can be activated by pressing V to recover some HP. This skill will have additional effects based on the chosen job path.
While awakened, every hit you do will level up the Queen's Core. A core level up is indicated when it lights up for 1 second. The higher the level of the core, the more damage will be dealt by the Queen's Laser, and the number of times it is able to defend you increases.
When a Special Active is used while the core is active, it will trigger the Queen's Laser, a thin blue laser dealing damage to anything in its path. If you entered awakening mode with 3 beads, the laser will be far more powerful, indicated by the red color. The powerful red laser is able to deal splash damage.
When you are attacked while on the ground while the core is active, the Queen's Core will switch to a defensive mode and surround you with a force field to absorb the damage. While the core is defending you, you can press ![]() or
or ![]() to phase backwards out of harms way. After defending you, the core will disappear until enough hits are dealt again.
to phase backwards out of harms way. After defending you, the core will disappear until enough hits are dealt again.
Chung: Freiturnier
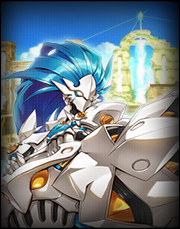
Chung's Ammunition Supply is one of his most notable and interesting features. Many of his skills are ammo-reliant. Skills such as Detonation and Lunatic Blow use up all of Chung's ammo, but increase in power based on how much ammo was used. Other skills such as Aiming Shot or Steel Edge use only one. Many of Chung's X attacks use ammo too.
Despite being covered in chains when empty, Chung's third awakening bead is obtained like any other. It has a different appearance to indicate when Berserk Mode is ready. When Berserk Mode is activated, Chung is enveloped in his full Freiturnier armor (notably including the helmet) stored inside his suit's Guardian Stone, a special object that increases his fighting ability.
Whenever Chung is hit while he has a blue outline (e.g., the third attack of the ![]()
![]()
![]() combo. Like super armor, it cannot be seen if unit graphics are not set to high), he switches to a guarding stance which gives 66% damage reduction. However, he will stagger after guarding around 5-6 hits.
combo. Like super armor, it cannot be seen if unit graphics are not set to high), he switches to a guarding stance which gives 66% damage reduction. However, he will stagger after guarding around 5-6 hits.
Ara: Power of Eun

By using the hairpin of Eun (design varies on her class), Ara is able to go into a 3rd awakening bead transformation called the Celestial Fox Mode. While in this mode, her appearance changes, in which her hairstyle will change(hairstyle varies on her class) and become fully white, 9 spectral tails will also appear on her back, giving her the looks of the Gumiho. Equipped accessory will not be shown in this mode.
Ara has a unique combo system which involves using Spirit Energy. Spirit Energy is shown as beads below your HP bar. New players start with a 10 bead gauge.
Ara is able to cancel active skills by using another skill/active skill right before the previous skill used ends. This will cancel the active skill's final hit which prevents KD, but also gains extra Spirit Energy depending on the skill. For example, if you used Exorcism Stance 3 : Shadoweave (which usually gains 1 spirit energy when used) and cancel with Tiger Stance 2 : Tiger Claw, you will gain 5 Spirit Energy instead (1 from using Shadow Knot + 4 from cancel bonus as stated in description).
Elesis: Chivalry
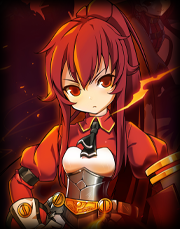
When playing Elesis, there will be an additional gauge below the MP bar. This Chivalry gauge will enable you to activate "Knight of Gale" or "Knight of Annihilation" for a period of time.
Depending on the type of combo attack (e.g. Z and X key moves) or skill you use, the gauge will lean towards Gale or Annihilation. While in either "Knight of Gale" or "Knight of Annihilation", you will receive special benefits.
Note that the system they use is not what what it may appear to be at first; gale-based attacks take away gale from the gauge, leaning the gauge towards annihilation; annihilation-based attacks take away annihilation from the gauge, leaning the gauge towards gale; this is why only attacks that use the gauge area affected in the respective aura.
Add: Dynamo Point
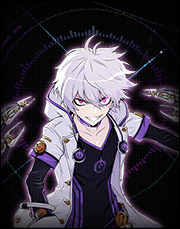
Unlike other characters' awakening, Add's awakening is called the Dynamo Configuration Mode (DC Mode). When he is not in DC Mode, every hit he does will charge up the DP gauge. When you have at least 100 DP, Add is able to awaken like any other character at the cost of 50 DP and all surrounding targets will be damaged. While in DC mode, his stance and dynamos will be changed. Every hit he does will decrease the gauge. Pressing awaken hot key again will deactivate DC mode. Like awakening, Add will gain a damage boost when in DC Mode. Unlike a normal awakening, when Add goes into DC mode, the screen will not freeze. Add is able to execute Nasod Armor combo extensions depending on the job advancement. Some skills will no longer use DP in DC mode.
When Add goes into DC mode, 1 Dynamo Mutation Point will be added to the counters below his portrait. Mutation Points are used to power up his skills. Skills will only be boosted if Add is in DC mode.
Lu/Ciel: Combination
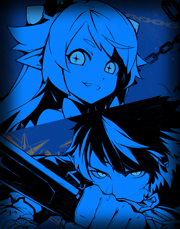
Being a duo character with a tag-team playstyle, Lu and Ciel do not share MP and also have a special system known as Combination. When either Lu or Ciel is tagged out, the inactive character will rapidly recover 6 MP per second (1.5 MP in PvP). This MP recovery, combined with fast, short skills and the special Combination Gauge, encourage players to keep switching between the two in order to maximize damage.
The combination gauge can be filled with Combination Points, which are used in specific situations, such as Combination Skills. These skills cost no MP, but can usually only be used when the combination gauge is full. Combination points are gained every time the player switches, be it through a normal combo or a skill. Combos require you to land the switching attack to actually grant you any CP, however.
Rose: ECP System

The "ECP System" enables Rose to use a special resource called ECP, as well as wield 4 different firearms: Revolvers, Musket, Auto-Guns, and Hand Cannons.
Revolvers will attack with quick shots at a medium range, Muskets can fire strong shots at large range, in exchange for a low firing rate, Auto-Guns utilize multiple shots at a very quick rate with a smaller range and Hand Cannons use the strongest shots but have a short range and a firing slow firing rate.
Instead of MP, all of Rose's actives will consume ECP, a resource that will recover itself naturally over time, indicate by the yellow gauge below your MP. When the ECP gauge is depleted, Rose will enter Overstrike Mode, allowing her combos and skills to do additional damage, but preventing you from using Active skills until the ECP gauge recovers itself completely, during which it will flash in a bright red.
